

Linking technical and functional skills to specific organizational layers ensures talent matrices align with annual evaluation runs. Administrators can register skill repositories, distribute evaluation weights, and assign competencies to specific job titles or entire departments.
1. Choosing Tagging Frameworks and Accessing Skill Controls
To create a capability matrix and set its routing path:
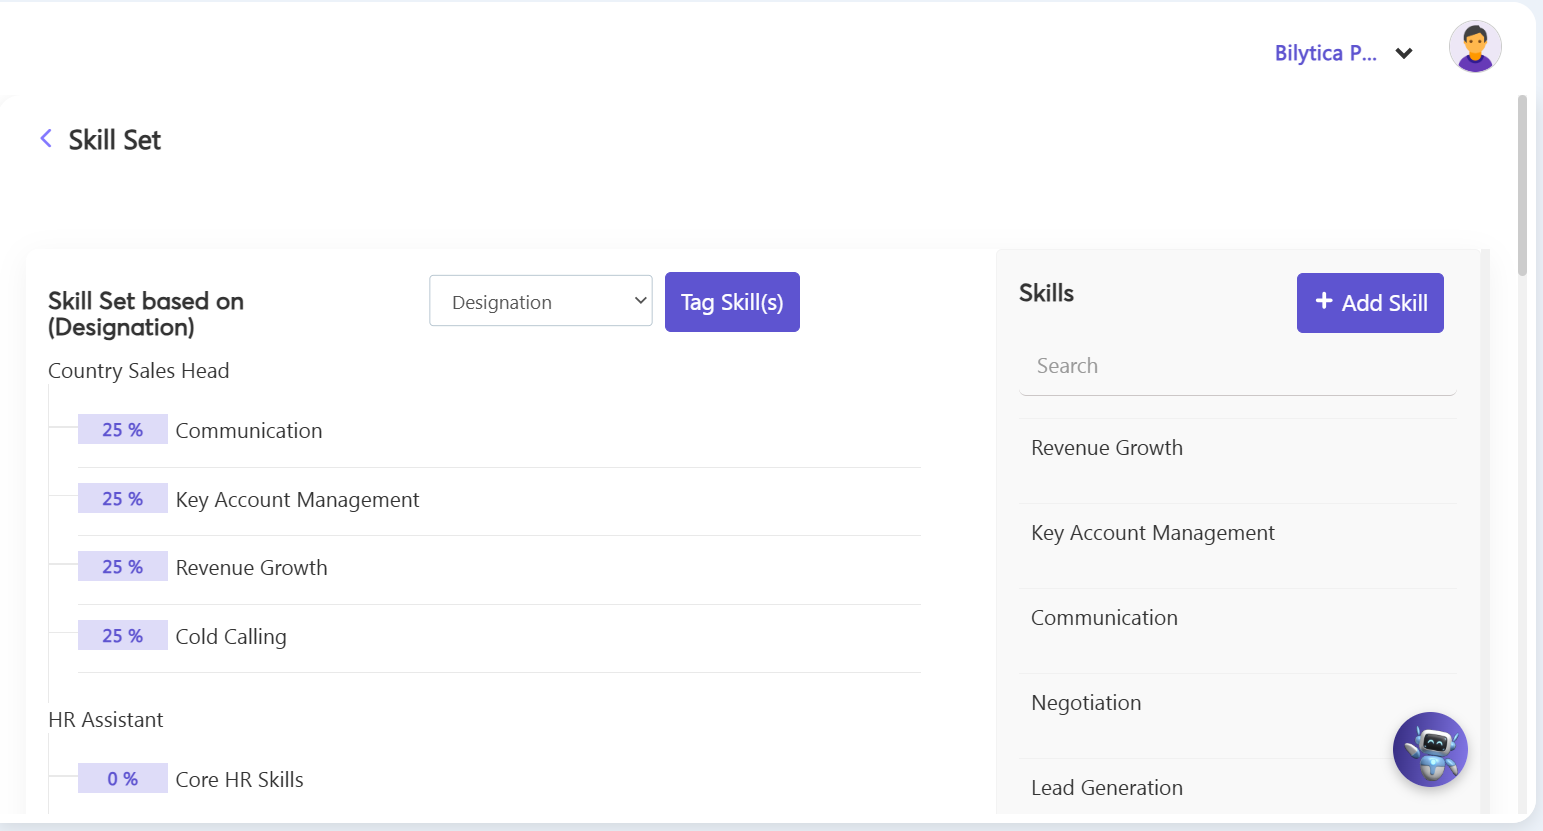
- Step 1: Open Skill Set Configuration — Inside the Performance back-end, go to Accounts Settings and click on the Skill Set management card to open your company's skill ledger page.
- Step 2: Choose Tagging Level — Go to the top section of the page and use the dropdown menu to choose your sorting basis: either Designation-based (by job title) or Department-based.
- Step 3: Launch the Tagging Wizard — Once you select your grouping level, click the purple Tag Skill(s) button to open the capability configuration form.
2. Creating Skills Manually or with AI
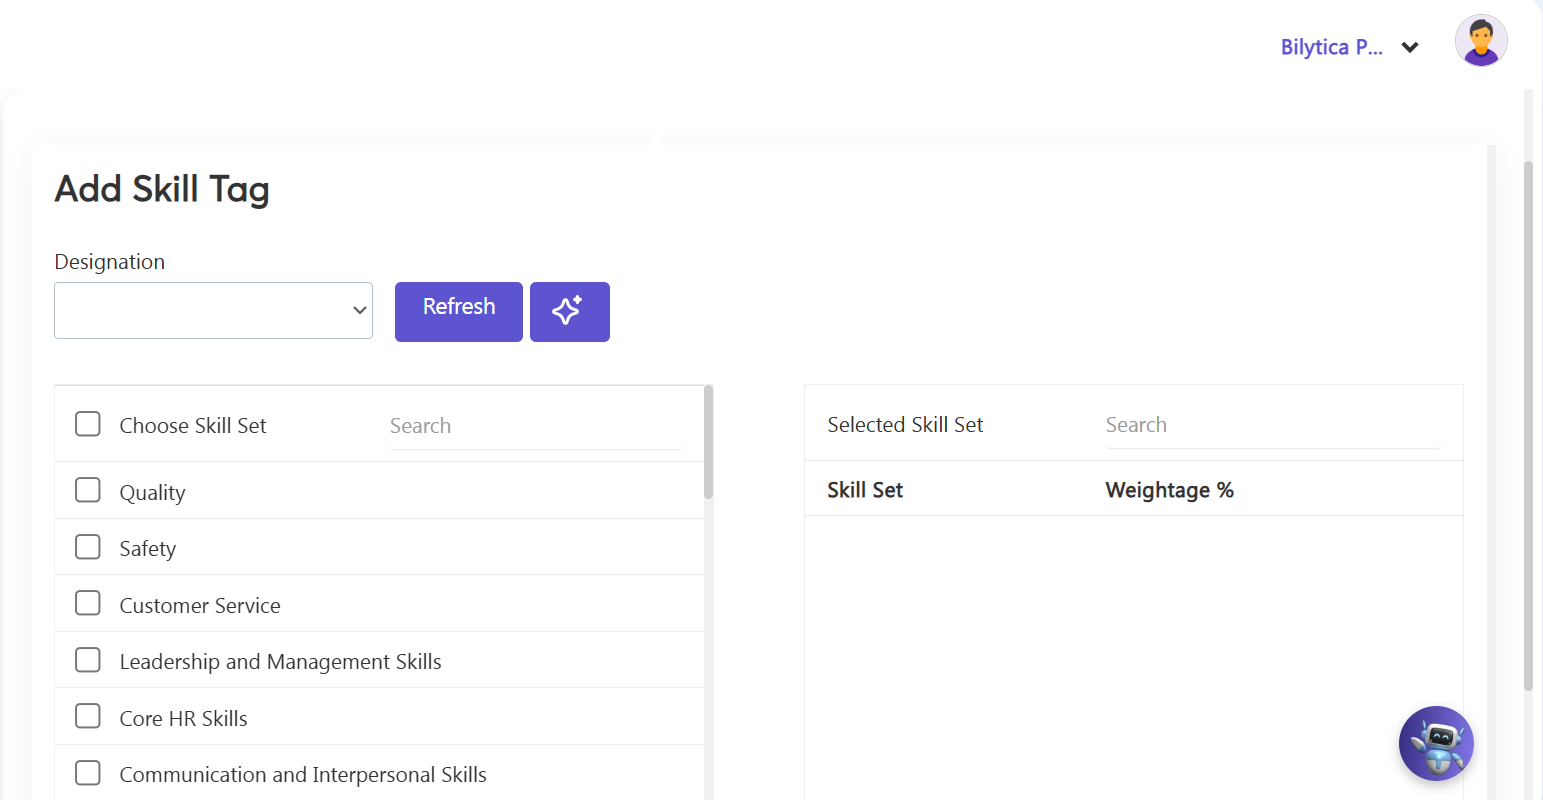
Inside the Add Skill Tag panel, administrators can set up skill definitions in two ways:
- Manual Creation: Look at the Choose Skill Set list on the left pane, which contains pre-loaded categories (like Quality, Safety, Customer Service, Leadership, Core HR, or Communication). Simply check the boxes next to the skills you want to add.
- AI Assistant Generation: To skip manual setup, click the purple AI Assistant Spark icon at the top next to the Refresh button. The AI will instantly generate and suggest standardized skill sets tailored specifically to that job tier.
3. Setting Weights and Saving the Skills Matrix
Once your skills are selected, set up their scoring impact and save your changes:
- Step 4: Distribute Weights: Your selected skills will move to the Selected Skill Set grid on the right. Click inside the Weightage % cells for each skill and type in a number (for example, splitting a profile evenly by giving Communication, Key Account Management, Revenue Growth, and Cold Calling 25% each).
- Step 5: Save and Lock Assignments: Make sure your total weightages add up correctly without errors, then click the Save button at the bottom of the screen. The system will instantly lock these skills to the selected department or job title across all performance review templates.
Skill Weightage Balance Pro-Tip: |