

Managing distributed offices, production sites, or regional teams requires establishing structured workspaces inside your portal database. In PayPeople, defining specific locations allows administrators to deploy advanced geographical features—such as geo-fencing and geo-tagging—to govern mobile app shifting protocols.
1. Navigating to Work Locations
To begin creating or adjusting your organizational workplace hubs:
Step 1: Open the primary navigation ribbon dashboard and click the Setup module icon (gear ) on the upper right margin.
Step 2: Select the Organization tab from the horizontal menu layer options, then click on the Work Locations grid card component.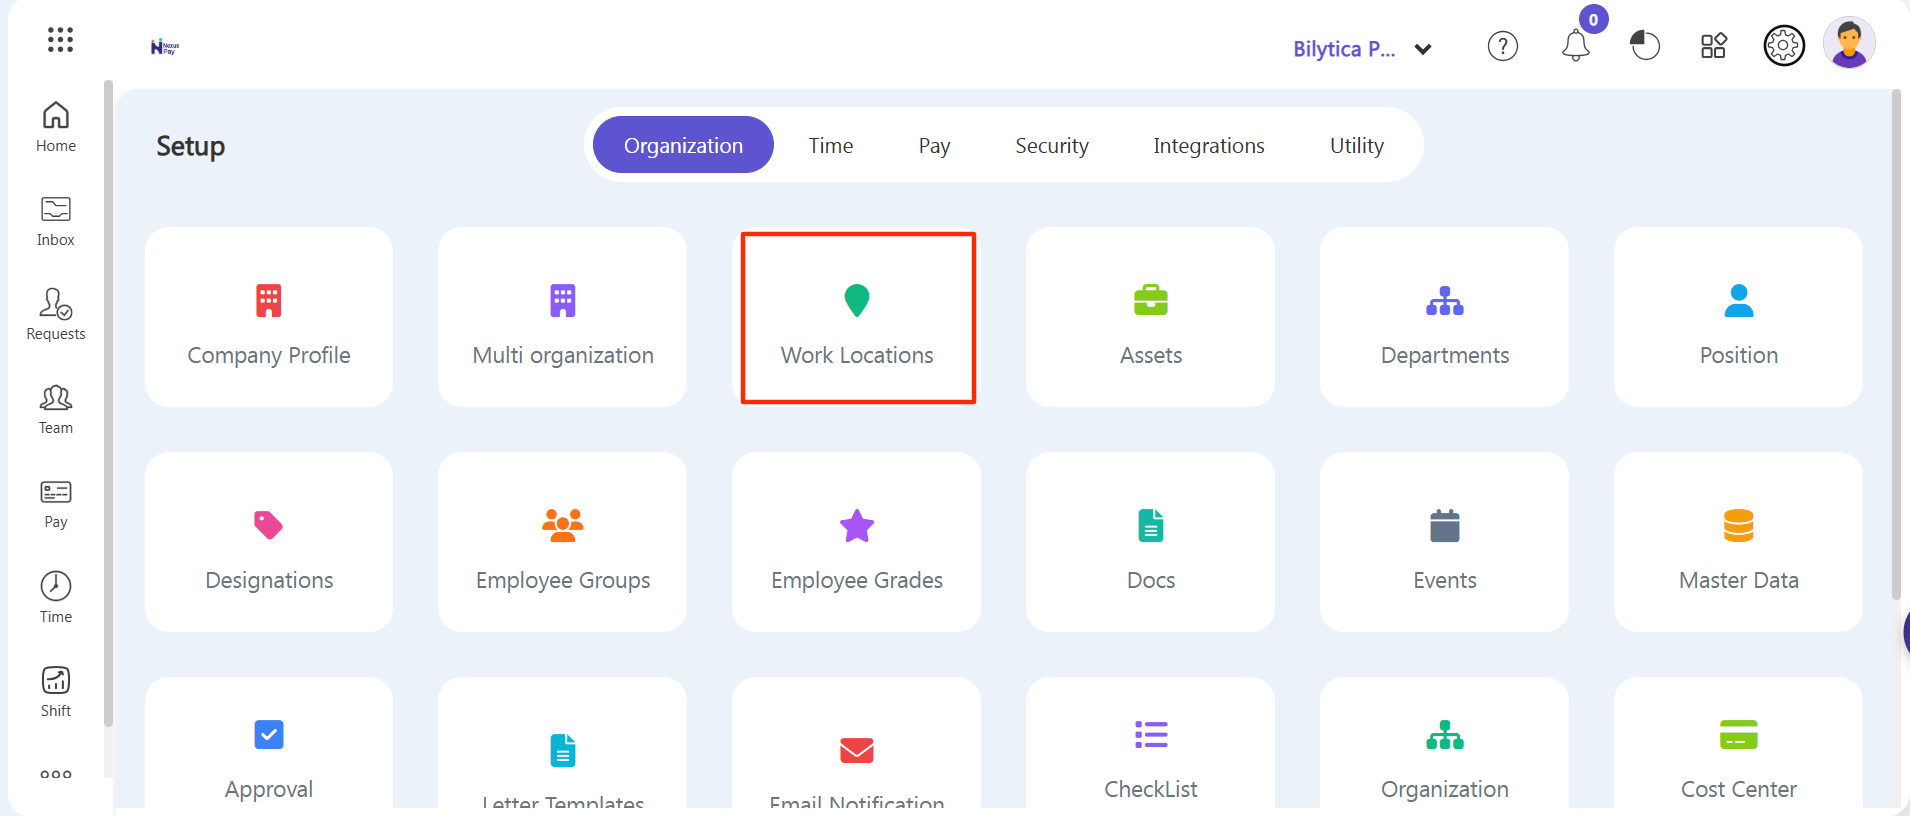
Step 3: The central listing register index screen will populate on your page view, displaying your active locations, address strings, and employee distribution counts.
Step 4: Locate and click the purple Create a New action button block inside the upper right margin ribbon header area.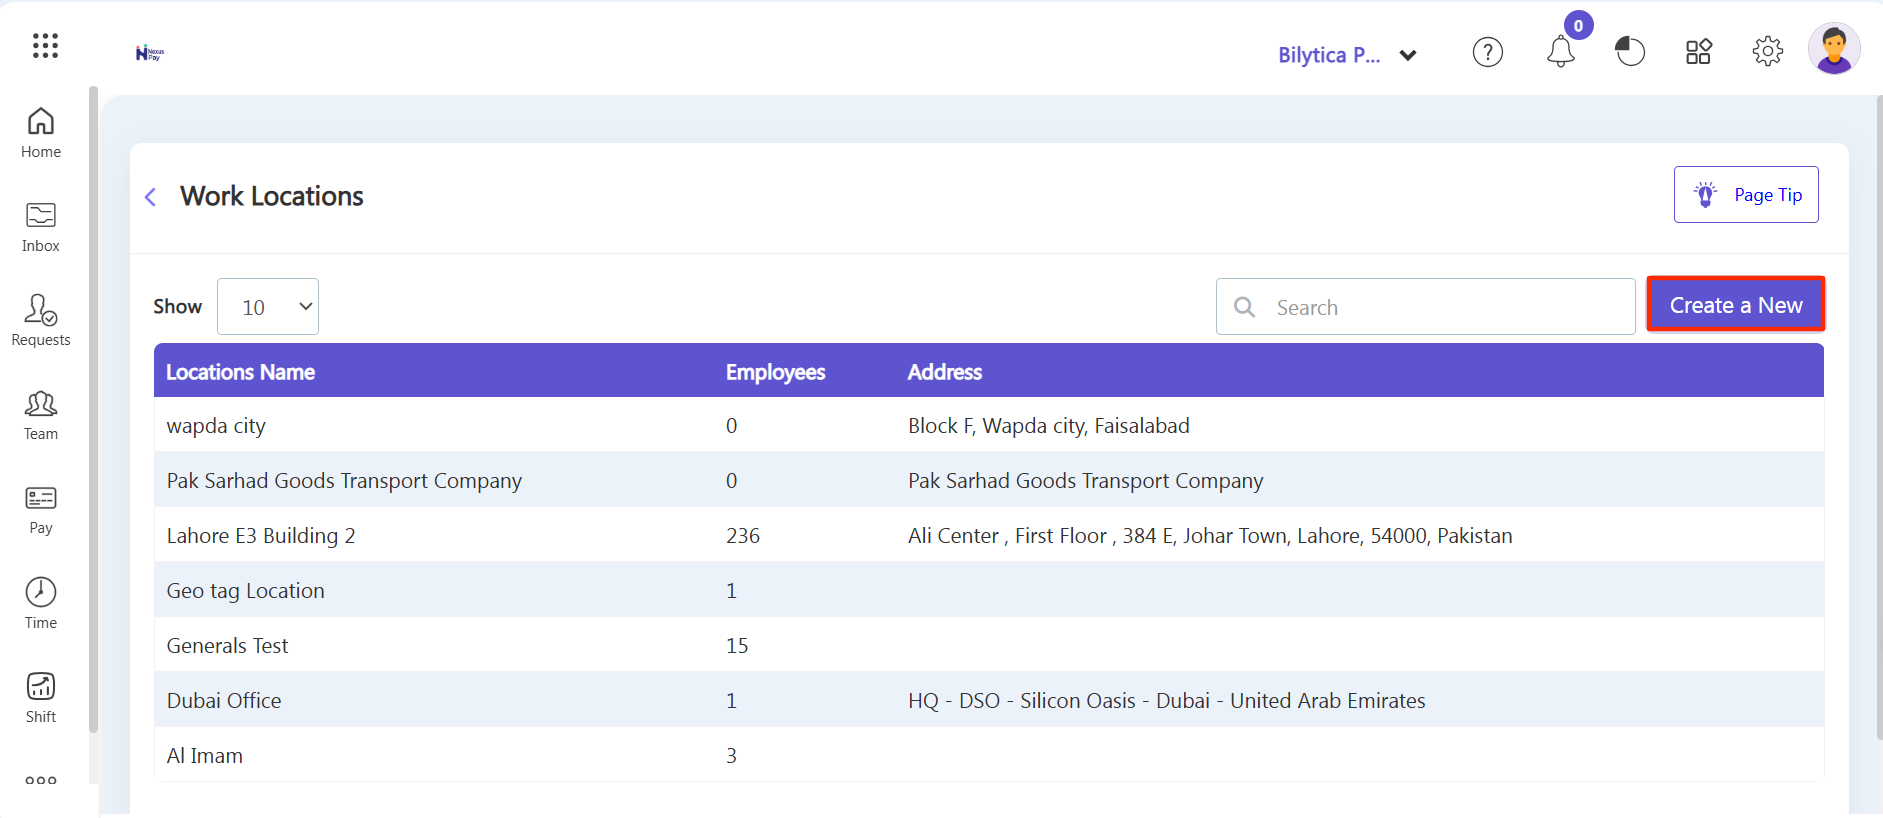
2. Setting Up Location Profiles & Boundary Rules
The Add Work Location wizard pop-up card view container layout form will reveal itself. Complete the target details sequentially:
Step 5: Core Geography—Type your localized identifier title inside the required Work Location text field, and choose the matching parameters from the Country and City drop-down list fields.
Step 6: Deploying Geo-Fencing (Strict Radius Locks)—If you want to restrict mobile attendance to precise workplace perimeters, check the Enable Geo-Fence checkbox indicator. This toggles your boundary options. Enter your exact location Latitude and Longitude coordinate map strings along with the target boundary distance limit inside the Radius parameter box field. When active, employees can only log shifts if their smartphone's active hardware location tracking confirms they are physically sitting inside that specific radius zone.
Step 7: Deploying Geo-Tagging (Location Awareness)—Alternatively, if your staff covers traveling operations or distributed remote tasks, enable the checkbox option for Enable Geo-Tagging. This selection allows employees to log their presence safely from any remote zone, but automatically captures their global coordinates at the instant they punch, pinning their exact workspace trail context directly inside administrative tracking log metrics summaries.
Step 8: Finalizing Attendance Modes—Scroll to the base of the form page configuration interface to select the authorized parameters inside the Mode Of Attendance check indicators (such as toggling Manual checking, unique QR Code tags, Voice confirmation scripts, or localized Video recording locks).
Step 9: Review all your parameters and click the white Save action button on the lower right dashboard container margins to launch the fresh workspace module.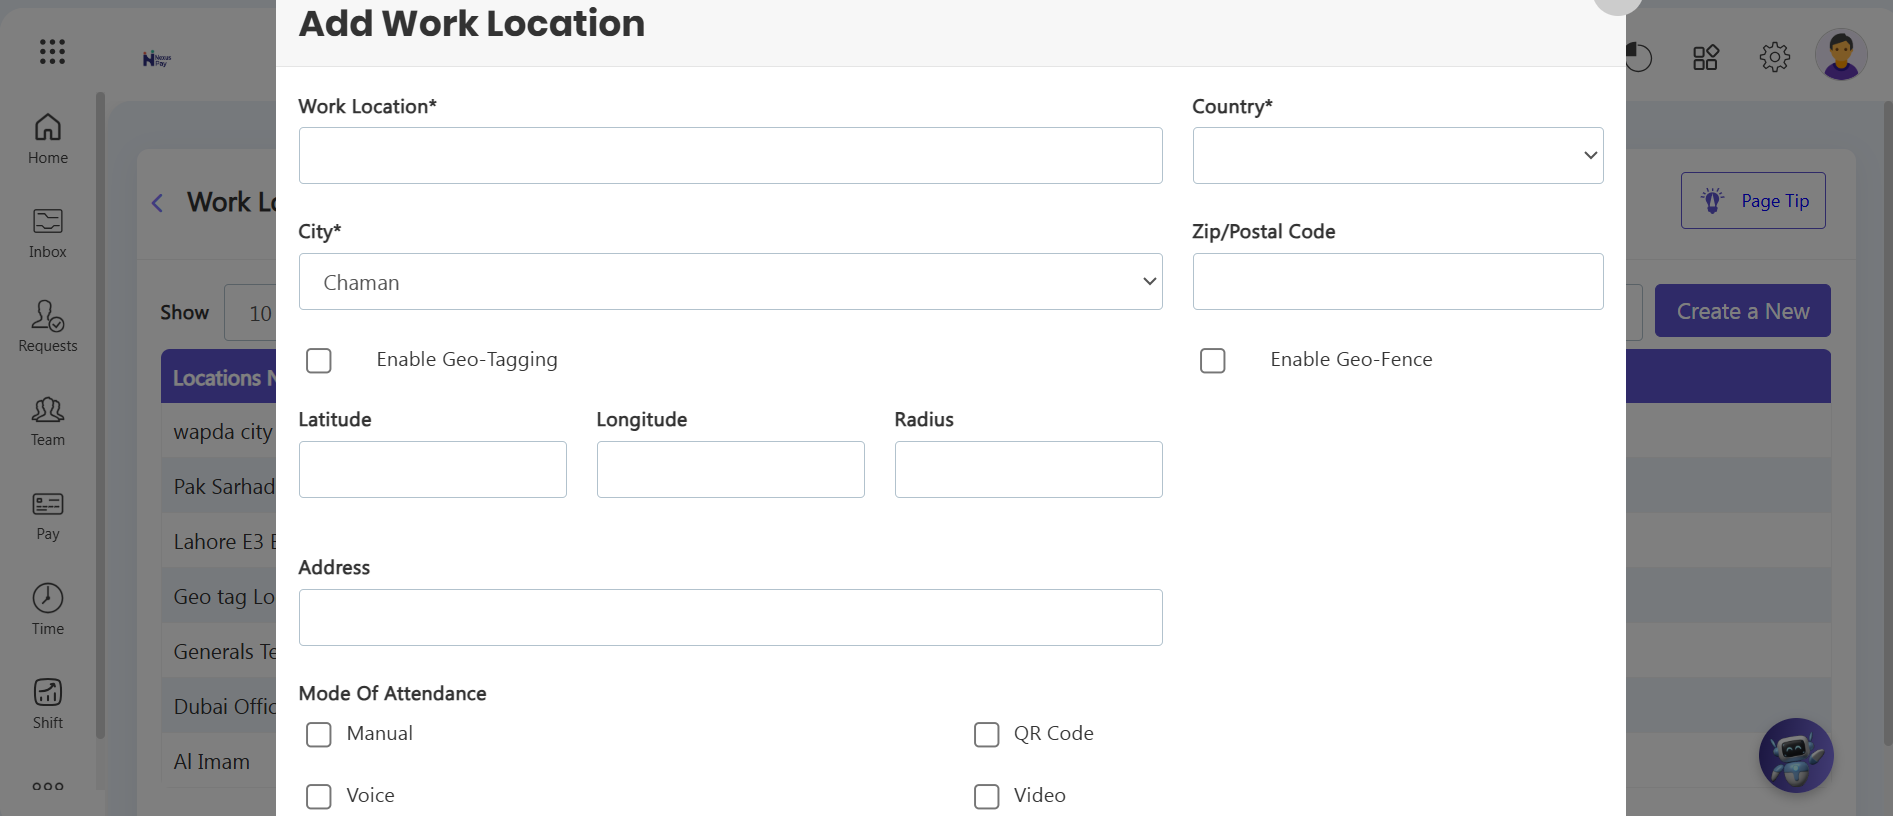
Setup Deployment Tip: |