

Managing cross-departmental operations during an employee's lifecycle milestones requires clear coordination. PayPeople incorporates an automated checklist lifecycle engine to provision operational tasks across departments natively. When triggered during new hiring or exit cycles, the background system auto-routes targeted tasks to relevant functional departments seamlessly.
1. Navigating to the Checklist Configuration Panel
To access your system's global task lifecycle configuration registries:
Step 1: Click on the main Setup module icon (gear ) located in the upper-right corner area of the system layout ribbon.
Step 2: Verify the Organization menu category layout tab is active, then locate and select the CheckList Configuration grid card component (highlighted in a red box frame).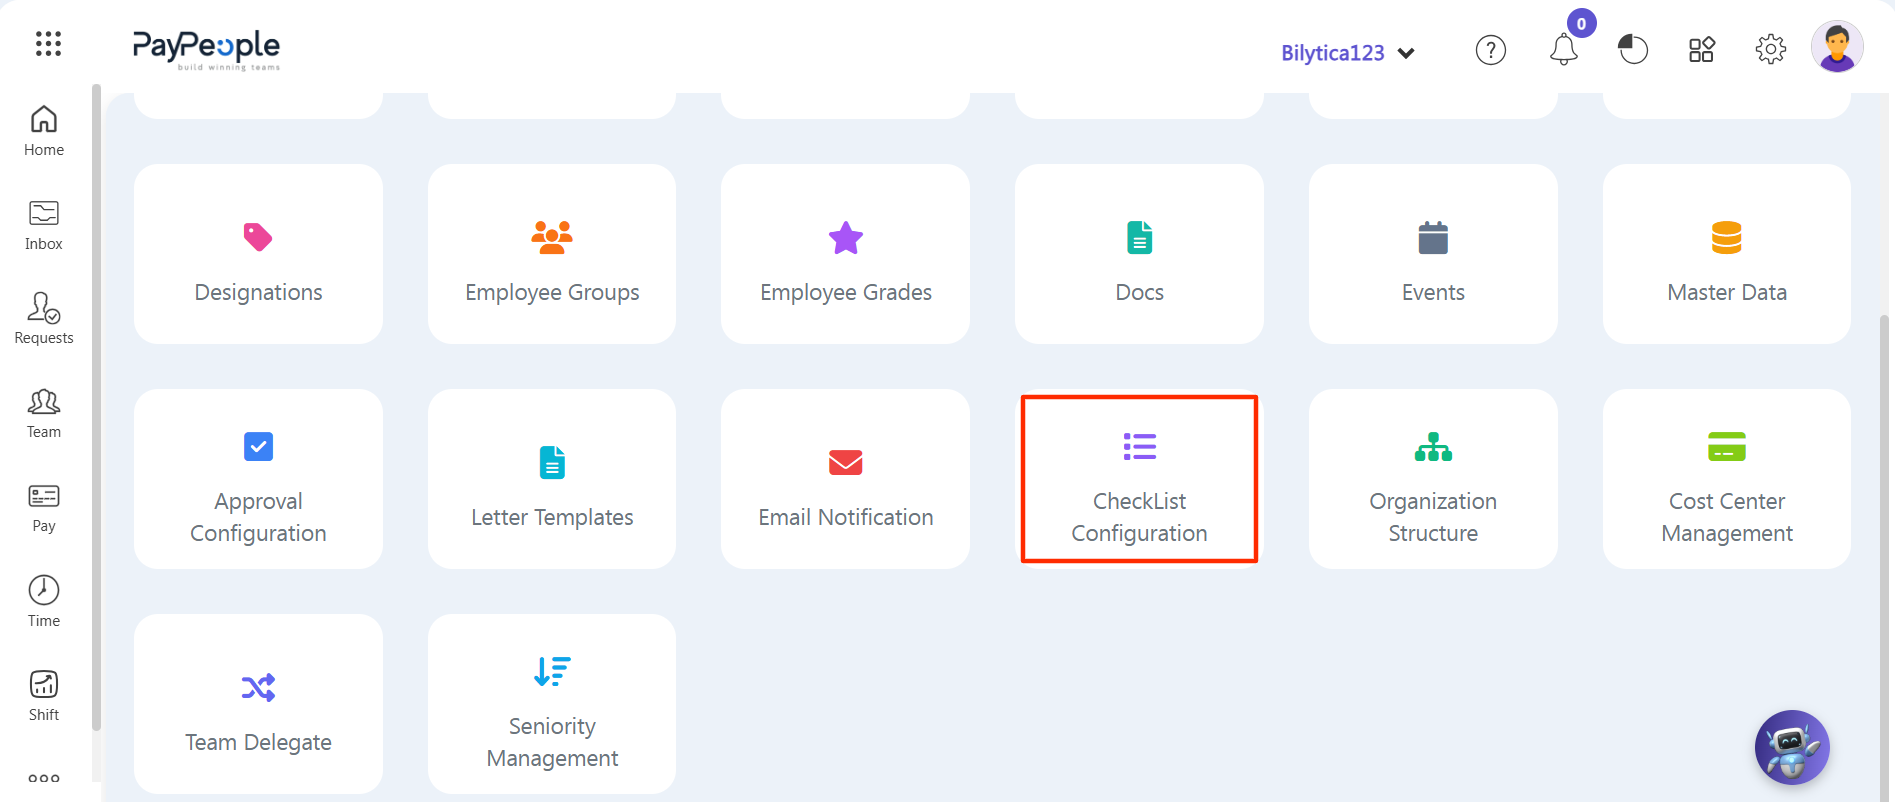
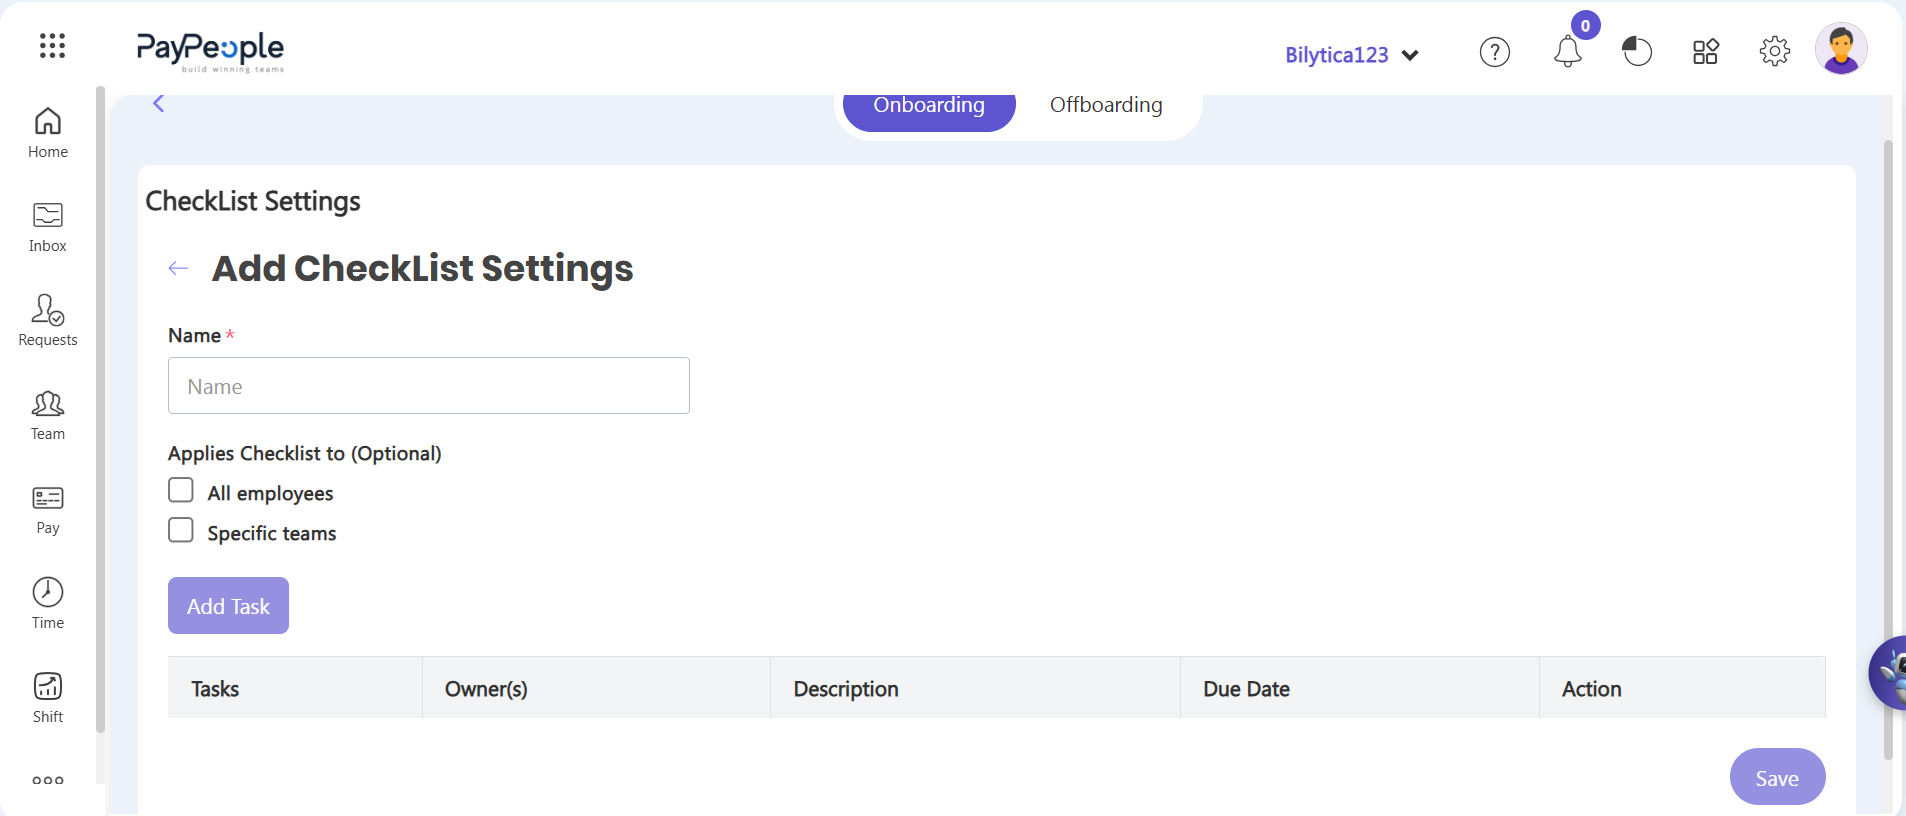
Step 3: The central control directory view populated on-screen segments your data views via two prominent horizontal category toggles: Onboarding and Offboarding.
2. Constructing Cross-Departmental Lifecycles Tasks
The Add CheckList Settings input wizard view dashboard workspace page will initialize. Populate your parameters sequentially:
Step 5: Name* — Type a definitive title inside the required Name text field container line (e.g., Core Engineering Onboarding Checklist).
Step 6: Enforcing Target Scope Boundaries — Under the Applies Checklist to (Optional) parameter configuration tier, check either the All employees checkbox indicator to map rules globally or choose Specific teams to filter assignments based on selective structural team frameworks.
Step 7: Compiling Dynamic Task Rows — Click the purple Add Task action button component to append an active tracking entry inside the workspace grid layout.
Step 8: Provisioning Responsibilities Across Functional Departments — Populate your dynamic line parameters fields manually within the matrix rows: details include defining the specific Task (e.g., 'Complete documents' or 'Creating profile' for onboarding), identifying the Owner(s) to route task notifications to relevant departments (e.g., HR Department, Accounts Department for bank accounts opening, or Admin Department for parking arrangements), providing a clear text Description, and specifying a precise Due Date offset limit.
Step 9: Commit Changes — Review your matrix distribution scope carefully and tap the purple Save option button control in the lower right margin layout to record your checklist rule permanently inside the background database engine.
3. Mapping Lifecycle Workflows for Employee Offboarding
The background execution parameters apply identically across the exit management lifecycle phases:
• Configuring Offboarding Controls: To provision exit tasks, return to the master panel view and ensure you toggle the workspace view to the Offboarding menu ribbon block layer.
• Structuring Clearance Rows: Click Create a New to launch a matching Add CheckList Settings overlay matrix. Structure tasks tailored specifically to exit clearance frameworks—such as assigning the HR Department to conduct exit interviews, mapping the Accounts Department to process final settlements, or tasking the IT/Admin Departments to manage physical asset returns or cancel data security parameters.
• Background Trigger Automation: Once saved, whenever an administrator later processes a profile workflow inside an employee's account card, selecting the matching checklist causes the software database engine to instantly fire targeted auto-notifications to all relevant departments' dashboard queues simultaneously without manual coordination.
Workforce Management Notice: |