

Tracking hardware, vehicles, office equipment, and digital provisions assigned to personnel is a core administrative responsibility. PayPeople integrates a central asset inventory registry that allows you to manage lifecycle tracking, allocate inventory directly to team members, and trace device statuses instantly.
6.4.1. Navigating to the Assets Dashboard
To access your company's equipment inventory grid and tracking registries:
Step 1: Open the primary system navigation sidebar and click on the Setup module icon (gear ) in the upper right-hand corner ribbon.
Step 2: Confirm that the Organization horizontal menu category is selected, then locate and click on the Assets grid card component (highlighted in a red box).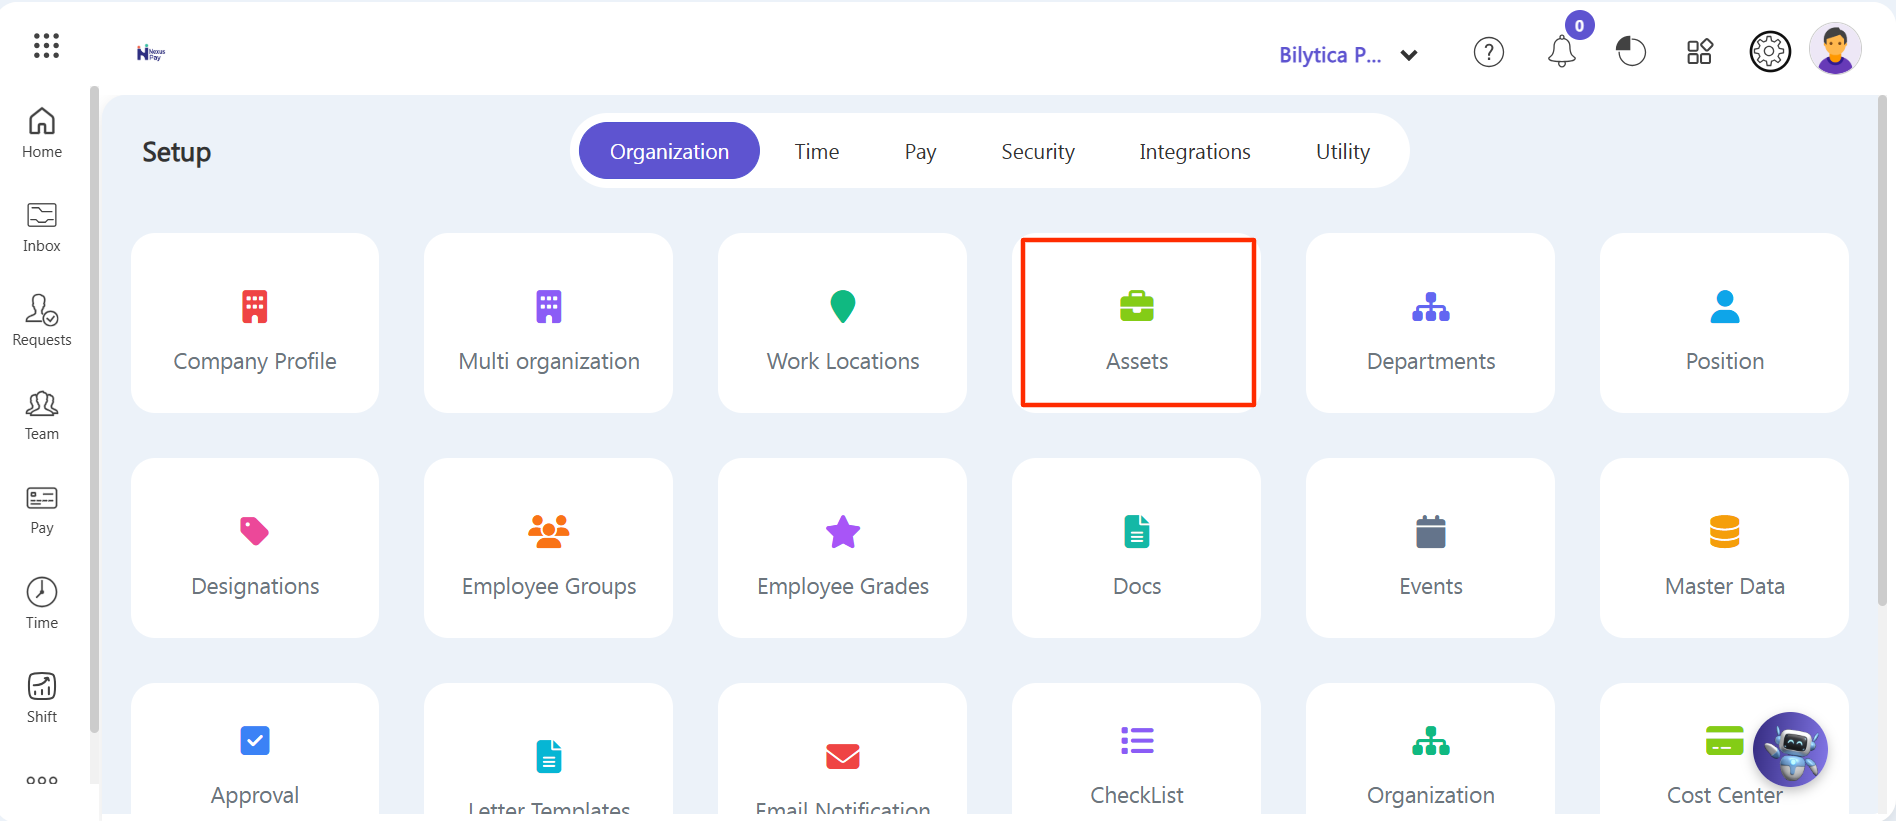
Step 3: The central Assets Details inventory panel list screen will load, displaying a complete row register of items along with their unique Serial Numbers, Product Names, current Holder Names, and Purchase Dates.
Step 4: To add a piece of equipment or assign inventory to an employee, click on the purple Create Asset button (highlighted in a red box) on the right margin.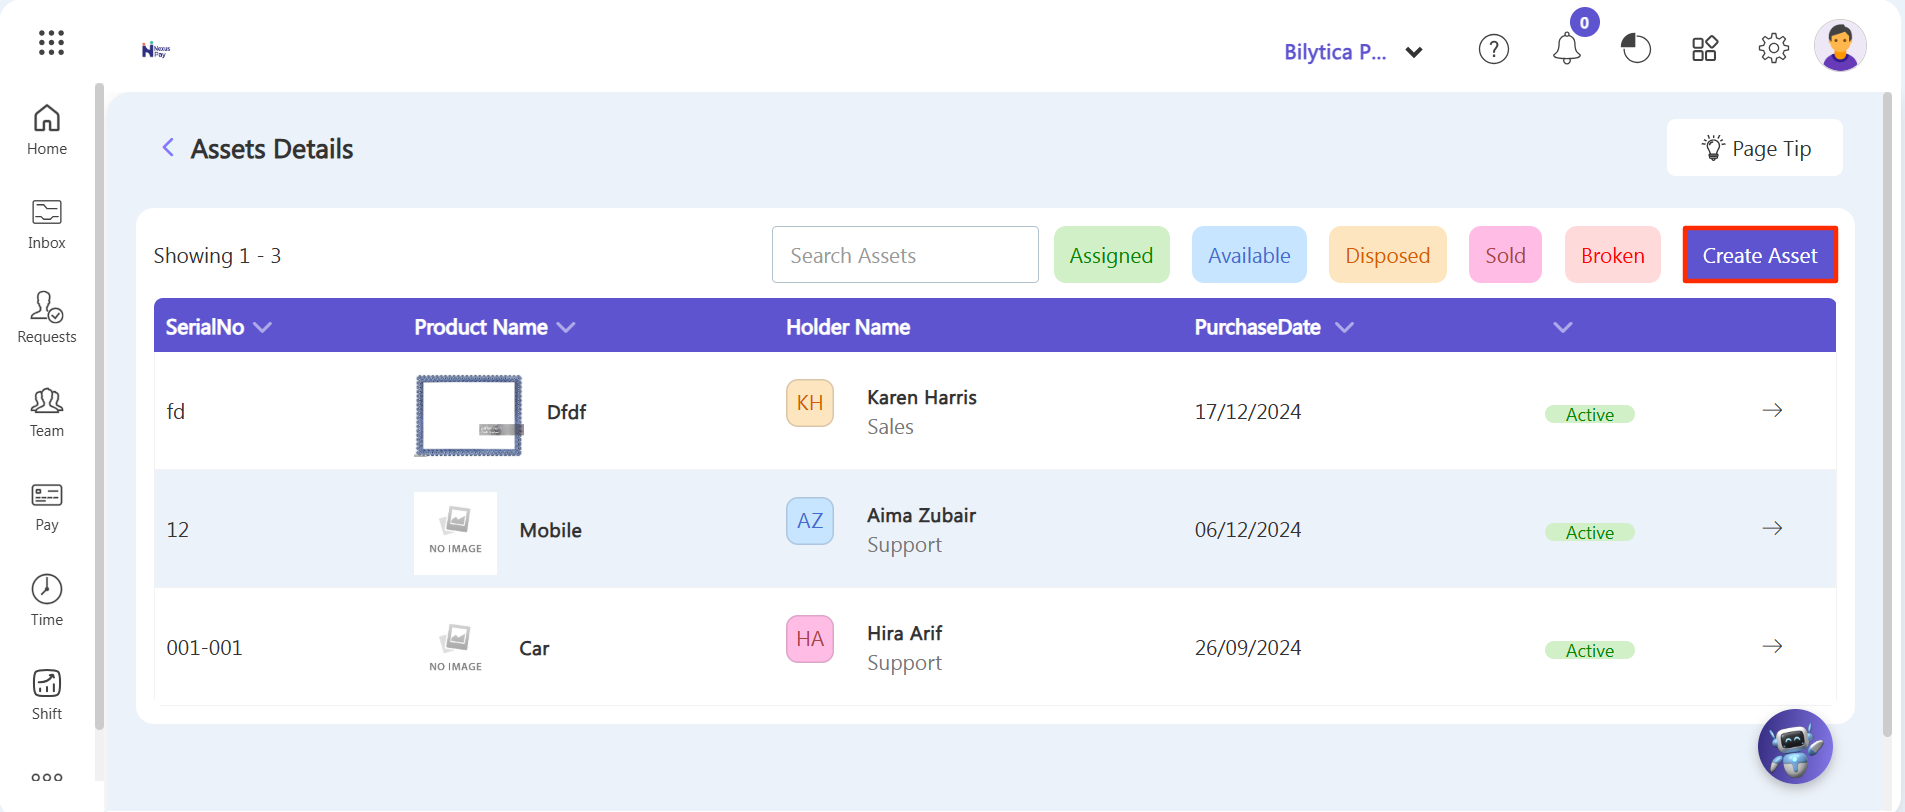
6.4.2. Assigning and Creating a New Asset Profile
An Asset creation popup window overlay form container will manifest on your dashboard workspace view. Complete the tracking parameters sequentially:
Step 5: Employee Selection—Click inside the Search Employee text box input field. Type or select the specific employee name card to whom you want to assign the item.
Step 6: Hardware Parameters—Enter the exact hardware identification string inside the Serial NO field box, and provide the specific item title (e.g., Laptop) inside the Name form field.
Step 7: Allocating Status—Open the Status dropdown selection menu field. Choose 'Issued' (or assigned) to initialize the active handoff tracking context parameters.
Step 8: Financial and Warranty Details—Fill in the additional logistics field indicators, including selecting your operational Currency, keying in the item's valuation Price, and choosing your specific Purchase Date and Guarantee Date from the calendar prompts.
Step 9: Documentation & Saving—Provide descriptive notes in the Description field area, and use the image attachment icon button control if you want to upload receipts, signed handoff handbooks, or verification images. Once completed, click the purple Save button to permanently record the item allocation inside your tracking history database logs.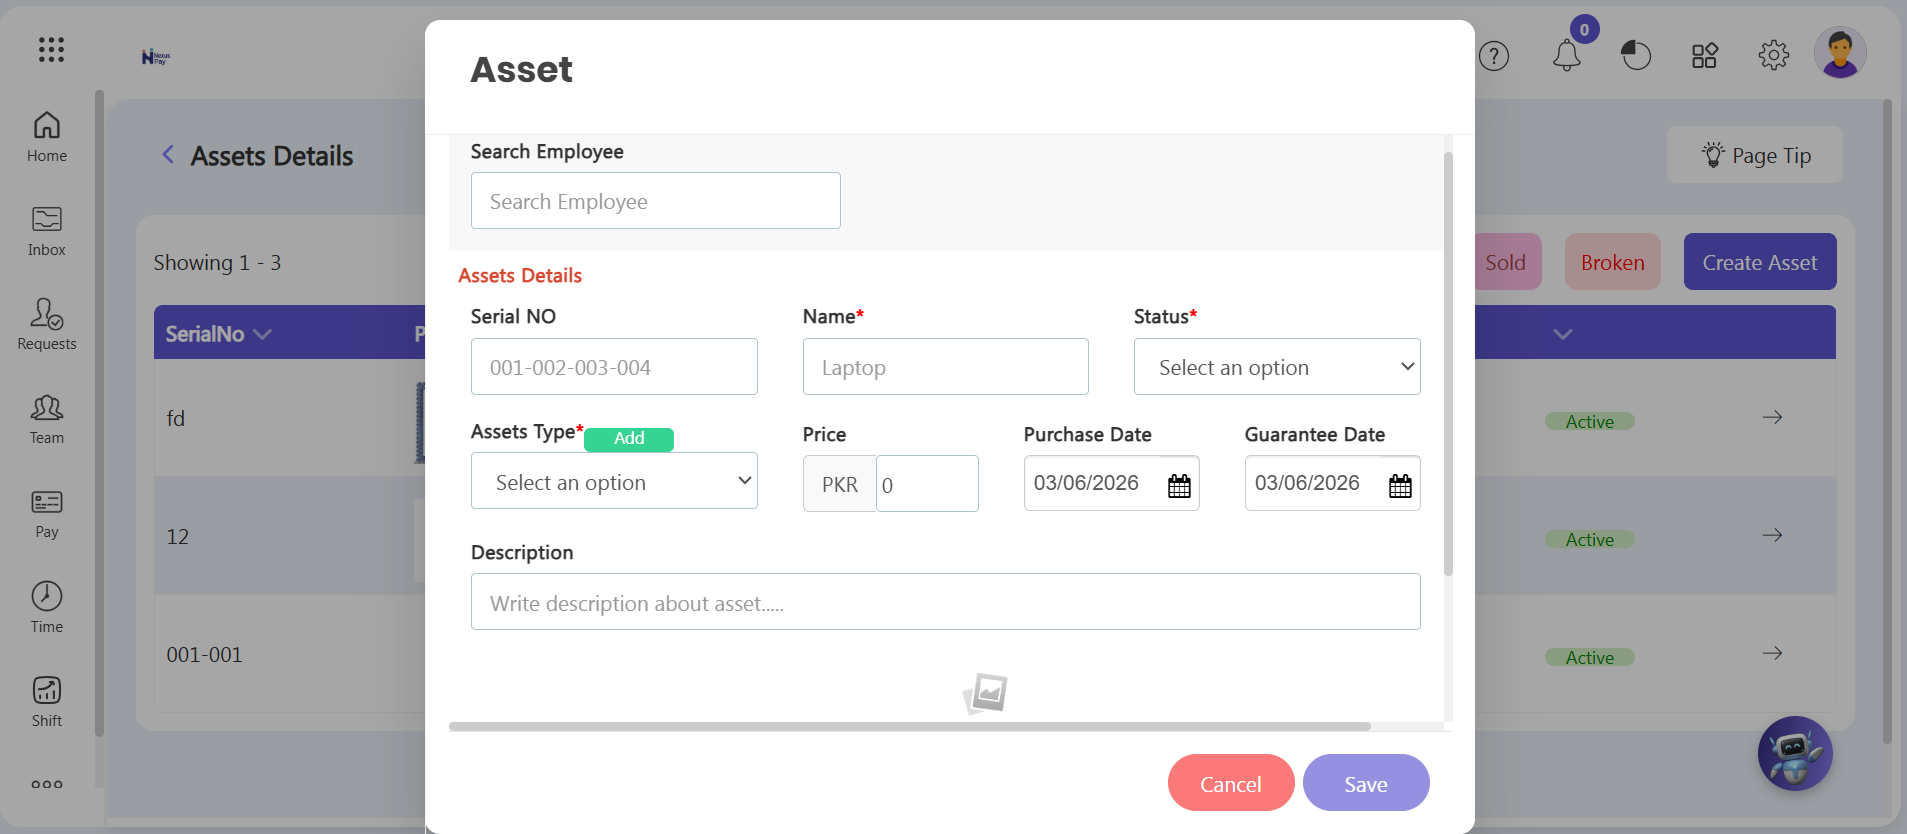
6.4.3. Filtering and Modifying Asset Lifecycles
Inventory components flow through various deployment stages over time. PayPeople makes monitoring and auditing lifecycle status filters simple:
• Status Lifecycle Filtering: At the top of the central inventory details list control workspace, the system displays distinct colored status type filter buttons: Assigned (Green), Available (Blue), Disposed (Orange), Sold (Pink), and Broken (Red). Click on any of these individual type tabs to instantly filter your register view grid to only show items holding that exact status tracking label.
• Modifying Allocation Statuses: If an asset is currently marked as assigned and you want to return it to inventory, re-allocate it, or log a breakage report, locate its row entry on the active table grid layout and click the arrow icon (→) to open its edit dialog box. Simply modify the Status select menu value option (e.g., changing it from 'Assigned' back to 'Available' or 'Broken') and tap the Save button to apply your updates.
Lifecycle Management Tip: |