

Populating your global system settings with core foundational parameters—such as employee types, financial disbursement methods, document types, regional locations, nationalities, and marital status tiers—is required before onboarding workers. Pre-defining this sub-data guarantees drop-down menu consistency, speeds up profile creation workflows, and secures clean data fields across all internal operational modules.
1. Navigating to the Master Data Registry
To begin expanding or revising your organization's systemic selection options:
Step 1: Click on the primary system Settings module icon (gear ) positioned on the upper right-hand corner area of the header navigation ribbon panel.
Step 2: Verify the horizontal Organization category layout menu tab is highlighted, then select the Master Data grid card module component (marked with a red frame box).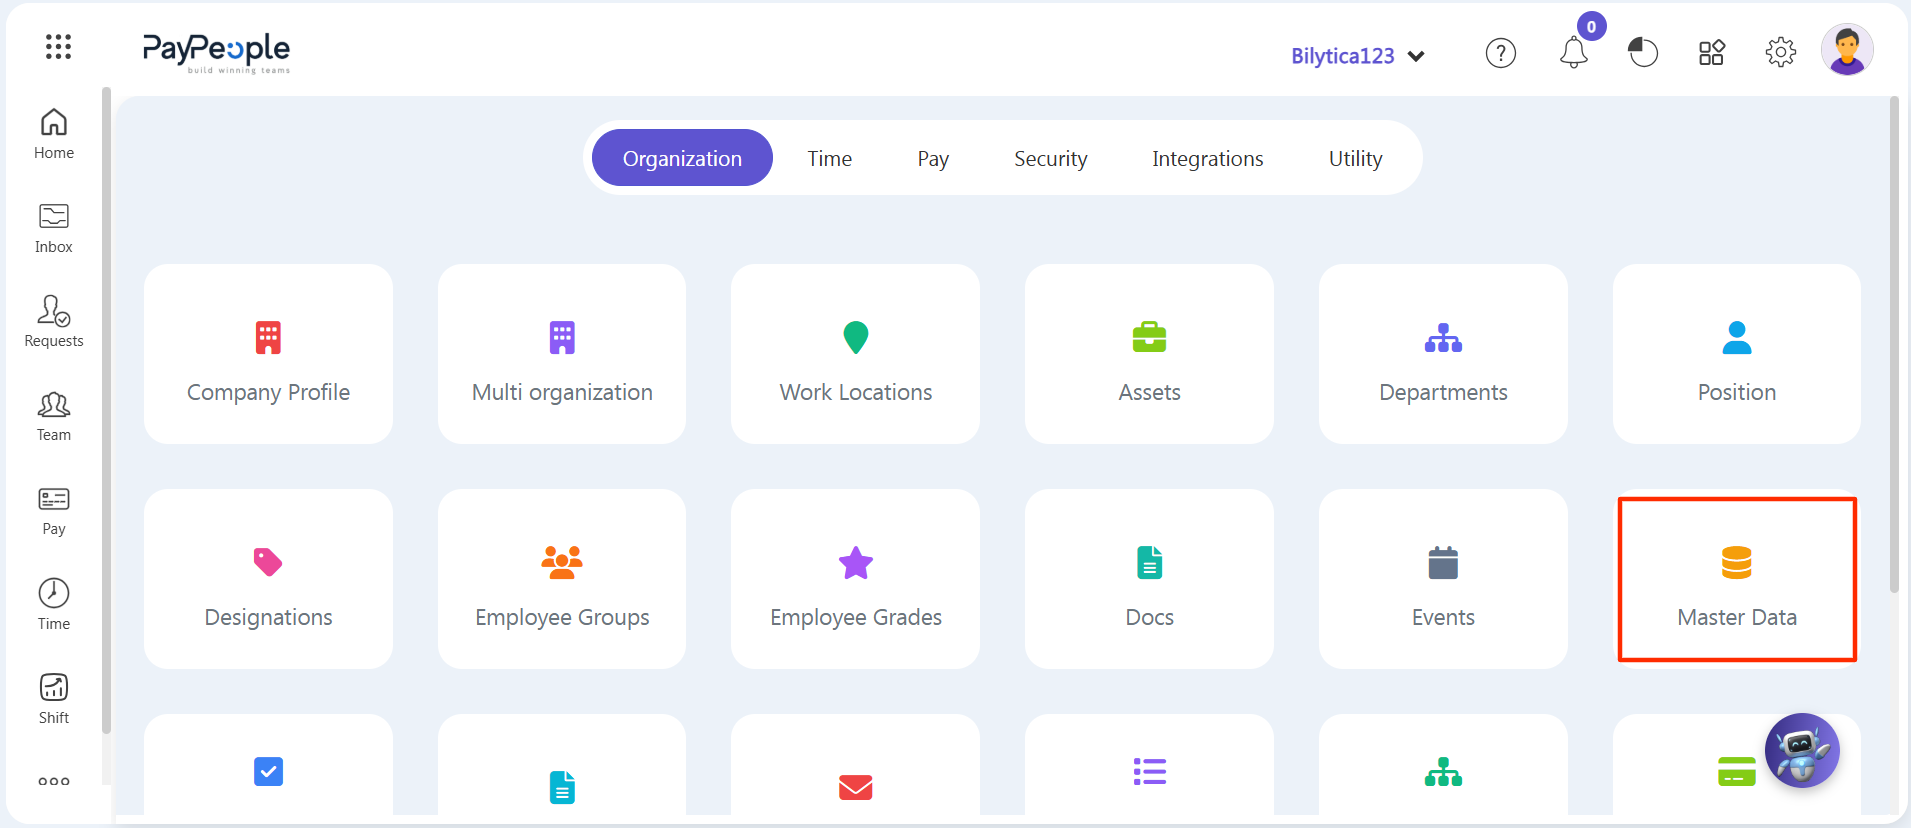
Step 3: The global Master Data directory view layout will load on-screen, providing an extensive catalog register of active systemic variables and record lists.
Step 4: Click inside the filter/search selection dropdown bar field component labeled 'Select or search...' (highlighted with a red boundary box frame) positioned on the left side of your panel toolbar layout view.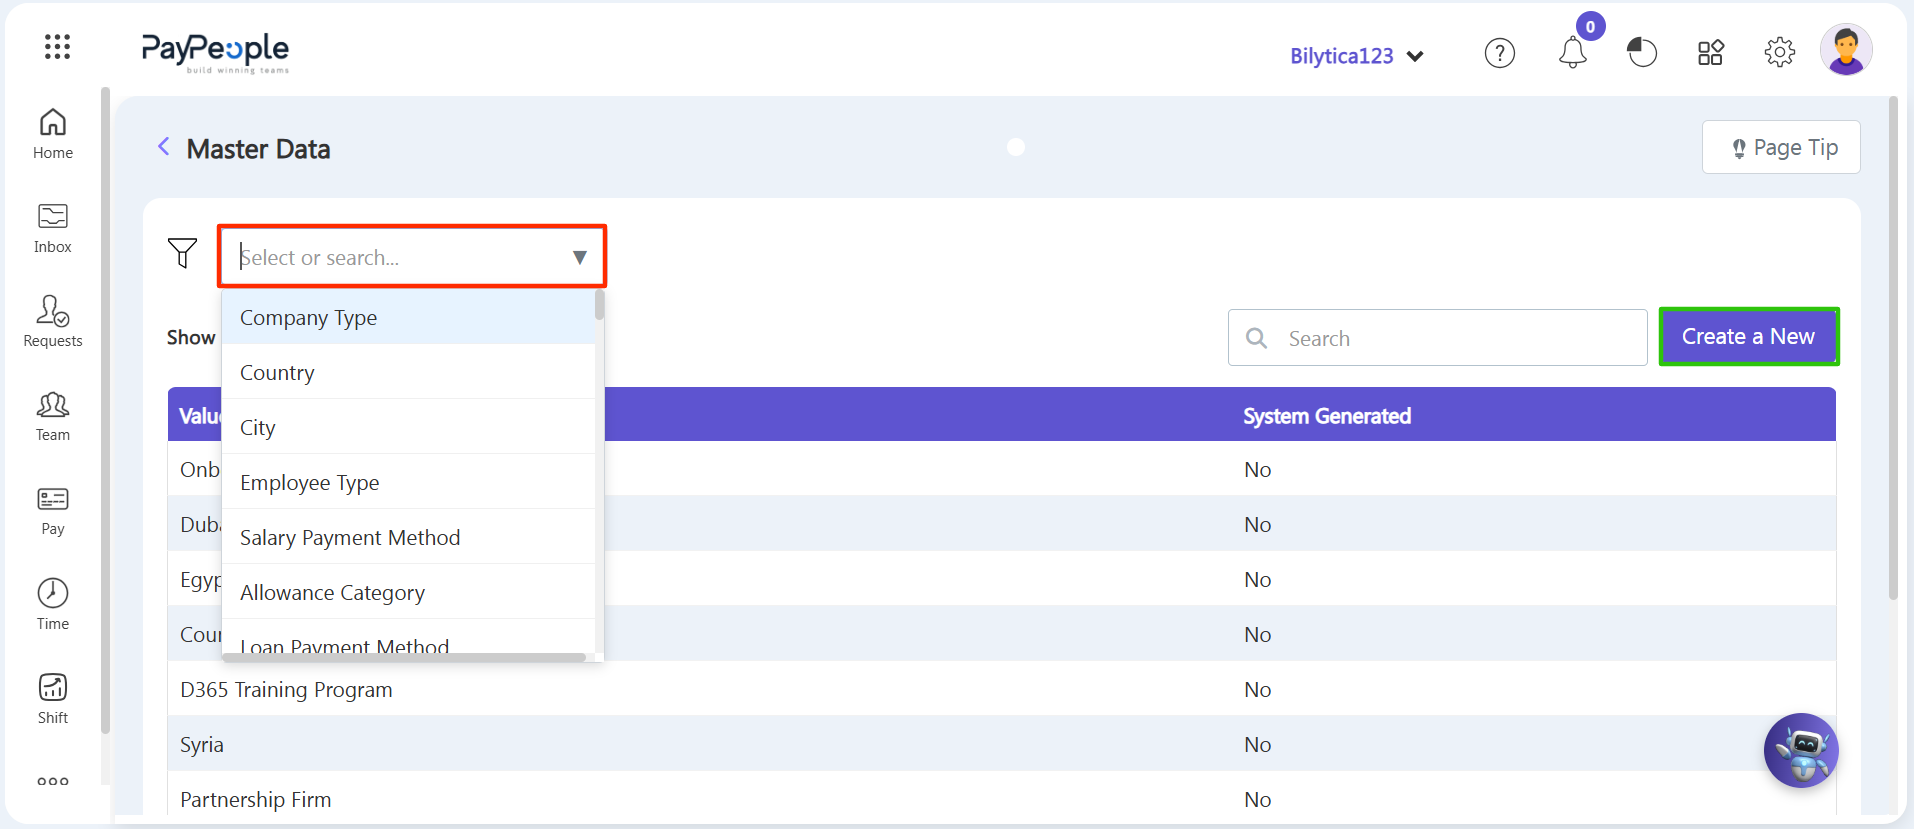
2. Selecting and Provisioning Master Sub-Data Variables
Isolate the explicit administrative field layer you intend to build out, and apply your structural sub-data sequential additions:
Step 5: Pick Your Target Field Classification Type — From the active filter/search select dropdown list field view container, select the specific parameter field module group category you want to enrich with new sub-data records. Examples include: Company Type, Country, City, Employee Type, Salary Payment Method, Allowance Category, Document Type, Nationality, or Marital Status,etc.
Step 6: Launch the Data Entry Workspace — Once your target category option updates inside the filter layout field view, look to the right margin area of the dashboard registry layout and click the purple Create a New action button block (highlighted with a green boundary box frame).
Step 7: Key-in and Commit the Entry Parameter Records — A parameter setup input screen view modal pop-up card will manifest over your active view workspace layout. Key the specialized sub-data option text string variables into the input data fields container box sequential details (e.g., keying in 'Full Time', 'Part Time', or 'Contractual' under Employee Type categories; or inputting 'Bank Transfer' or 'Cash' under Salary Payment Method segments). Look over your entries and tap the systemic Save option button control to permanently log the option record inside your master platform databases.
3. Operational Data Integration & Field Verification
Once you execute the database save action command pipelines, the platform instantly populates your inputs across live user selection environments:
• Profile Creation Alignment: When adding a new hire account card or modifying an active workforce file, the exact sub-data text variables entered here populate automatically inside the system fields dropdown selection elements.
• Clerical Error Mitigation: Standardizing parameters such as document validation constraints, location definitions, and marital criteria logs completely prevents typographical errors during user onboarding processes.
• Global Core Compatibility: Any data record logged under the master repositories applies instantly to attendance tracking engines, financial disbursement grids, and organizational reporting matrices company-wide.
System Architecture Pro-Tip: |