

Broadcasting internal announcements, organizing company-wide workshops, or scheduling team engagement functions keeps a workforce aligned and informed. PayPeople features a central corporate events engine that lets administrators target specific employee populations and push schedules directly into localized user dashboards.
1. Navigating to the Events Setup Panel
To configure a new public announcement or team calendar milestone:
Step 1: Click on the primary Setup module icon (gear ) located in the upper right-hand corner area of the main system ribbon header.
Step 2: Verify that the Organization tab option is highlighted, then find and click on the Events grid card component (marked with a red frame).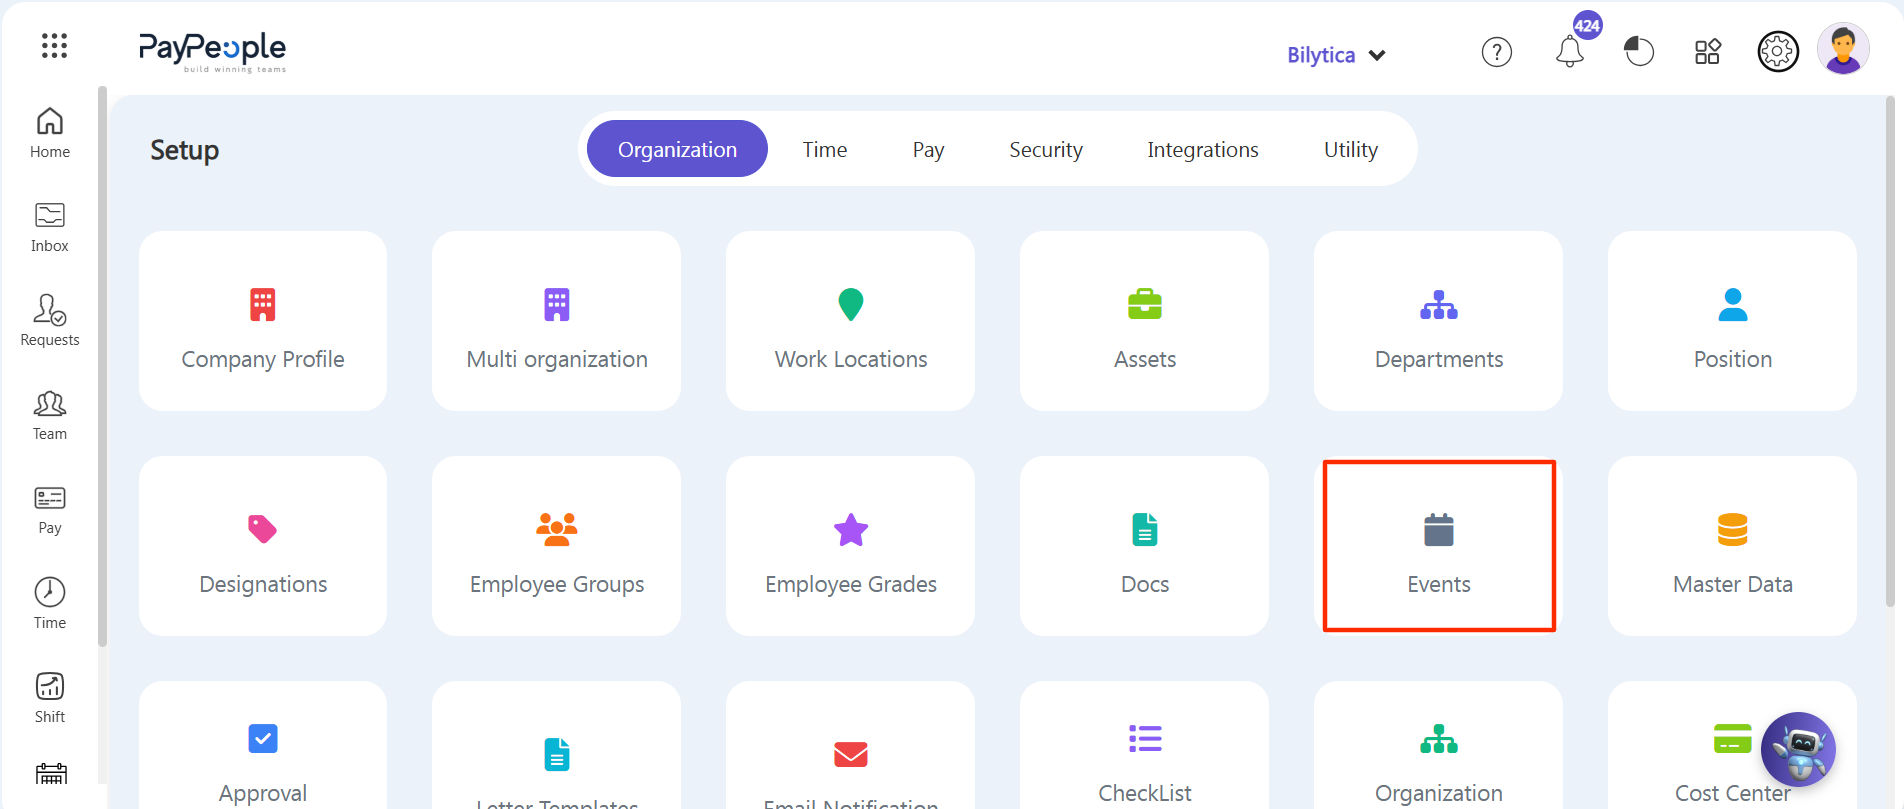
Step 3: The central Events management directory dashboard will open, showing an index log register of upcoming or past items alongside their unique Event Title, Event Location, Event Time, and Created Date parameters.
Step 4: Click on the purple Create a New button block (highlighted in a red box) on the right margin sub-navigation toolbar.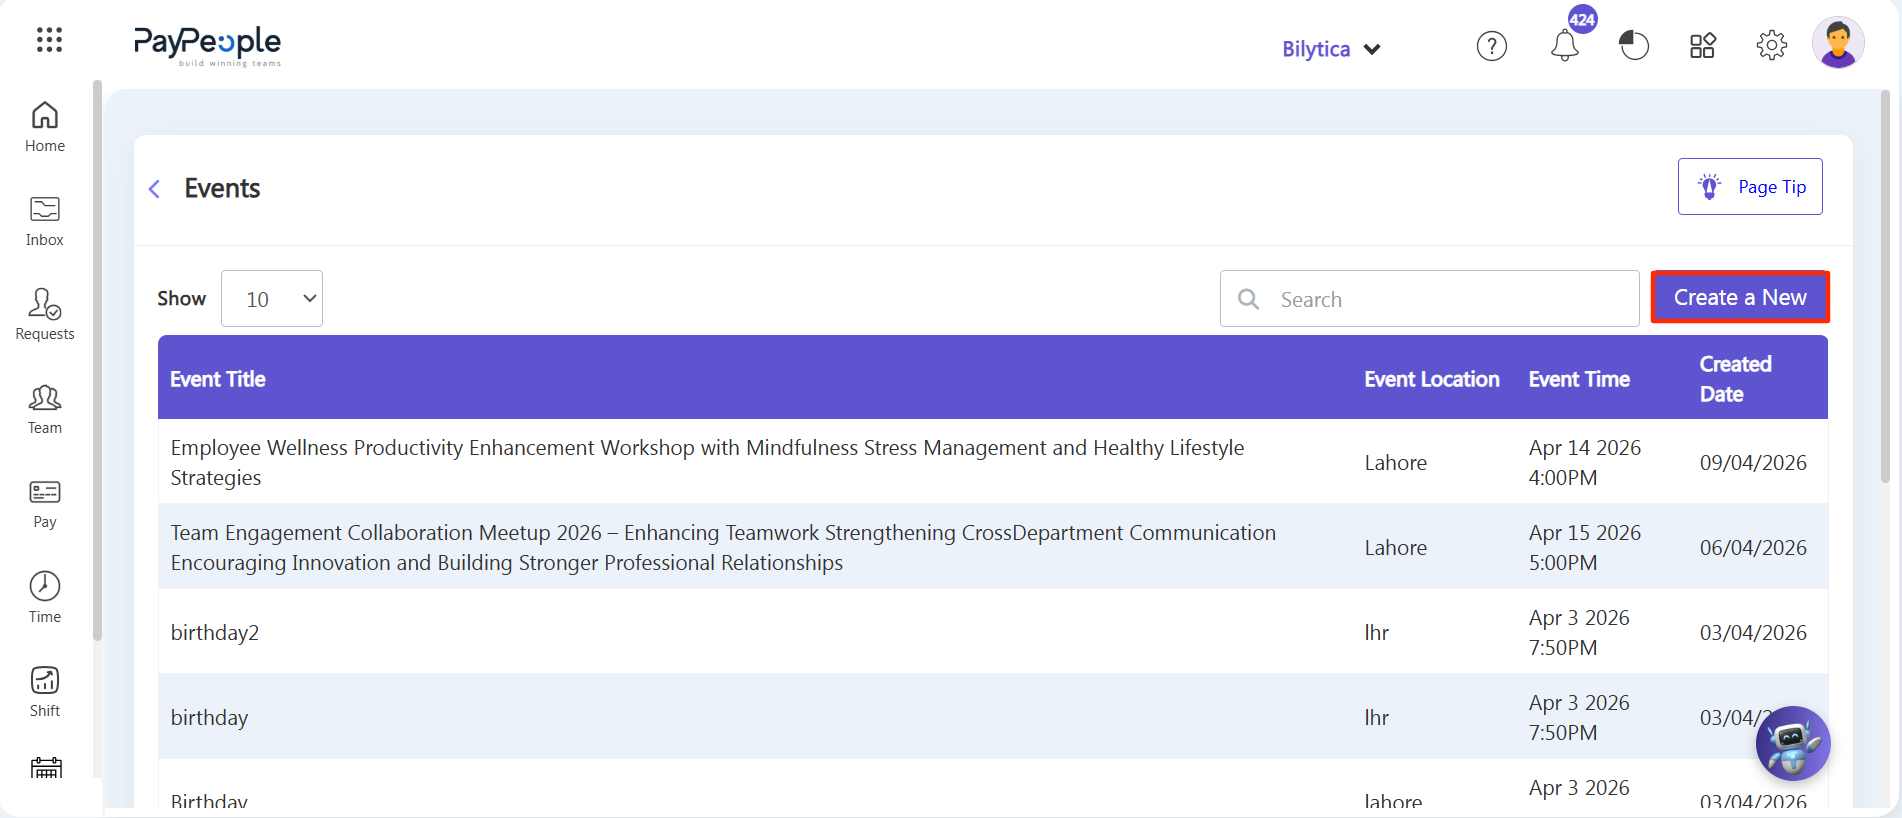
2. Compiling Event Parameters & Access Controls
The Add Public Events modal form popup card view container will open on your dashboard layout view. Populate the information fields sequentially:
Step 5: Media Attachments (Optional) — If your announcement involves an explicit agenda pamphlet, internal map, or policy memo flyer, click the orange Upload File button control under the Attachment Type block to add a relevant document straight from your hard drive storage.
Step 6: Core Event Profile Details — Type the official subject line inside the Title* required field, specify a venue in the Event Location box, and pick the required targets from the Event Date calendar picker and Start Time* dropdown list selections.
Step 7: Activating Feedback Loops — Enable the Allow Comments checkbox indicator if you want to let targeted employees add their custom remarks, questions, or notes on that specific event page layout view.
Step 8: Description Block — Input any relevant operational descriptions, training schedules, or expectations within the main multi-line rich text editor area.
Step 9: Setting Granular Event Access — Scroll to the Event Access framework layer below. Define precisely to whom you want to show this event by filtering criteria across four standalone drop-down matrices: Location, Department, Designation, and explicit Employees.
Step 10: Finalizing Filter Saves — Once you have selected your targeted filter parameters, click the purple Filter Employees action button to lock the structural distribution query scope, and then tap the purple Save button on the lower right corner ribbon.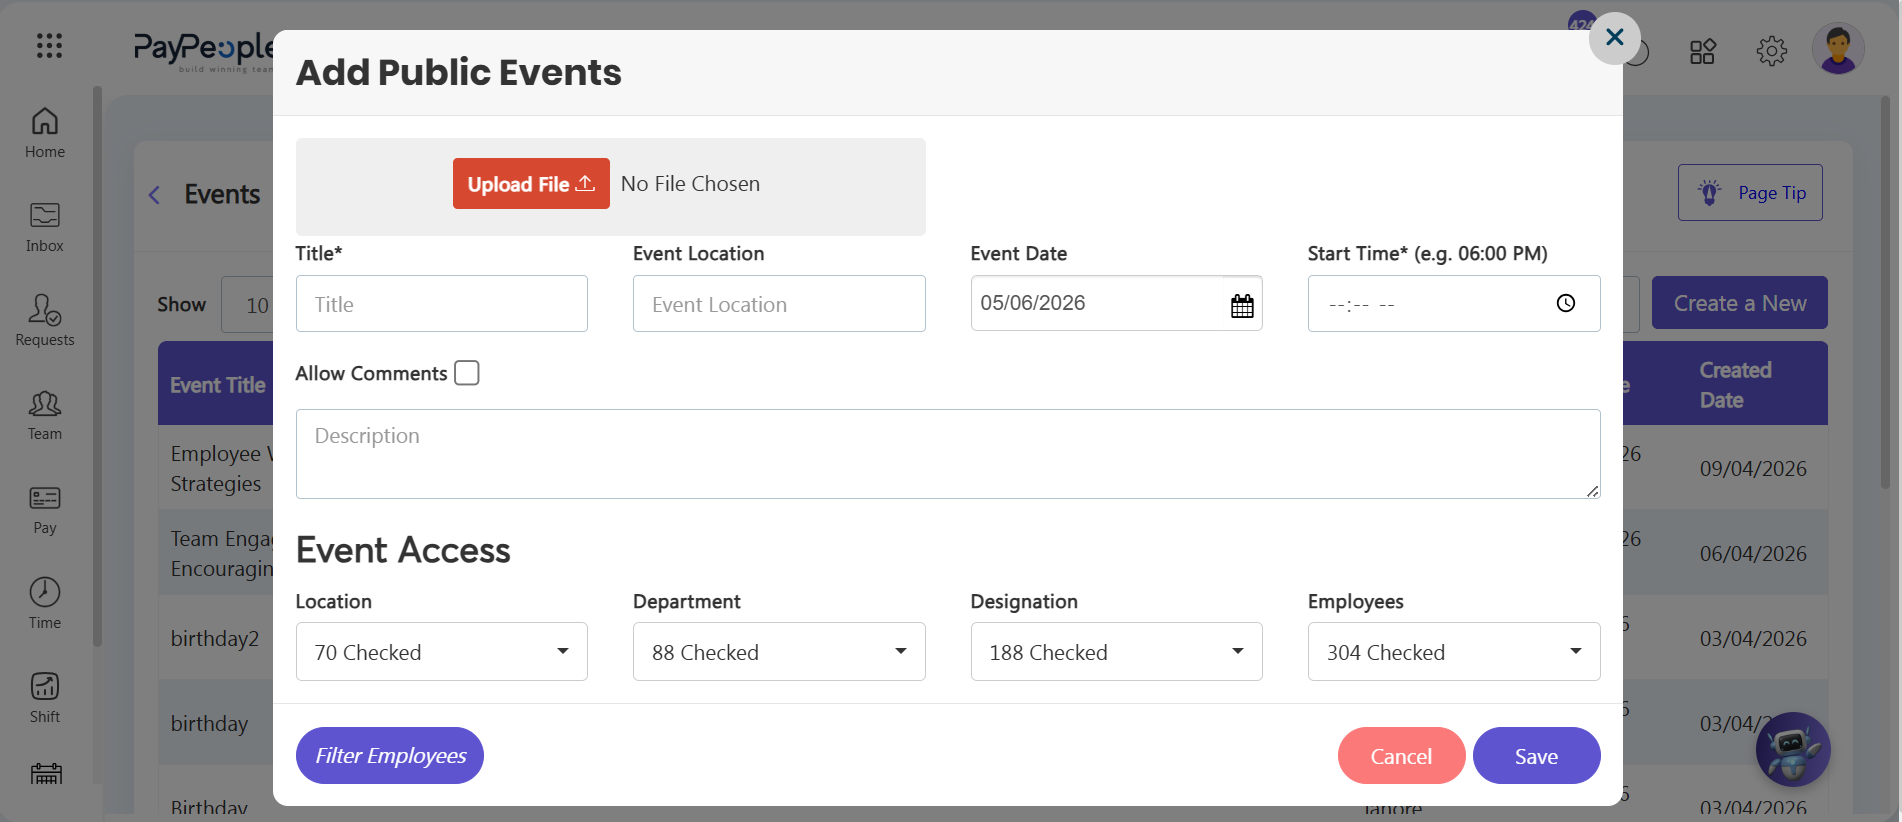
3. Verification in the End-User Calendar View
Once saved in the system, the platform instantly populates the announcement schedule straight onto targeted employee feeds:
Step 11: When authorized team members log in, they click the primary Home module tab on the left-hand navigation menu selection sidebar.
Step 12: From the horizontal dashboard ribbon selections, click the Calendar button block component (highlighted in a red box frame).
Step 13: The interactive tracking monthly calendar matrix grid layout will populate on-screen, automatically displaying the created announcement item or scheduled workshop block on its respective calendar date block layer.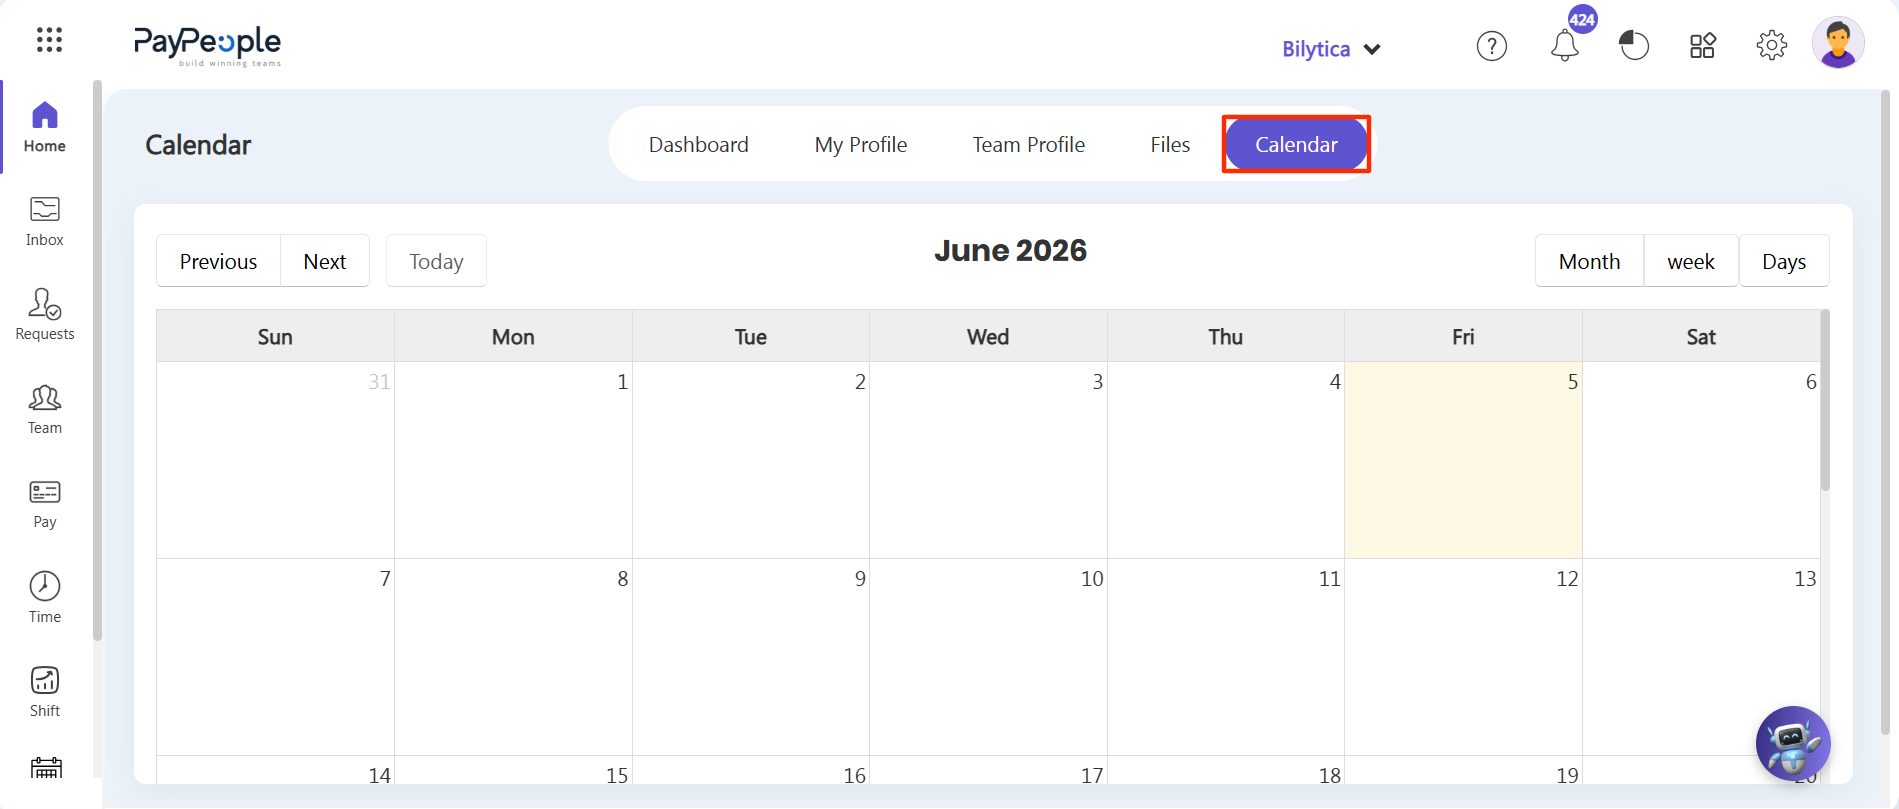
Workforce Engagement Tip: |