

For enterprise businesses running more than one corporate entity, PayPeople provides a seamless multi-organization infrastructure. Instead of creating isolated separate accounts, you can build and manage multiple company entities inside a single master database login.
6.2.1. Adding Multiple Company Entities
If your company operates under a multi-organization framework, use this wizard menu to define your distinct subsidiaries or sub-brands: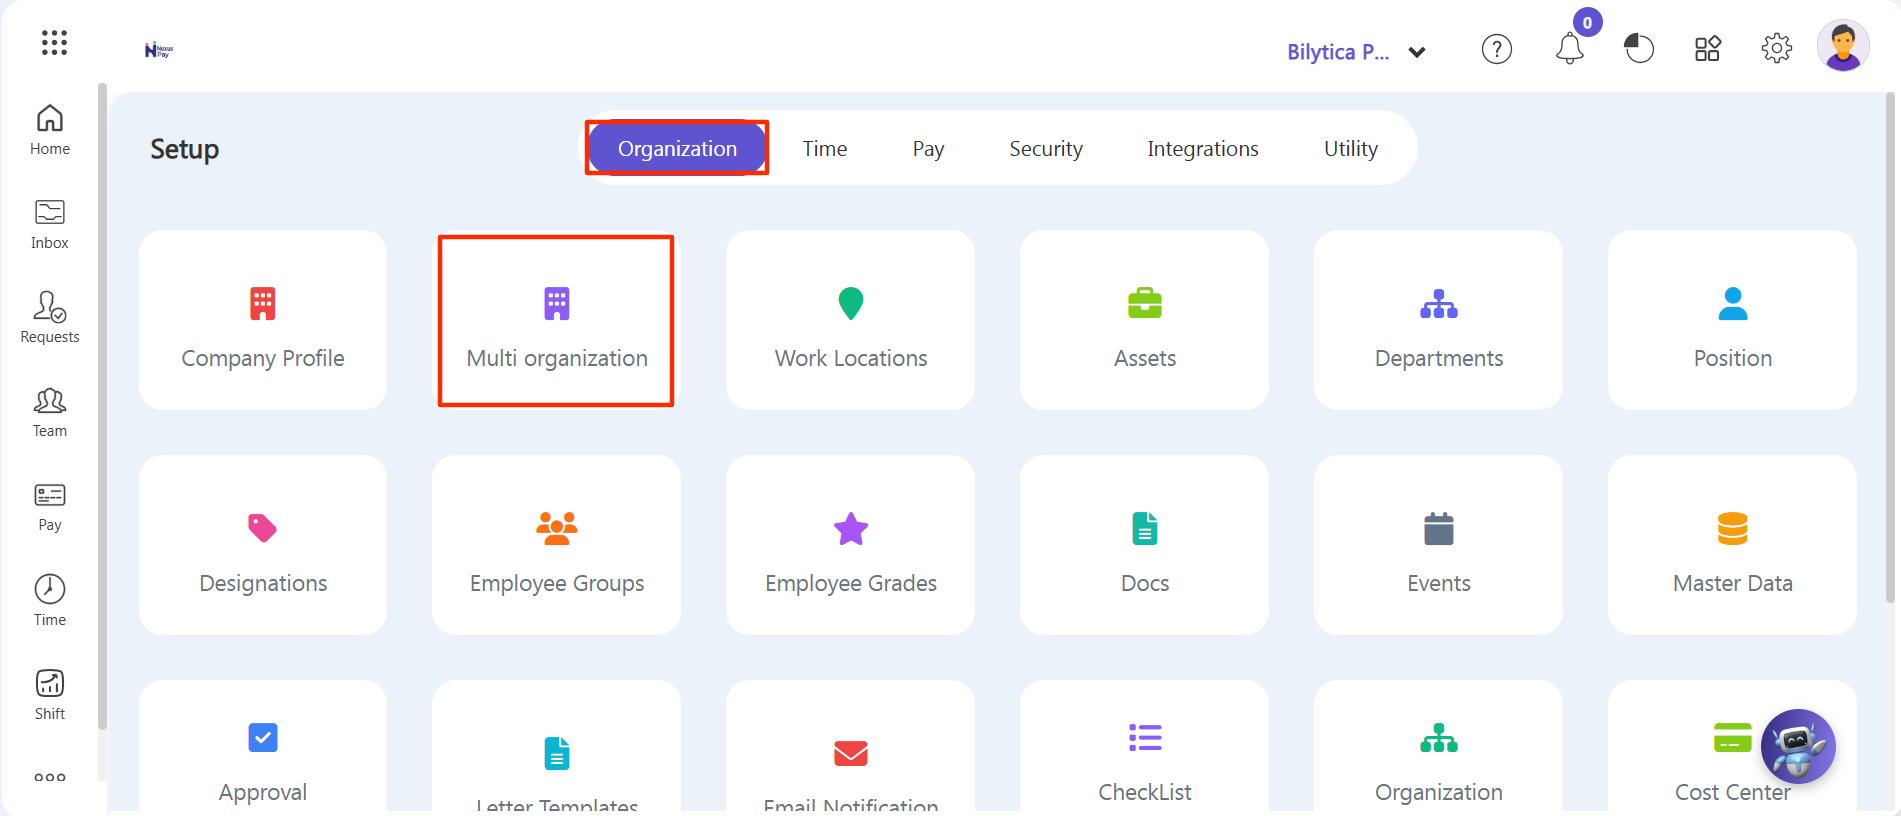
Step 1: Navigate to the main top-right menu panel and click the Setup module icon (gear ).
Step 2: Ensure the Organization horizontal tab is active, then locate and click on the Multi organization setup card.
Step 3: Once you click on Multi organization, the central management dashboard screen will appear. This page displays organization stats like Folder Space Usage and Employee counts.
Step 4: Click on the Create New Organization button (highlighted in a red box) in the upper-left quadrant.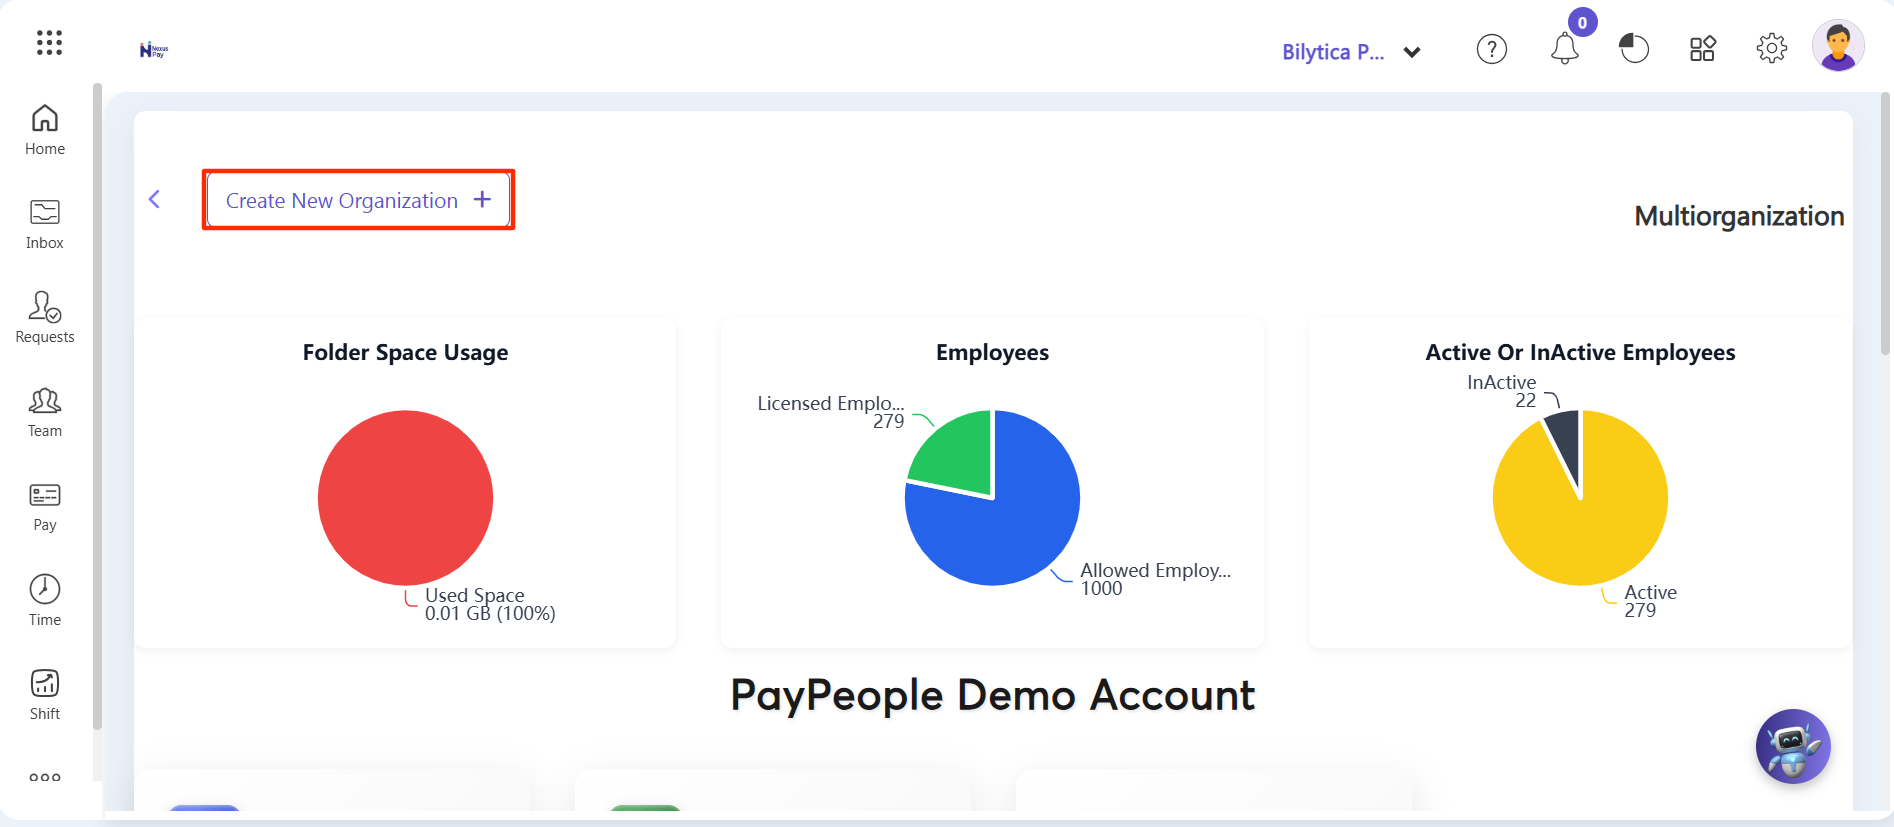
Step 5: Clicking this button will automatically direct you to the Company Profile creation page. Input your secondary business entity's profile details (such as official name, legal identifiers, or specific branding details) and click Save. Once completed, your fresh corporate node will instantly activate inside PayPeople
6.2.2. Switching Between Active Organizations
Once your sub-entities are configured, switching workspaces to review localized employee data, configure separate payroll methods, or process shift timesheets requires just two clicks:
Step 4: Look at the very top header ribbon bar and click on the corporate workspace dropdown indicator arrow icon (highlighted in red).
Step 5: A list tray will reveal all your active created entities. Simply select the specific company organization name card you want to access.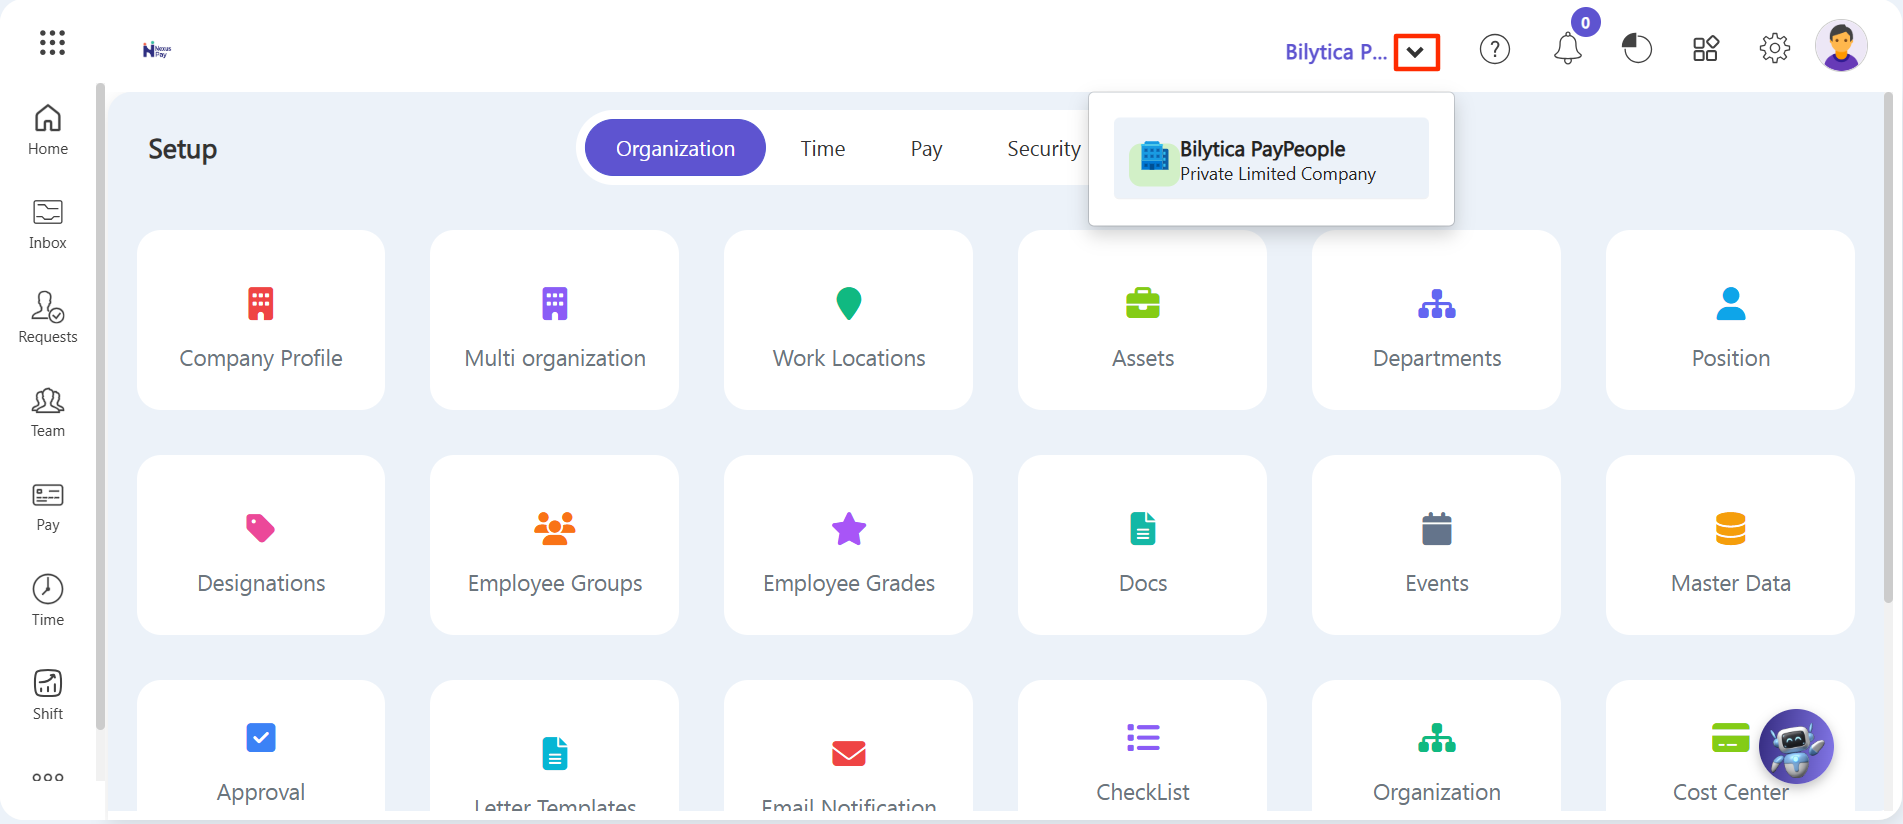
6.2.3 Processing Inter-Company Employee Transfers
In multi-organization corporate structures, employees may need to be reassigned to a different corporate group. Instead of manual offboarding and onboarding, PayPeople provides an internal pipeline to shift personnel seamlessly via an administrative request workflow.
1. Initiating a Transfer Request
To begin moving an employee from your active entity to another registered subsidiary:
Step 1: Click on the Requests module tab on your left-hand primary navigation sidebar selection menu.
Step 2: From the horizontal workflow choices along the top dashboard, select Employee Action.
Step 3: Click the white New Request button located in the upper right-hand corner ribbon.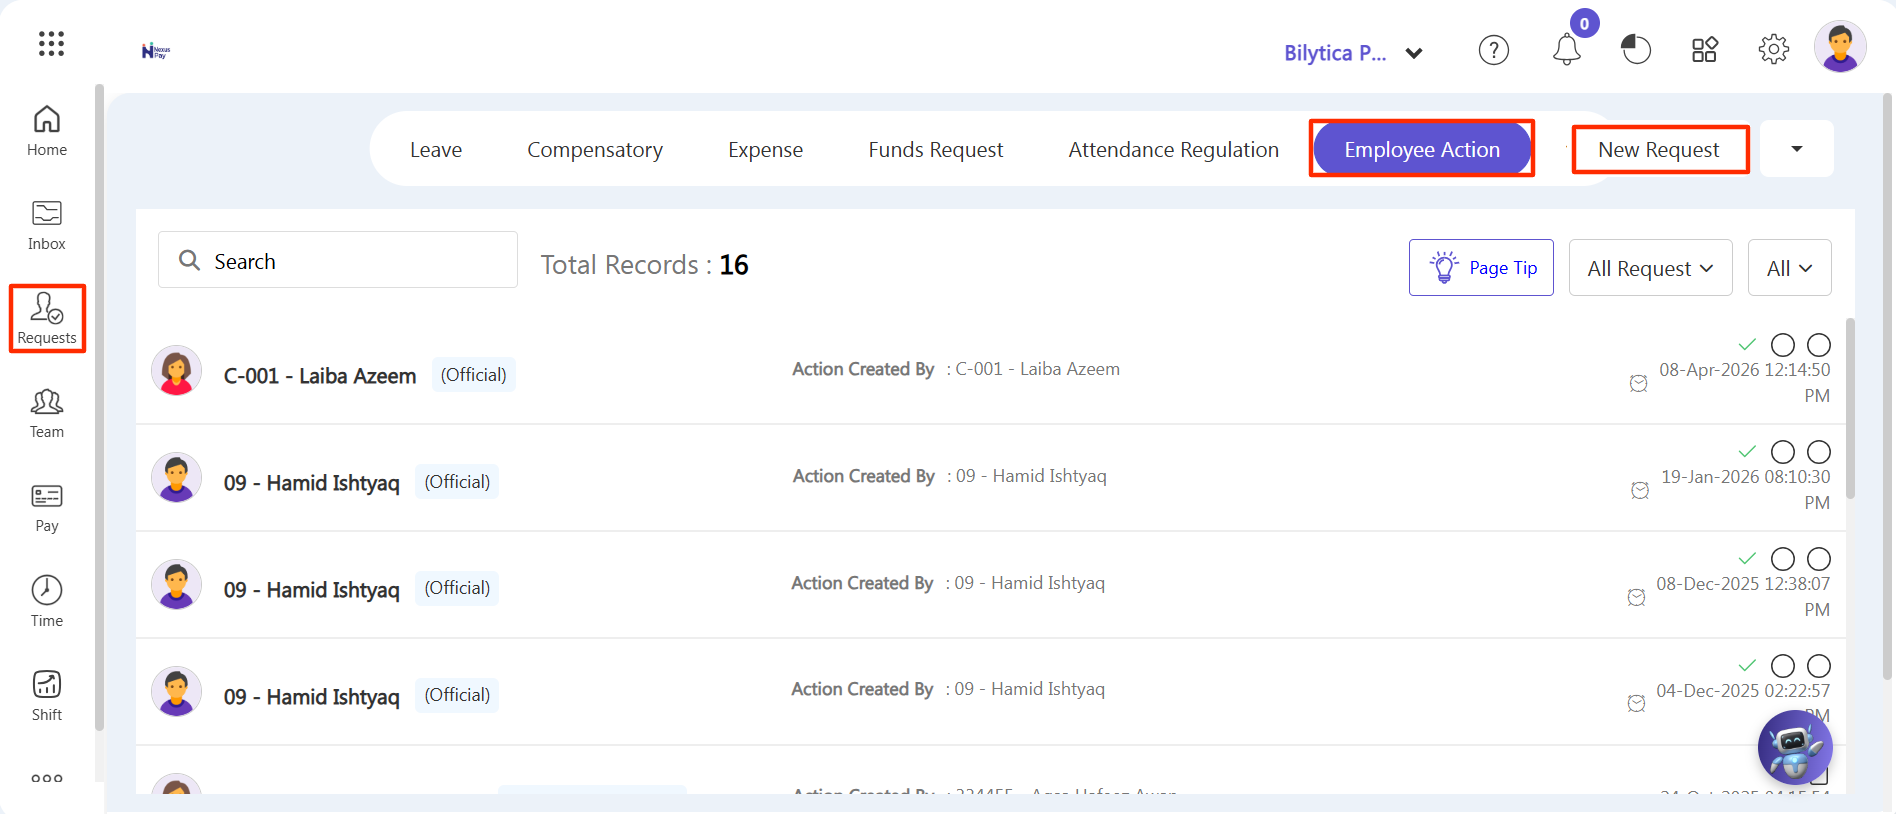
2. Modifying Transfer Form Information
After launching the request wizard, the Add Employee Action wizard form screen will open. Proceed through the configuration checkpoints:
Step 4: Type or select the targeted worker's profile inside the Search Employee required form drop-down list box.
Step 5: Check the box next to Inter Company Transfer to open the internal structural routing paths.
Step 6: Open the Transfer To Company drop-down menu selection list and click on the specific corporate destination branch entity where the individual is moving.
Step 7: The employee's current Personal information data records will populate lower down on your screen view. Look over the fields and edit the layout values if any personal details need changing, then click Next.
Step 8: The layout will advance you to the Official information section page. Review and edit any internal designations, departments, reporting lines, or operational shift rules for the new entity, then click Next.
Step 9: Lastly, the system will route you into the final Salary information stage layer. Make any necessary updates to basic structural packages, tax calculation settings, or account distributions.
Step 10: Once all data points are verified, click the submit control option button to forward the transfer file to approval authorities.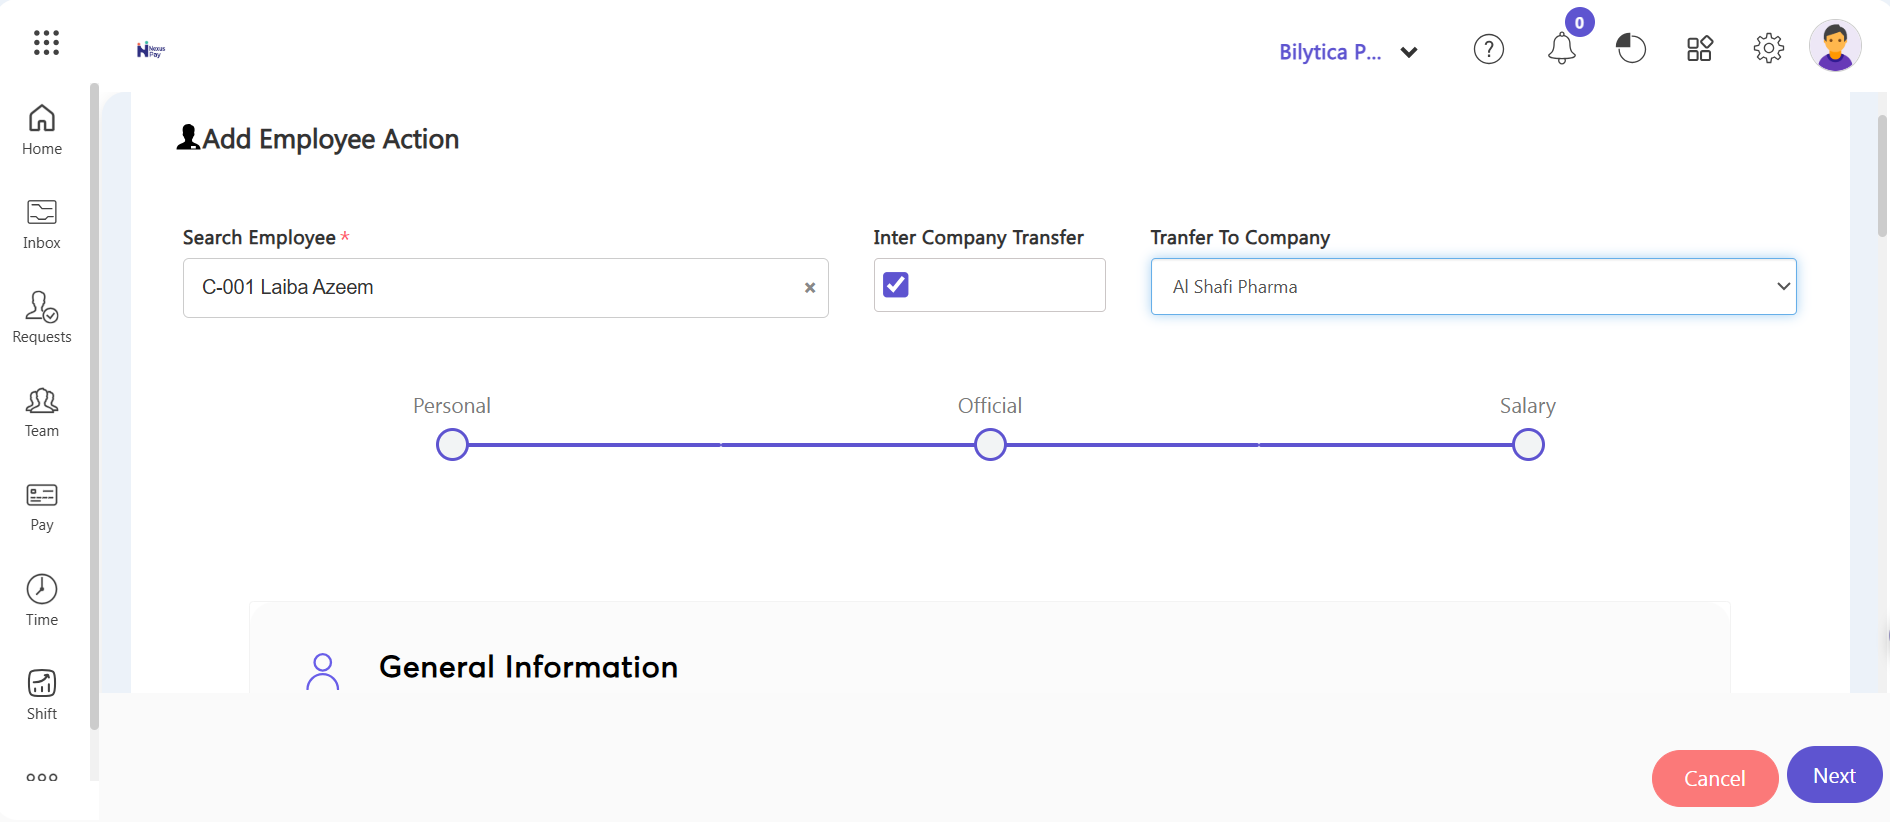
Critical Automation Notice: |
6.2.4 Configuring Multi-Currency Settings
When operating a multi-organization corporate structure, different subsidiaries often require distinct financial localization. PayPeople allows you to set up and isolate a unique transactional currency for each separate company entity inside your system layout.
1. Setting Up Separate Currencies per Subsidiary
To configure a separate operational currency for a specific business entity, make sure you have first switched to that company workspace from your top dropdown layout menu, then follow these setup steps:
Step 1: Click on the Setup module icon (gear ) located on the top right toolbar panel navigation ribbon.
Step 2: Select the Organization tab from the available horizontal configuration sub-menus, and click on the Company Profile card.
Step 3: Inside the profile wizard screen view layout, look at the top navigation choices and click on the Other tab button.
Step 4: Locate the Currency drop-down selection form field box (highlighted in a red box layout).
Step 5: Open the select menu tray and choose the specific localized legal tender identifier currency that your active organization uses for baseline expense logs, compensation balances, or salary registries (such as PKR).
Step 6: Click the white Save button on the top right margin to commit the regional changes to that specific organizational node database.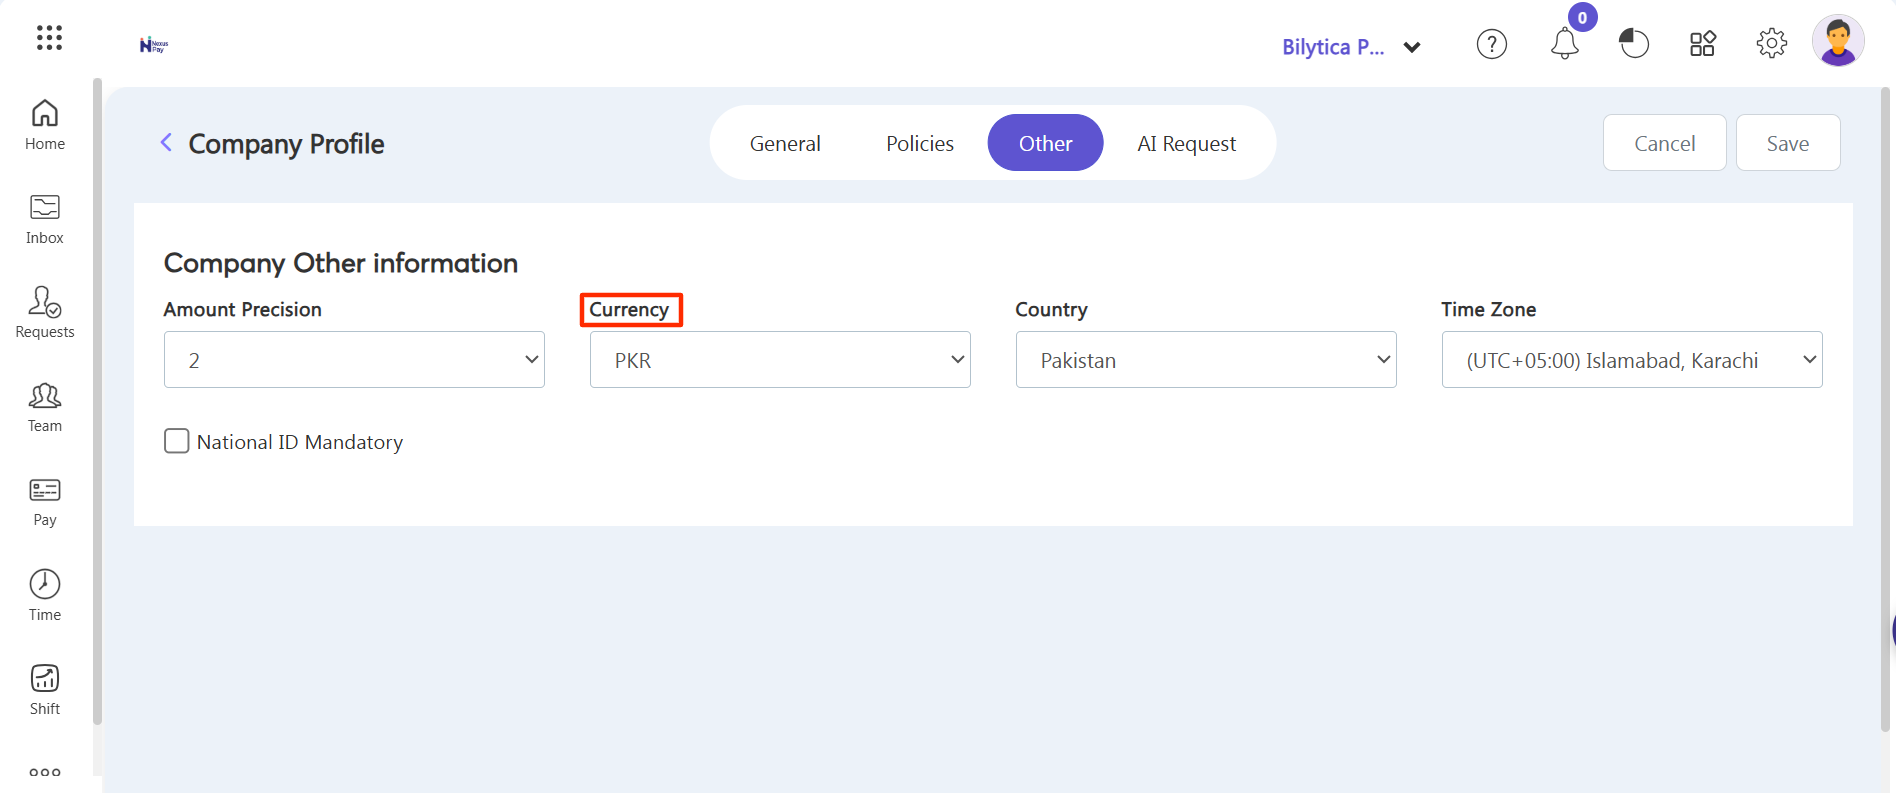
Financial Isolation Reminders: |