

Automating internal routing rules ensures that whenever an employee initiates a request—such as a leave application, loan request, or document release—the file lands directly in front of the appropriate authorizing authorities. PayPeople utilizes a multi-tiered approval configuration engine to map out specialized authorization hierarchies.
1. Navigating to Approval Settings
To begin creating or modifying an operational hierarchy routing rule:
Step 1: Click on the primary Setup module icon (gear ) located in the upper-right corner of the top system dashboard panel ribbon.
Step 2: Ensure the Organization horizontal tab is active on your workspace view, then locate and click on the Approval Configuration grid card component (highlighted in a red box layout).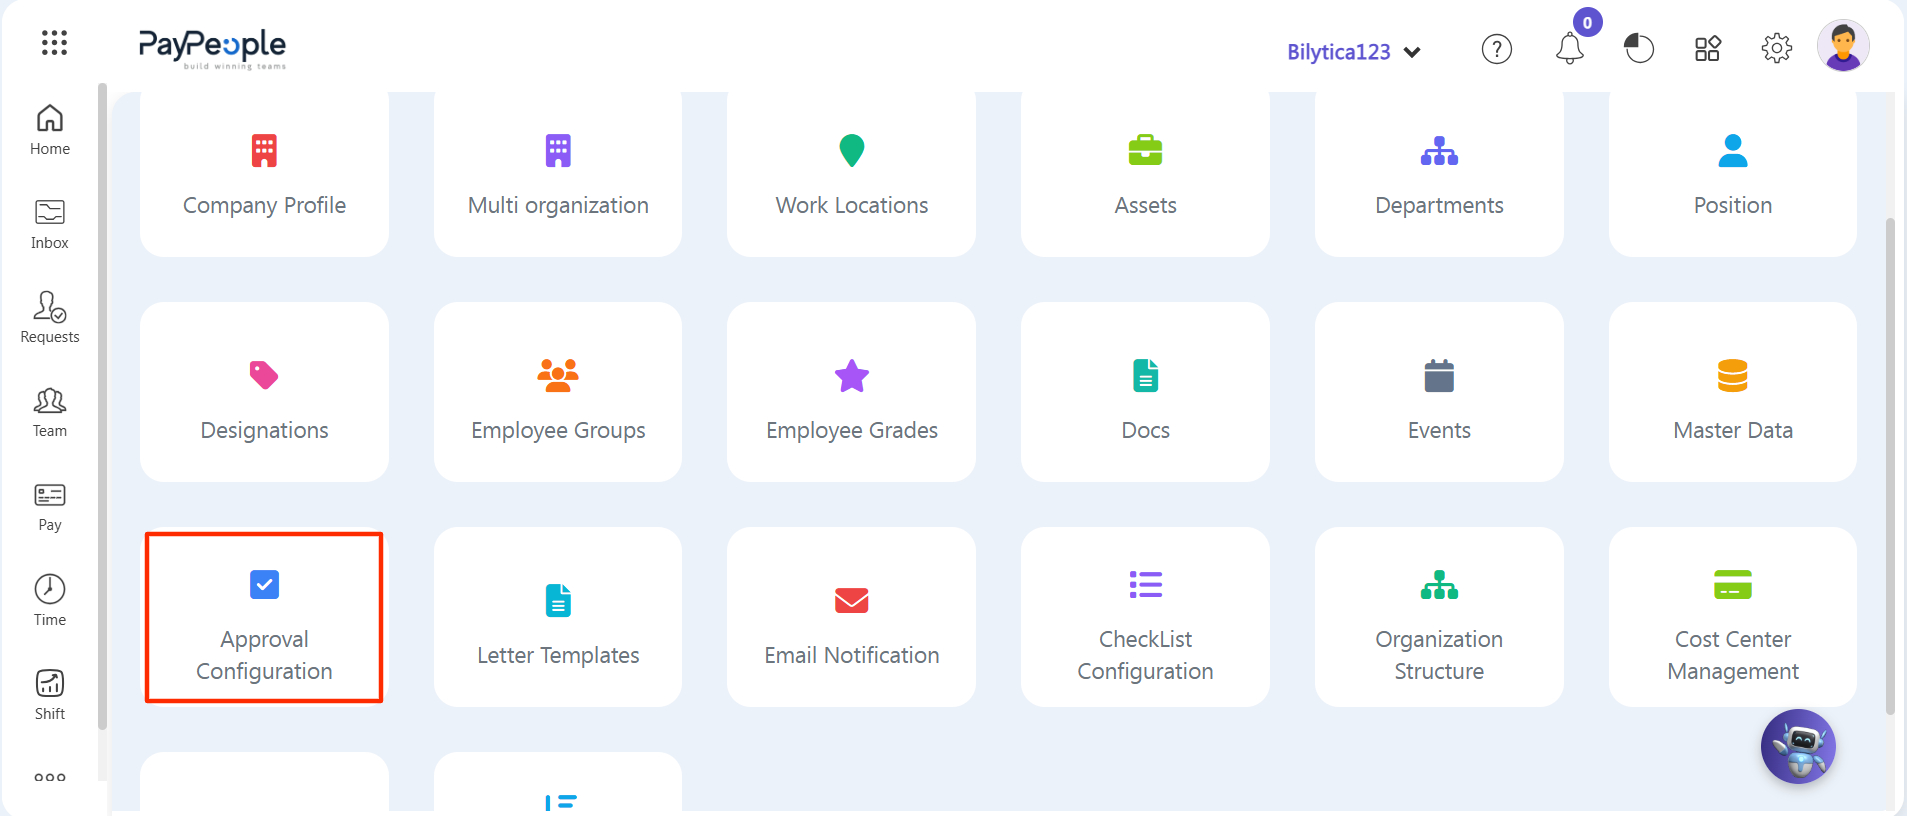
Step 3: The master Approval Configuration directory summary page will load, displaying a row listing of existing workflows along with their Form Names, Template Names, and active status tags.
Step 4: Click on the purple Create a New button block (highlighted with a red rectangular box frame) positioned within the right-hand sub-navigation ribbon area.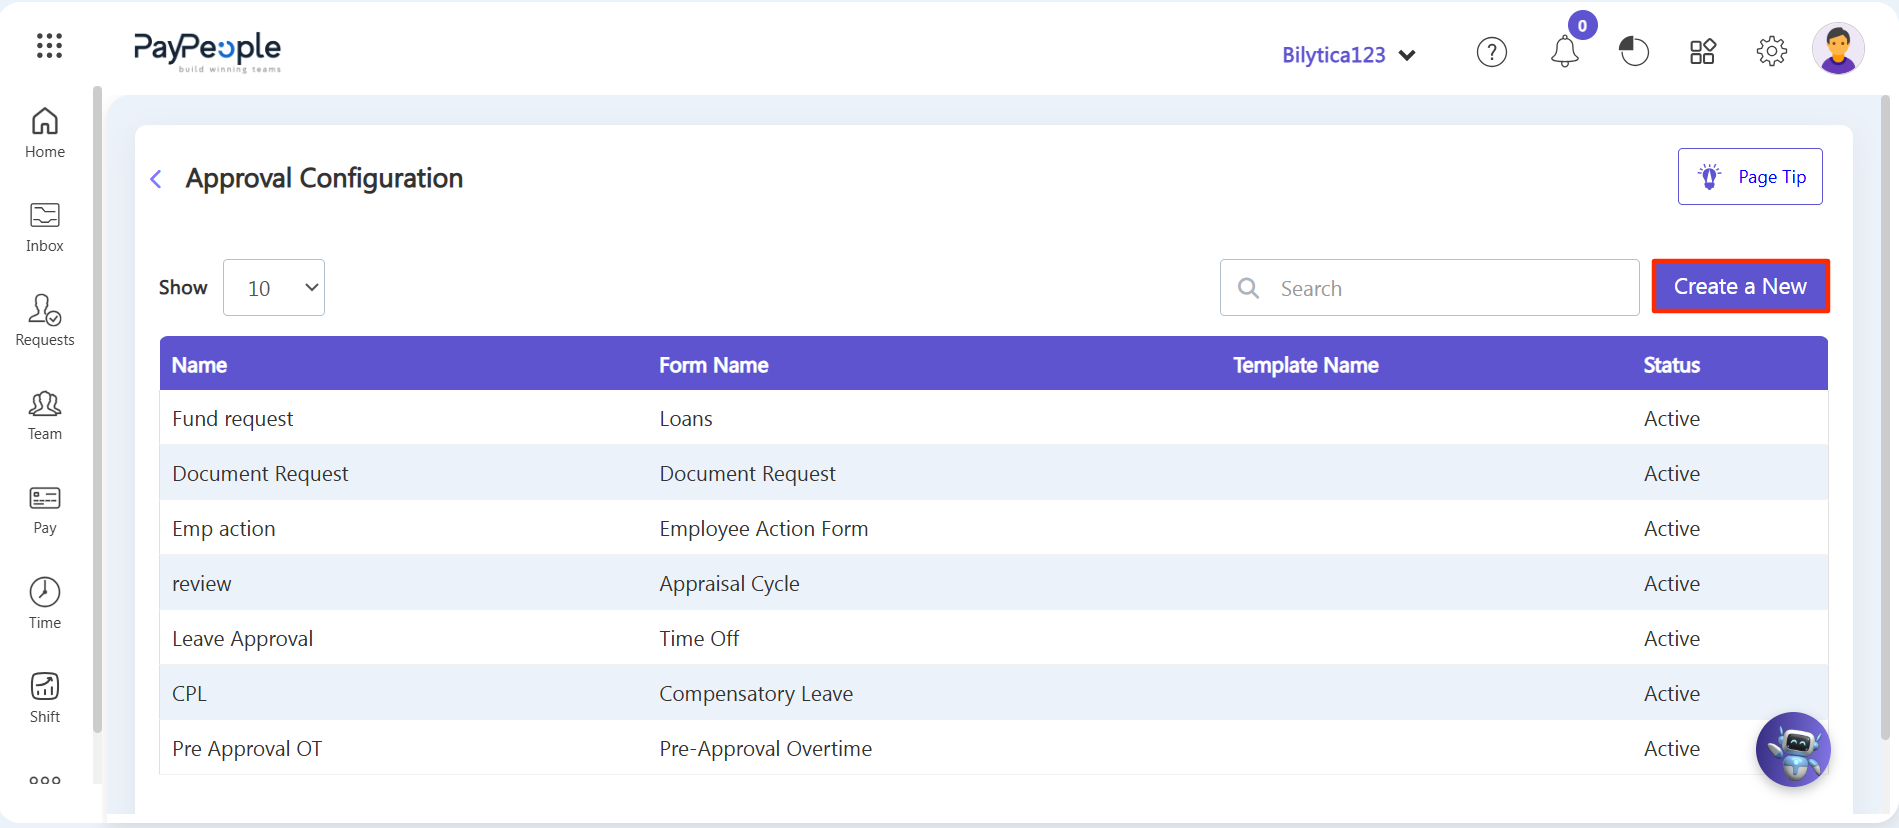
2. Initiating Approval Rule Metadata & Criteria
An Add Approval form wizard popup modal overlay will open on your view layout. Complete the core tracking parameters sequentially:
Step 5: Form Name Assignment — Open the Form Name drop-down selection box menu and choose the specific request type module that will trigger this chain (e.g., Leave Request, Loan, or Document).
Step 6: Setting Workflow Titles — Type a clear, identifiable name inside the Approval Name input text field box container (e.g., Leave Approval) to separate this rule from other conditional branches.
Step 7: Applying Policy Criteria Thresholds — If you want to enforce specific criteria as per your corporate policy, click the purple Set Criteria action button block located in the center panel section layer.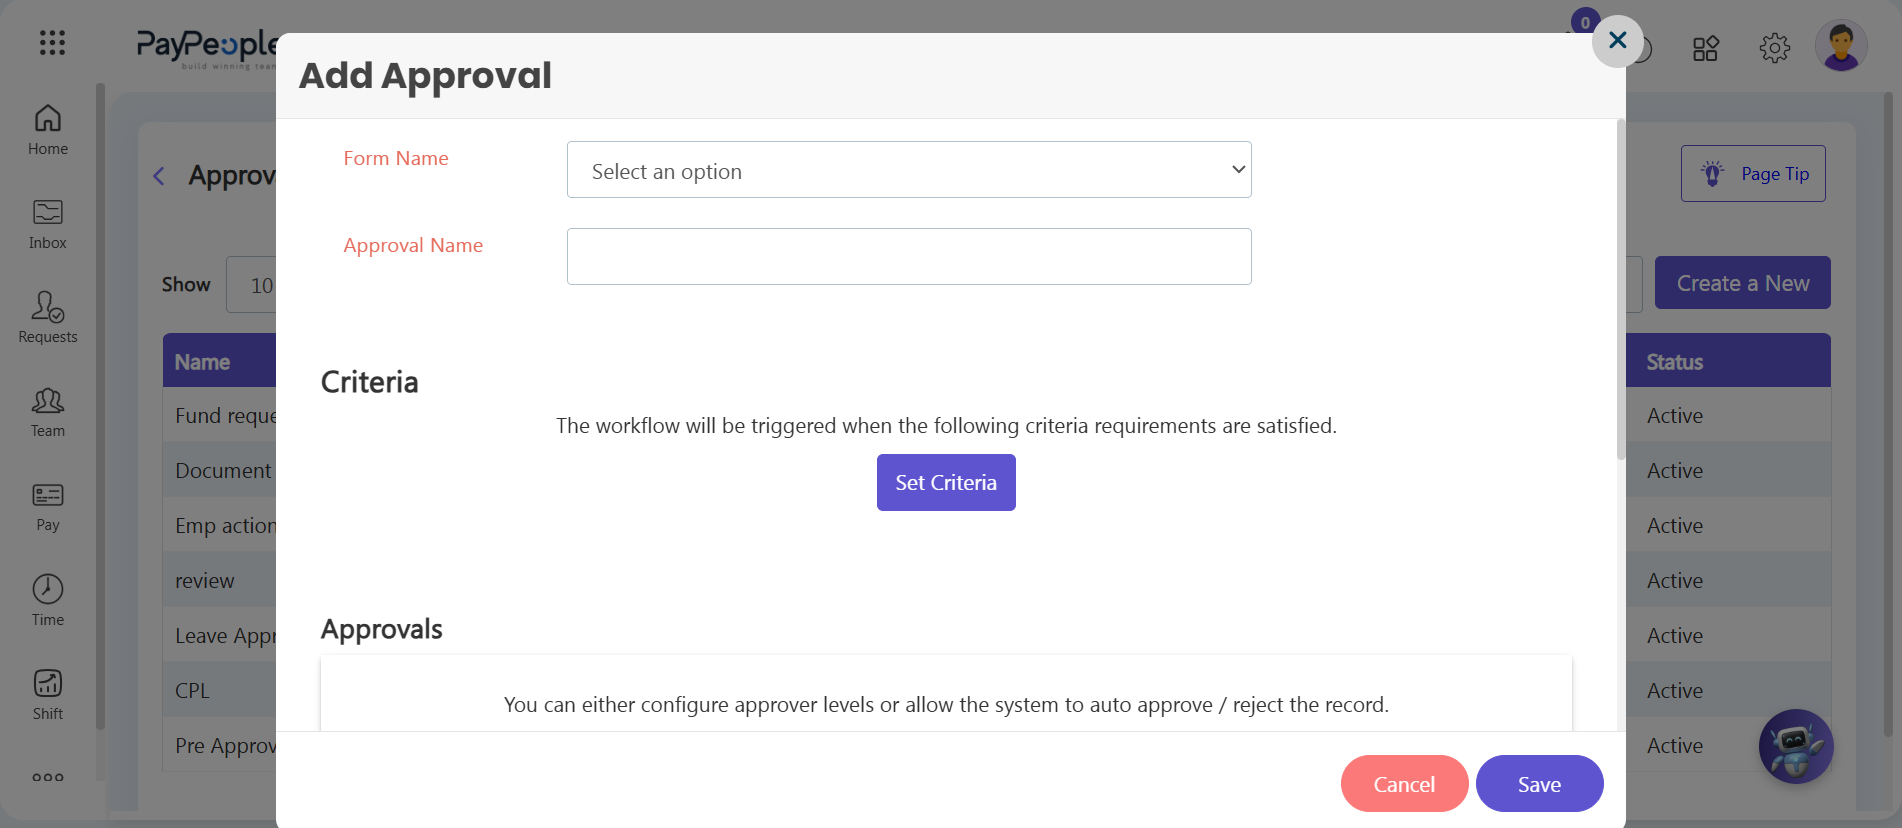
3. Constructing Multi-Level Hierarchies & Messaging Alerts
Scroll lower into the modal parameters form container to establish your structural chain sequence and communication dependencies:
Step 8: Define the Approver Authority Type — Use the left-hand drop-down select field within the Approvals panel block to determine your target authority line (e.g., selecting Reporting To to route packets based on organizational structures).
Step 9: Map out the Level Target Tier — Use the secondary dropdown field to isolate structural placement limits (e.g., mapping a Single Level sign-off or specifying an extended managerial path).
Step 10: Build the Hierarchy Chain of Command — To add more authorization checkpoints, click the green plus icon button (+). This allows you to construct sequential routing flows customized to your policy requirements—such as establishing a rule where a request goes to the first Line Manager, then routes to the HR Manager, and finally lands with the Administrator for absolute sign-off.
Step 11: Integrate Automated Email Notifications — Scroll to the Message section area and click on the white Configure Email Template button block. Designing your message layout here ensures that the system automatically sends an email update directly to the employee the moment their request undergoes workflow actions.
Step 12: Once your hierarchy layout parameters and message alerts are verified, click the purple Save option button control in the lower right-hand margin to activate the routing rule.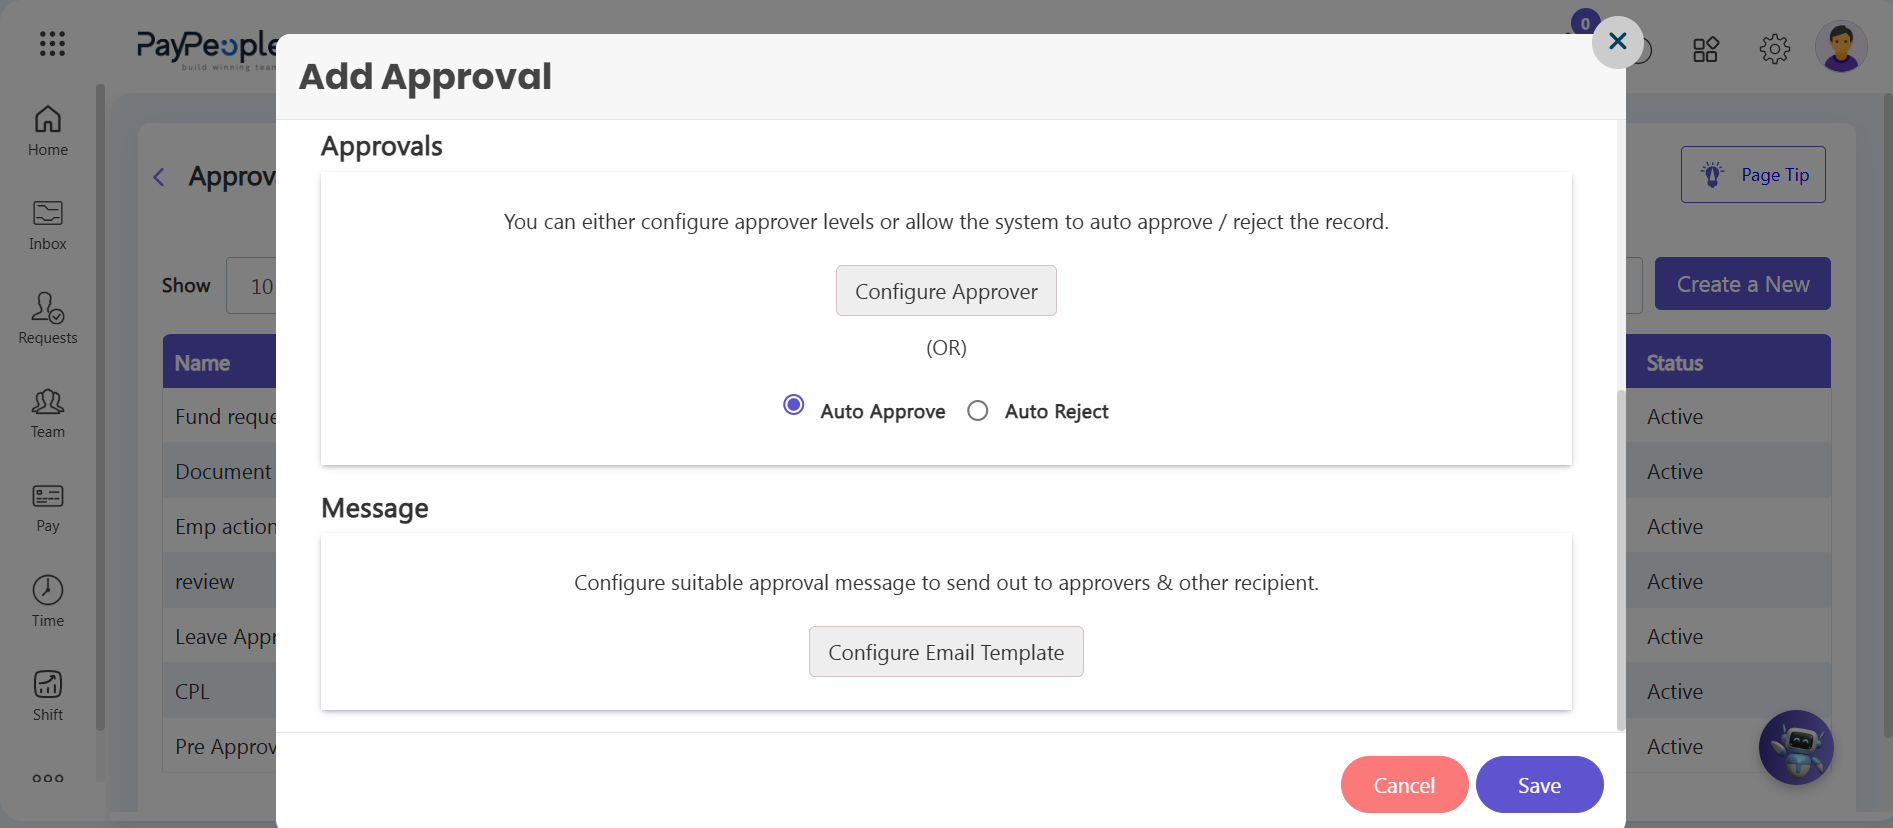
System Proactive Tip: |