

Defining clear professional titles within your company provides an organized layer for employee leveling, salary structures, and role assignments. PayPeople allows you to map structural job identifiers directly to management tiers and grading logic for smoother profile mapping.
1. Navigating to the Designations Registry
To begin defining your organization's formal job positions:
Step 1: Click on the primary Setup module icon (gear ) located in the upper right navigation panel header ribbon.
Step 2: Verify that the Organization tab is highlighted on the top menu grid, then select the Designations grid card component (marked with a red frame).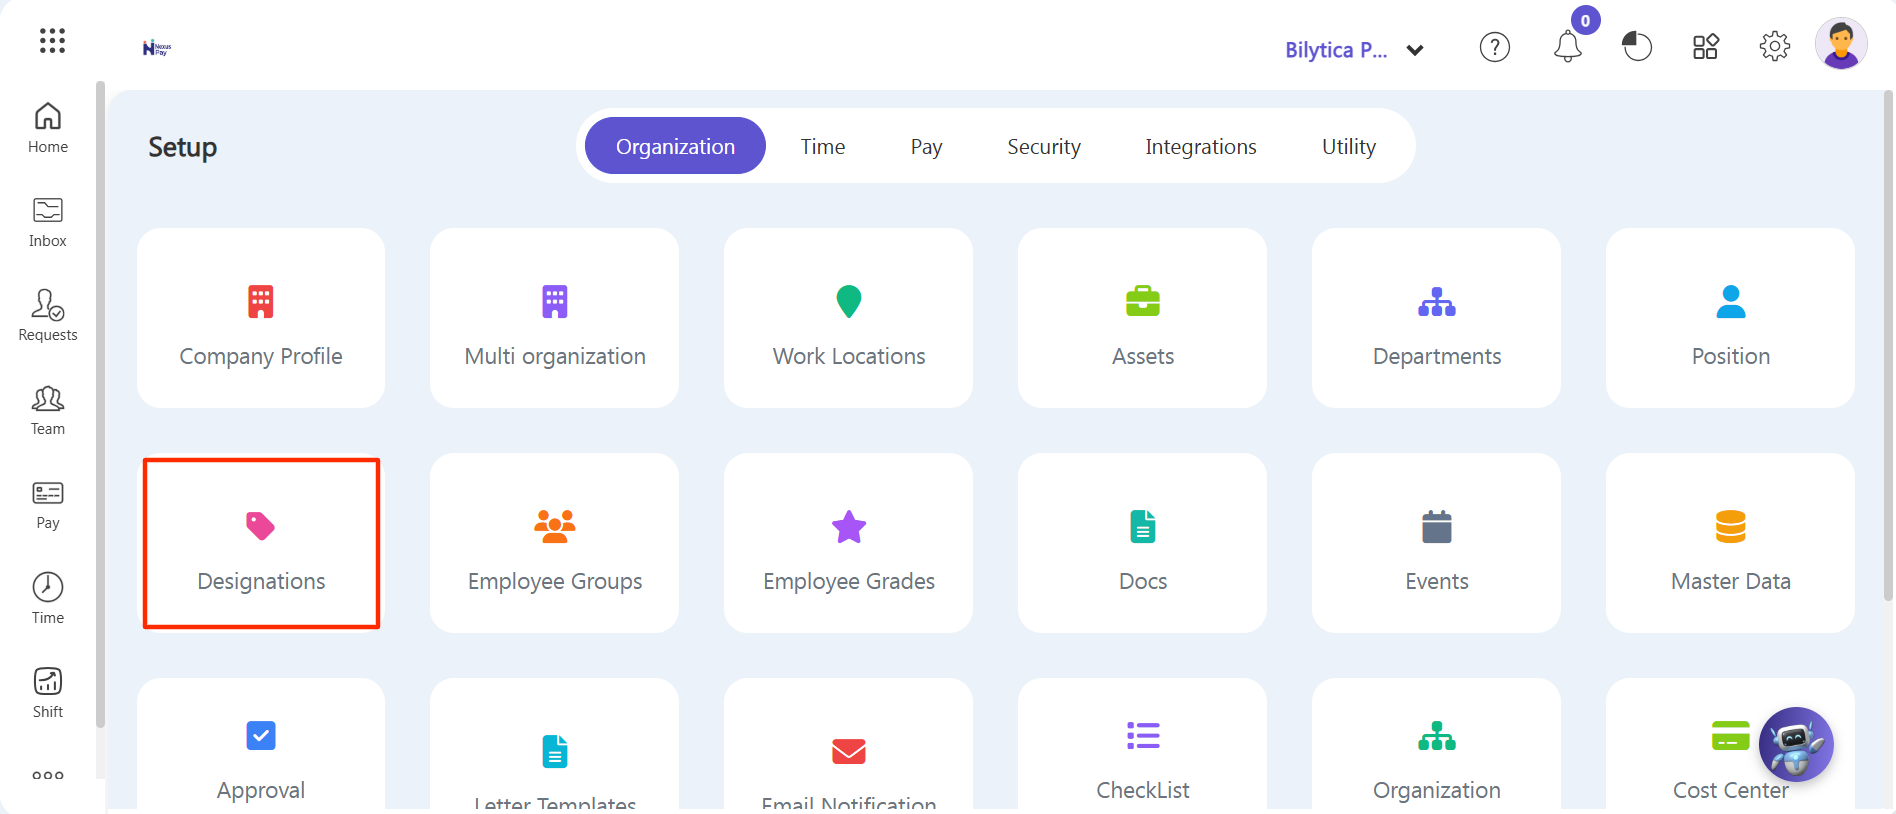
Step 3: The central Designations master listing screen view layout will reveal itself, providing a structured register of active job family indices, management levels, and current headcount metrics.
Step 4: Click on the purple Create a New action button block (highlighted in a red box) on the top right margin area to launch the setup overlay wizard.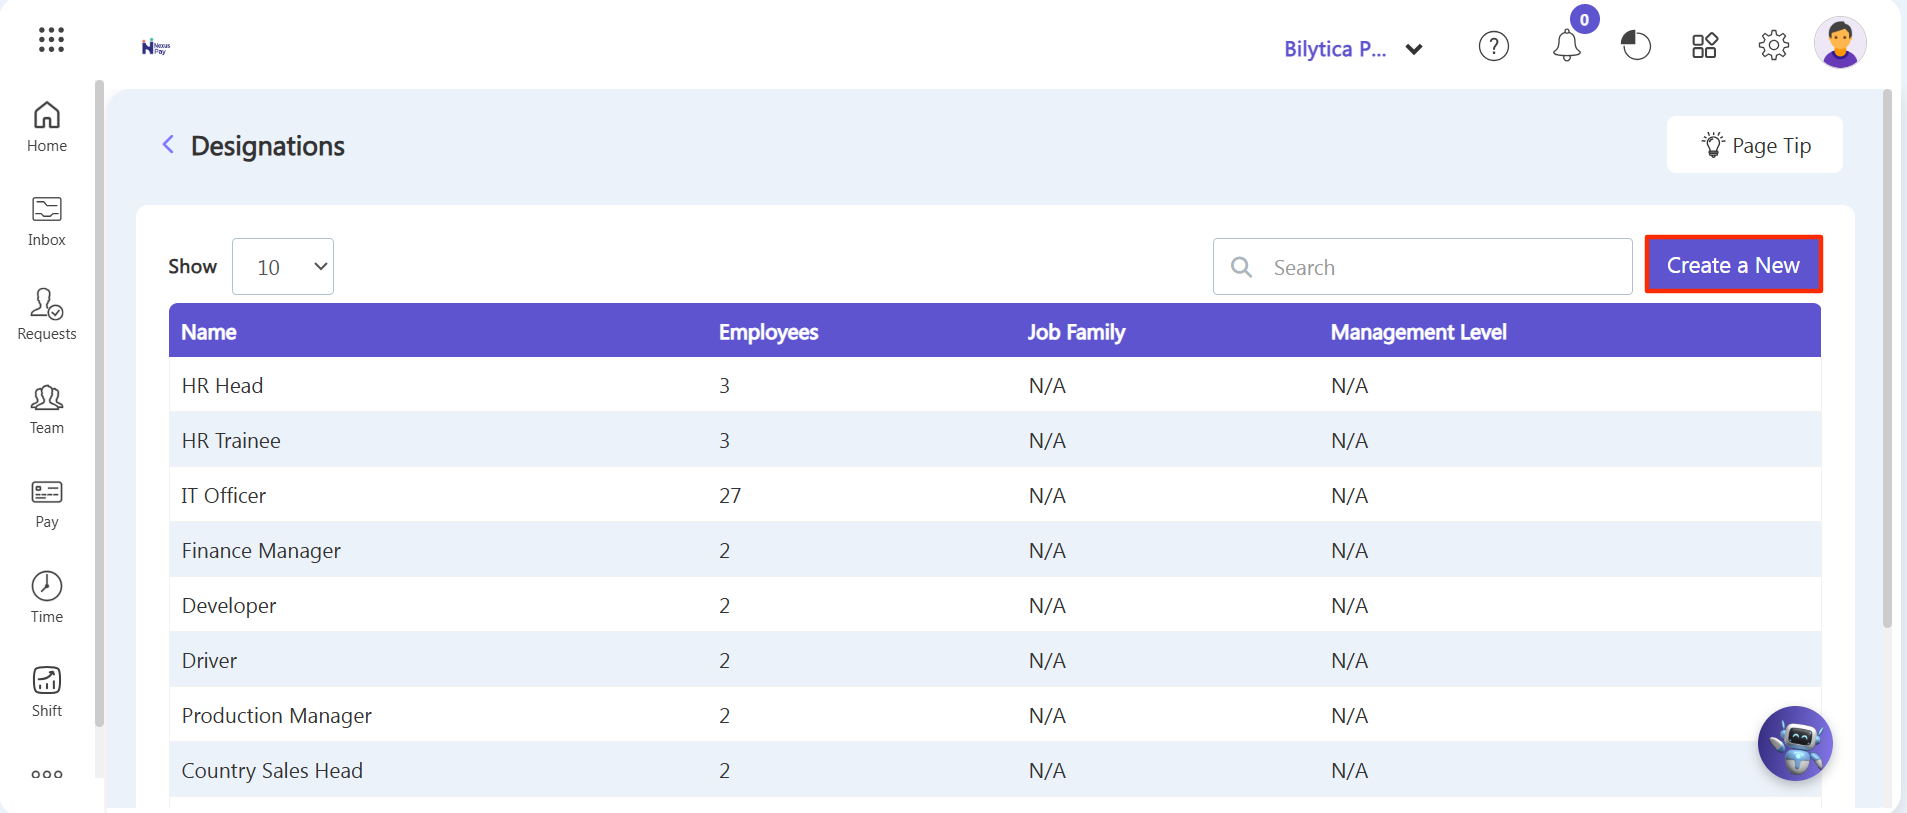
2. Setting Up Job Designation Profiles
An Add Designation modal pop-up card view form container will appear over your page layout. Complete the position tracking variables sequentially:
Step 5: Designation Name — Type the official title of the corporate position inside the targeted required input data field line (e.g., Senior Systems Engineer).
Step 6: Applicable Grades — Open the multi-select option box field to check off which corporate pay or performance levels match this explicit job tier assignment list logic.
Step 7: Code — Key in your internal alpha-numeric catalog text value string into the Designation Code data box for cleaner organizational record-keeping configurations.
Step 8: Management Level Mapping — Select the corresponding structural placement drop-down tier options. Mapping a title to an explicit management level establishes conditional form rendering paths. When you later create a live employee profile and specify their management level group layer, the software will dynamically filter the selection lists to only display the specific job designations mapped directly to that same tier block!
Step 9: Description Text Block — Input any roles, structural parameters, or department tracking notes inside the built-in text editor container tool.
Step 10: Review all your parameters and click the purple Save option button to permanently register your new position profile data logs inside the master company layout grid database.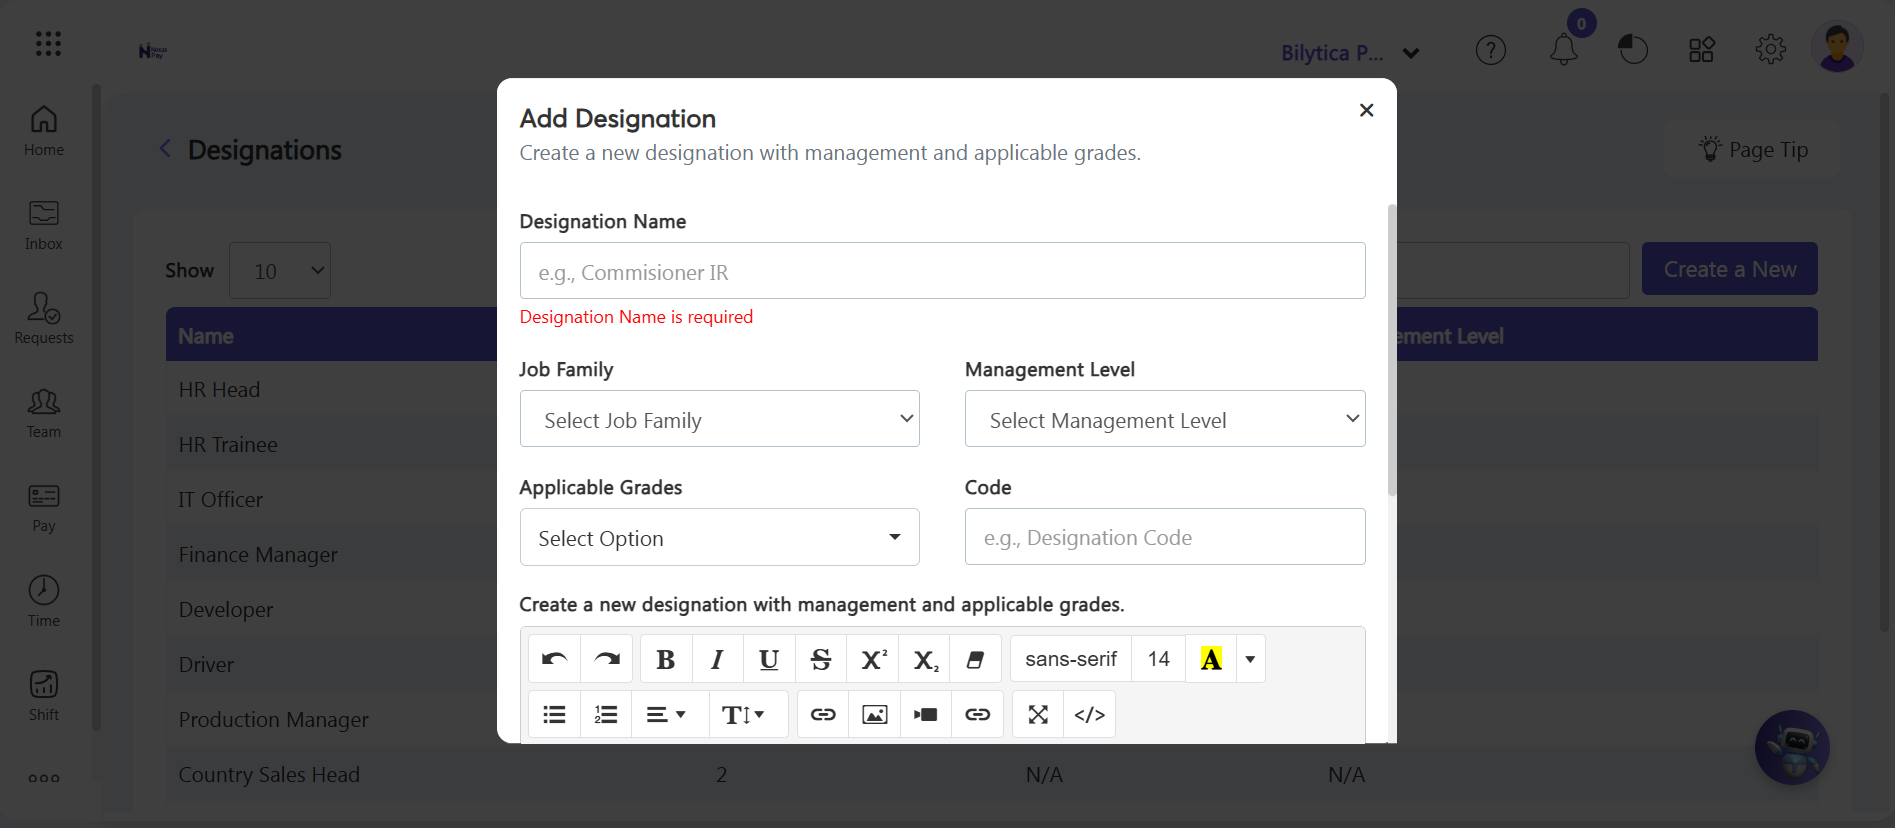
Database Relationship Tip: |