

Before mapping out complex attendance constraints inside an individual shift slab, administrators must define the system's core time status indicators. Pre-configuring these status fields is necessary so they are available as selectable options when building out shift conversion rules.
1. Navigating to the Time Status Tab
To access your system's global timeline status dictionary registry:
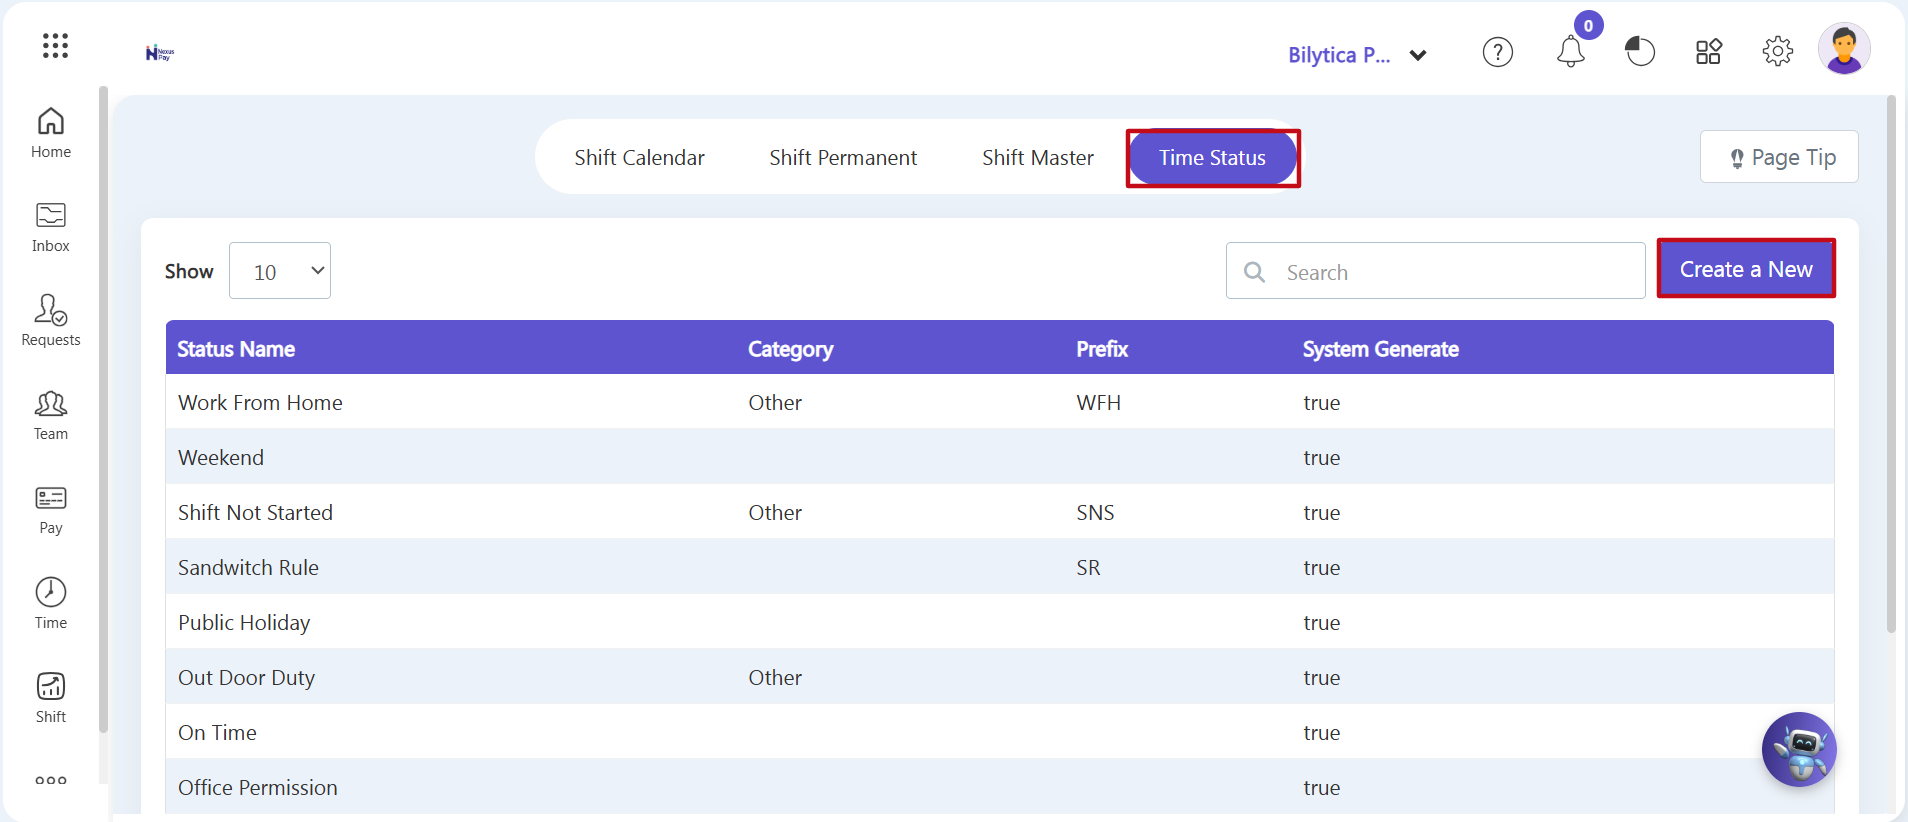
- Step 1: Open the Time Status Panel — From the shift configuration dashboard interface, locate and click the horizontal menu tab labeled Time Status (marked with a red boundary box frame).
- Step 2: View the Status Directory — The Time Status summary ledger directory will load on-screen, displaying an index table of pre-existing baseline tracking criteria such as Status Name, Category, Prefix, and System Generated tracking metrics.
- Step 3: Launch the Status Creation Wizard — Click the purple Create a New action button (marked with a red rectangular frame) located on the right side of the sub-navigation toolbar.
2. Creating and Storing New Attendance Identifiers
An Add setup wizard window will open on your dashboard. Complete the parameter requirements step-by-step:
- Step 4: Label the Identity Parameters — Enter your tracking option title string inside the Status Name text field according to your organizational requirements.
- Step 5: Enforce Operational Rules Data — Fill out supplementary parameter fields within the modal rows if required—such as defining custom shorthand characters inside the Prefix container box.
- Step 6: Permanent Database Compilation — Review your input properties and click the purple Save button in the lower-right corner. The customized statuses are now successfully created, stored inside the system data dictionaries, and will instantly begin appearing as options inside your live shift parameter dropdown lists.
System Prerequisite Tip: |