

Standardizing leave type attributes and tracking cycles ensures statutory compliance, reduces operational disruptions, and streamlines self-service employee requests. PayPeople integrates an exhaustive leave policy engine paired with custom annual time boundaries to control entitlement balances, enforce advanced restriction thresholds, and scale allocations across targeted workforce cohorts smoothly.
1. Creating Corporate Leave Types & Structural Metadata
To design a core time-off classification entry inside your system settings:
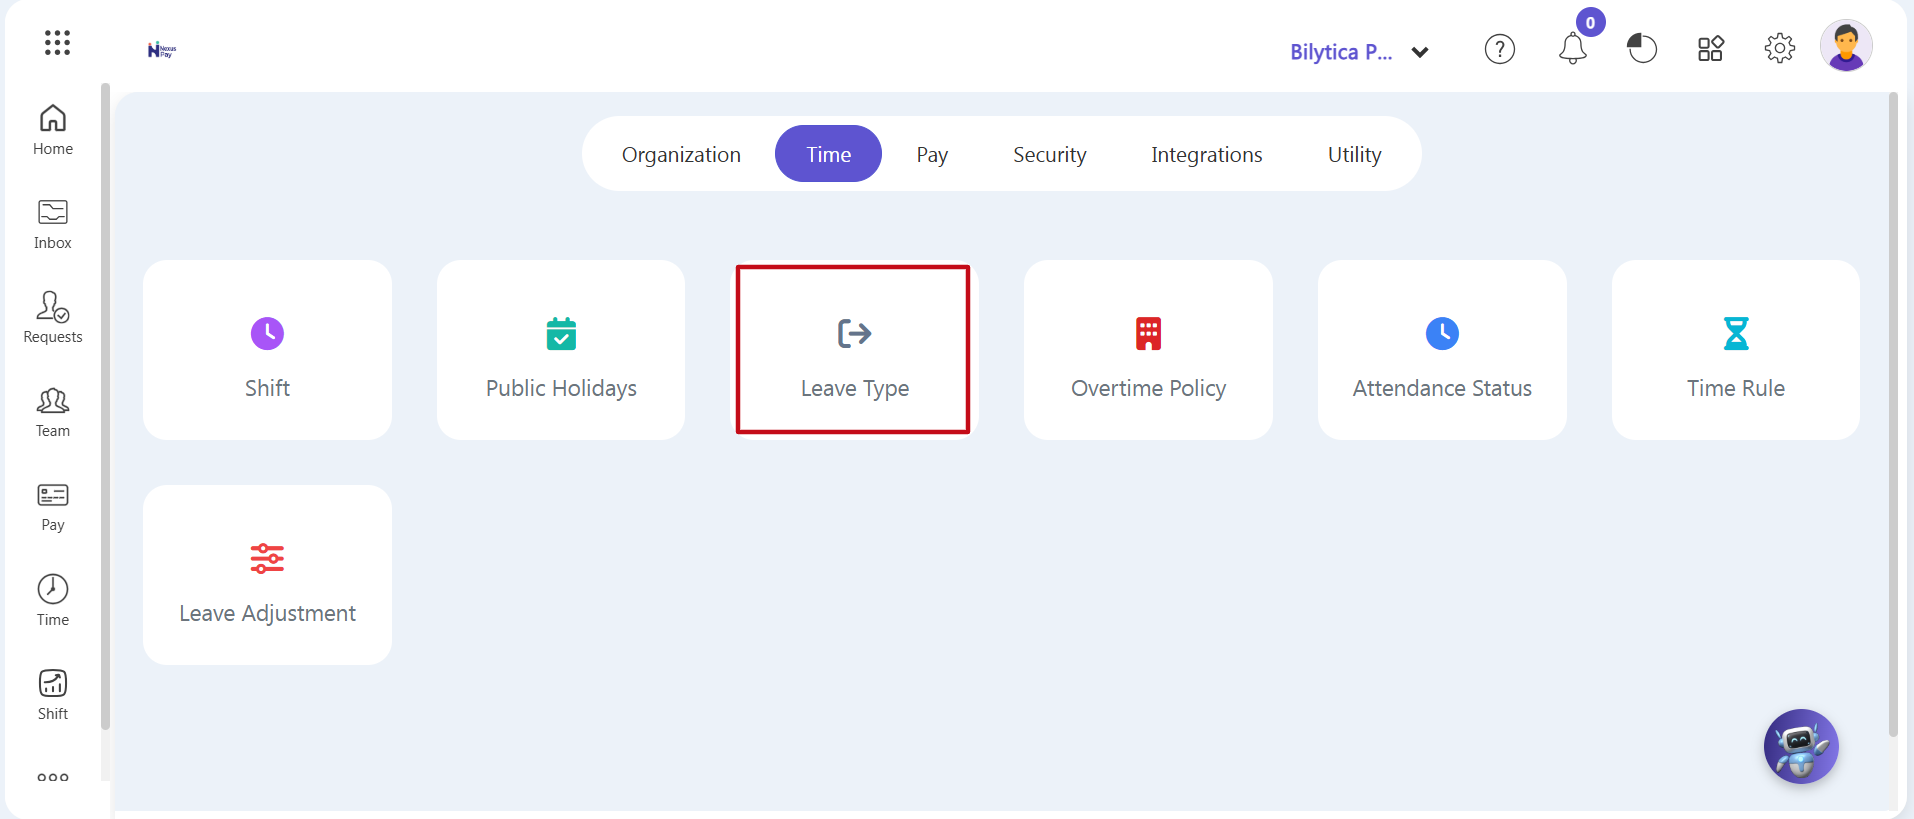
- Step 1: Open Module Settings — Navigate to your dashboard navigation menu and select Settings > Time > Leave Type to access the central repository.
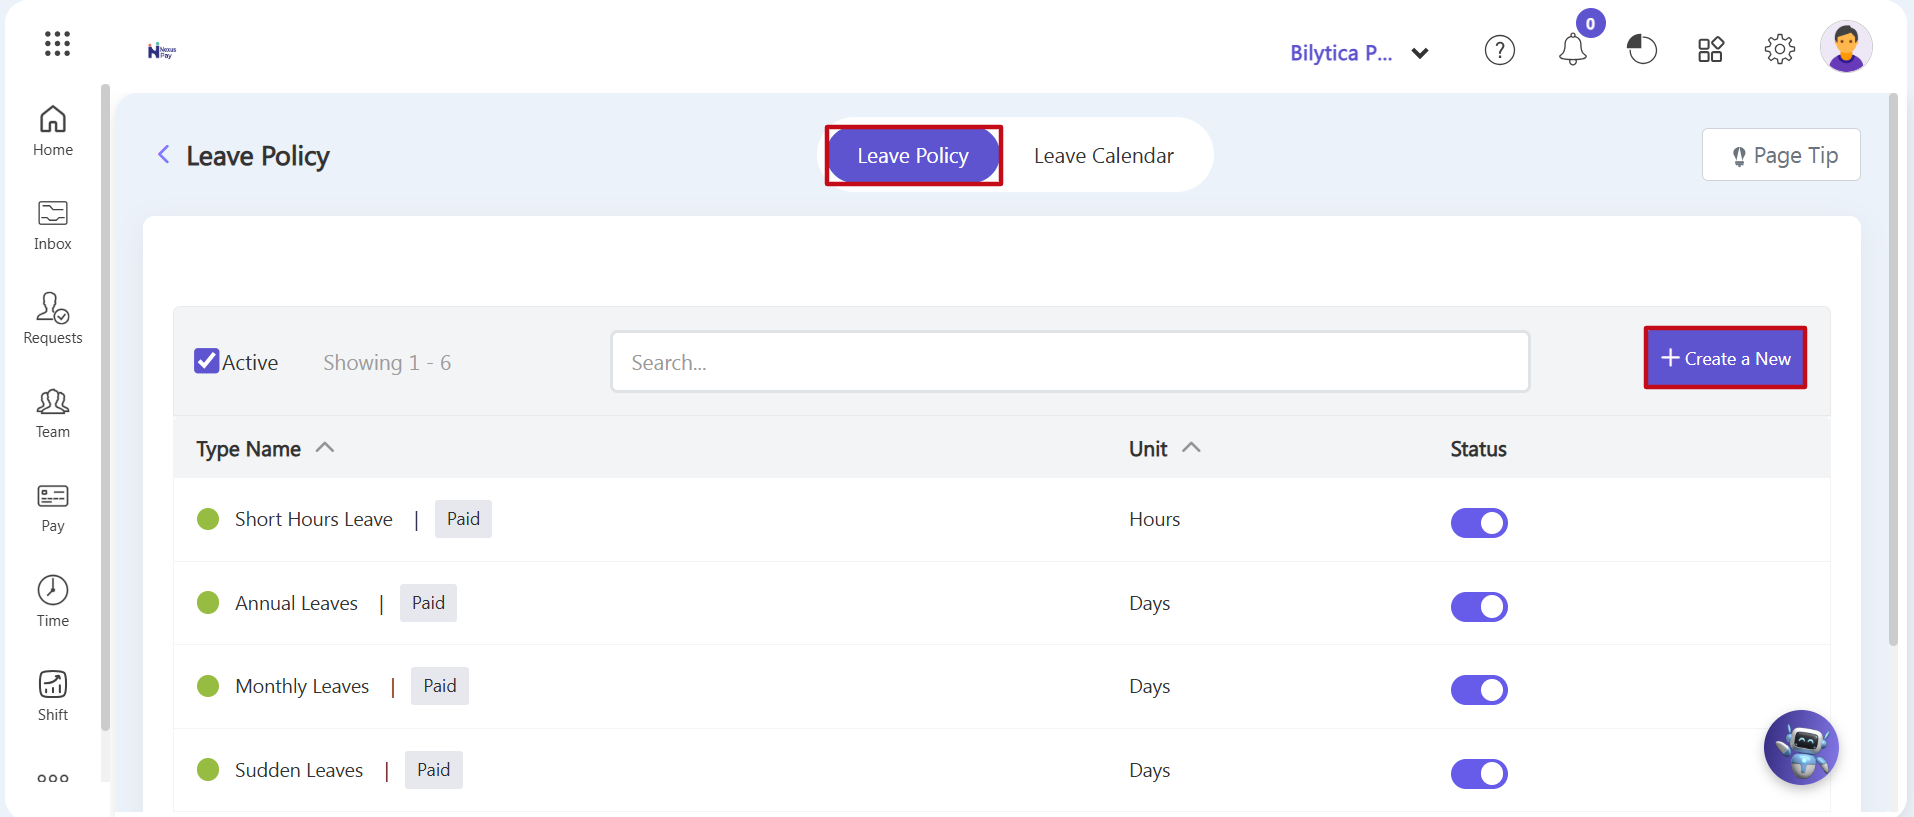
- Step 2: Initialize Configuration — Ensure that the active view toggle is set to the Leave Policy tab, then click the purple + Create a New action button block.
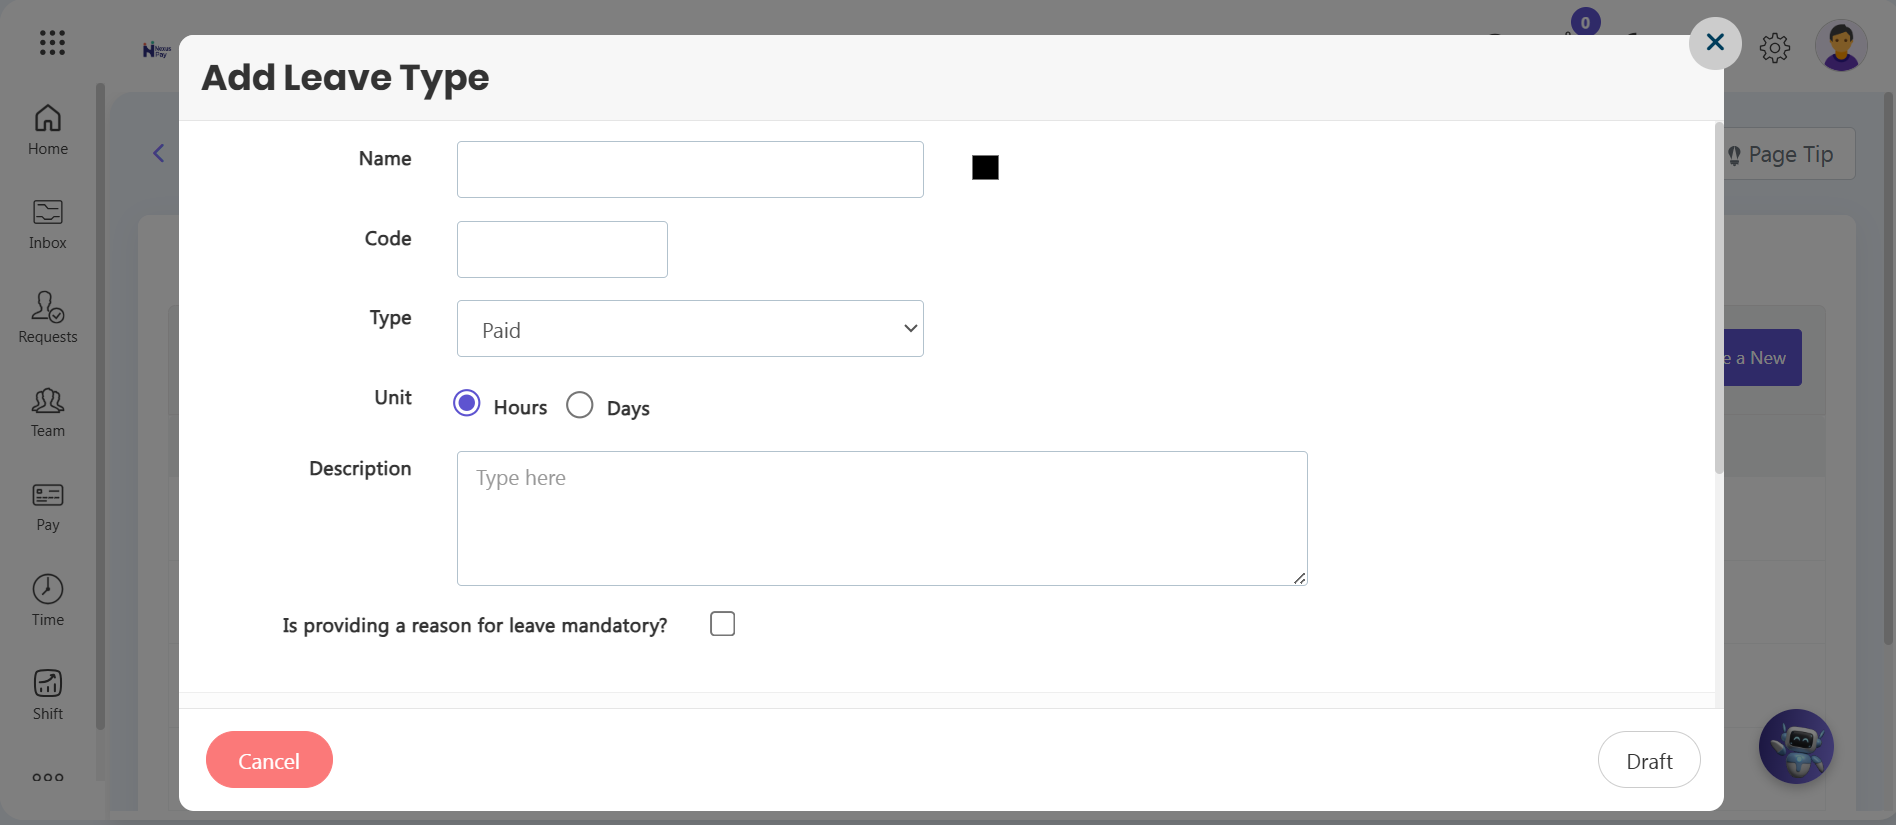
- Step 3: Define Baseline Identity Elements — An Add Leave Type wizard window will open over your workspace. Fill in the parameters step-by-step:
- Name: Type a public category title string (such as Casual Leave or Sick Leave).
- Code: Assign a shorthand alphanumeric identifier code.
- Type: Use the dropdown menu to select the financial tracking category (Paid, Unpaid, or CPL).
- Unit: Select the tracking unit toggle to set whether allocations calculate as Hours or Days.
- Description: Add supplementary documentation, policy notes, or references.
- Step 4: Require Application Justification — Check the checkbox labeled Is providing a reason for leave mandatory? if your business workflow requires employees to supply a text justification before submitting their leave application.
2. Setting Entitlements, Scopes & Advanced Request Restrictions
Scroll down within the wizard configuration window to set up your scope thresholds, prorations, and operational restrictions:
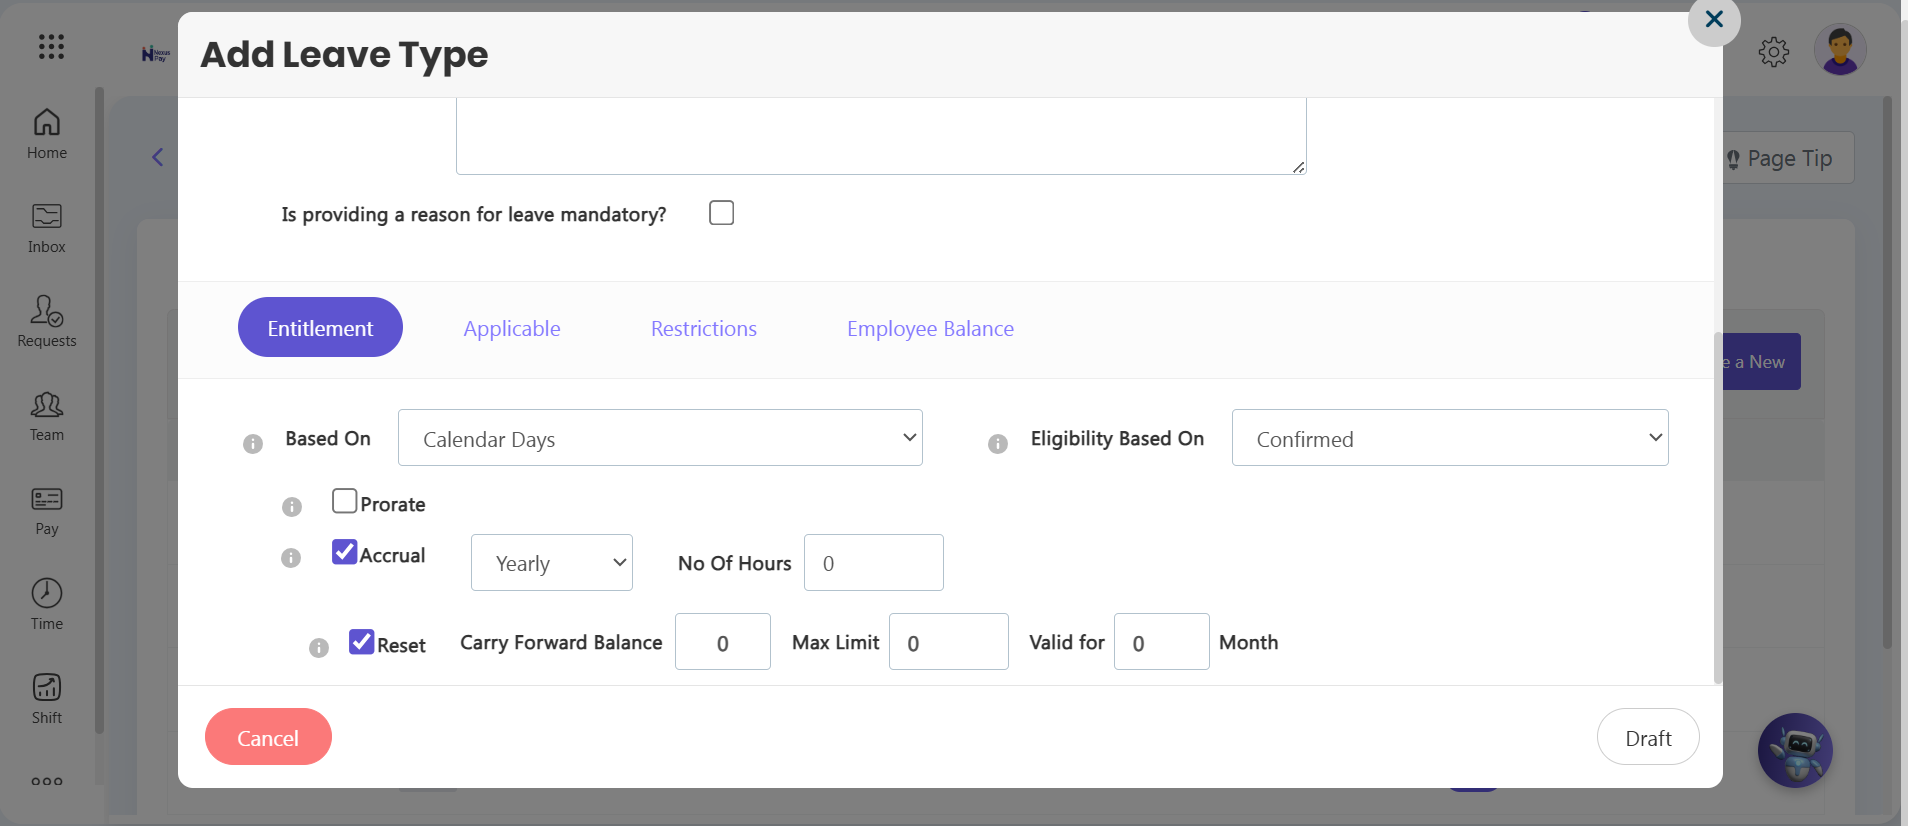
- Step 5: Define Entitlement Rules — Under the Entitlement tab, configure your accrual logic. Choose whether leave balances track based on Calendar Days or Joining Date metrics, set initial employee visibility rules, and structure advanced variables such as proration rules, carry-forward options, limits, and reset cycles.
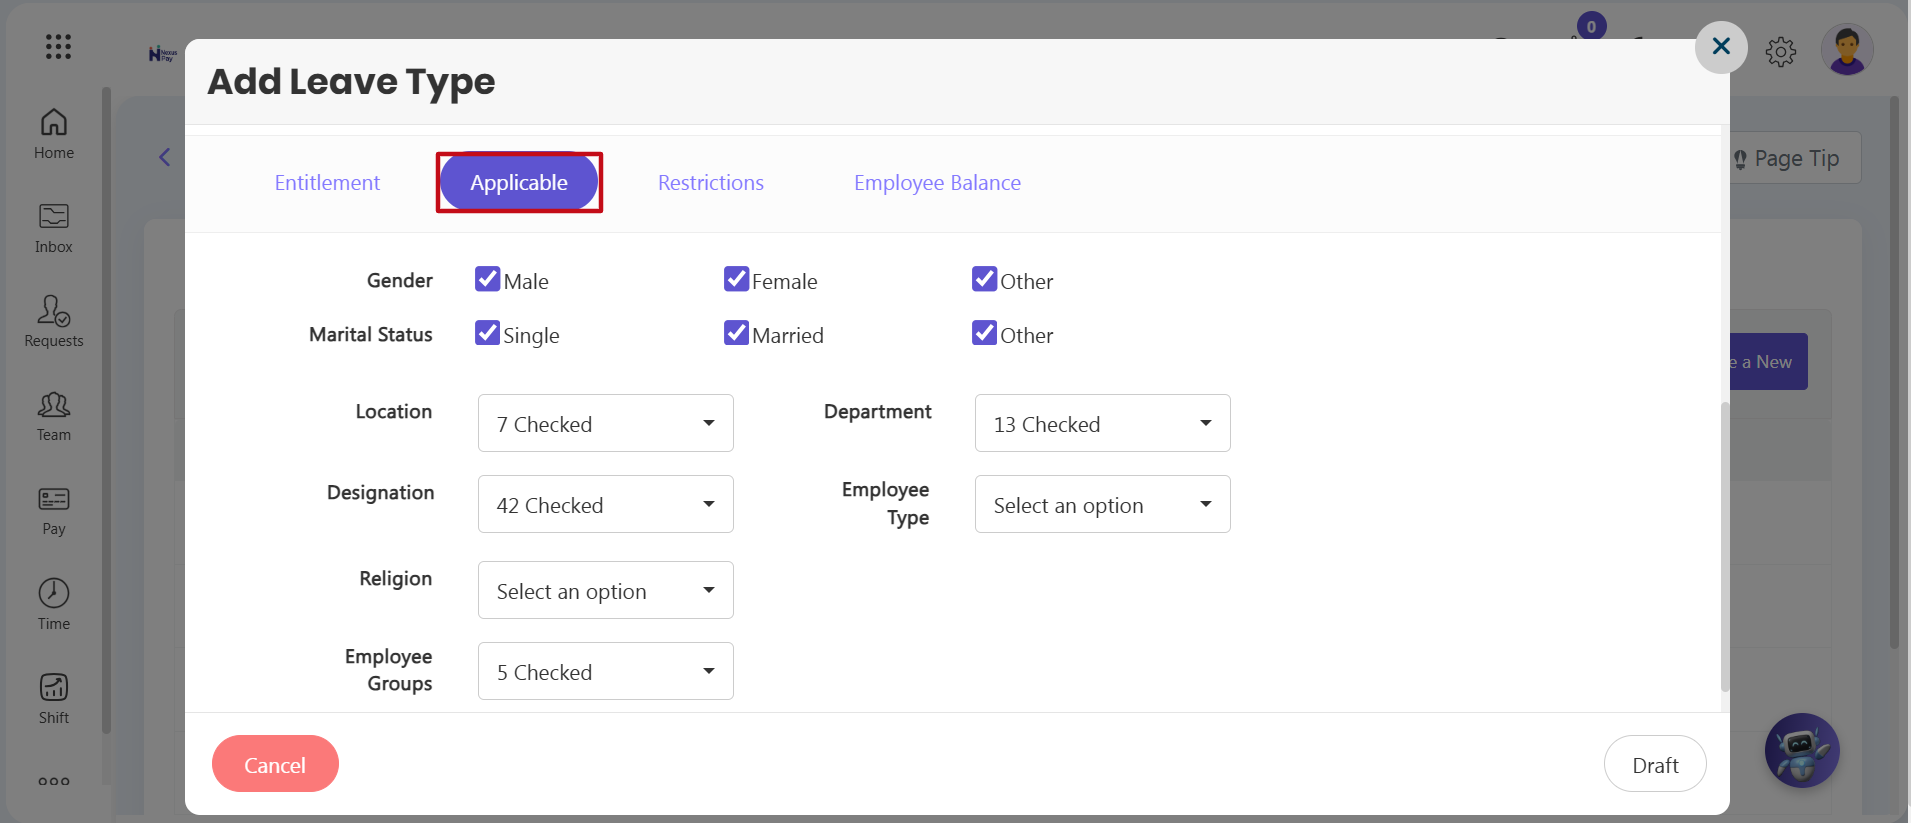
- Step 6: Enforce Demographic Scopes — Switch to the Applicable horizontal tab layer. Use the active filter options on-screen to isolate exactly which employee groups this leave rule applies to—filtering by Gender, Marital Status, Location, Department, Designation, Religion, or unique Employee Groups.
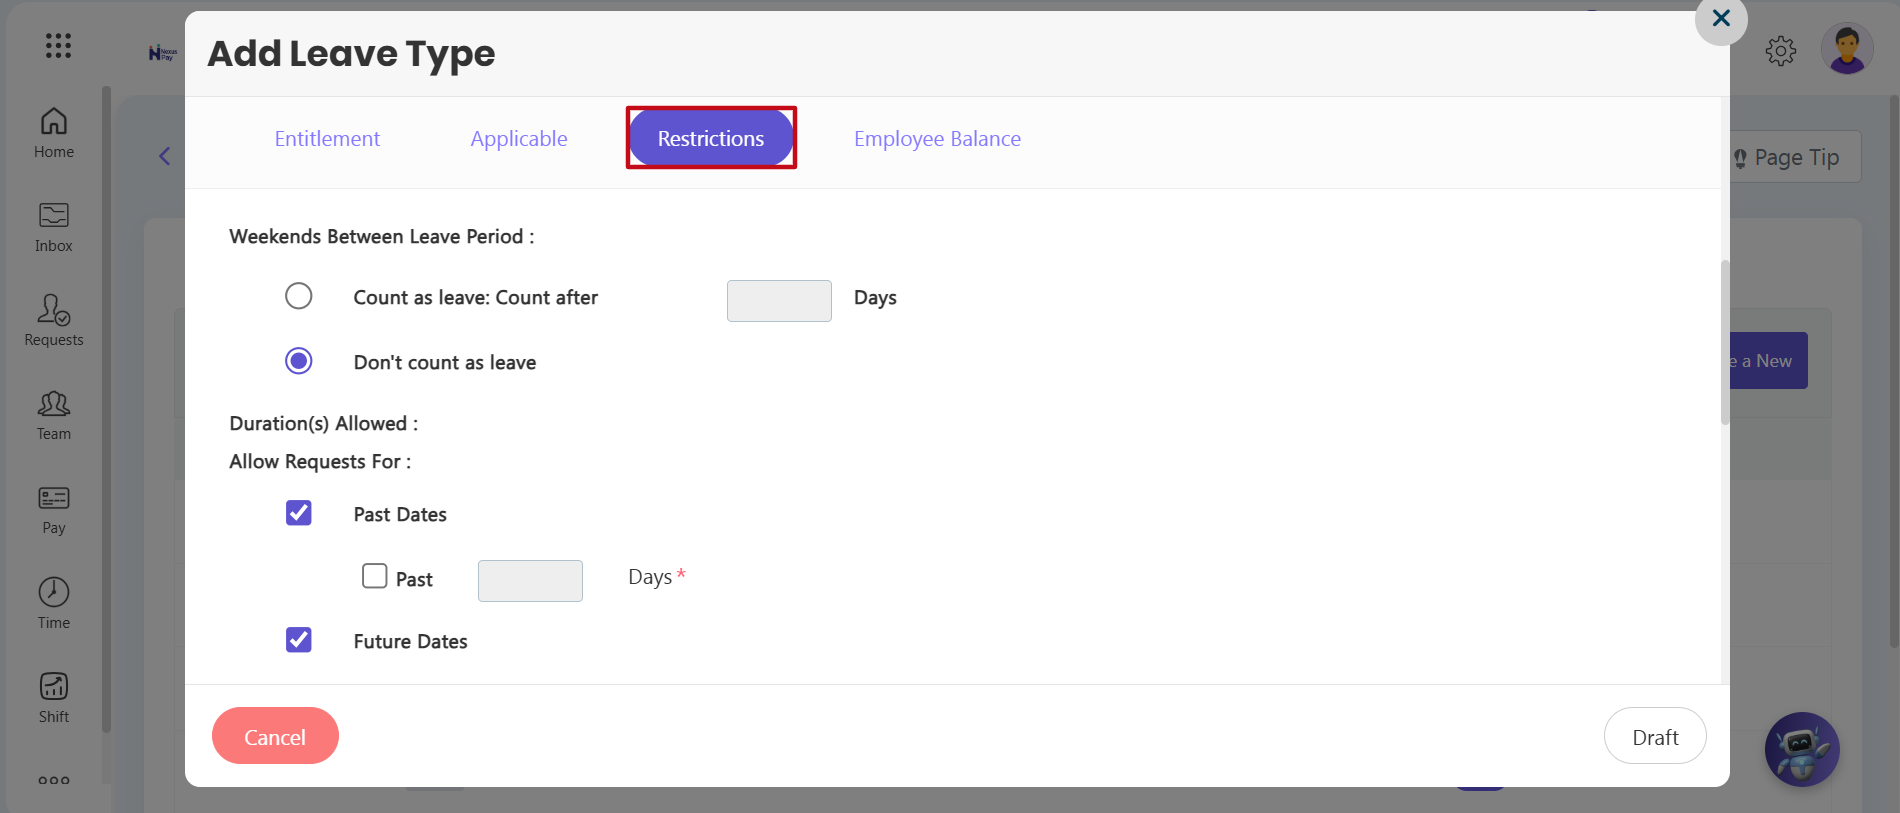
- Step 7: Configure Timeline Calendar Constraints — Click into the Restrictions horizontal sub-tab to set up advanced parameter controls. Define your corporate sandwich policy guidelines to determine whether weekends and public holidays are included in the leave period count. Next, specify the past dates and future dates constraints to limit how far back or how far in advance an employee can submit an application.
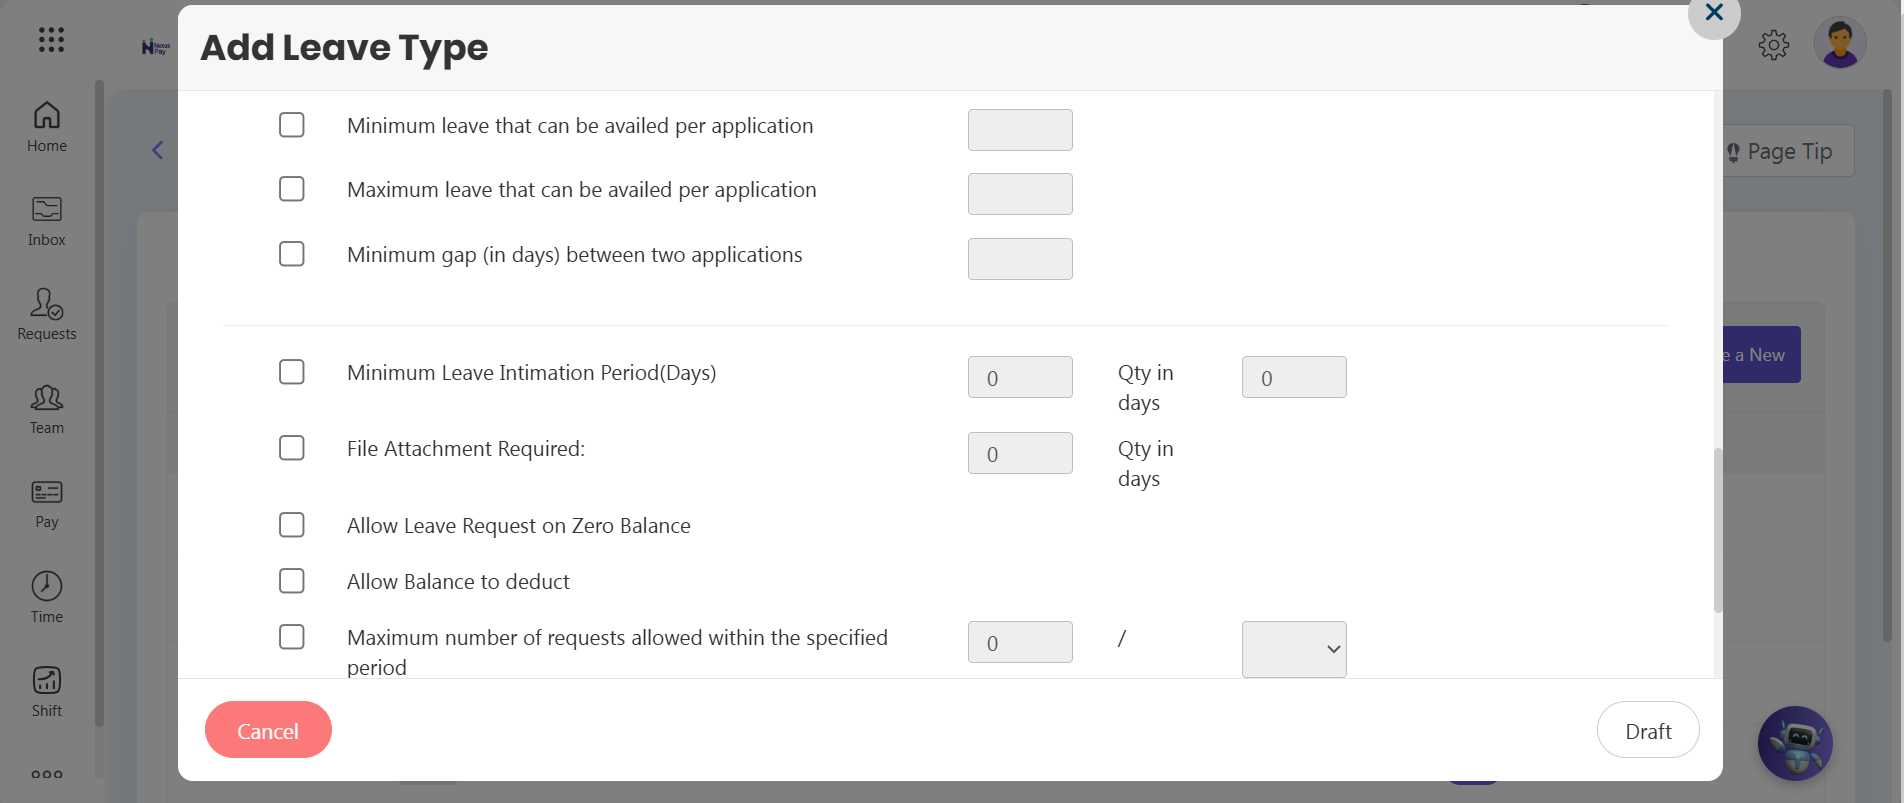
- Step 8: Impose Advanced Application Rules — Scroll down the parameter form to configure advanced behavioral tracking and constraints:
- Min/Max Per Application: Define the minimum and maximum number of leave days allowed within a single request.
- Minimum Gap: Set the required number of working days that must pass between two separate leave periods before another request can be filed.
- Minimum Leave Intimation Period: Specify the advanced notice period (in days) required before an employee can submit a request.
- File Attachment Required Threshold: If formal documentation (like a medical certificate) is mandatory for longer absences, check this box and enter the threshold value (e.g., entering '3' requires an attachment for any leave exceeding 3 days).
- Allow Leave Request on Zero Balance: Check this box to allow employees to request time off even if their current leave balance is at zero.
- Allow Balance to Deduct: Enable this toggle to instruct the backend system to automatically deduct the approved days from the employee's profile balance upon final manager approval.
- Period Constraints Maximums: Use the final row of fields to limit the total number of requests allowed within a specific timeframe (e.g., enforcing a policy of no more than 2 leave requests within a single month).
- Once all rules are configured, save the record as a draft or a finalized leave policy.
3. Creating the Leave Calendar & Activating Balances
To link your custom-built leave types to your active fiscal timeline and deploy balances out to filtered employees:
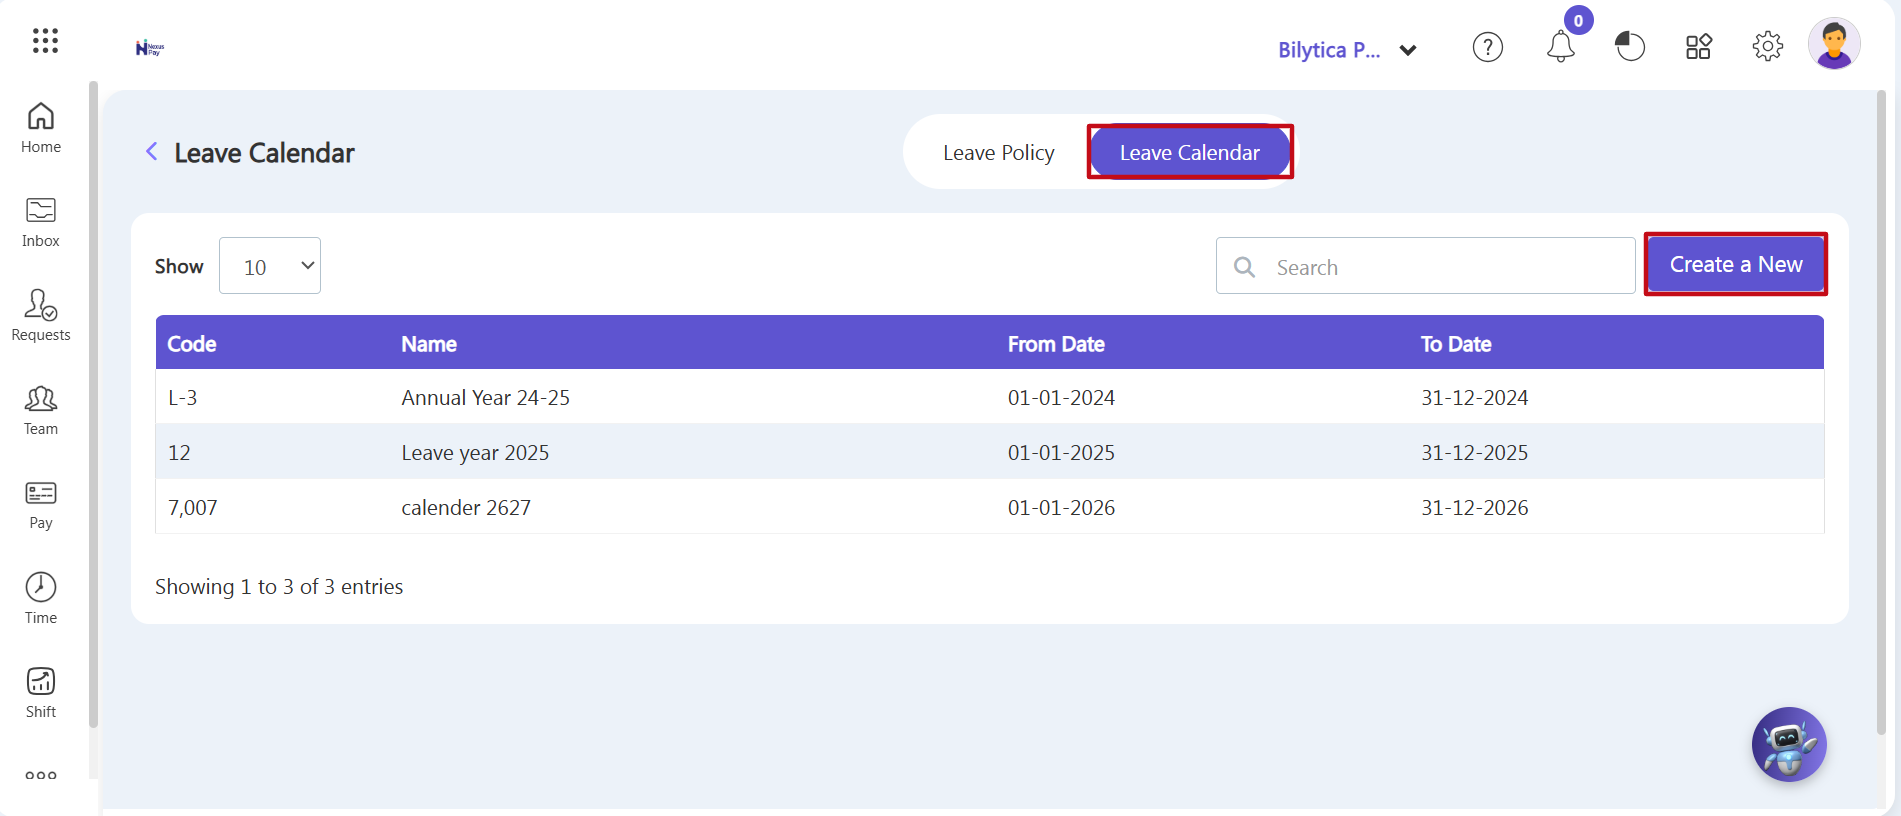
- Step 9: Open the Calendar Repository — Return to the main directory interface header ribbon and toggle the view to the adjacent Leave Calendar horizontal sub-tab category.
- Step 10: Launch the Setup Window — The calendar directory log will display active annual tracking rows. Click the purple Create a New action button (marked with a red rectangular frame) on the upper-right sidebar banner toolbar.
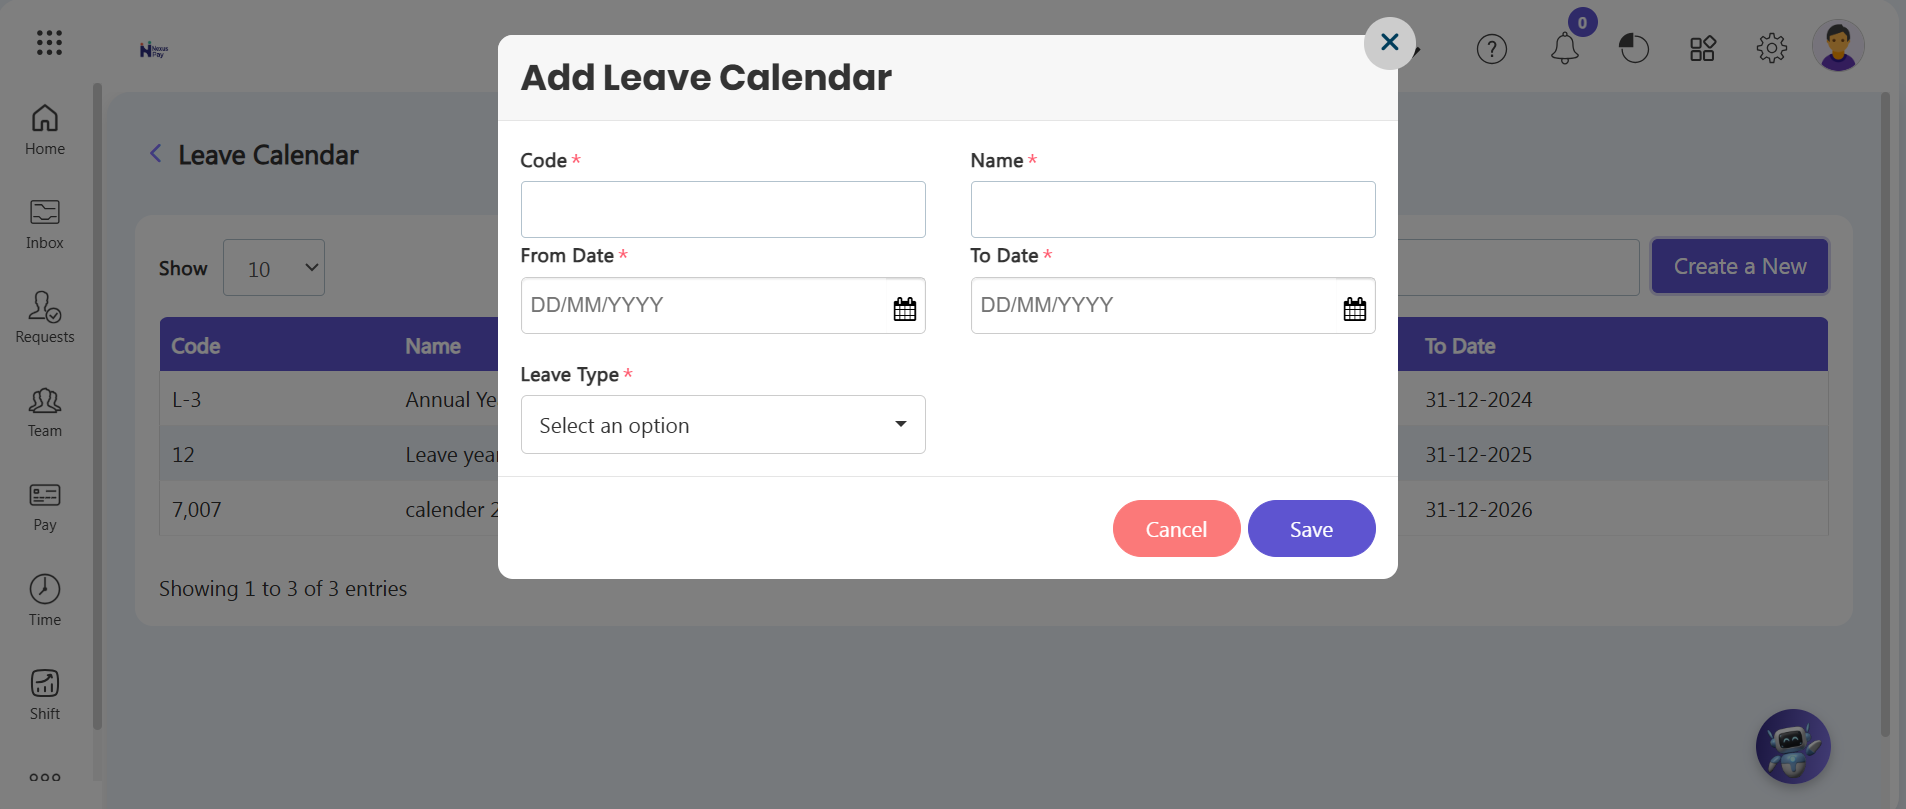
- Step 11: Set Calendar Attributes & Add Leaves — An Add Leave Calendar wizard form layout overlay will open over your dashboard interface page view. Complete the parameter entries sequentially:
- Code & Name: Key in a tracking category code and clear descriptive name (e.g., Fiscal Year 2026-2027 or Leave Year 2026).
- From Date & To Date: Input the custom date range blocks your company tracking system follows (such as standard fiscal year blocks or traditional calendar year parameters).
- Leave Type Selector: Click inside the Leave Type* required dropdown selection list block to map and append the pre-configured leave types created earlier into this timeline framework folder layout.
- Step 12: Permanent Database Activation — Review your timeframe windows mapping allocations and click the purple Save option button. The background execution engine will process the timeline parameters, permanently assigning and activating the leaves across all filtered employees.
Workforce Compliance Pro-Tip: |