

To configure a new corporate timeline policy or operational work shift block:
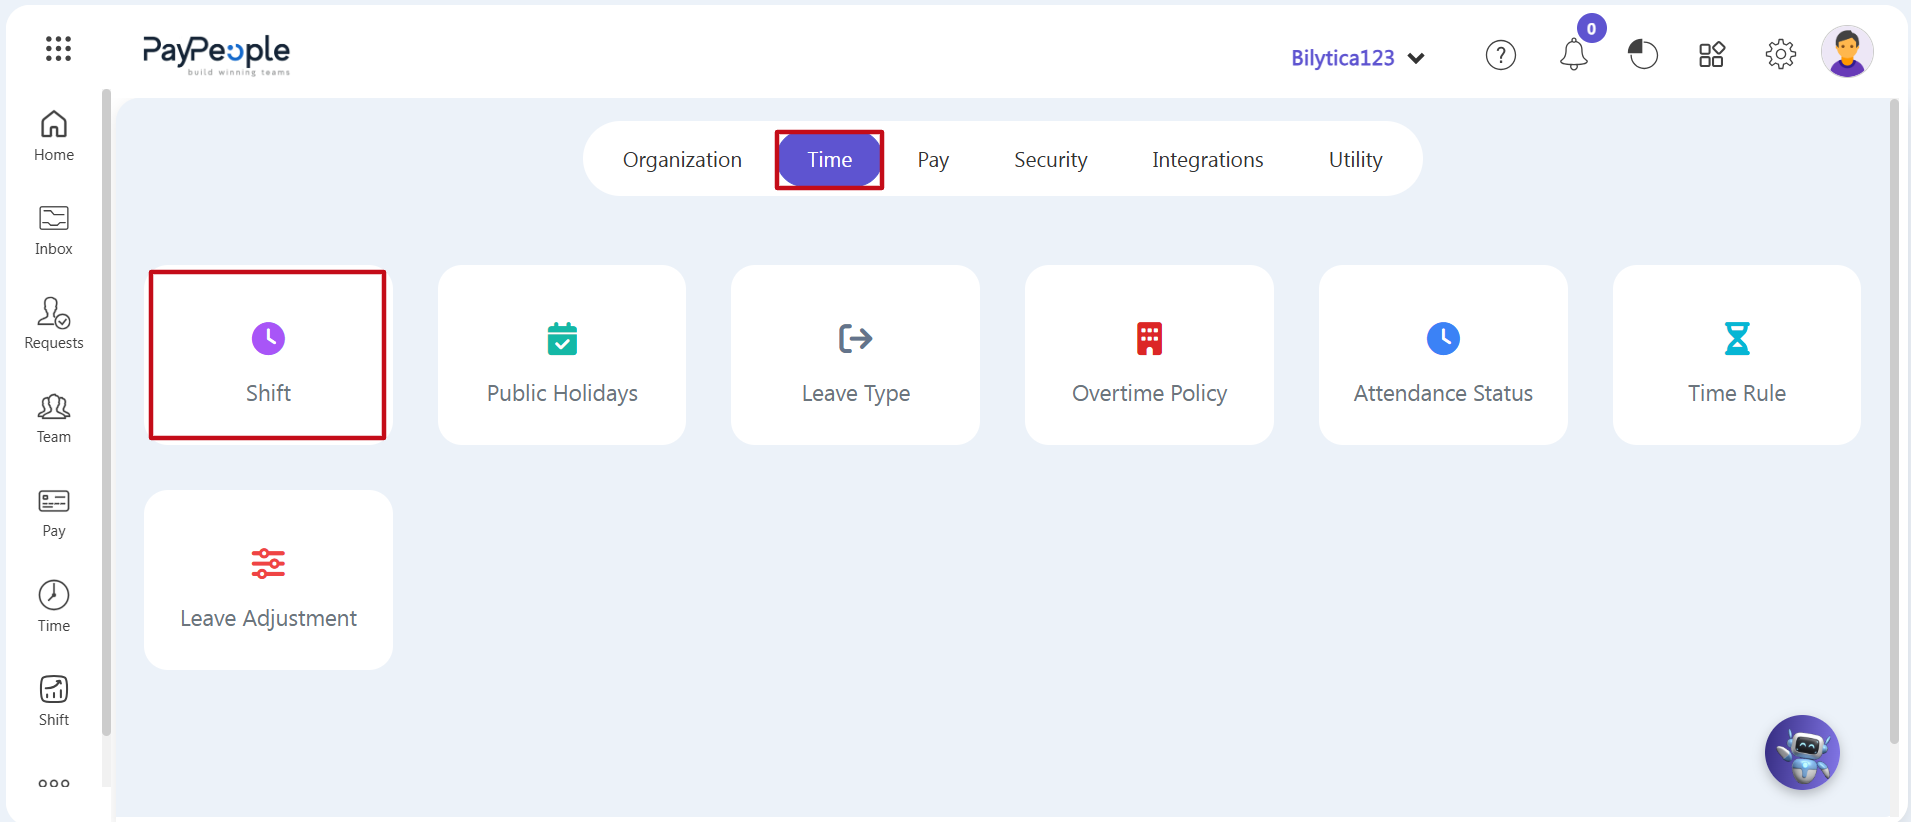
- Step 1: Open System Settings — Go to the main application header ribbon and click on the Setup gear icon located in the upper-right corner.
- Step 2: Access the Shift Panel — Click on the horizontal Time tab menu, then select the Shift card module icon (marked with a red box frame layout).
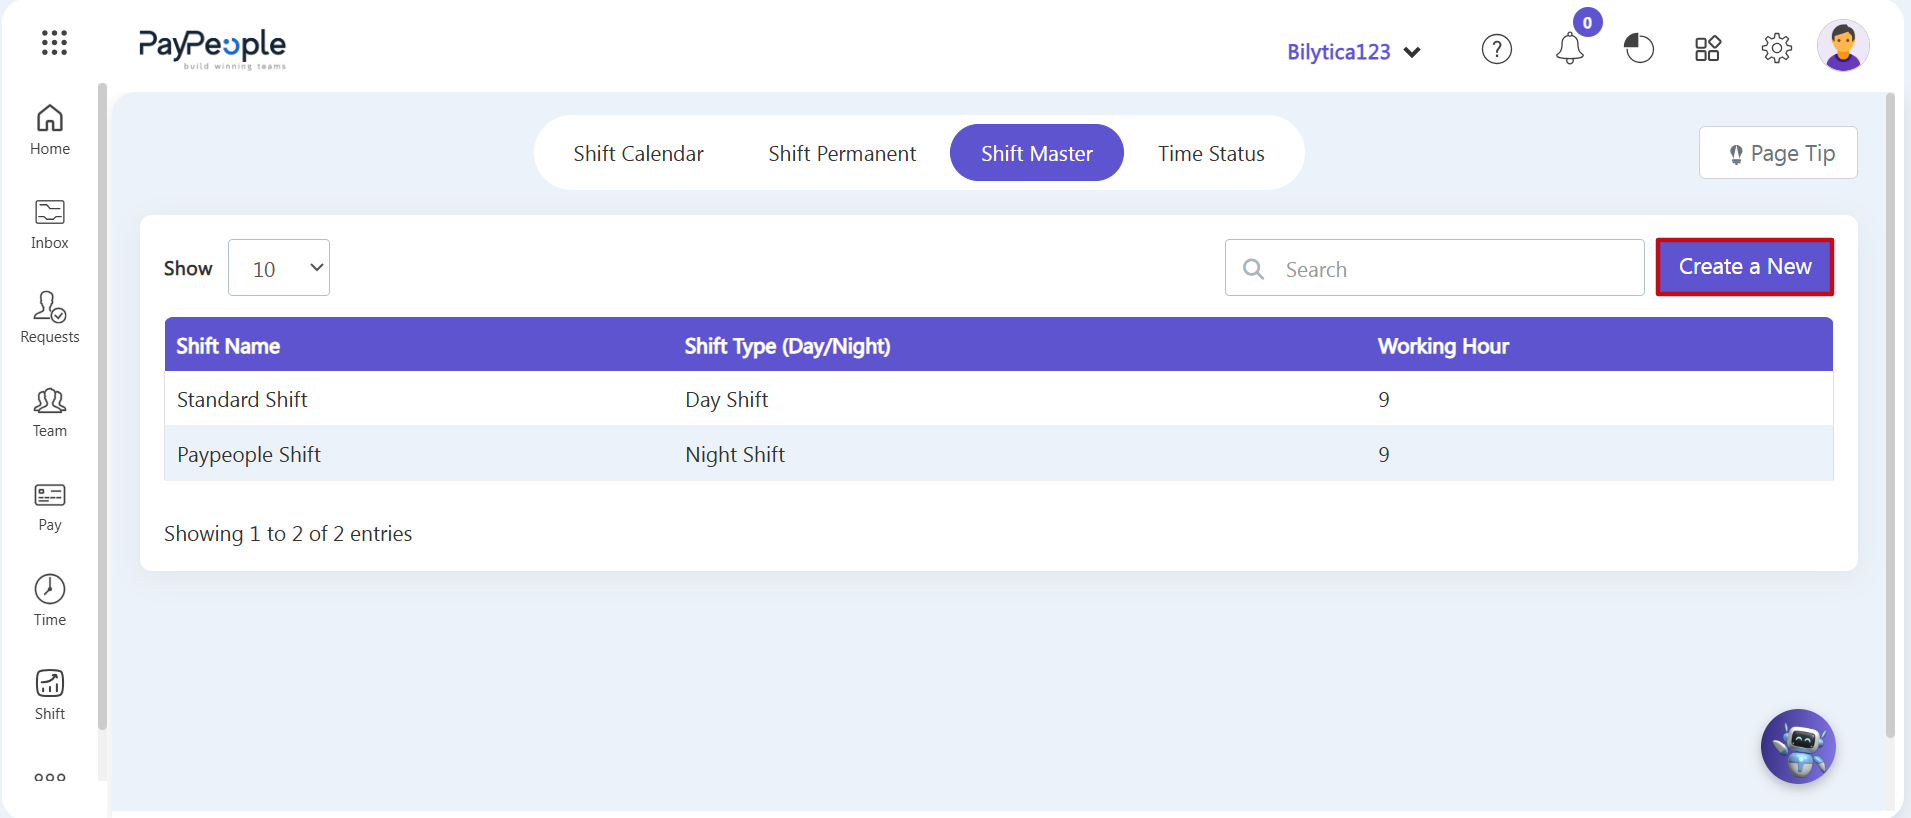
- Step 3: Access the Directory — The system will redirect you to the main Shift Master directory panel, which displays all active operational shift logs.
- Step 4: Launch the Setup Wizard — Click the purple Create a New action button (marked with a red boundary box frame) located on the right side of the sub-navigation toolbar.
2. Compiling Core Shift Metadata & Attendance Settings
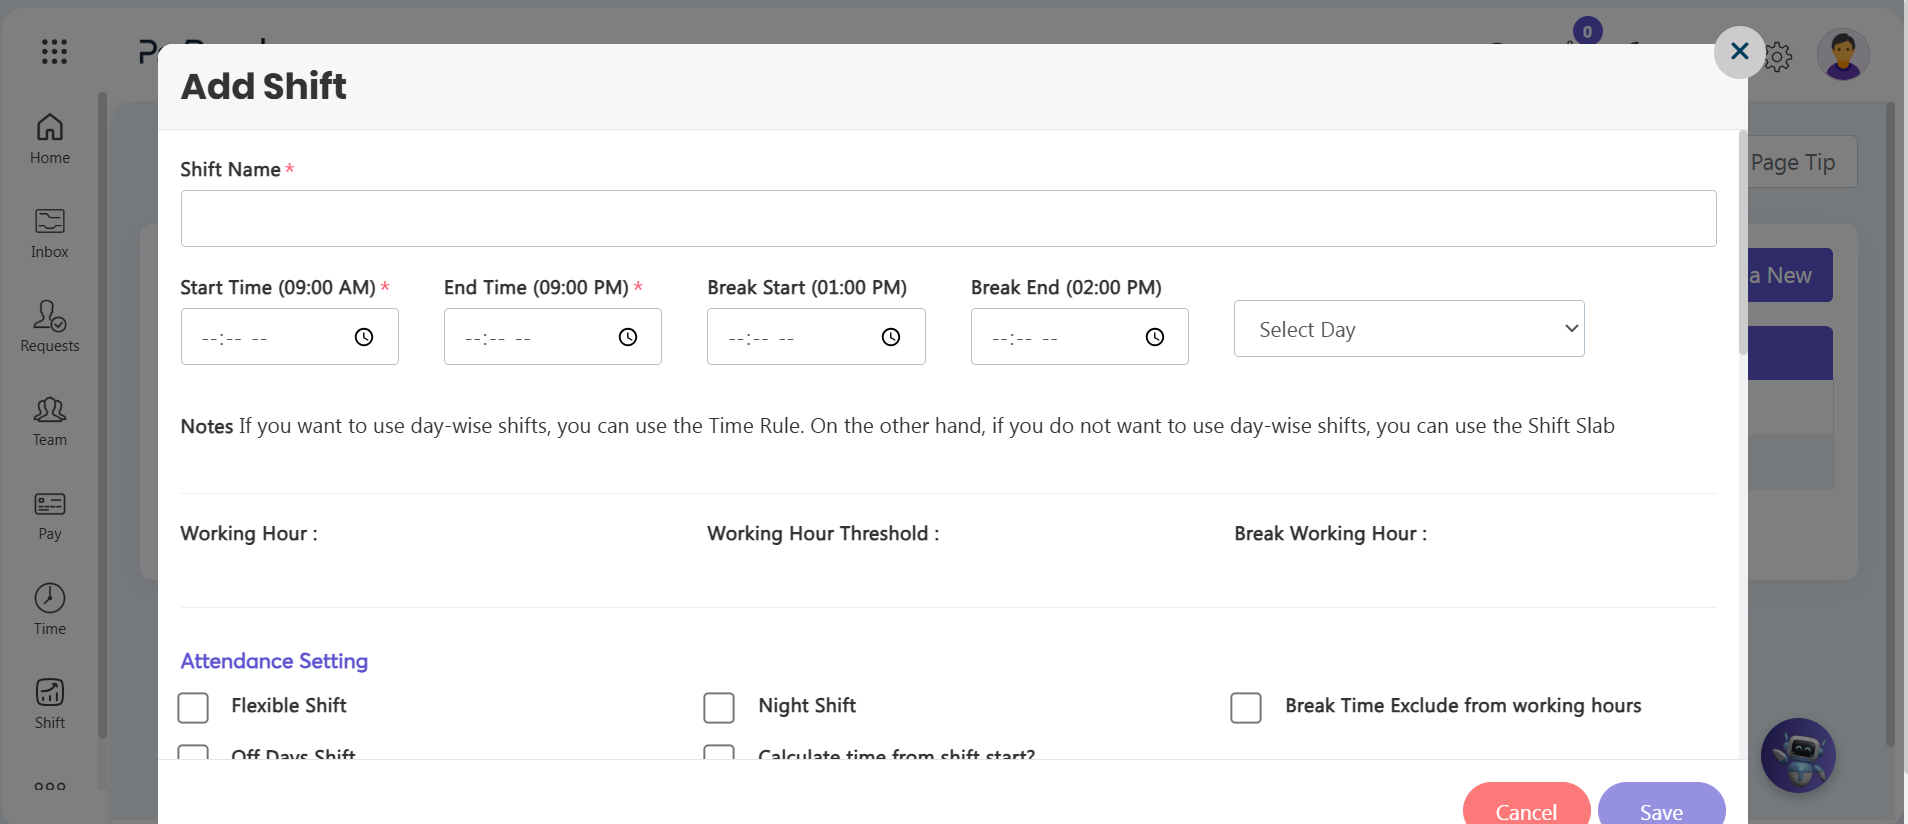
An Add Shift configuration wizard pop-up window will appear on-screen. Populate the operational fields step-by-step:
- Step 5: Base Shift Metadata — Type your shift's public title in the Shift Name* mandatory field. Use the dropdown pickers to set the Start Time, End Time, Break Start, and Break End parameters, and define your standard weekend boundaries using the Select Day off-days selection box.
- Step 6: Attendance Setting Toggles — Under the Attendance Setting section checkboxes, customize your conditional policy rules:
- Flexible Shift: Enable this toggle to deactivate punctuality penalties. For flexible shift structures, the system only verifies that the worker completes their total required hours, completely bypassing late arrival and early departure salary deduction rules.
- Night Shift: If operations roll past midnight (12:00 AM), check this option so the database tracking engine correctly logs and links the checkout timestamp to the correct calendar date block.
3. Defining Threshold Boundaries, Grace Periods & Variations
Scroll down within the Add Shift modal window to set up your threshold parameters, policy variances, and timeline tracking levels:
- Step 7: Set Check-in & Check-out Thresholds — Enter time parameters within the StartTime Threshold* and EndTime Threshold* fields to dictate how early or late an employee is systemically allowed to log punches on the biometric readers.
- Step 8: Set Up Overtime Rules — Define your premium hours settings by filling out the Overtime Start time after shift* and Maximum overtime limit* entry boxes to control extra hours compliance limits.
- Step 9: Configure Policy Grace Periods — Enter time buffers in the Tolerance Limit (In Mins)* text box for check-ins and the Tolerance Limit (Out Mins)* text box for departures. This regulates how late or early an employee can log punches without triggering immediate time-tracking penalties.
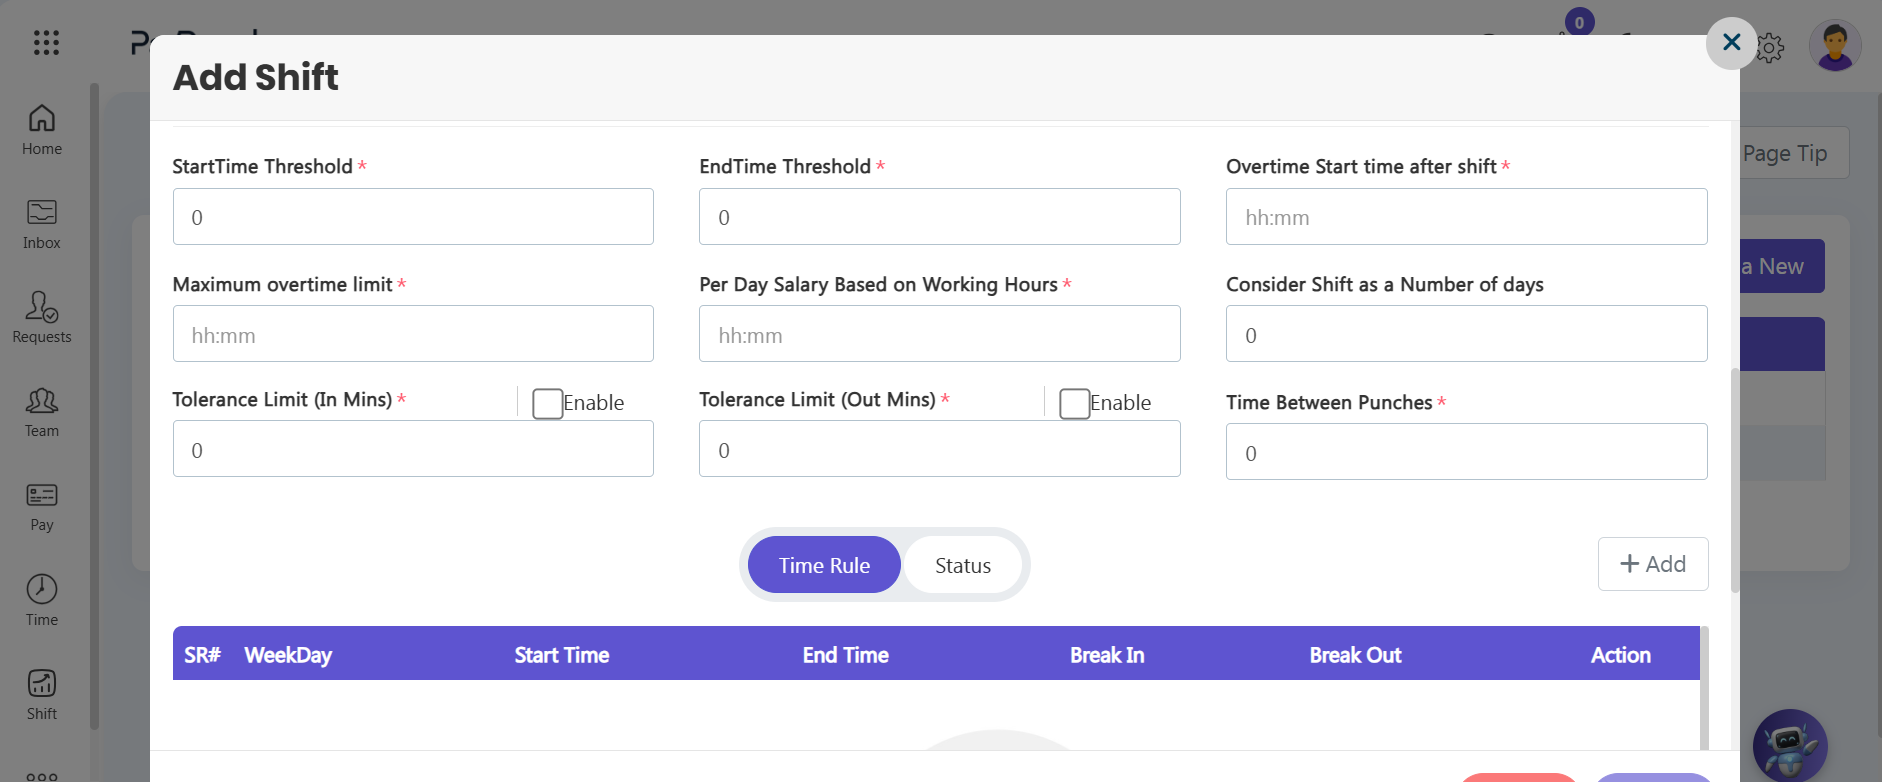
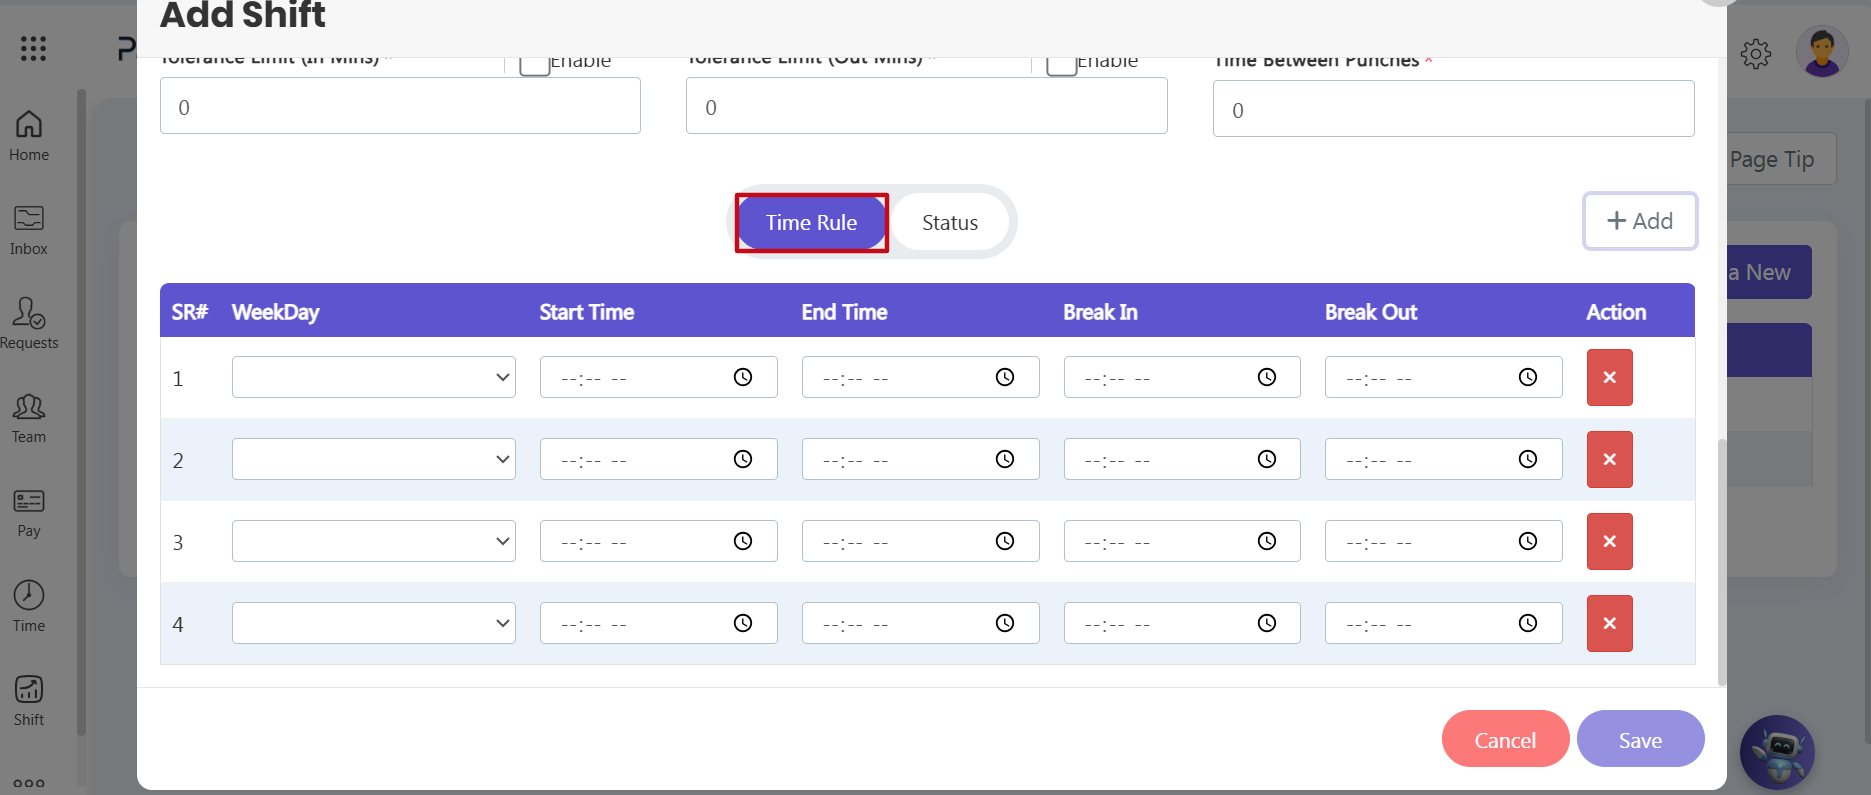
- Step 10: Map Day-Wise Variances via Time Rules — If a specific weekday requires unique timing constraints (such as standard timings applying Monday through Thursday, but Friday demanding a modified schedule or adjusted break times), click the Time Rule sub-tab toggle. Use the grid rows to map out your day-specific variable timing adjustments directly.
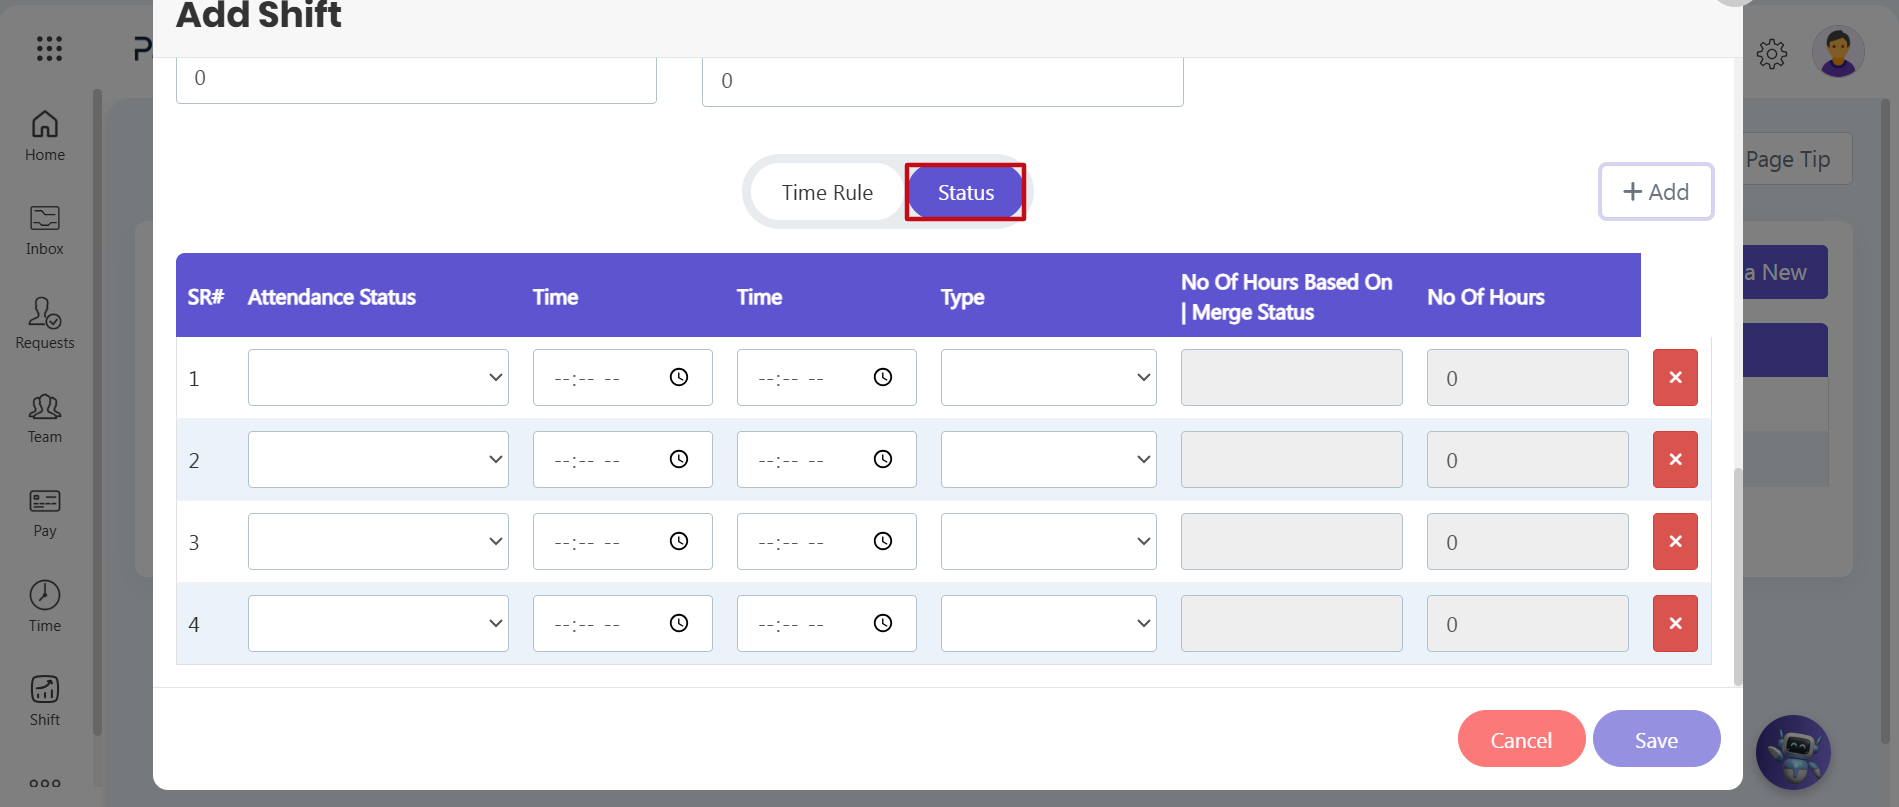
- Step 11: Set Dynamic Status Conversions via Time Status — Click on the adjacent horizontal Status sub-tab. This section defines the precise system status applied to specific clock-in patterns. For example, you can set rules where a standard shift starts at 9:00 AM with a 10-minute grace period; an incoming punch at 9:30 AM marks the user as 'Late', while a punch at 10:30 AM automatically flags the timeline tracking grid as 'Quarter Day Late', and so forth.
.
- Step 12: Save and Finalize — Review all nested threshold variables, day-wise rules, and shift status indicators. Once confirmed, click the purple Save button in the lower-right corner to commit the new shift workflow permanently to the system database.
Workforce Scaling Pro-Tip: |