

Executing manual balance modifications or encashment provisions allows system administrators to resolve data discrepancies, process custom policy settlements, and manage structural updates directly outside standard accrual loops. PayPeople provides a dedicated Leave Adjustment workspace to target individual personnel profiles, fetch active calendar cards, and modify entitlement lines safely.
1. Navigating to the Leave Adjustment Workspace
To access your system's manual ledger modification module:
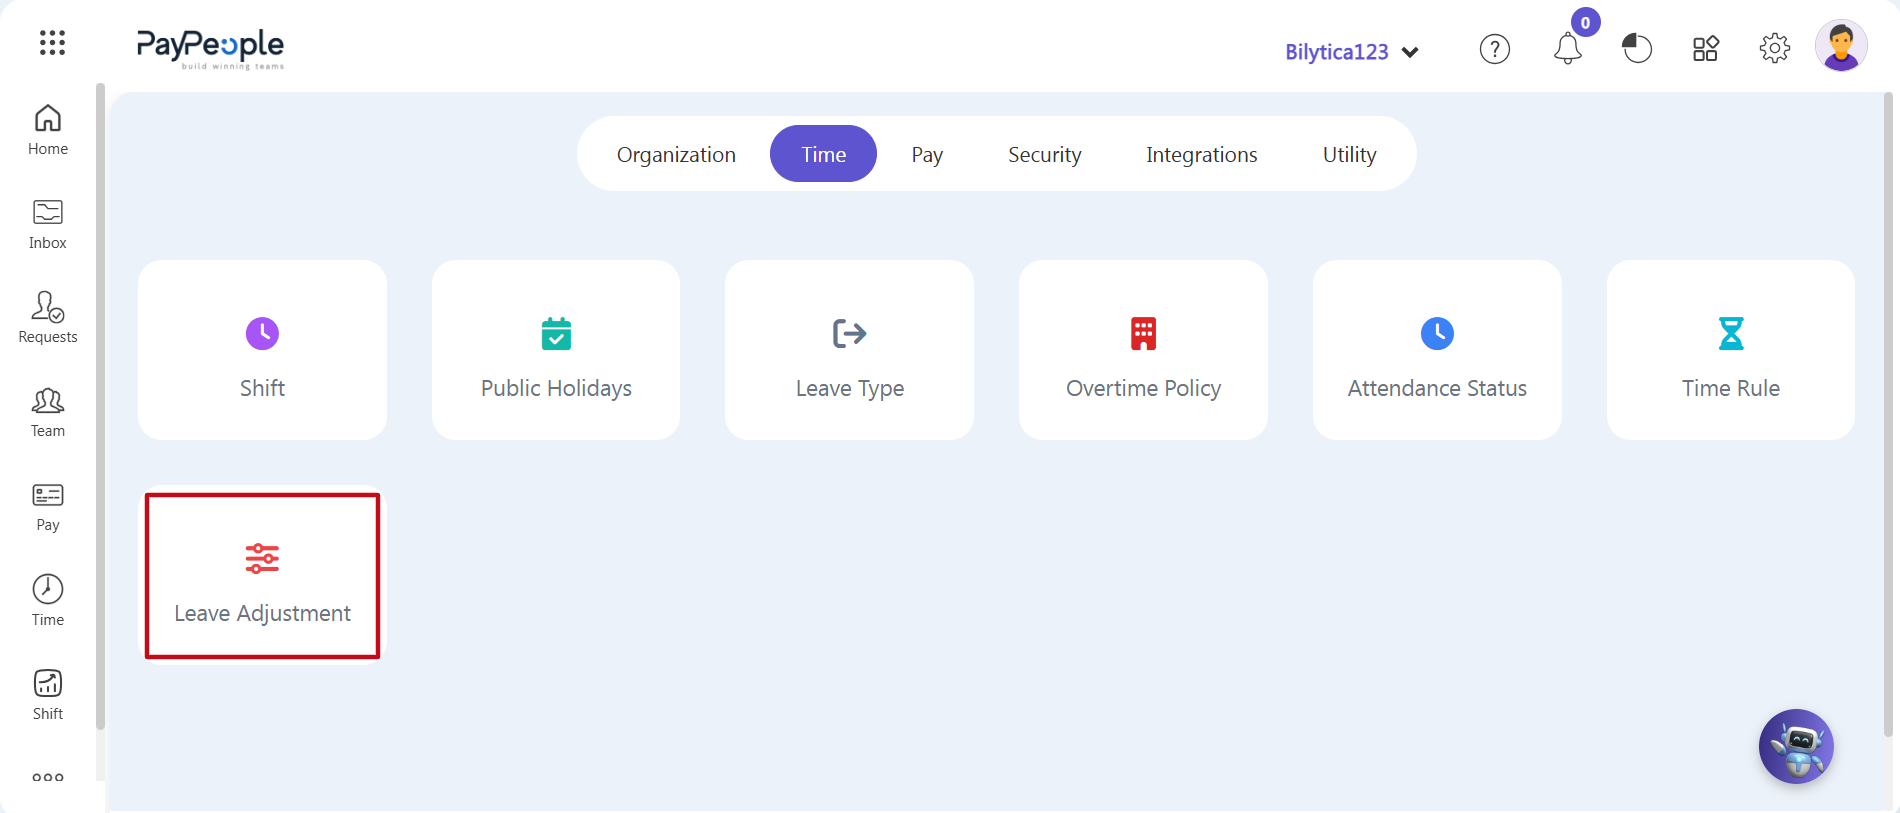
- Step 1: Open System Settings — Navigate to your primary platform workspace panel ribbon and click on the Setup gear icon located in the top navigation banner line.
- Step 2: Access Leave Adjustments — Ensure the horizontal Time sub-tab section is active on the layout header, then locate and click on the Leave Adjustment card module icon (marked with a red rectangular frame box).
2. Fetching and Modifying Individual Employee Ledgers
A dedicated Leave Adjustment filter workspace layout will load on-screen. Execute your adjustment parameters sequentially:
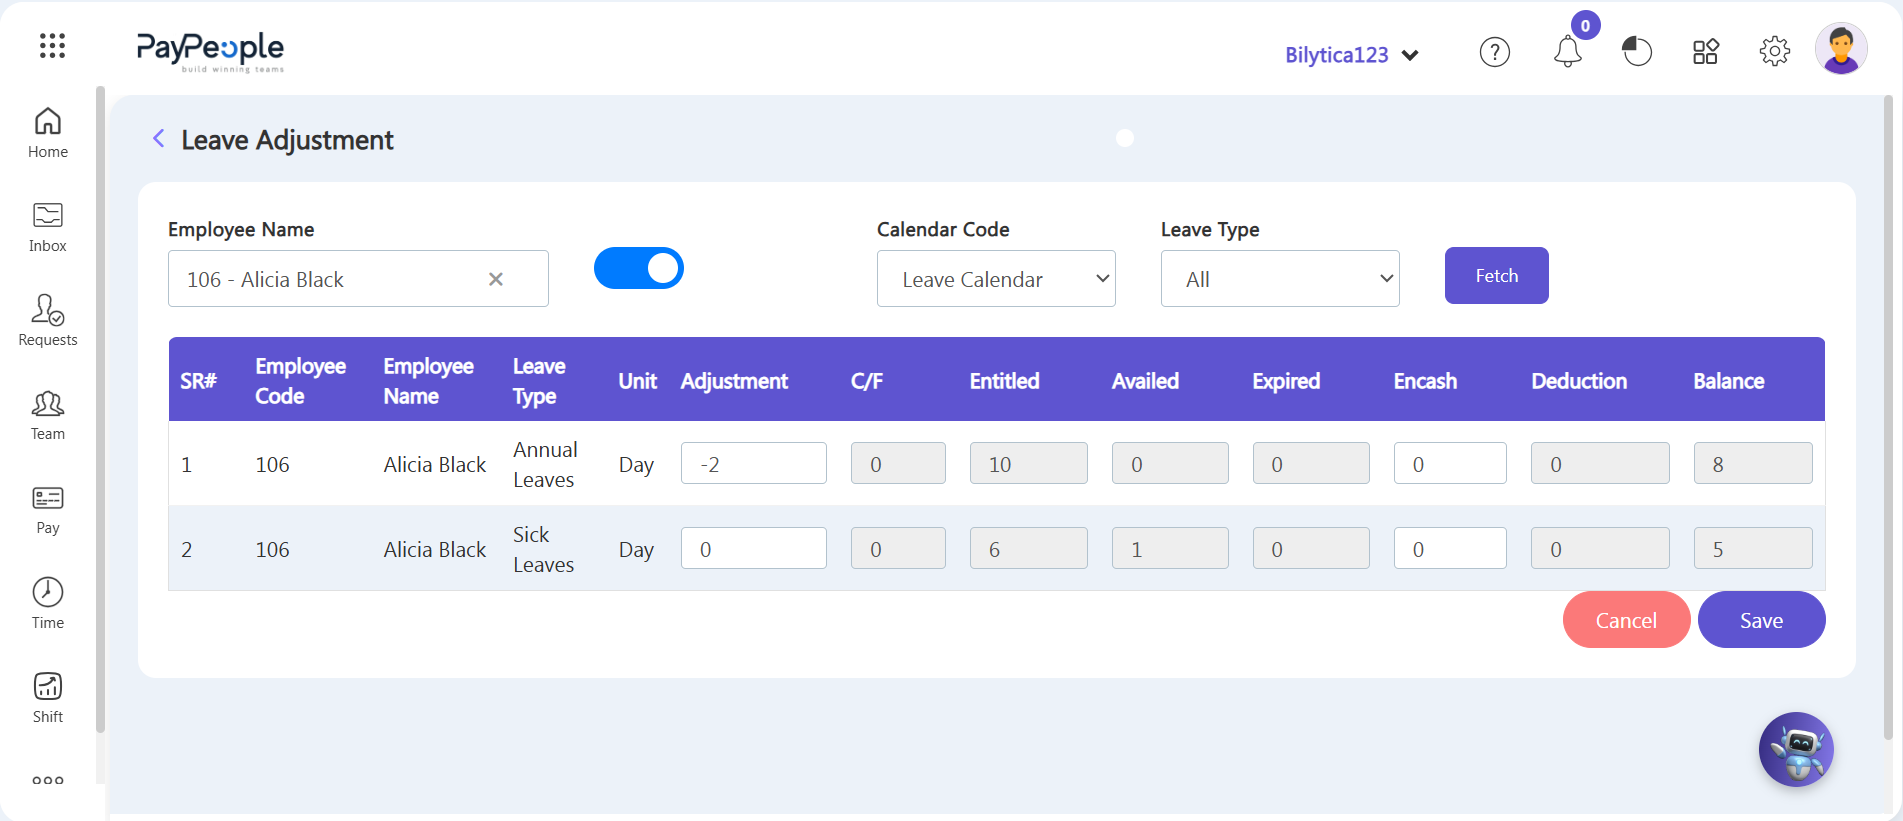
- Step 3: Target the Employee Profile — Click inside the Employee Name search field input block and enter or select the specific worker profile you intend to modify (such as searching for 106 - Alicia Black).
- Step 4: Activate the Workspace Utility — Toggle the active sliding switch button control component to ensure the workspace sheet utilities are turned on and ready to operate.
- Step 5: Define the Target Calendar Framework — Open the Calendar Code dropdown selection picker menu and choose the explicit leave calendar template folder currently assigned to that employee profile.
- Step 6: Choose Leave Classifications — Expand the Leave Type dropdown menu picker box container to select either a specific category classification block or choose All to load all available assignments simultaneously.
- Step 7: Execute System Data Query — Click the purple Fetch action button to process the script and query your backend system database logs. The system will load the corresponding employee data table grid view rows below.
3. Updating Balances and Saving Structural Overrides
Once the interactive grid is populated with tracking metrics like Unit, C/F, Entitled, Availed, Expired, and Deduction lines, proceed with direct data entry:
- Step 8: Input Quantitative Balance Adjustments — Locate the specific editable column fields inside your targeted leave type row (such as Annual Leaves or Sick Leaves). Adjust the figures manually based on your requirements:
- To decrease a balance, enter a negative integer directly (e.g., typing -2 in the Adjustment field to subtract two days from the ledger).
- To increase a balance, type a positive integer straight into the line.
- To log values for end-of-cycle payouts, enter the required balance amount directly into the Encash column field box.
- Step 9: Save and Sync to Database Registers — Review all your modified adjustment entries and verify the totals under the finalized Balance column. Once completed, click the purple Save button in the lower right-hand corner toolbar. The changes are processed immediately, permanently updating the employee's balance metrics inside the live workforce registers.
Administrative Control Pro-Tip: |