

Managing supplemental compensation through structured overtime rules protects operational transparency and aligns compensation tracking with organizational guidelines. PayPeople features a dual-phase premium configuration workspace to provision granular multi-tier pay codes and link them into dynamic, date-bound checking modules for calendar periods.
1. Initializing Custom Premium Rate Formulations via Pay Codes
Before establishing premium runtime parameters, system administrators must define the financial calculation baselines:
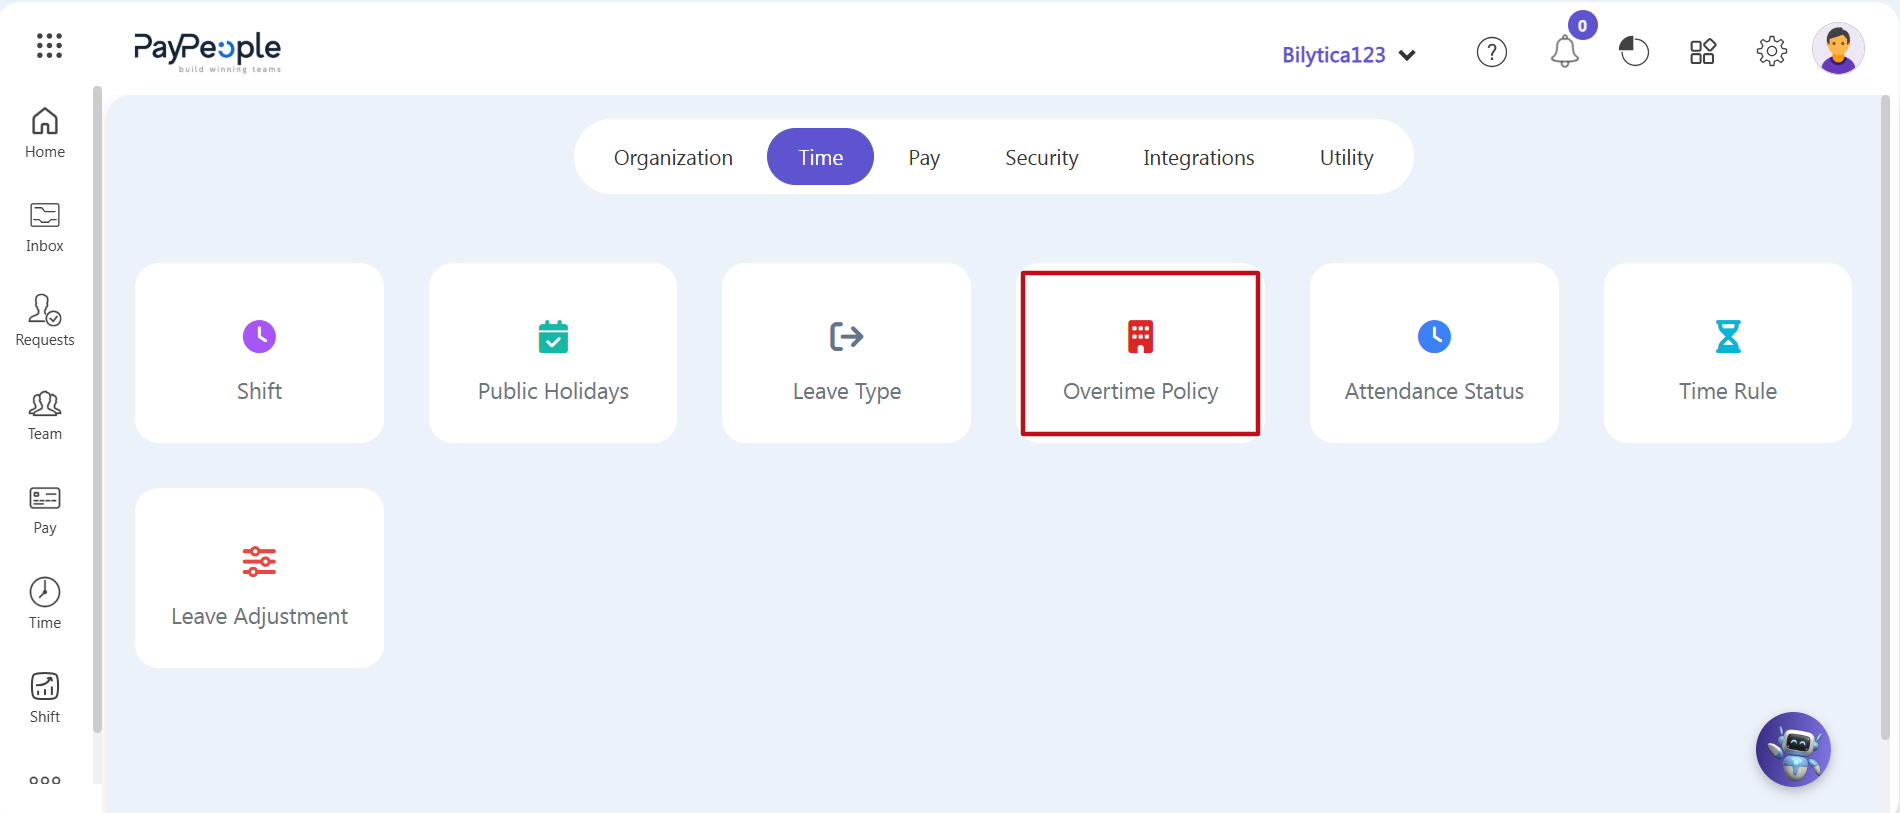
- Step 1: Open Module Control — Navigate across your dashboard setup workspace toolbar to Settings > Time and click on the Overtime Policy card module icon (marked with a red frame box).
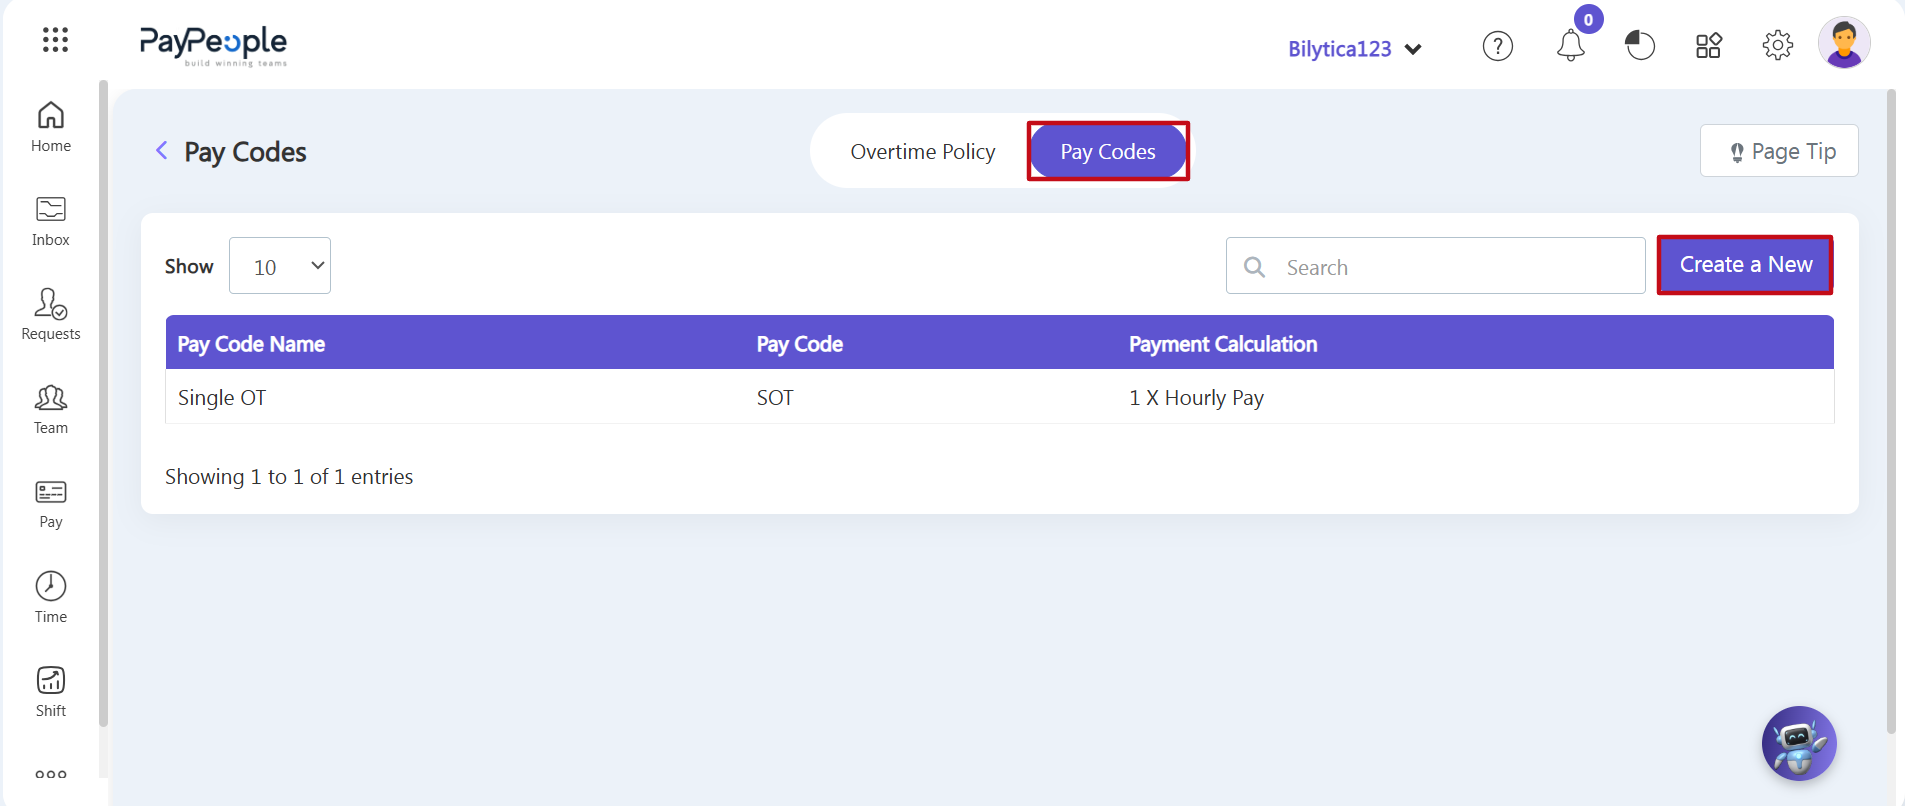
- Step 2: Access the Pay Codes Register — Once the workspace opens, switch the upper sub-navigation menu tab from Overtime Policy to the adjacent Pay Codes horizontal tab layout (marked with a red boundary frame box).
- Step 3: Launch the Definition Window — Review the existing metrics rows and click the purple Create a New action button located on the right corner of the sub-toolbar.
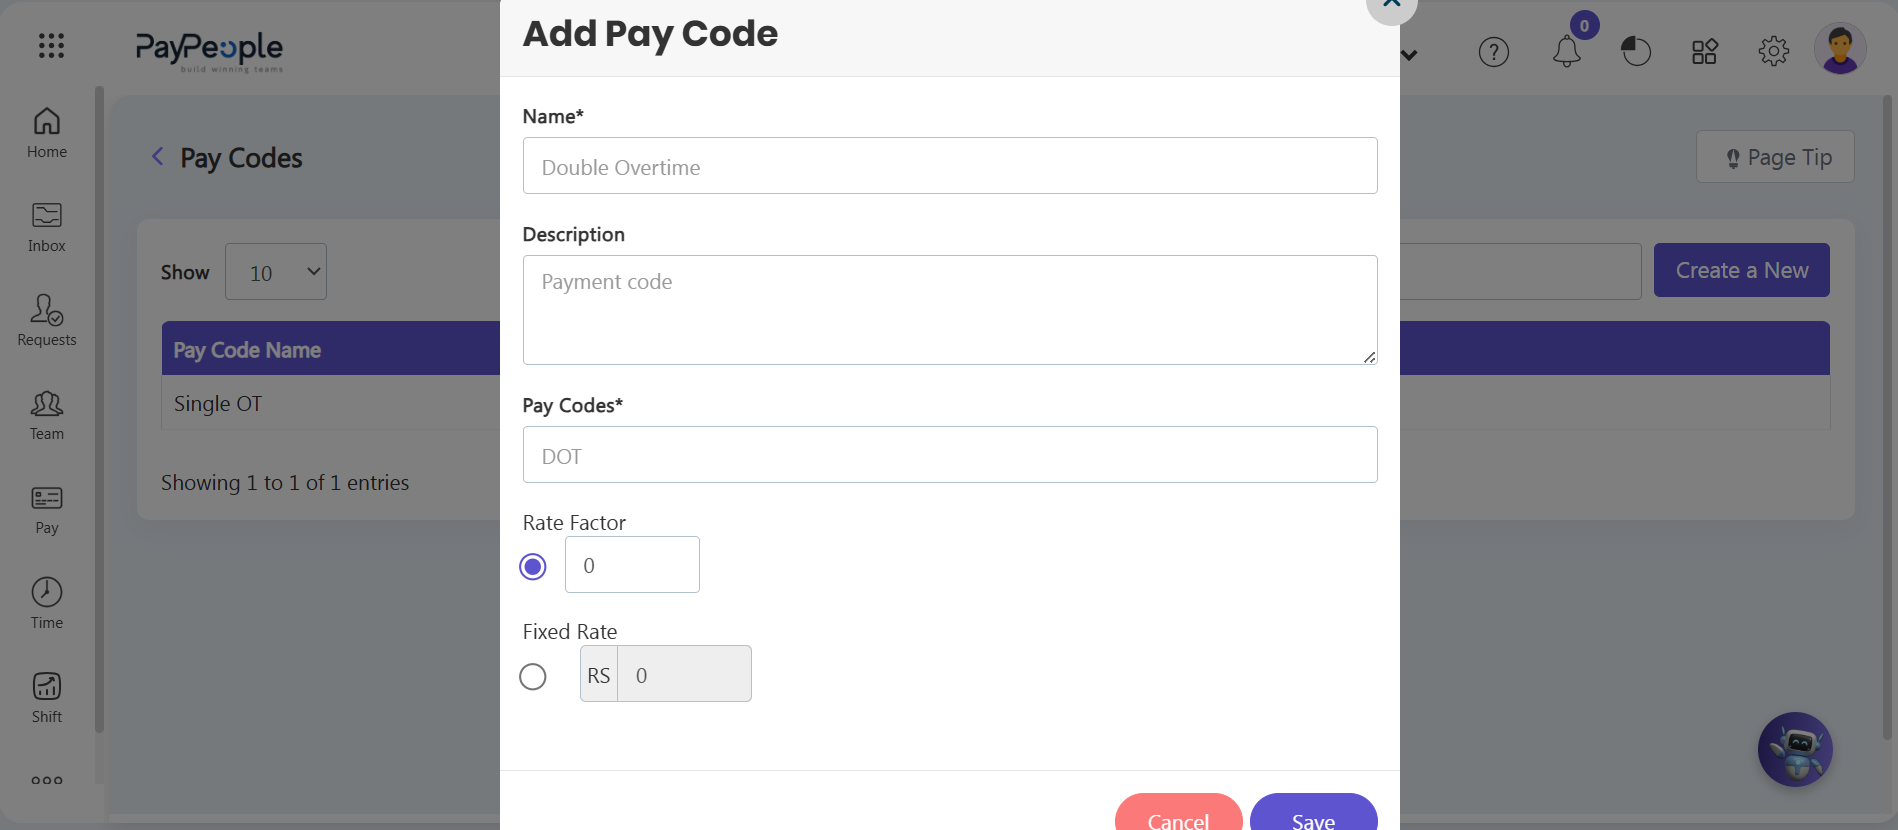
- Step 4: Label the Premium Pay Code Name — An Add Pay Code parameter configuration wizard window will open on-screen. Type your title string into the Name* required text field (such as Single OT, Double Overtime, or specialized multi-tier tags).
- Step 5: Define Systemic Policy Tags — Move to the Pay Codes* input text container box and enter the localized short abbreviation string that the system should project during reporting calculations (such as entering SOT for single parameters, or DOT for double premium segments). You may also add description notes for team reference.
- Step 6: Select the Rate Calculation Method — Choose your underlying baseline compensation logic by selecting one of the two active operational radio toggle buttons:
- Rate Factor: Enable this option to scale regular salaries by a percentage factor. Enter 1 inside the multiplier input box row to represent straight parameters, 2 to enforce double calculations, or customized fractions matching your compliance guidelines.
- Fixed Rate: Enable this alternate radio option field to completely bypass standard basic pay formulas. Type a strict, fixed currency parameter amount directly into the entry line to specify a constant rate per hour worked.
- Step 7: Save Formula Reference — Review your multiplier math variables and click the purple Save button in the lower-right corner of the layout framework to commit the pay code to your corporate database.
2. Constructing the Global Overtime Policy Rules
Once your baseline pay codes have successfully populated the underlying registers, move to map calendar operations constraints:
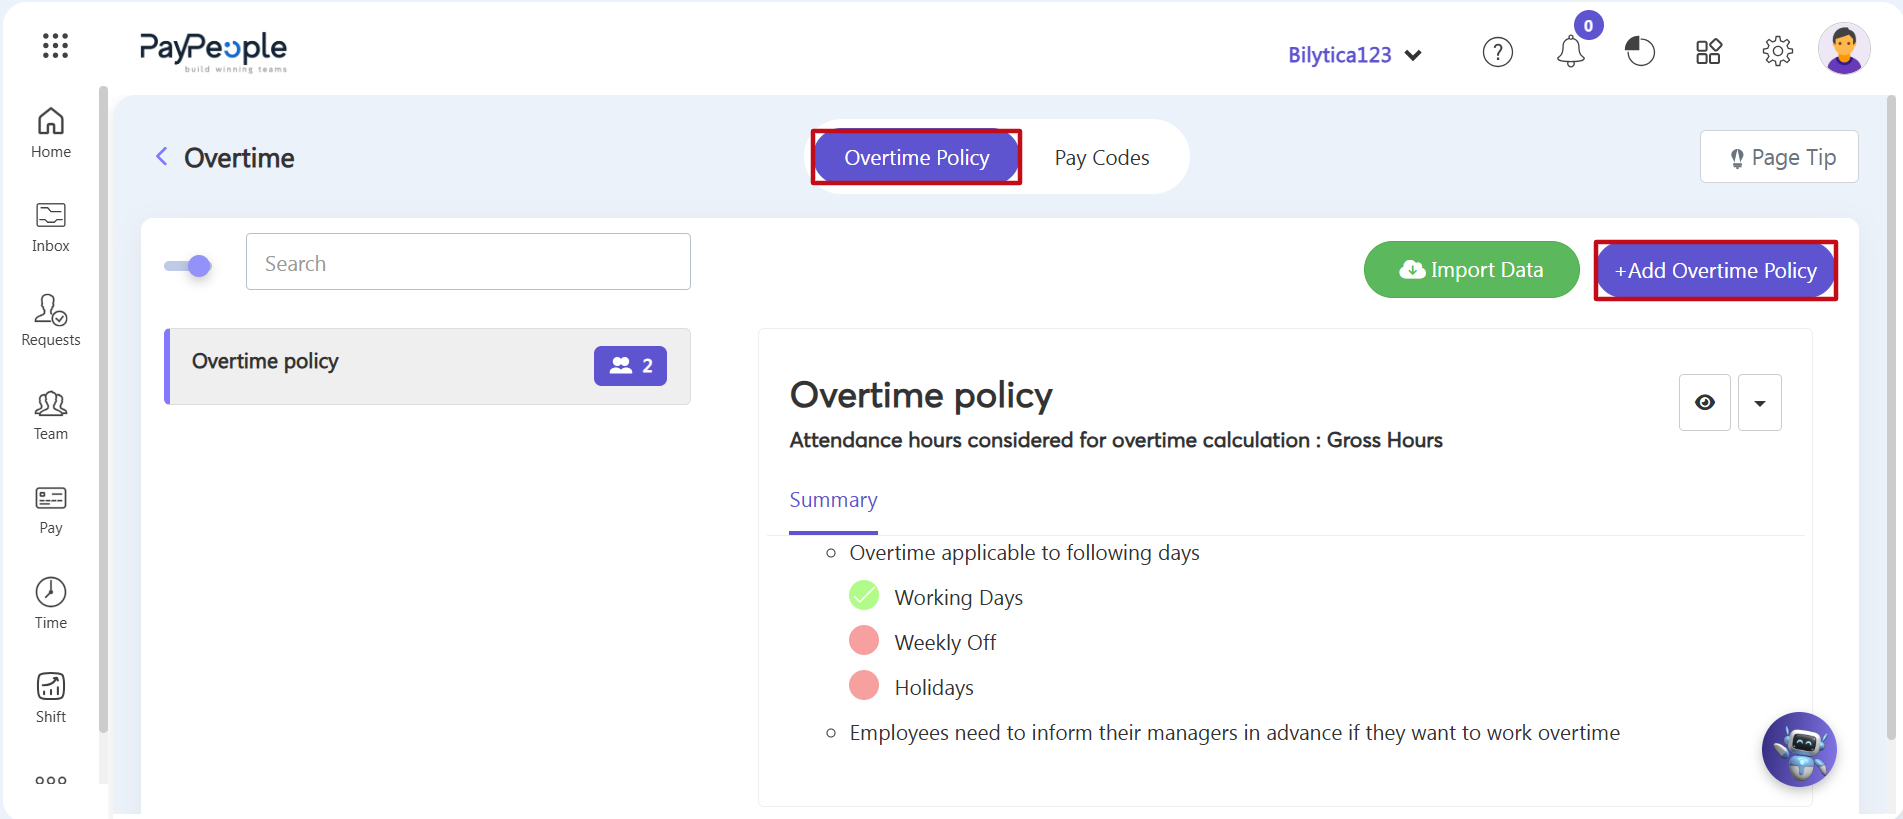
- Step 8: Return to Policy Management — Switch your active sub-navigation menu tab back to the Overtime Policy horizontal container tab link on your main layout workspace header.
- Step 9: Launch the Policy Builder Wizard — Look to the right-hand sub-navigation banner area line and click the blue +Add Overtime Policy action button (marked with a red border frame box).
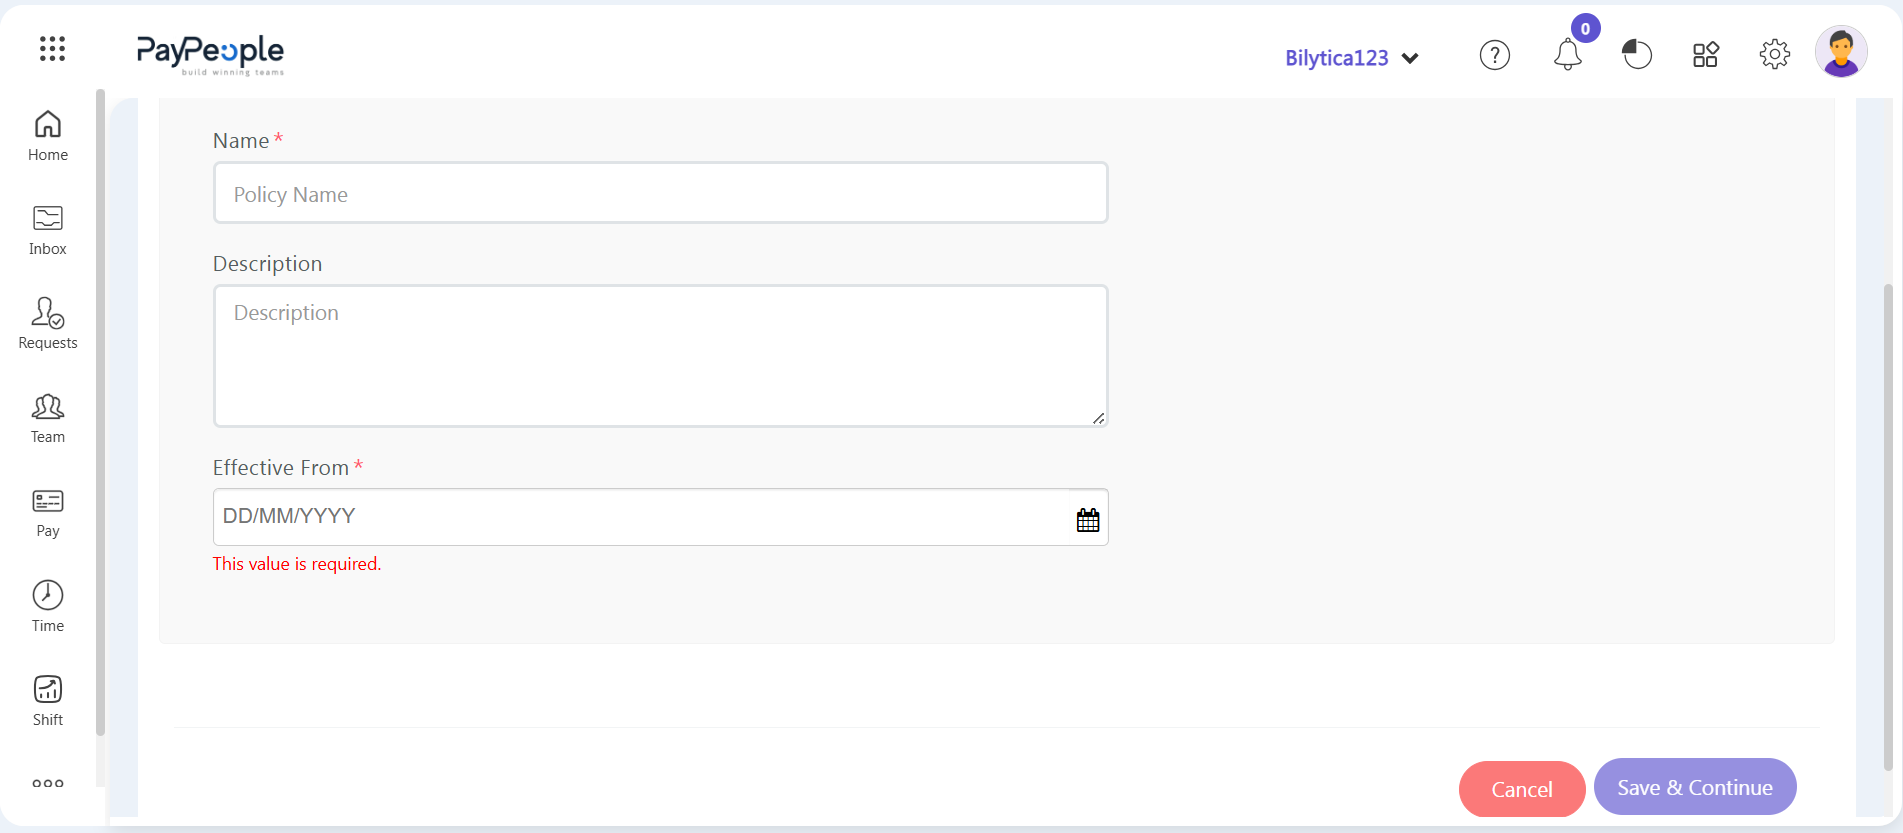
- Step 10: Define Policy Identity & Target Activation Date — A new configuration screen will open immediately. Type the identifying title of your policy structure within the Name* required text field. Scroll down to select the explicit calendar timeline boundaries from the Effective From* date picker to determine exactly when this overtime rule should become active within your system.
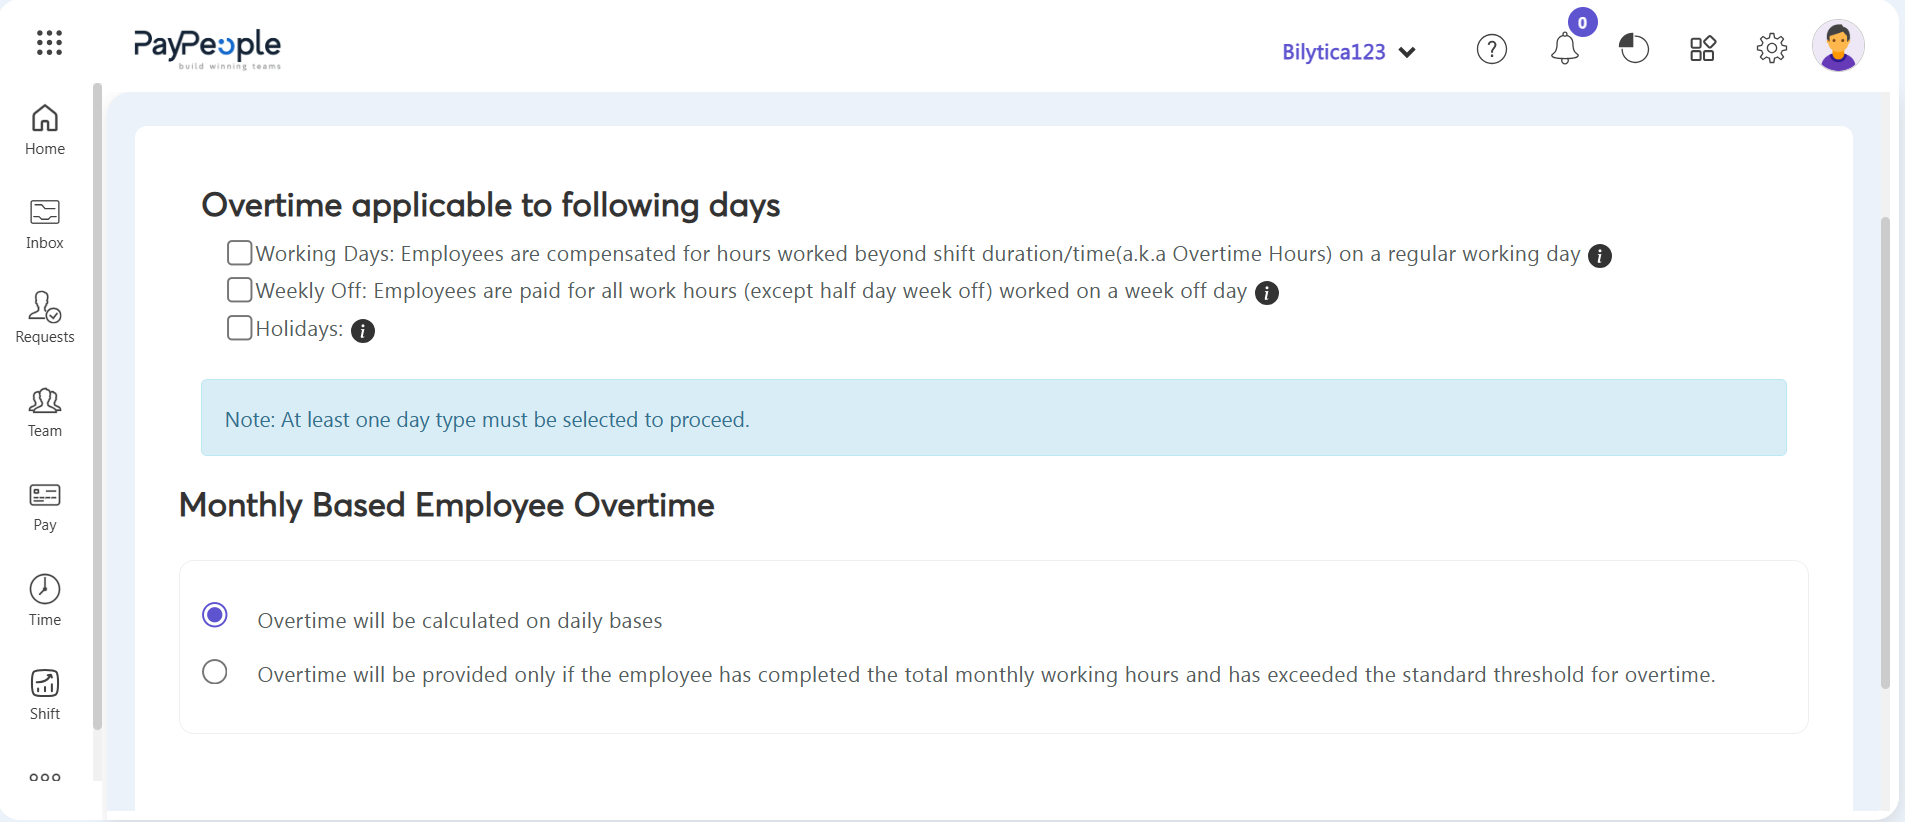
- Step 11: Select Target Roster Calendar Days — Proceed to the policy rules section. Under the Overtime applicable to following days segment, check the boxes that match your company guidelines to activate tracking constraints across:
- Working Days: Rules that apply when personnel exceed regular shift thresholds on standard workdays.
- Weekly Off: Rules governing premium allocations for working during rest cycles.
- Holidays: Constraints defining premium compensation tracks for scheduled holidays.
- Step 12: Map Hourly Limits and Compensation Rates — Click into any of your selected day classification rows to open its internal parameter card. Define the maximum number of hours authorized under that classification, and select the corresponding pre-saved pay code formula to control the calculations.
- Step 13: Configure Calculation Timing Intervals — Scroll down to the Monthly Based Employee Overtime section. Select the appropriate tracking interval toggle to configure the backend calculation engine:
- Daily Basis: Compute premium hours independently for each active shift cycle.
- End of Month: Calculate premium hours only at the end of the monthly cycle, validating that aggregate hours thresholds are met before compensation triggers.
- Step 14: Finalize and Commit Policy — Review all nested day-type checkboxes, hourly limit entries, and calculation intervals, then click the Save button in the bottom margin to permanently activate the policy structure for your workforce tracking grids.
3. Verification and Systemic Audit
Once you finalize the setup, the application redirects you to your active rules registry dashboard for instant validation checks:
- Visual Inspection Tools — To review your active structural rules details without changing any data fields, click the Eye Icon component (marked with a red rectangular frame) located on the right margin of your active policy summary dashboard row.
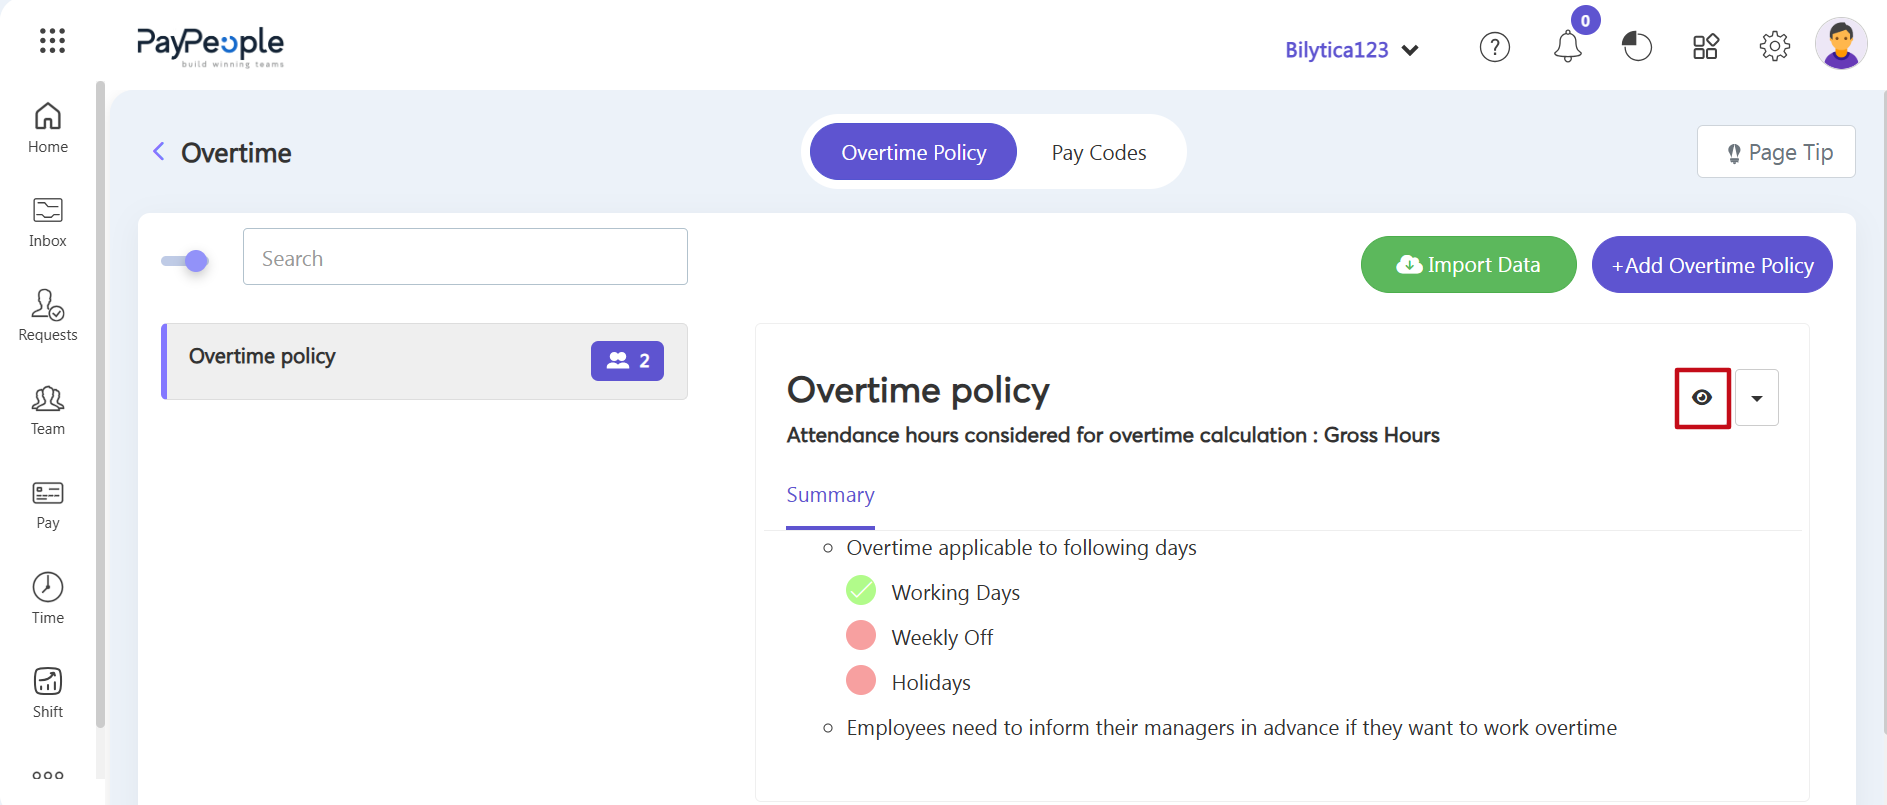
• Instant Systemic Audit: The platform will open an interactive read-only modal form grid showing all configured day thresholds, rate calculations formulas, and billing parameters for fast verification pipelines.
Premium Compensation Configuration Pro-Tip: |