

Applying structured tax reliefs, rebates, and income adjustments guarantees that employee net salary distributions comply accurately with current tax regulations. The PayPeople fiscal framework offers a central Tax Relief module where corporate administrators can process target adjustments per individual employee profile, manage multi-tiered relief categories, and link verified data directly into monthly statutory calculation runs.
1. Navigating to the Central Tax Relief Workspace
To configure structural adjustments and initialize a tax relief transaction line item:
- Step 1: Open Settings Panel — Go to your main corporate administrator platform dashboard interface and click on the primary Setup gear icon located in the upper-right control ribbon.
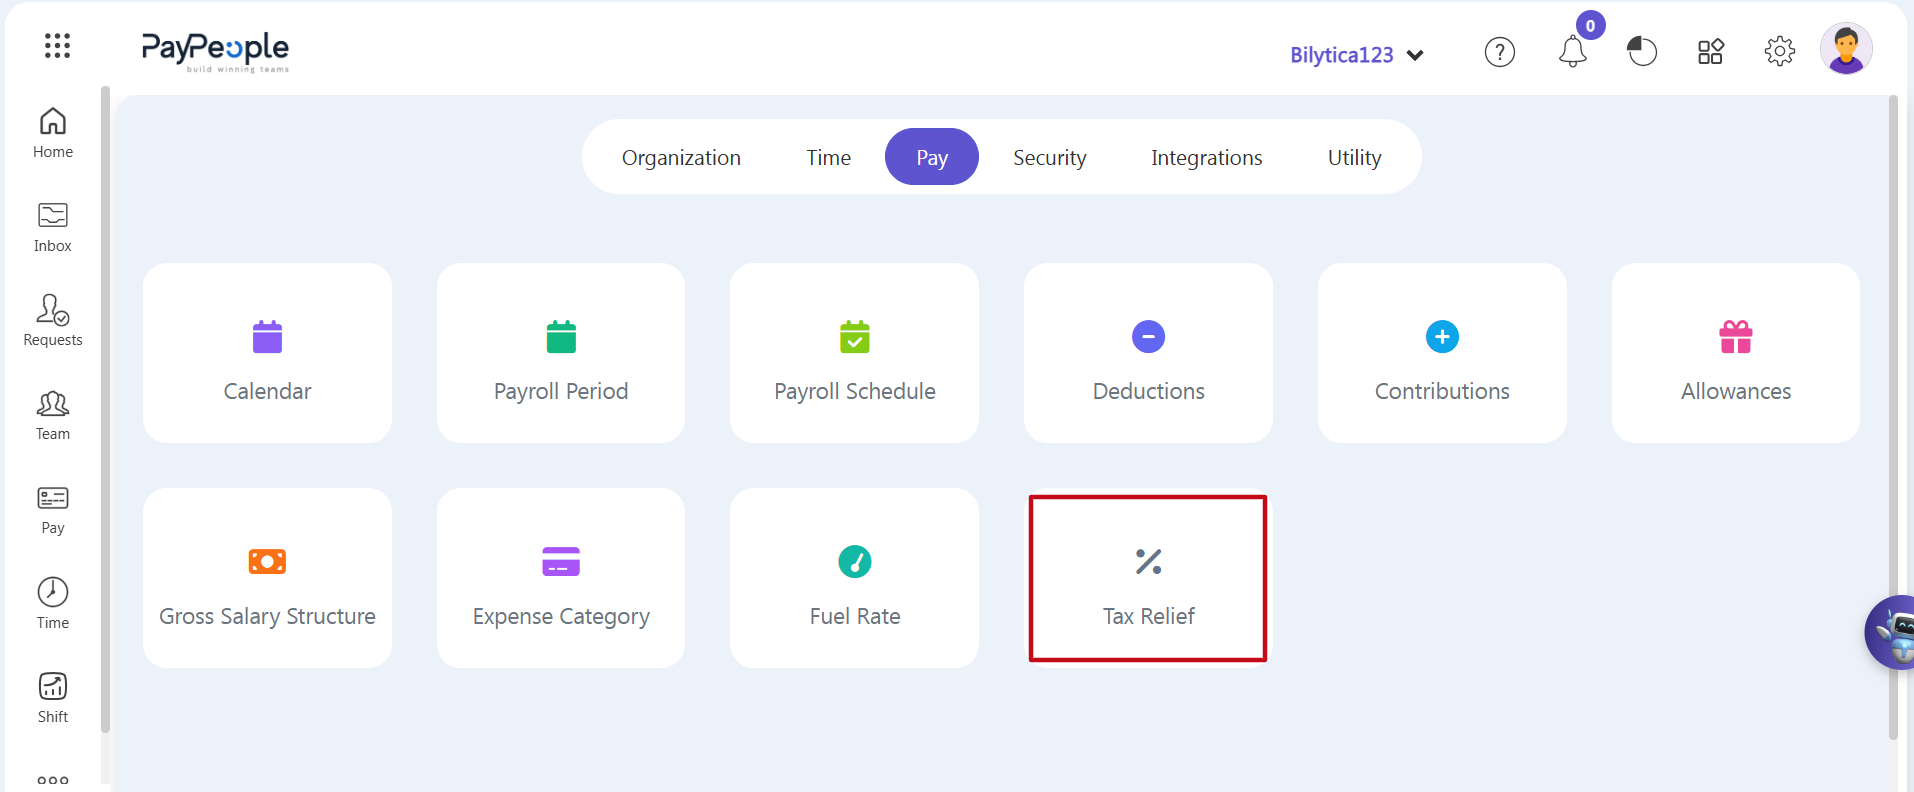
- Step 2: Access the Pay Configuration Matrix — Click on the horizontal Pay tab inside the top setup menu. Locate and click on the primary Tax Relief card module (marked with a red rectangular frame box) to load the ledger interface.
2. Processing Employee Adjustments & Category Mapping
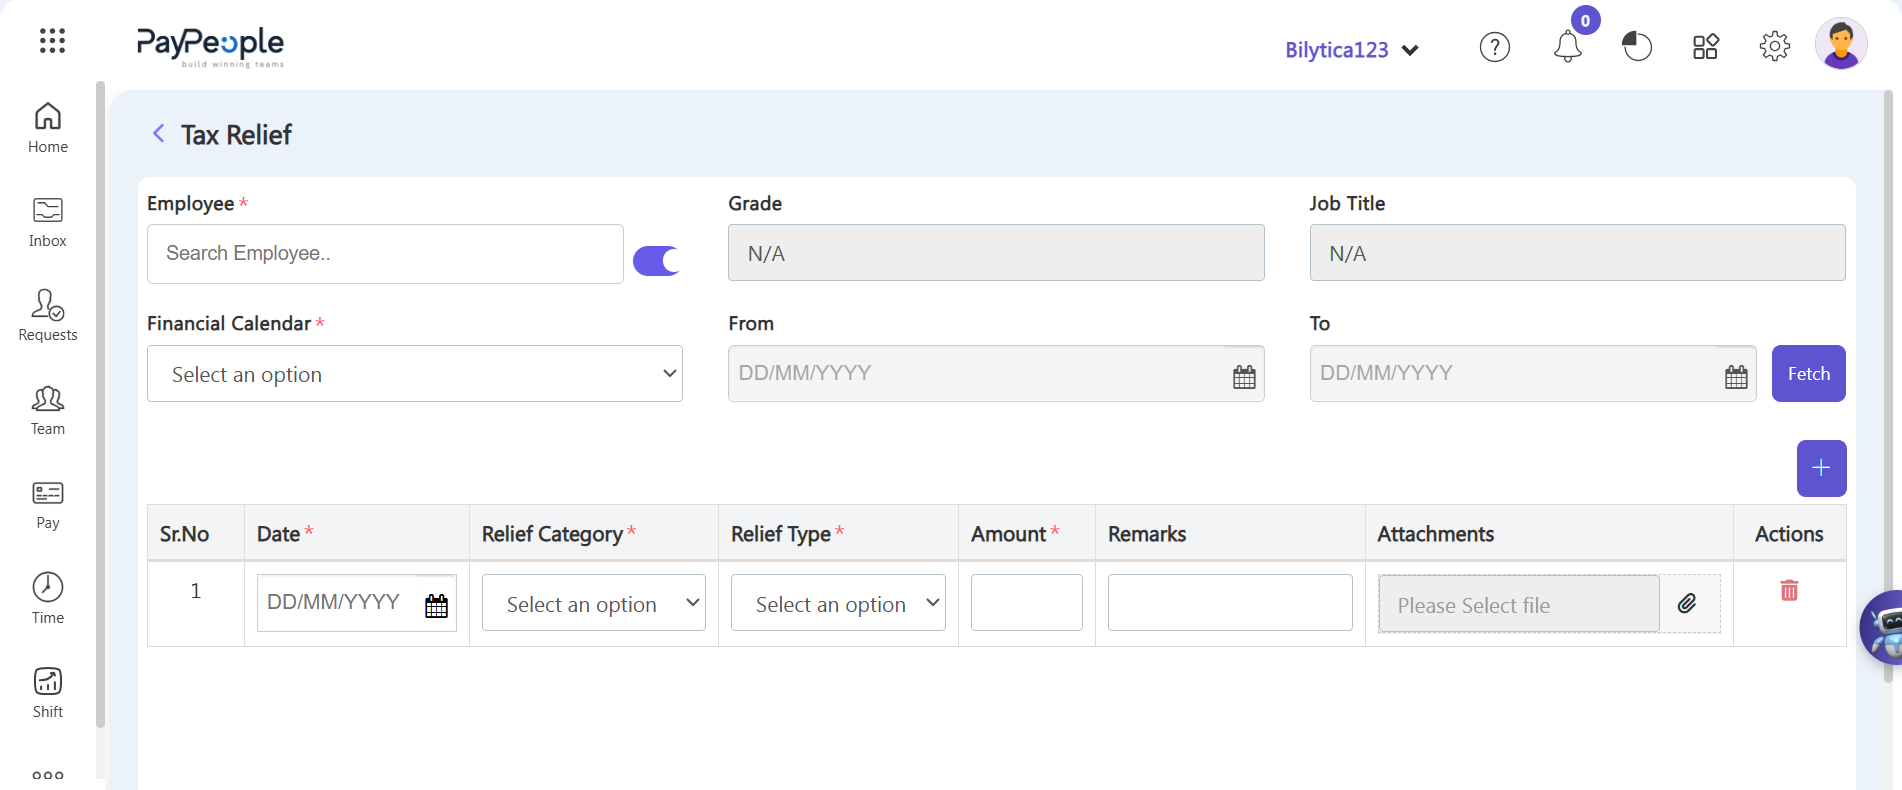
The global Tax Relief workspace page will open on-screen. Enter the specific parameter details step-by-step:
- Step 3: Find the Employee — Click inside the Employee* search bar, type the staff member's name into the "Search Employee..." box, and select their profile from the list.
- Step 4: Select the Fiscal Year — Click the Financial Calendar* dropdown menu and select the correct annualized payroll calendar for the tax year you want this adjustment to apply to.
- Step 5: Create an Adjustment Row — Go to the right side of the main input fields and click the blue + button. This instantly adds a fresh adjustment transaction row to the lower grid layout.
- Step 6: Set the Transaction Date — In the new grid row under the Date* column, use the calendar picker to select the exact date you want to issue this tax relief.
- Step 7: Choose the Relief Category — Open the Relief Category* dropdown menu to select your tax rule criteria (e.g., choose 'Tax Deduction' to subtract directly from the final net tax liability, or 'Adding Taxable Income' to adjust for secondary gross income).
- Step 8: Enter the Amount and Notes — Go to the Amount* column in that same row and type the currency adjustment value. If you need to add auditing notes, type them in the adjacent Remarks column.
- Step 9: Upload Supporting Documents — If corporate policy or tax regulations require physical proof (such as charity receipts or investment certificates), click the Attachments file upload field to upload the file from your computer.
- Step 10: Save and Finalize — Review your employee selection, dates, categories, amounts, and attachments. Click the Save button to finalize the transaction. The system will immediately update your payroll calculations for the next tax processing run.
Statutory Tax Relief Auditing Pro-Tip: |