

Structuring employee earnings elements effectively enables organizations to manage dynamic compensation distributions, perform accurate proration assessments, and remain synchronized with statutory compliance definitions. PayPeople's integrated Allowances configuration framework allows payroll administrators to quickly add custom components like medical disbursements, food stipends, house rent packages, or cost-of-living adjustments (COLA) through fixed values, basic salary percentages, or direct programmatic overrides.
1. Navigating to the Allowances Management Registry
To access your system's global earnings setup panel and initialize configuration steps:
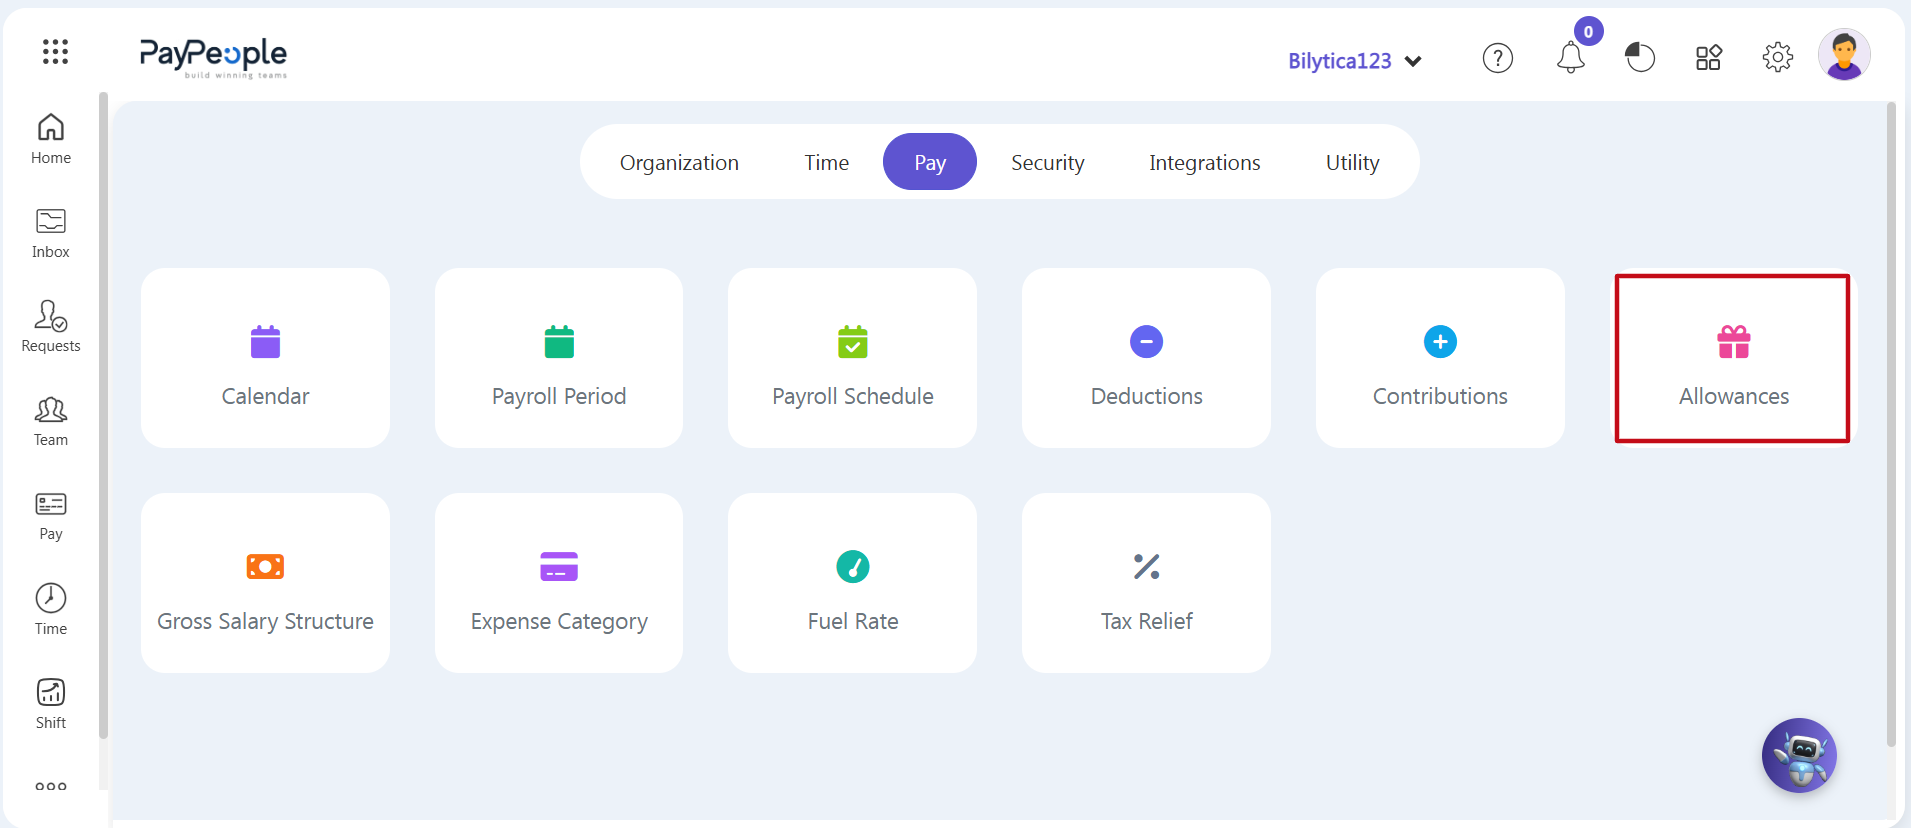
- Step 1: Open System Settings — Go to your main administrator dashboard interface and click on the Setup gear icon located in the upper-right control toolbar.
- Step 2: Enter the Pay Module Panel — Click on the horizontal Pay tab inside the top setup menu. Locate and click on the primary Allowances card module (marked with a red box).
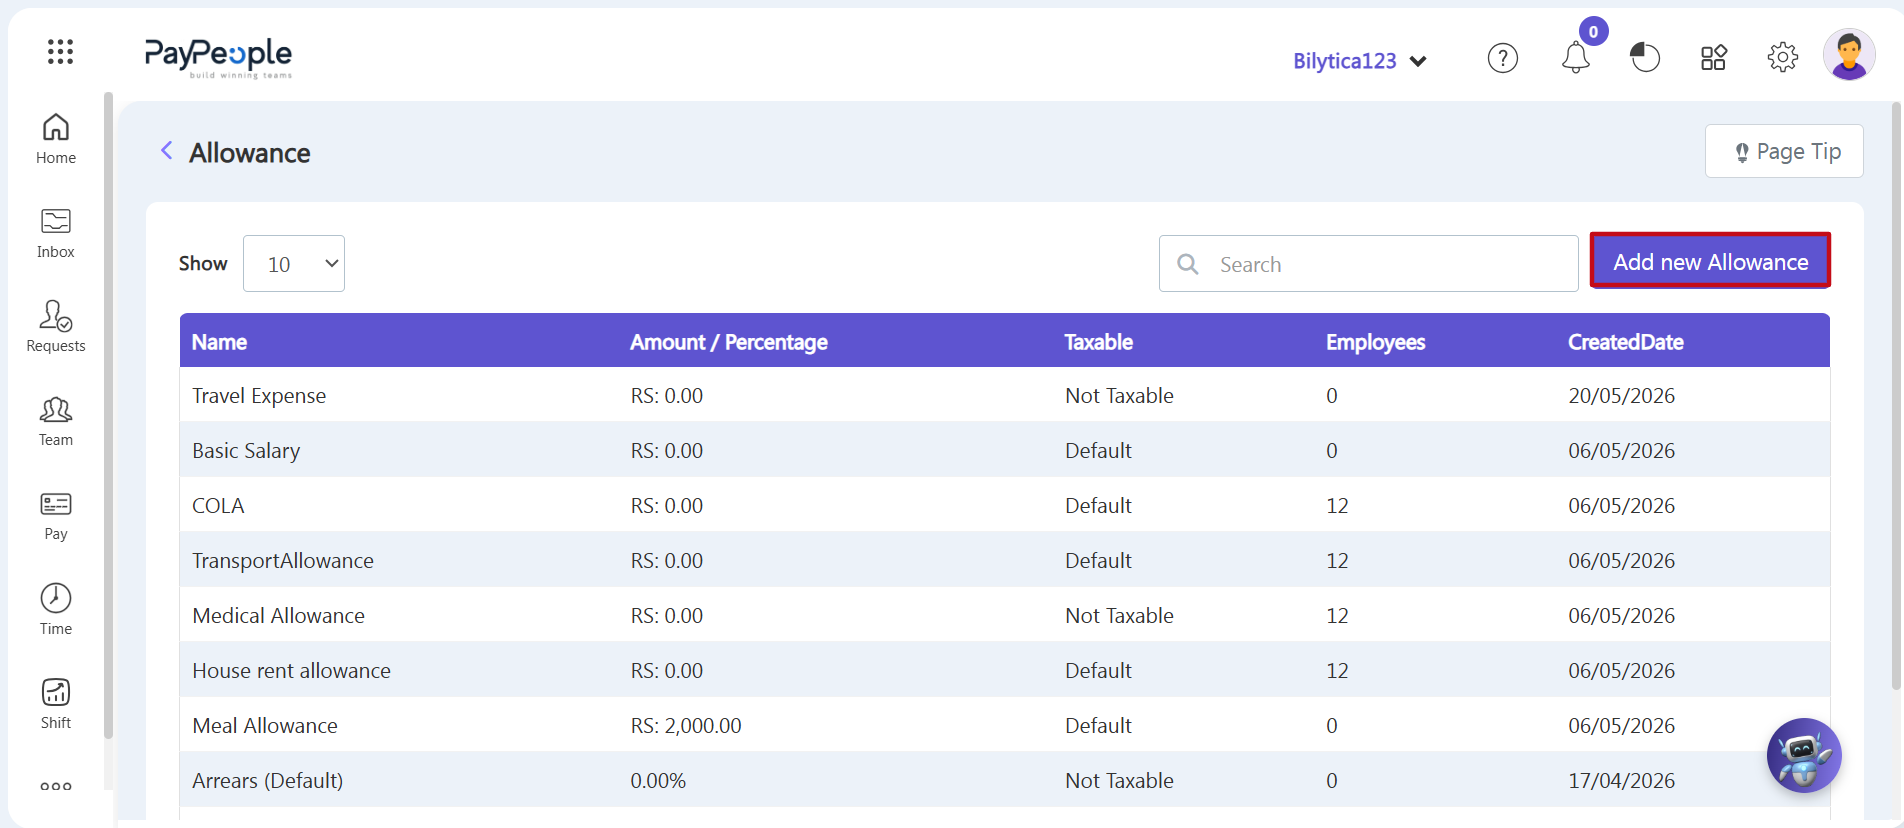
- Step 3: Open the New Allowance Wizard — The main Allowance registry table will open, showing standard items like Travel Expense, Basic Salary, COLA, Transport, Medical, House Rent, and Meal Allowances. Click the purple Add new Allowance button (marked with a red rectangular frame box) in the top-right toolbar.
2. Filling Out the Add Allowance Form
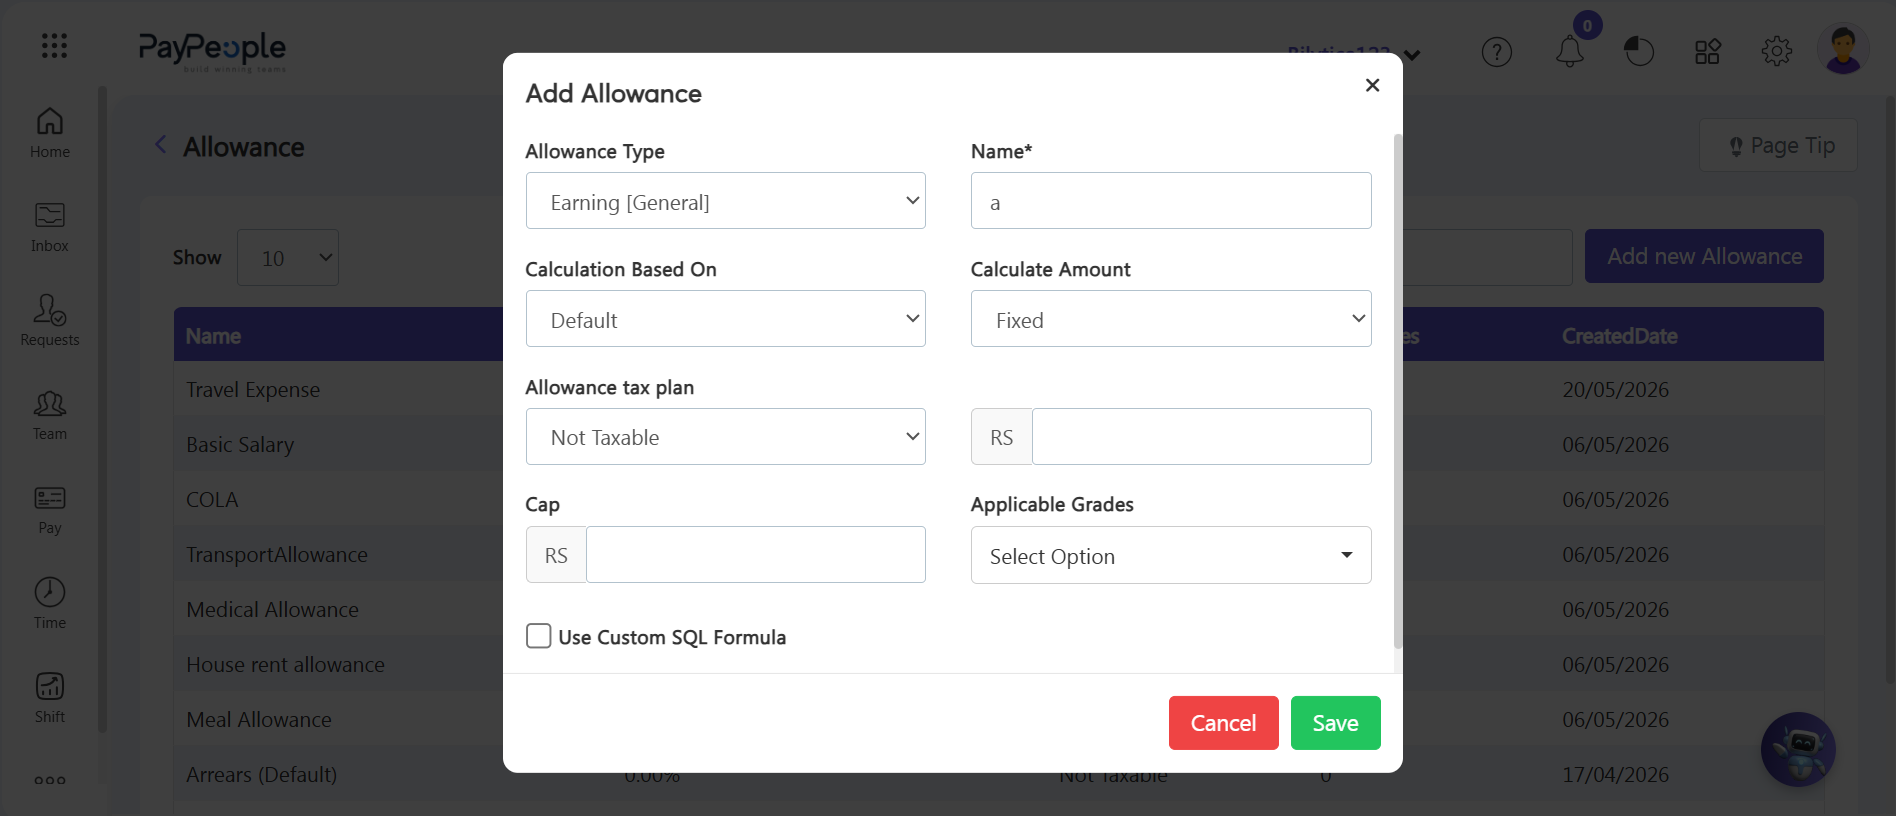
An Add Allowance popup window will open on-screen. Enter your configuration details step-by-step:
- Step 4: Choose the Earning Type — Click the Allowance Type dropdown menu and classify the component structure—choose 'Earning [General]' for standard rules, or map it against specialized system parameters.
- Step 5: Label the Payslip Title — Type the exact name in the Name* input box as you want it to appear on employee payslips.
- Step 6: Define Attendance Logic — Open the Calculation Based On dropdown menu. Select 'Default' for a standard flat scale, or choose 'Present Days' to link the calculation directly to employee attendance data.
- Step 7: Choose the Valuation Method — Open the Calculate Amount dropdown menu to decide how the system computes values:
- Fixed Amount: Select this for a steady cash allowance, then enter the flat amount in the adjacent field.
- Percentage Base (%age of salary): Select this to calculate a dynamic fraction of earnings, then enter the percentage scale in the next box.
- Step 8: Set Capping Limits and Tax Status — Type a maximum upper limit in the Cap input box (or enter 'false' to leave it open-ended). Use the Allowance tax plan dropdown menu to mark the component as either 'Taxable' or 'Not Taxable'.
- Step 9: Assign Grade Eligibility — Click the Applicable Grades dropdown filter and check the boxes for the specific corporate salary grades and organizational tiers authorized to receive this allowance.
- Step 10: Enable Advanced Custom Formulas — For complex calculation sequences that standard flat rates or percentages can't handle, check the 'Use Custom SQL Formula' box. This opens an advanced text script console where you can type custom SQL formulas directly.
- Step 11: Save and Complete — Review your ranges, caps, and formula settings. Click the green Save button in the bottom-right corner to permanently apply the allowance type to the system.
Earning Component Integration Pro-Tip: |