

Following the generation of annualized cycles, administrators must establish the behavioral calculation schedules that govern payroll processing. Building a customized payroll schedule defines the foundational pay model type, selects your calculation day divisors, and attaches structural fiscal timelines to enforce processing rules safely across specific worker cohorts.
1. Navigating to the Payroll Schedule Directory
To access your system's centralized payroll scheduling matrix:
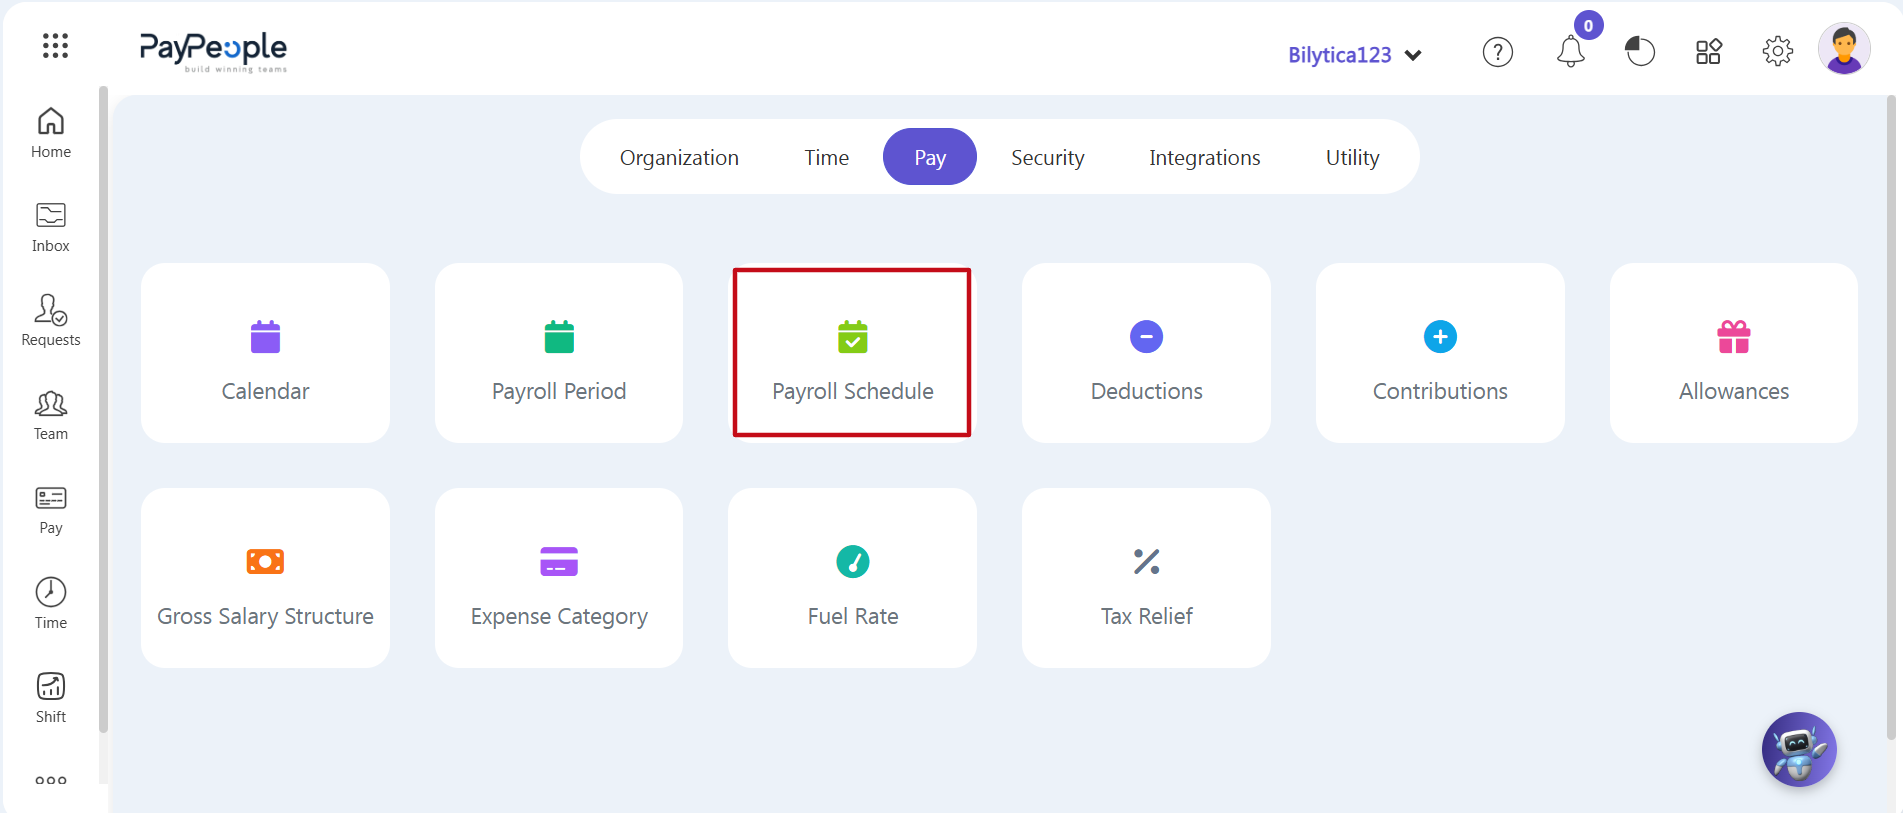
- Step 1: Open Module Settings — Go to your central dashboard setup panel toolbar and navigate to the Settings > Pay configuration workspace header.
- Step 2: Access Schedule Ledger — Locate the sub-tab card labeled Payroll Schedule (marked with a red rectangular frame) and click on it.
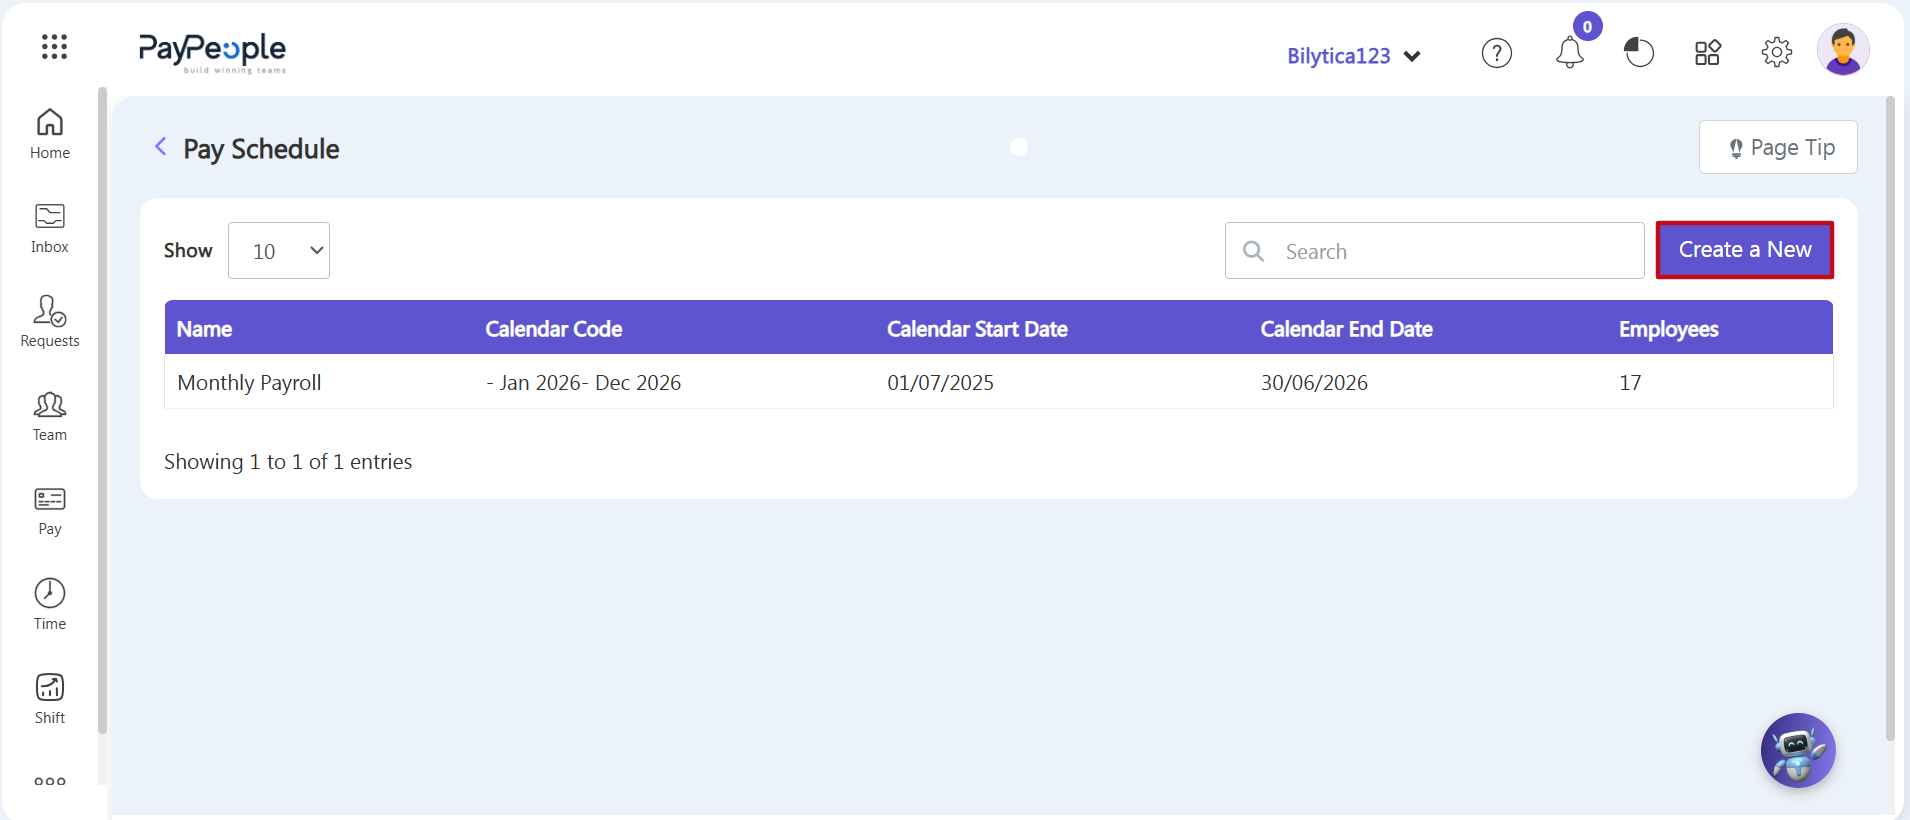
- Step 3: Open the Definition Wizard — The main Pay Schedule summary table will open on-screen, showing your current operational setups. Click the purple Create a New button (marked with a red border frame box) in the upper-right toolbar.
2. Filling Out the Add Payroll Schedule Form
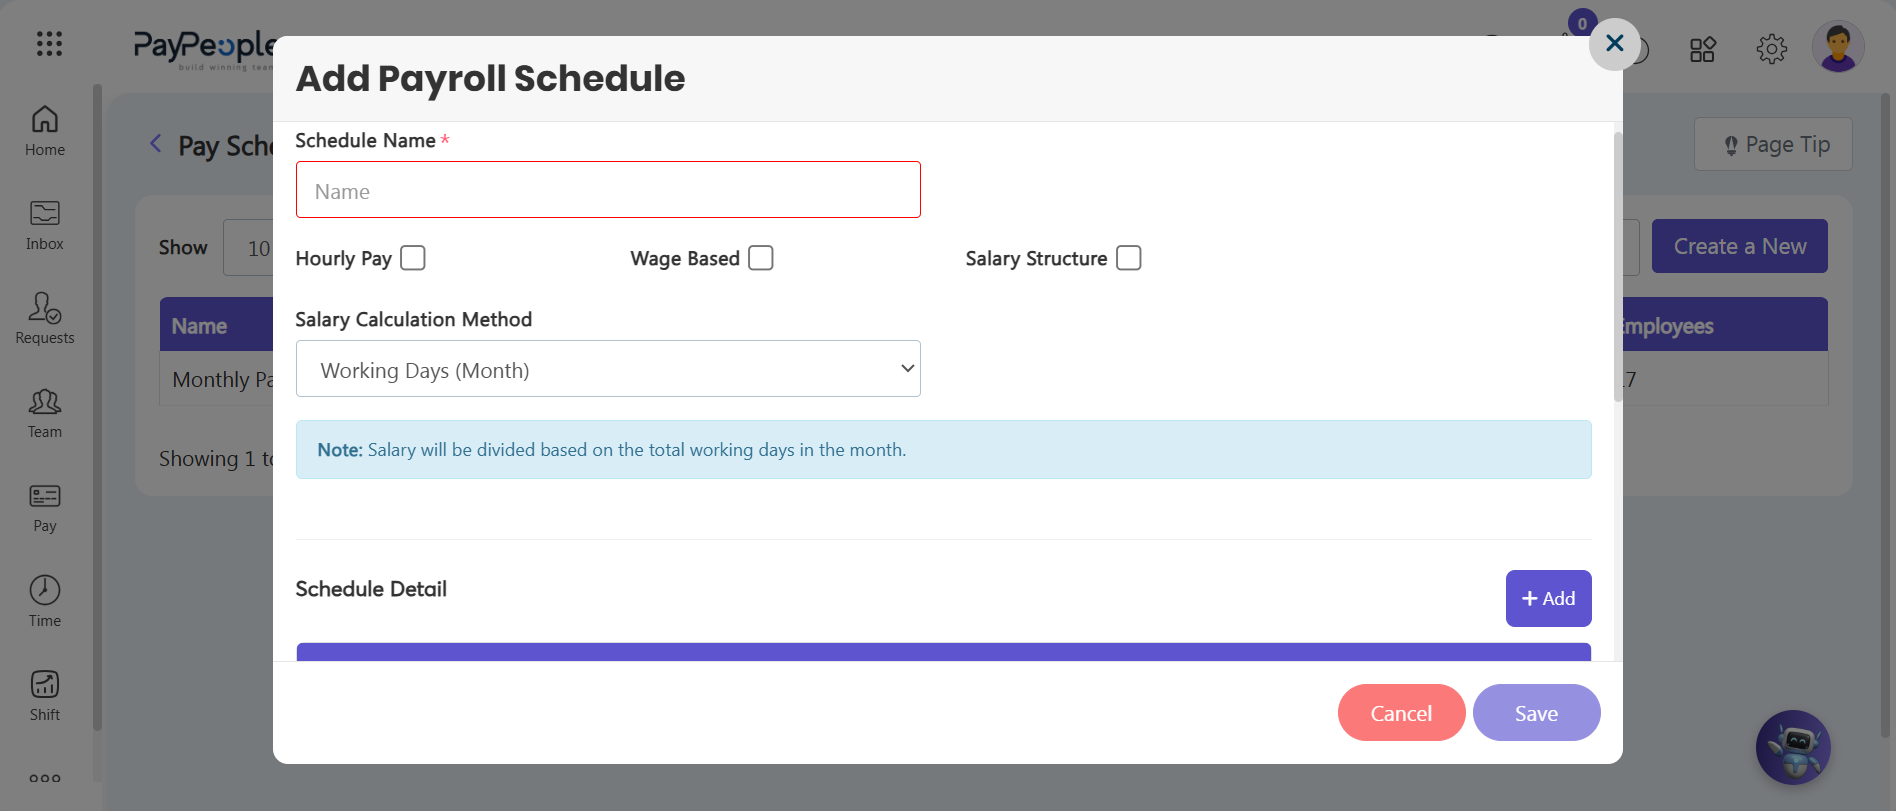
An Add Payroll Schedule popup window will open on-screen. Enter your configuration details step-by-step:
- Step 4: Name Your Schedule — Type a clear, descriptive name in the Schedule Name* input box to identify this track (e.g., 'Monthly Payroll' or 'Executive Schedule').
- Step 5: Select the Pay Basis — Choose how compensation is tracked by checking the appropriate option:
- Hourly Pay: Select this to process payroll using tracked hourly rates.
- Wage Based: Select this to calculate pay based on daily or piece-rate wages.
- Salary Structure: Select this to use standard base compensation packages defined in your Gross Salary settings.
- Step 6: Choose Your Salary Calculation Method — Open the dropdown menu to decide how the system calculates monthly salary divisors:
- Calendar Days: Divides the salary by the total actual days in that specific calendar month.
- Working Days (Month): Divides the salary strictly by the total operational working days in that month.
- Fixed Days: Uses a constant number of days for every month, bypassing calendar lengths entirely. If selected, enter your uniform day number in the extra field that appears.
- Step 7: Link Your Fiscal Timeline — Scroll down to the Schedule Detail grid and click the blue + Add button to create a new row. Use the dropdown to select your master calendar code, and set its start date using the Effective Date picker.
- Step 8: Save Your Schedule — Review your pay bases, calculation divisors, and effective dates. Click the purple Save button in the bottom-right corner to permanently apply the schedule parameters to the system.
Schedule Optimization Compliance Tip: |