

Following the initialization of your baseline fiscal calendar, administrators must break down the annualized timeline into individual operational cycles. Pre-configuring these payroll periods establishes accurate monthly computation brackets, custom attendance cut-off dates, and systemic lockouts to secure localized transactional ledgers.
1. Navigating to the Payroll Period Hub
To access your system's global cyclical payroll time blocks framework:
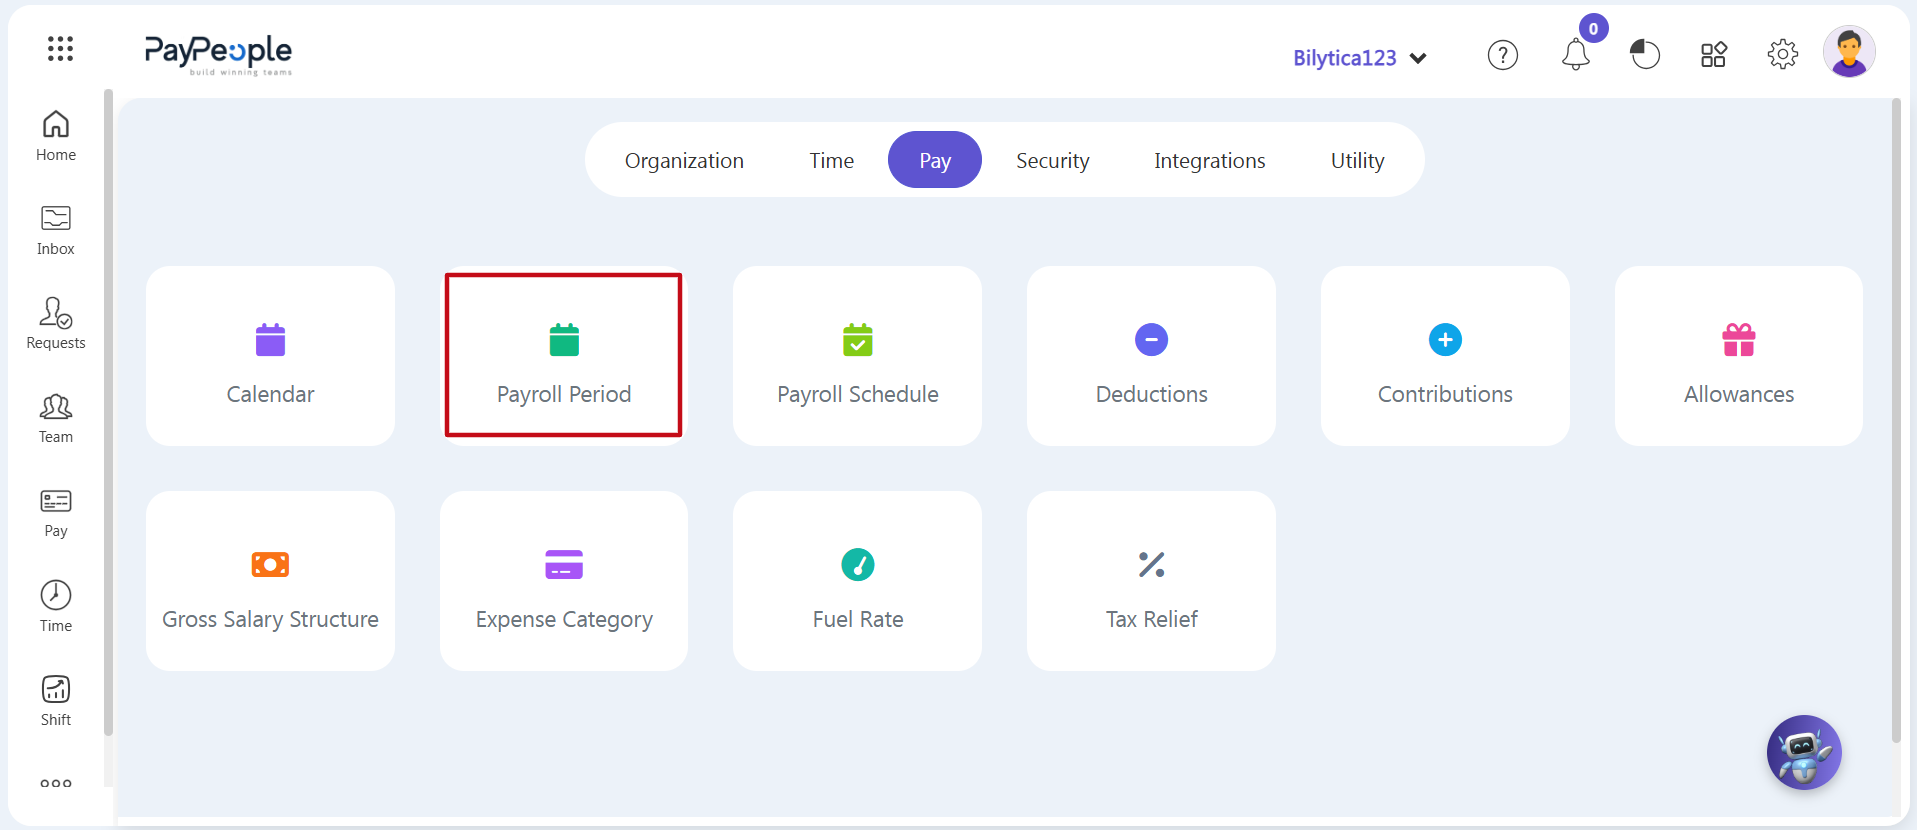
- Step 1: Open Module Settings — Go to your central dashboard setup panel toolbar and navigate to the Settings > Pay configuration workspace header.
- Step 2: Access Period Ledger — Locate the sub-tab card labeled Payroll Period (marked with a red rectangular frame) and click on it.
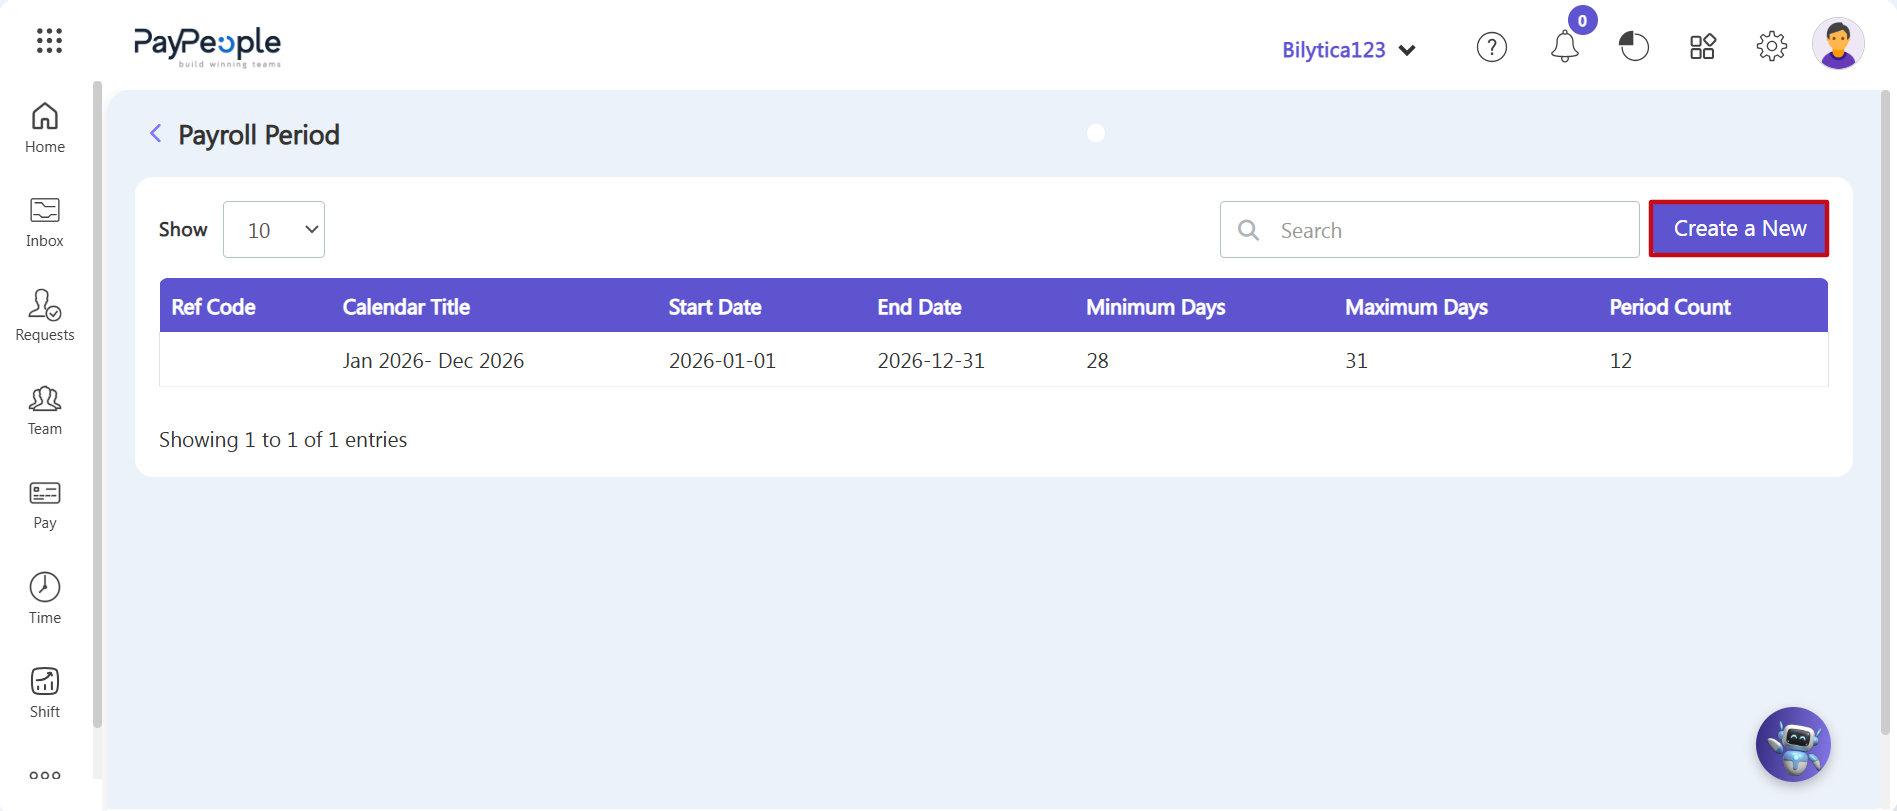
- Step 3: Open the Definition Wizard — The main summary ledger table will open on-screen, showing your current active timelines. Click the purple Create a New button (marked with a red border frame box) located on the upper-right toolbar.
2. Mapping Structural Cycles & Attaching Calendar Codes
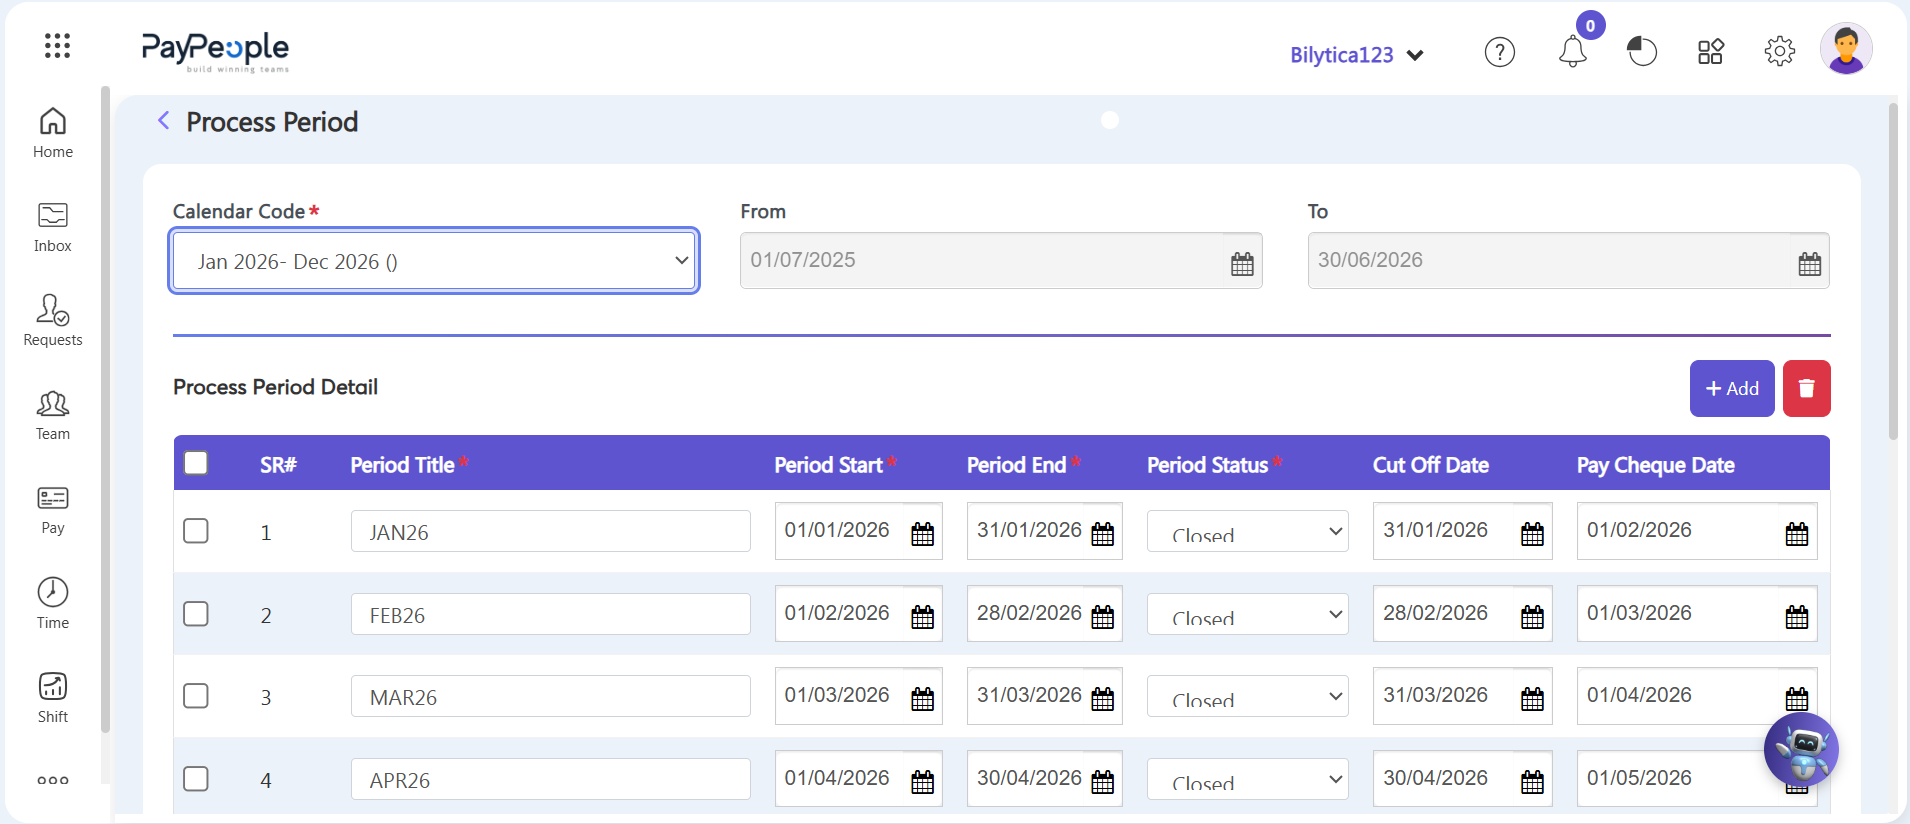
A dedicated Process Period setup form will open on-screen. Enter your parameters step-by-step to generate your timeline:
- Step 4: Select Pre-Configured Calendar — Click the Calendar Code* dropdown menu and select the structural template you created earlier (such as 'Jan 2026- Dec 2026').
- Step 5: Automated Grid Population — The system will instantly read your calendar constraints and automatically generate the complete twelve-month Process Period Detail grid rows at the bottom of the page.
3. Customizing Monthly Attendance Cut-Off Dates & Lifecycle Status
Administrators can adjust month-by-month accounting rules dynamically before finalizing payroll:
- Step 6: Freeze Past Months — If you are in the middle of a fiscal year and need to lock historical data to prevent retro-accrual changes, go to the specific month's row (such as JAN26 or FEB26). Click its Period Status* dropdown and change it from open to 'Closed'.
- Step 7: Adjust Attendance Cut-Off Dates — To change the sync cutoff dates for biometric time clocks or sheets for any month, go to the Cut Off Date column in that row. Use the calendar picker to select your alternative operational cutoff date.
- Step 8: Save and Synchronize — Review your period titles, start/end dates, and scheduled pay dates. Scroll to the bottom right and click the purple Save button. The system will instantly apply your overrides across all processing panels.
Cycle Management Compliance Tip: |