

Managing dynamic fuel benefit allocations requires a continuous connection between shifting regulatory/market prices and active employee benefit capacities. The PayPeople payroll core features an automated volumetric fuel processor that evaluates global price-per-liter parameters alongside employee-specific fuel limits to dynamically process localized transport allowances during payroll generation.
1. Navigating and Defining Global Fuel Rates
To configure or update the underlying fuel price framework matrix inside your system:
- Step 1: Open Settings Panel — Go to your administrator platform control panel interface and click on the Setup gear icon located in the upper-right toolbar.
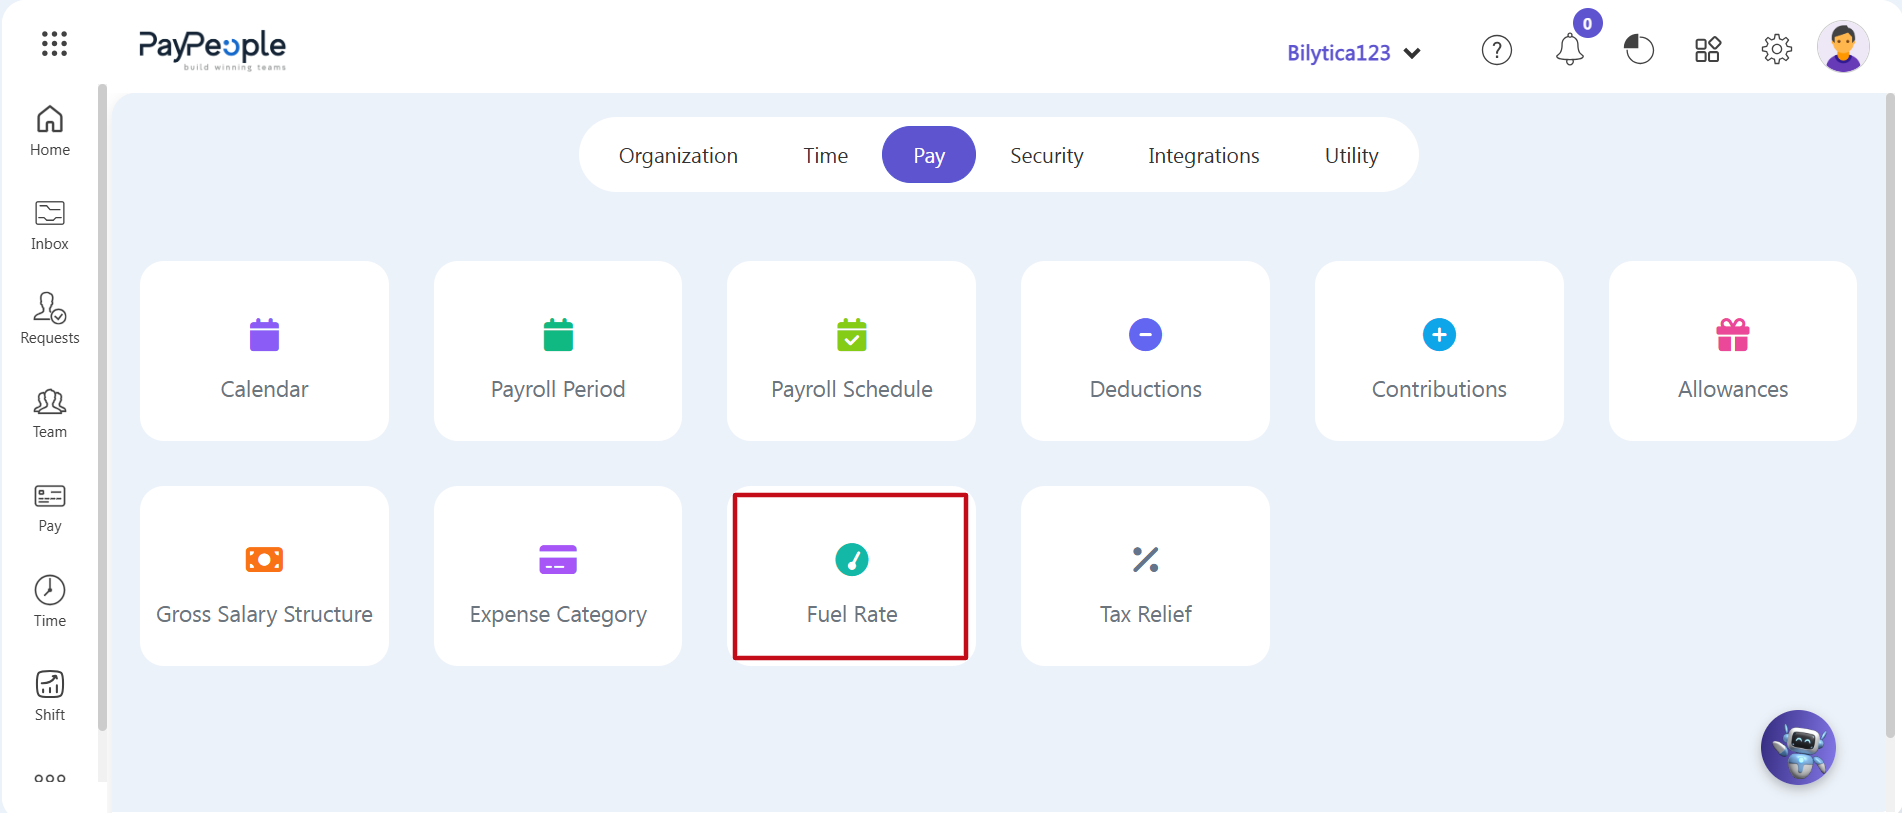
- Step 2: Locate Fuel Matrix Hub — Click on the horizontal Pay tab from the top setup menu, then select the centralized Fuel Rate module card (marked with a red rectangular frame box).
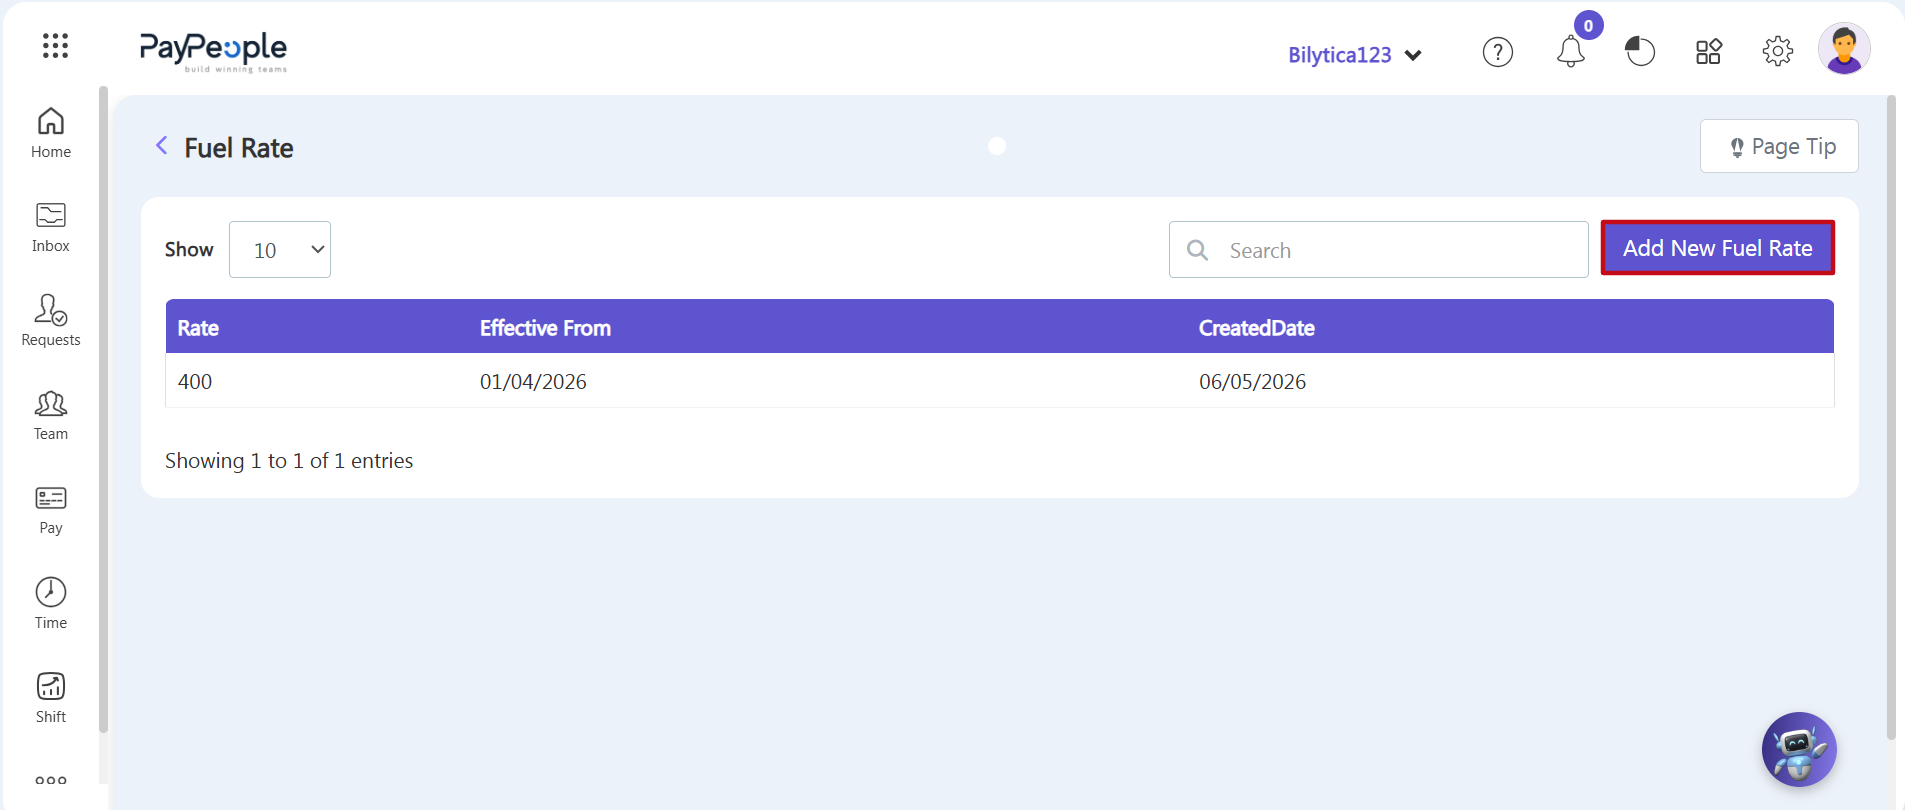
- Step 3: Open the Rate Entry Wizard — The main Fuel Rate ledger page will open, displaying your active rates. Click the purple Add New Fuel Rate button (marked with a red rectangular frame box) on the right side of the top toolbar.
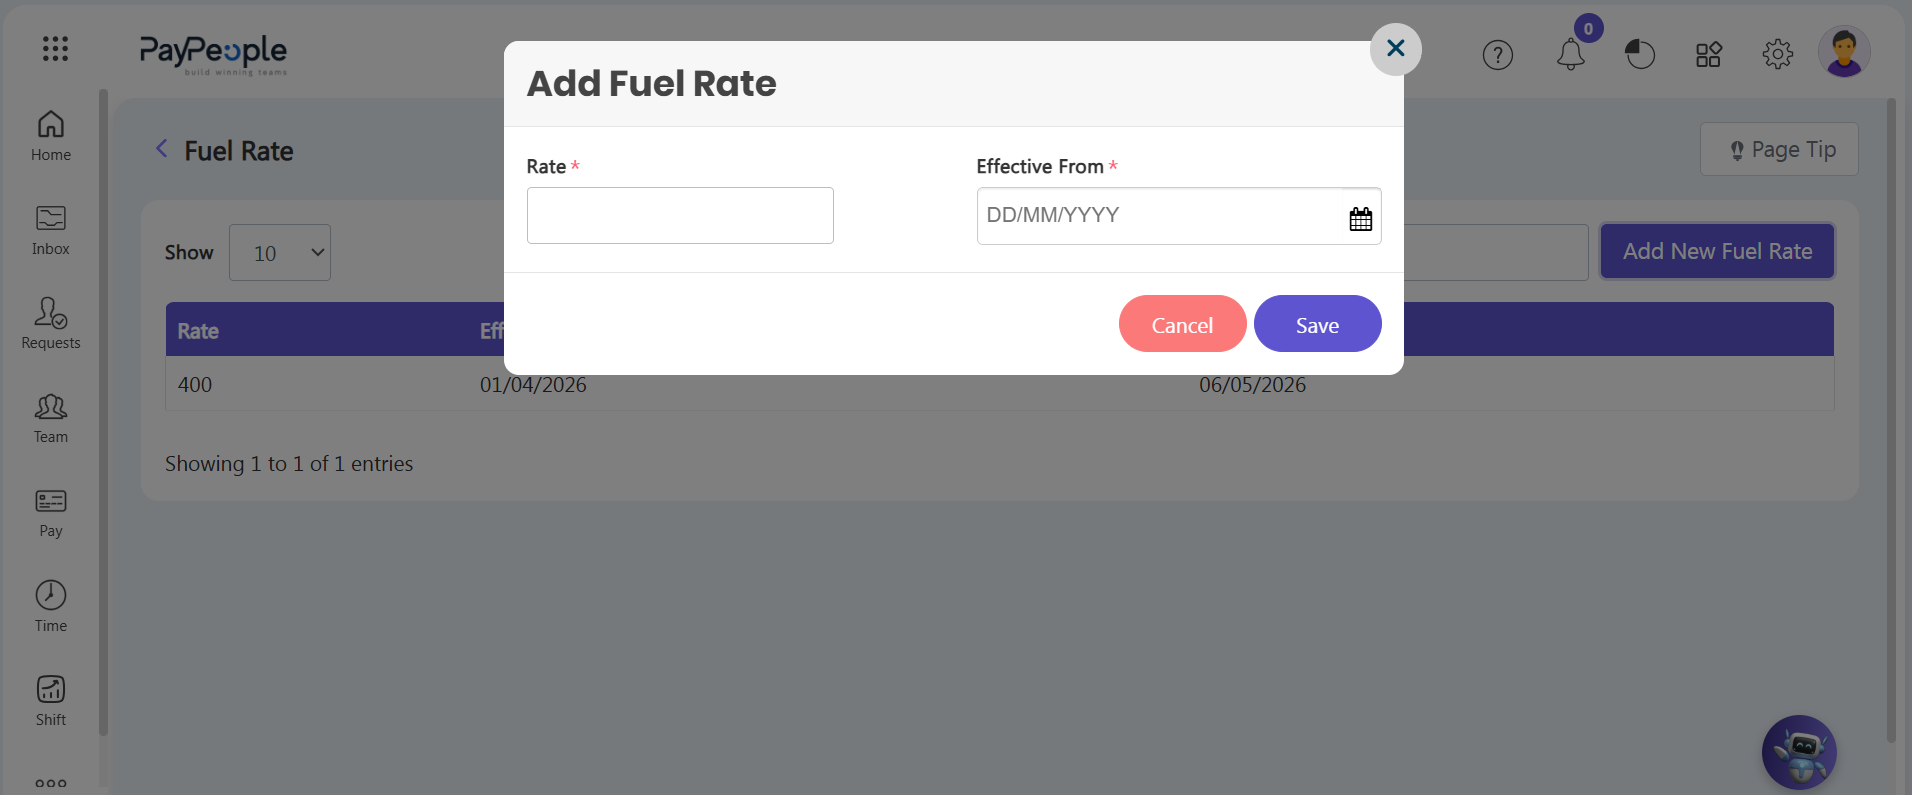
- Step 4: Enter Price and Start Date — An Add Fuel Rate popup window will open on-screen. Type the current price per liter in the Rate* input field, then use the Effective From* calendar box to set when this rate becomes active. Click the purple Save button to apply the changes.
2. Setting Fuel Liter Allowances on Employee Profiles
Once global fuel rates are set, administrators must specify individual volumetric capacities for eligible employees:
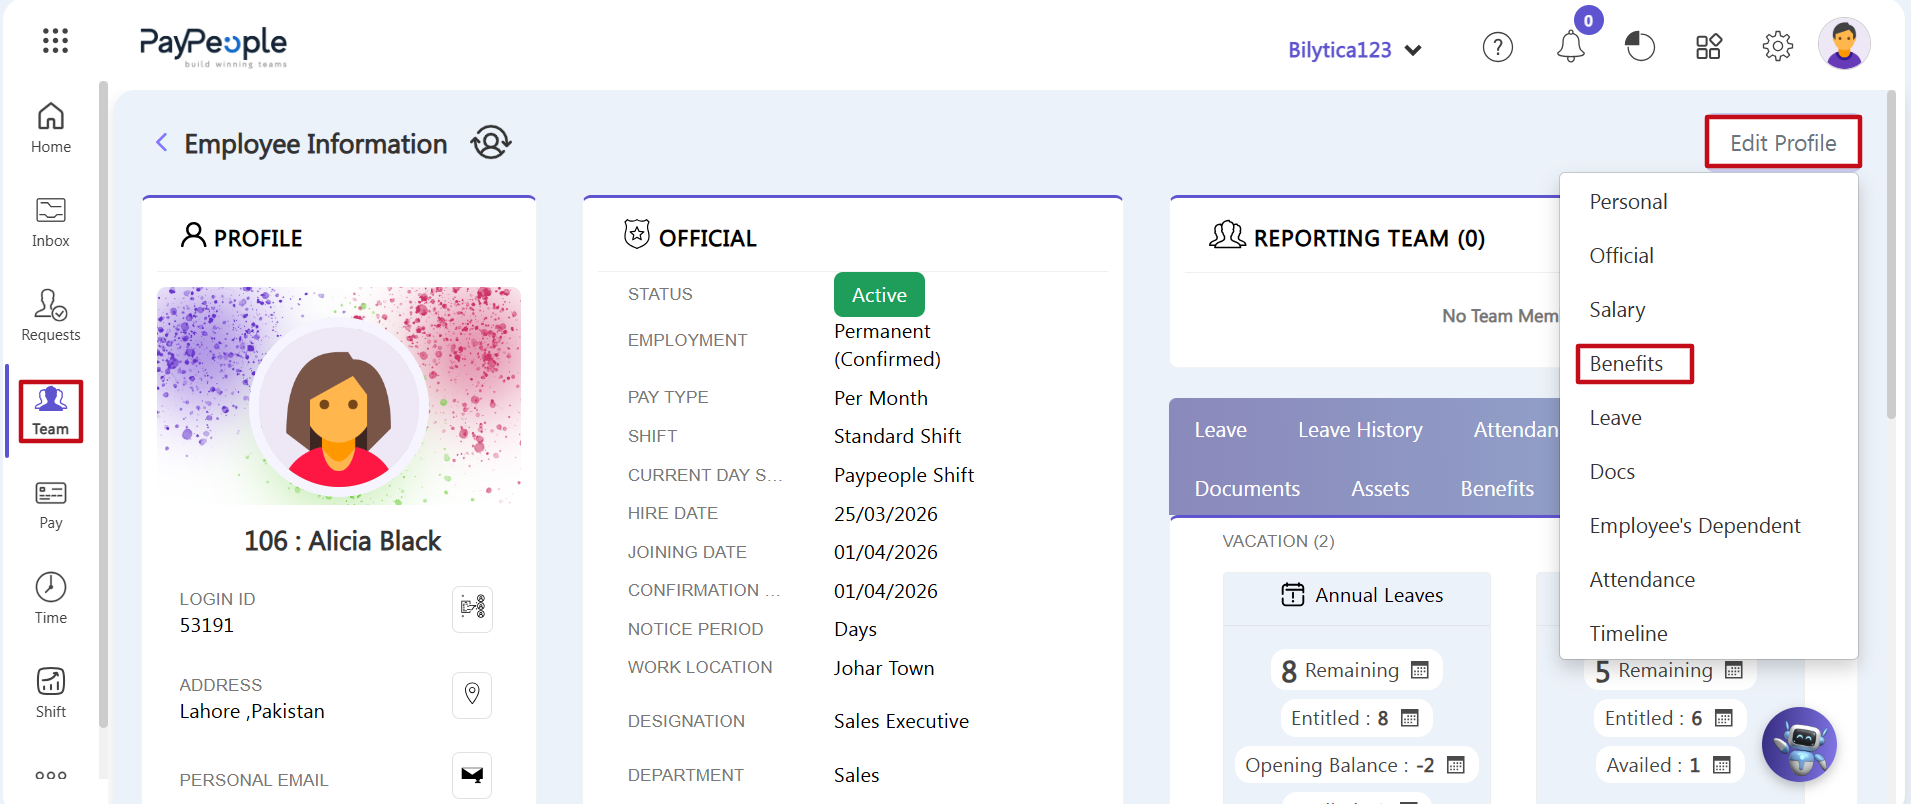
- Step 5: Go to the Employee File — Click on Team in the left-hand navigation menu, then search for and open the specific employee's profile dashboard.
- Step 6: Open the Benefits Section — Click the Edit Profile button on the profile toolbar (or click the profile options dropdown arrow) and select the Benefits category row.
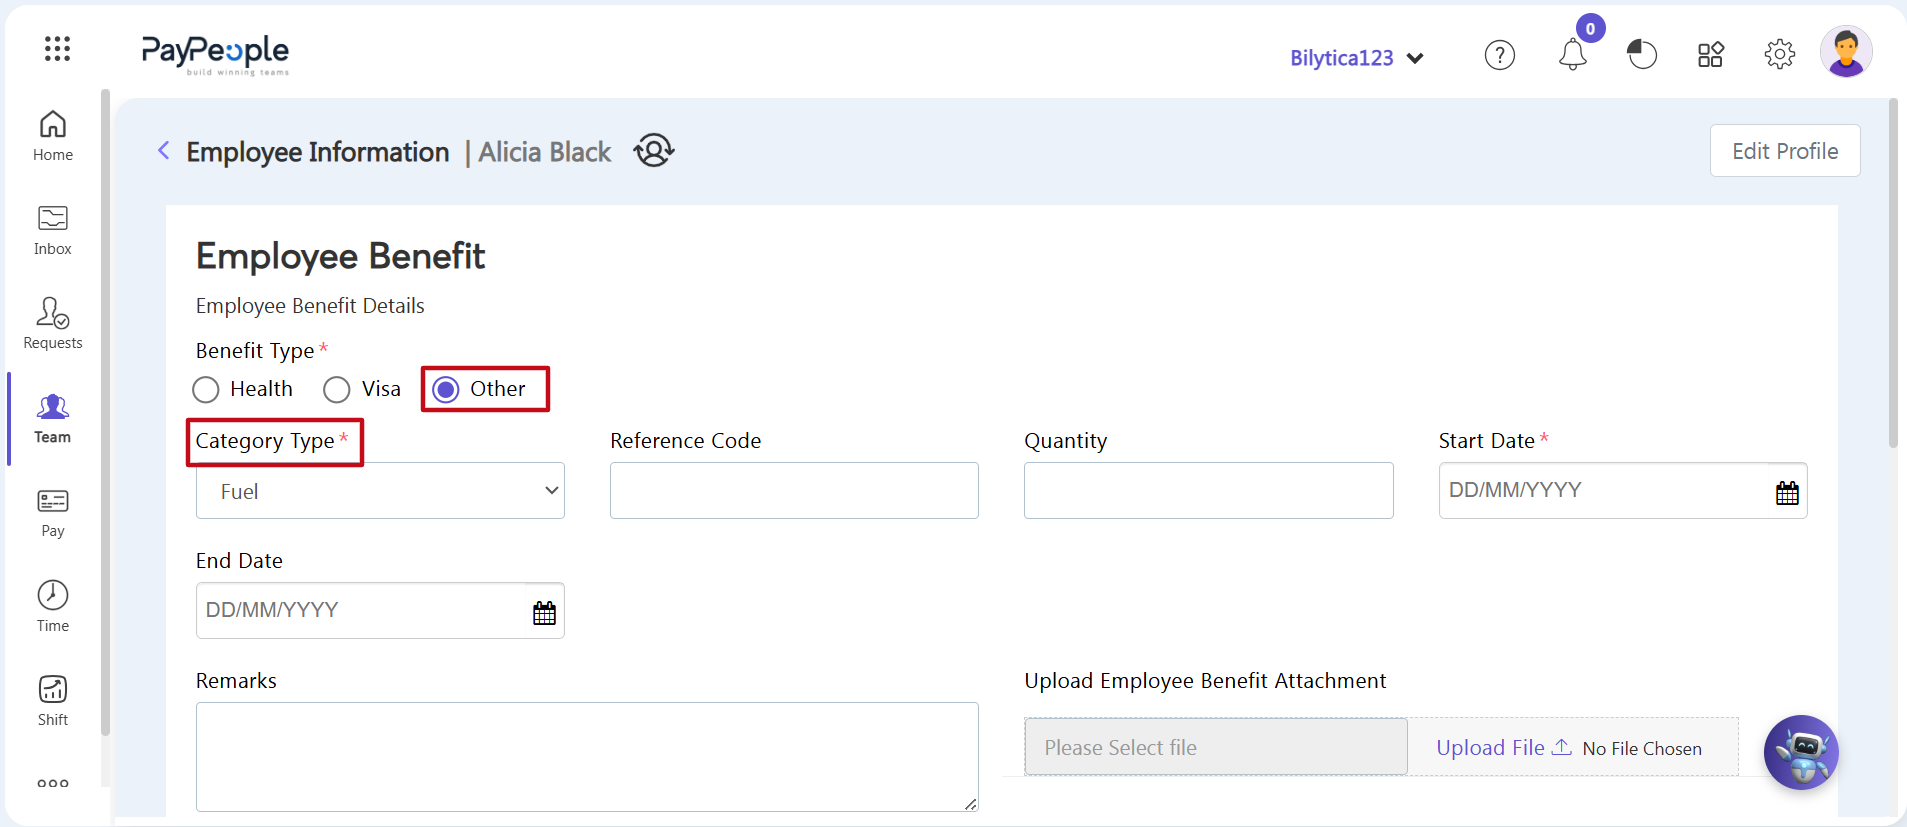
- Step 7: Configure Benefit Details — In the employee benefits panel, enter the following parameters:
- Benefit Type: Click the 'Other' radio button.
- Category Type:* Open the dropdown menu and select 'Fuel'.
- Quantity: Type the maximum total number of liters assigned to this employee directly into the data input field.
- Timeline Dates: Use the calendar pickers to set the exact Start Date* and optional End Date for the benefit.
- Step 8: Save and Sync — Review the assigned liters, effective dates, and any remarks. Click the green Save button. The system will immediately pair these liters with your global fuel rates to dynamically compute fuel allowances during monthly payroll runs.
Volumetric Fuel Processing Optimization Pro-Tip: |