

1. Navigating to the Payroll Configuration Hub
To configure structural policies and enter data required for payroll preparation:
- Step 1: Open Module Navigation — Go to the master system control toolbar and click on the Setup icon (gear ) in the top navigation bar ribbon.
- Step 2: Access the Pay Dashboard — From the top horizontal setup categories menu, locate and click on the tab labeled Pay (marked with a red box). This workspace opens all available sections for payroll configuration, including Payroll Period, Payroll Schedule, Deductions, Contributions, and Allowances.
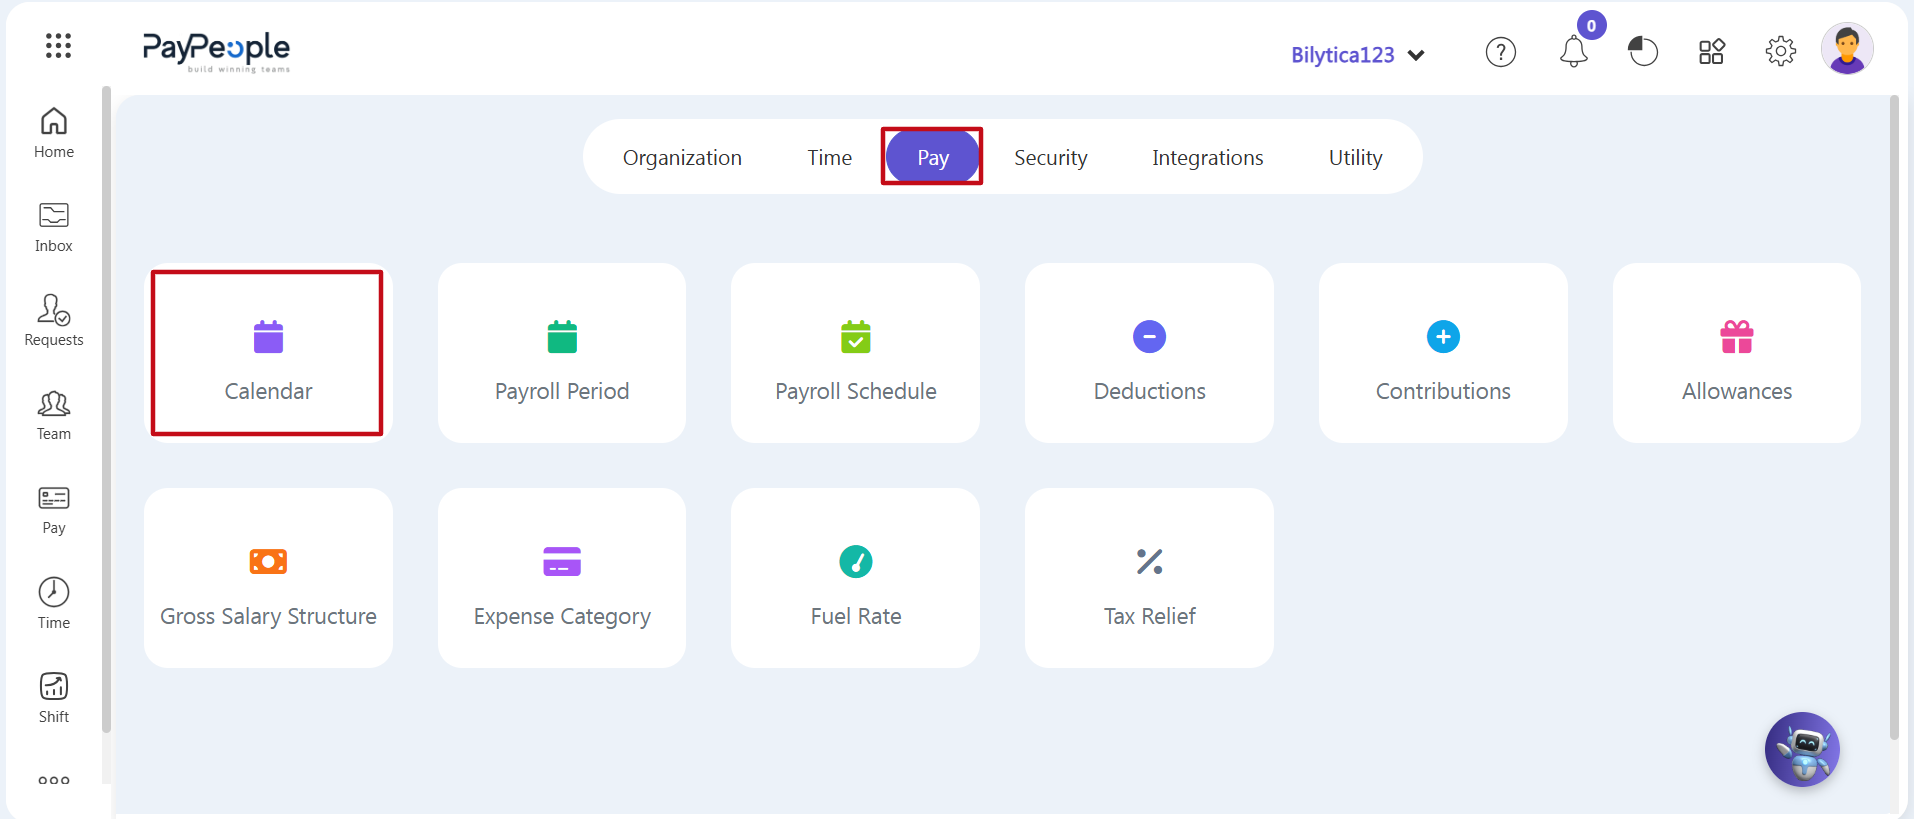
- Step 3: Open the Calendar Directory — Locate the sub-tab card labeled Calendar (marked with a red rectangular box) and click on it.
- Step 4: Start the Creation Wizard — The main Calendar summary table will open, showing your past setups. Click the purple Create a New button (marked with a red border box) in the top-right toolbar.
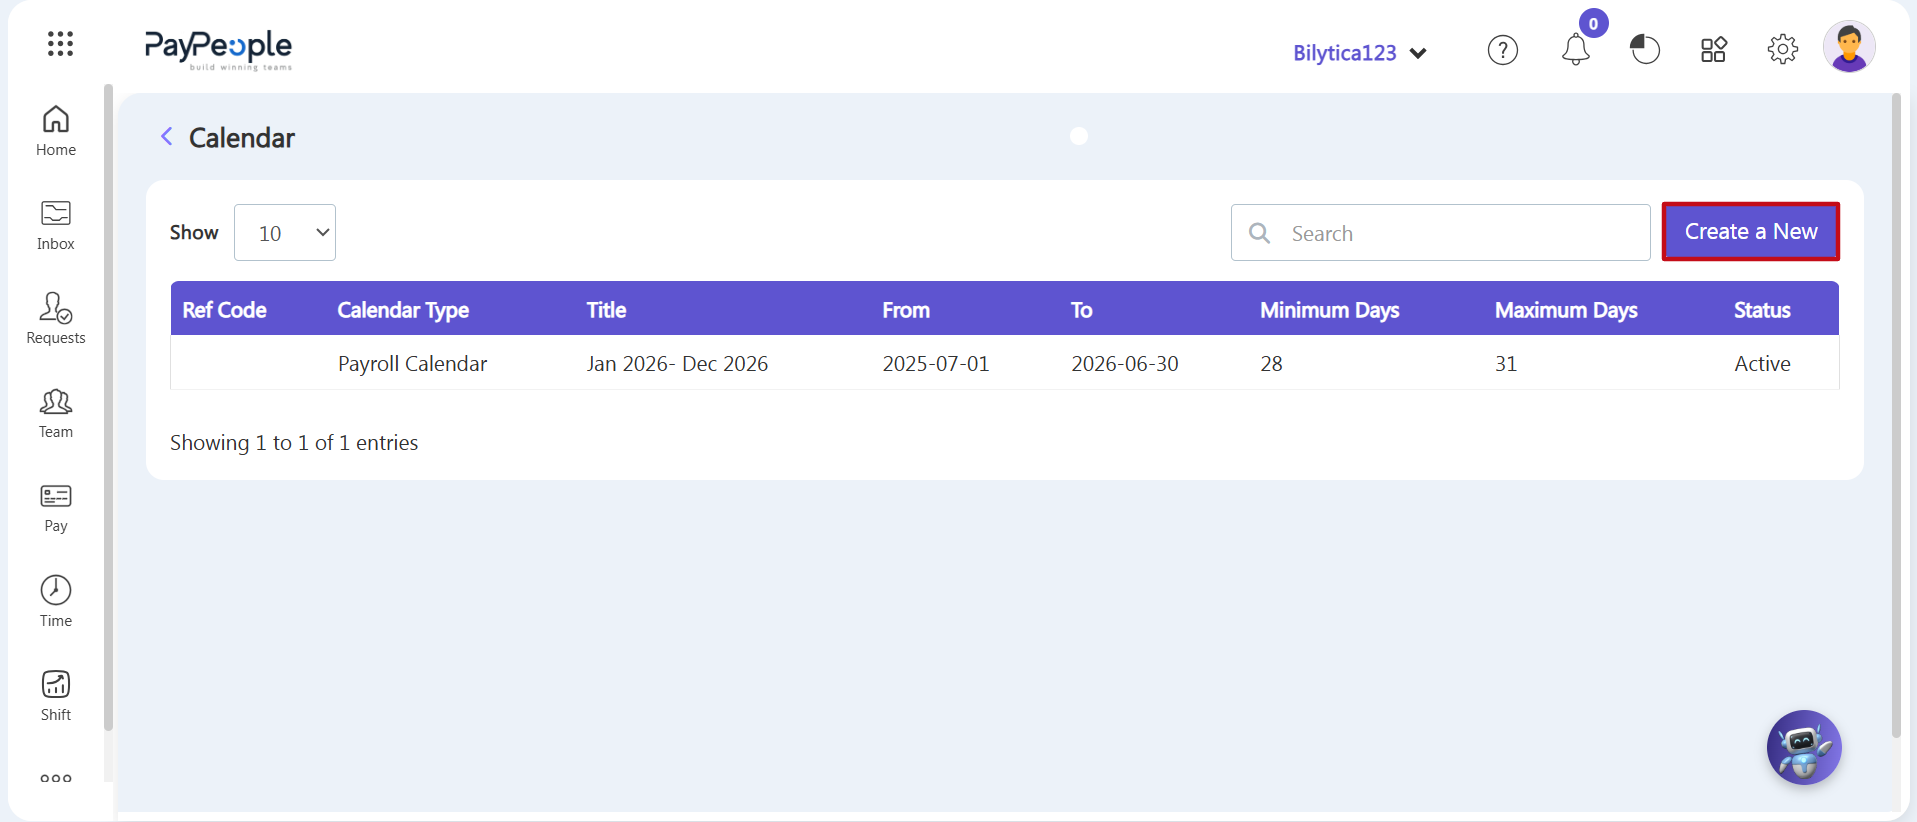
2. Filling Out the Add Calendar Form
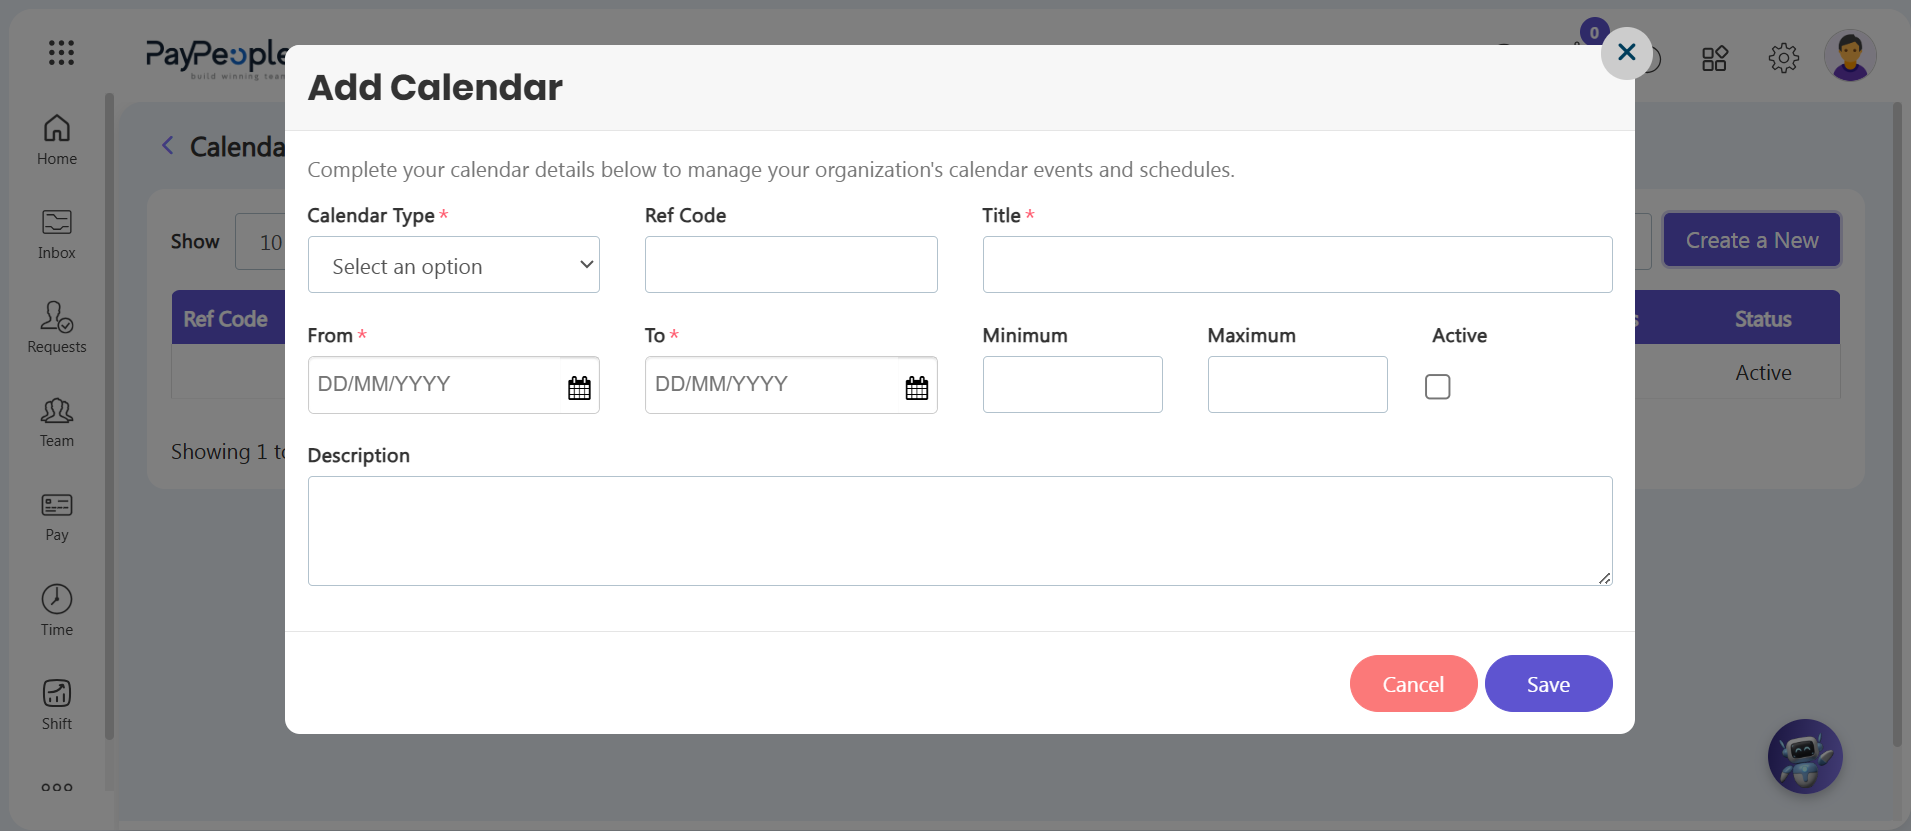
An Add Calendar popup window will open on-screen. Enter the required payroll details step-by-step:
- Step 5: Select Calendar Type — Open the Calendar Type* dropdown menu and choose the classification that matches your organizational structure.
- Step 6: Enter a Reference Code — Type a custom internal code into the optional Ref Code text field if needed for your company's workflows.
- Step 7: Name Your Calendar — Type a clear, descriptive name in the Title* input box to label this calendar policy (e.g., 'Payroll Calendar' or 'Jan 2026- Dec 2026').
- Step 8: Set the Calendar Dates — Click the From* and To* date fields to set your payroll tracking boundaries. For example:
- Standard Calendar Year: Enter '01/01/200X' in the From field and '31/12/200X' in the To field.
- Fiscal Year: Enter '01/07/200X' in the From field and '30/06/200X' in the To field, or use your organization's custom date range.
- Step 9: Set Minimum and Maximum Day Limits — Enter your processing day limits in the designated boxes to outline your payroll cycles:
- Minimum Field: Enter the lowest number of days allowed in a processing cycle (e.g., '28' to accommodate February).
- Maximum Field: Enter the highest number of days allowed in a cycle month (e.g., '31' for full months).
- Step 10: Activate and Save — Check the Active box to turn the calendar on immediately. Add any extra notes in the Description text box if desired, then click the purple Save button in the bottom right corner to complete the setup.
Core Structure Implementation Tip: |