

Defining standardized expense categories is necessary to regulate corporate reimbursement workflows and provide structured channels for employee out-of-pocket claims. The PayPeople framework allows setup operators to pre-define claim types, establish distinct payout channels, apply baseline timelines, and enforce supporting receipt documentation rules safely.
1. Navigating to the Expense Category Directory
To configure structural claims parameters and register a fresh operational category:
- Step 1: Open System Settings — Go to your main corporate platform dashboard interface and click on the primary Setup gear icon located in the upper-right control toolbar.
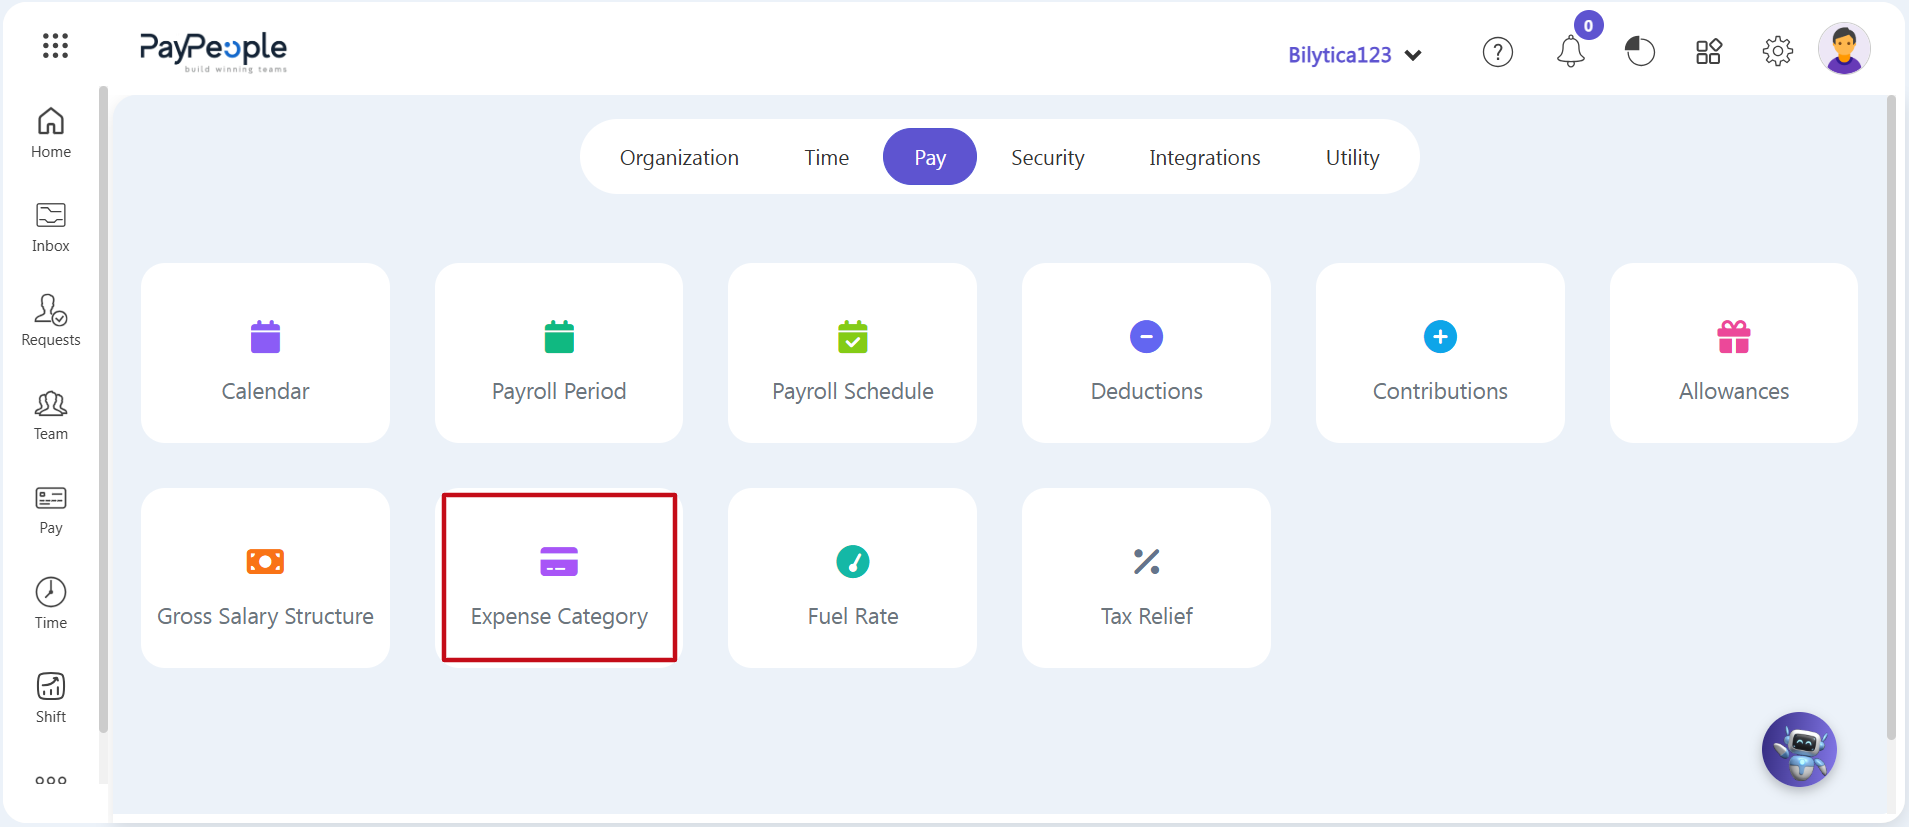
- Step 2: Enter the Pay Dashboard — Click on the horizontal Pay tab inside the secondary categories top setup banner. Locate and click on the Expense Category card module (marked with a red rectangular border frame).
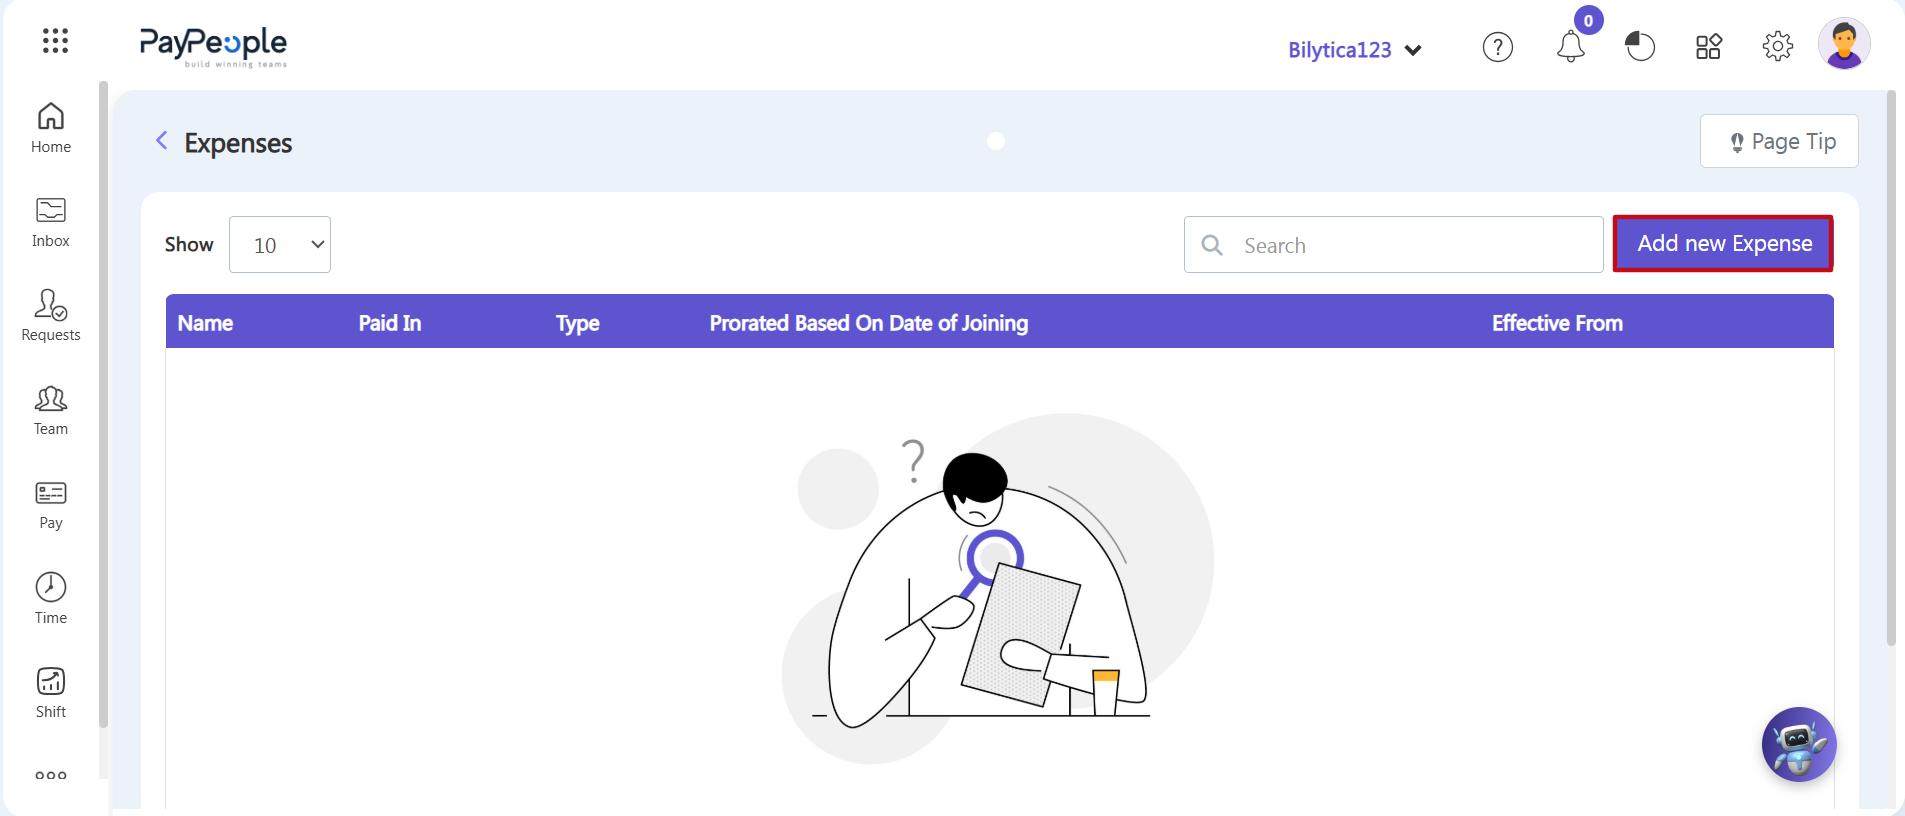
- Step 3: Open the New Category Wizard — The main directory index table will open on-screen. To create a new category definition, go to the upper-right toolbar and click the purple Add new Expense button (marked with a red rectangular frame box).
2. Filling Out the Add Expenses Form
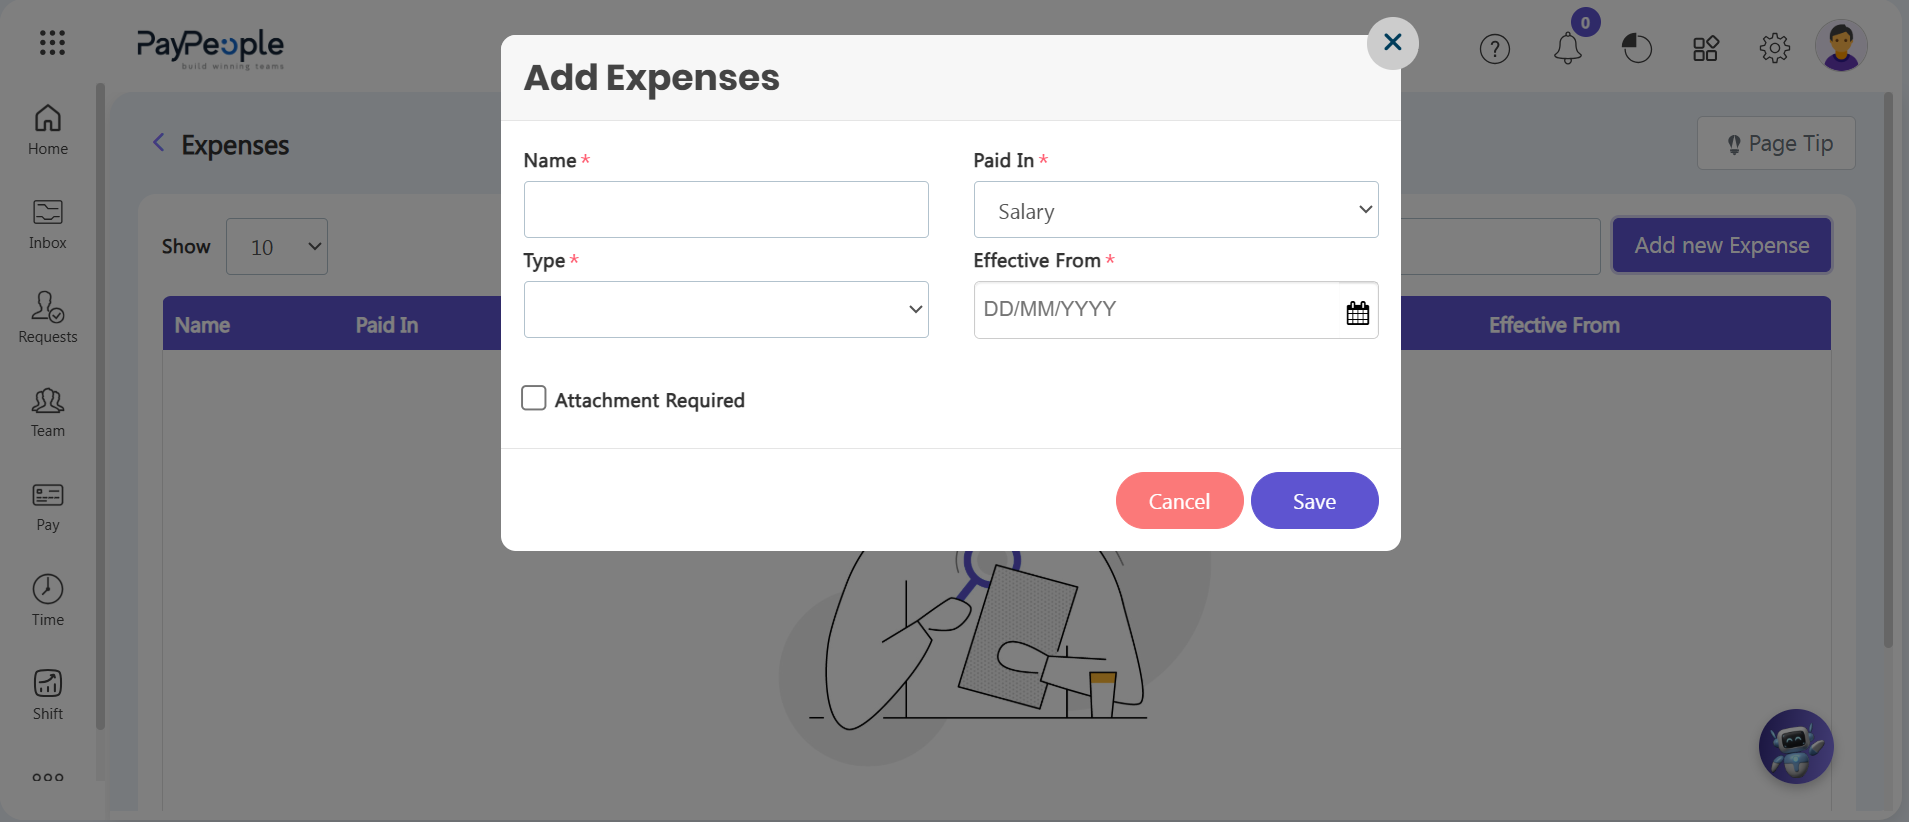
An Add Expenses popup form will open on-screen. Enter your configuration details step-by-step:
- Step 4: Name the Expense — Type a clear name in the Name* box for employees to select when making a claim (e.g., 'Fuel Reimbursement').
- Step 5: Choose the Payout Method — Open the Paid In* dropdown menu to choose how the claim is paid:
- Salary: Pays the approved amount through the employee's regular monthly payroll.
- Cash: Pays the claim as a separate cash disbursement. Note: Cash claims bypass the core payroll calculation engine entirely.
- Step 6: Select the Expense Type — Use the Type* dropdown menu to classify the expense as Reimbursement, Food, Travel, or Other.
- Step 7: Set the Start Date — Click the Effective From* calendar box to pick the exact date this expense category becomes active for employees.
- Step 8: Require Receipts — Check the Attachment Required box if employees must upload a picture of their receipt to submit a claim.
- Step 9: Save Your Settings — Review your entries and click the purple Save button in the bottom-right corner to make the category live.
Policy Optimization Audit Tip: |