

Adding new team members to PayPeople is a quick and straightforward process. The system guides you step-by-step through an 8-part form to ensure all essential details are recorded completely.
1. Open the Team Directory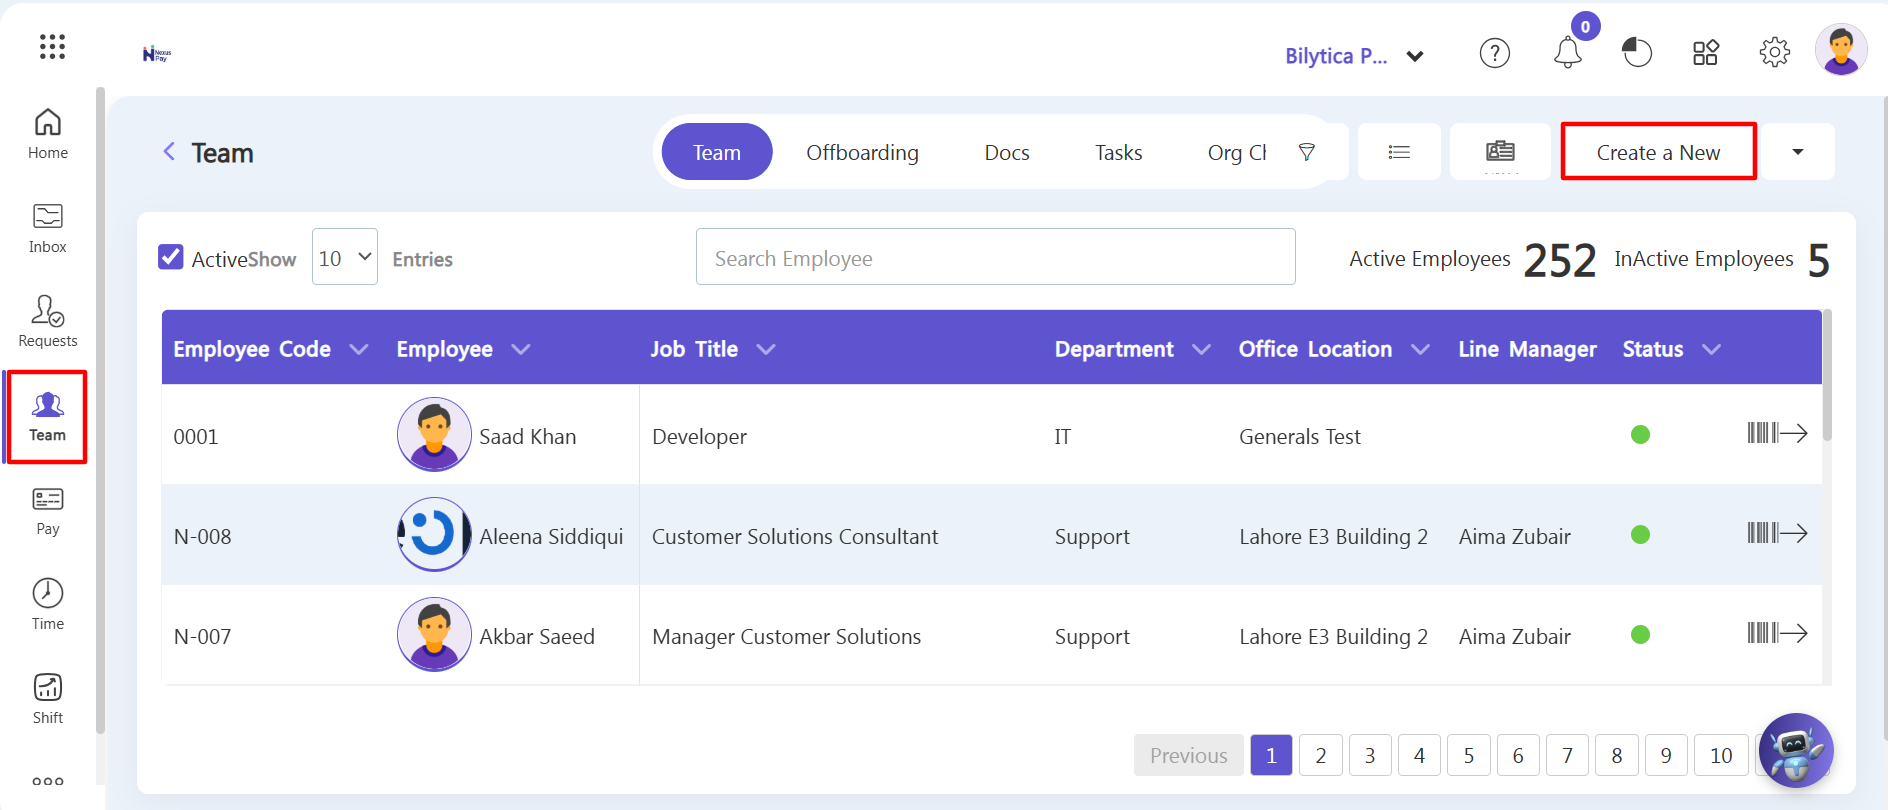
First, look at the left sidebar menu and click on Team (highlighted in red). This opens your employee directory page where you can see:
• Active Employees: The total number of staff members currently working in your company right now (for example: 15).
• InActive Employees: Former staff members who have left the company, but their historical files and payroll tax records are kept safe for records (for example: 2).
• Search Bar: You can type an employee's name, code, or department here to find their profile instantly.
• Create a New Button: The red box on the top right. Click this button to start adding a new person manually.
2. Filling the 8 Employee Sections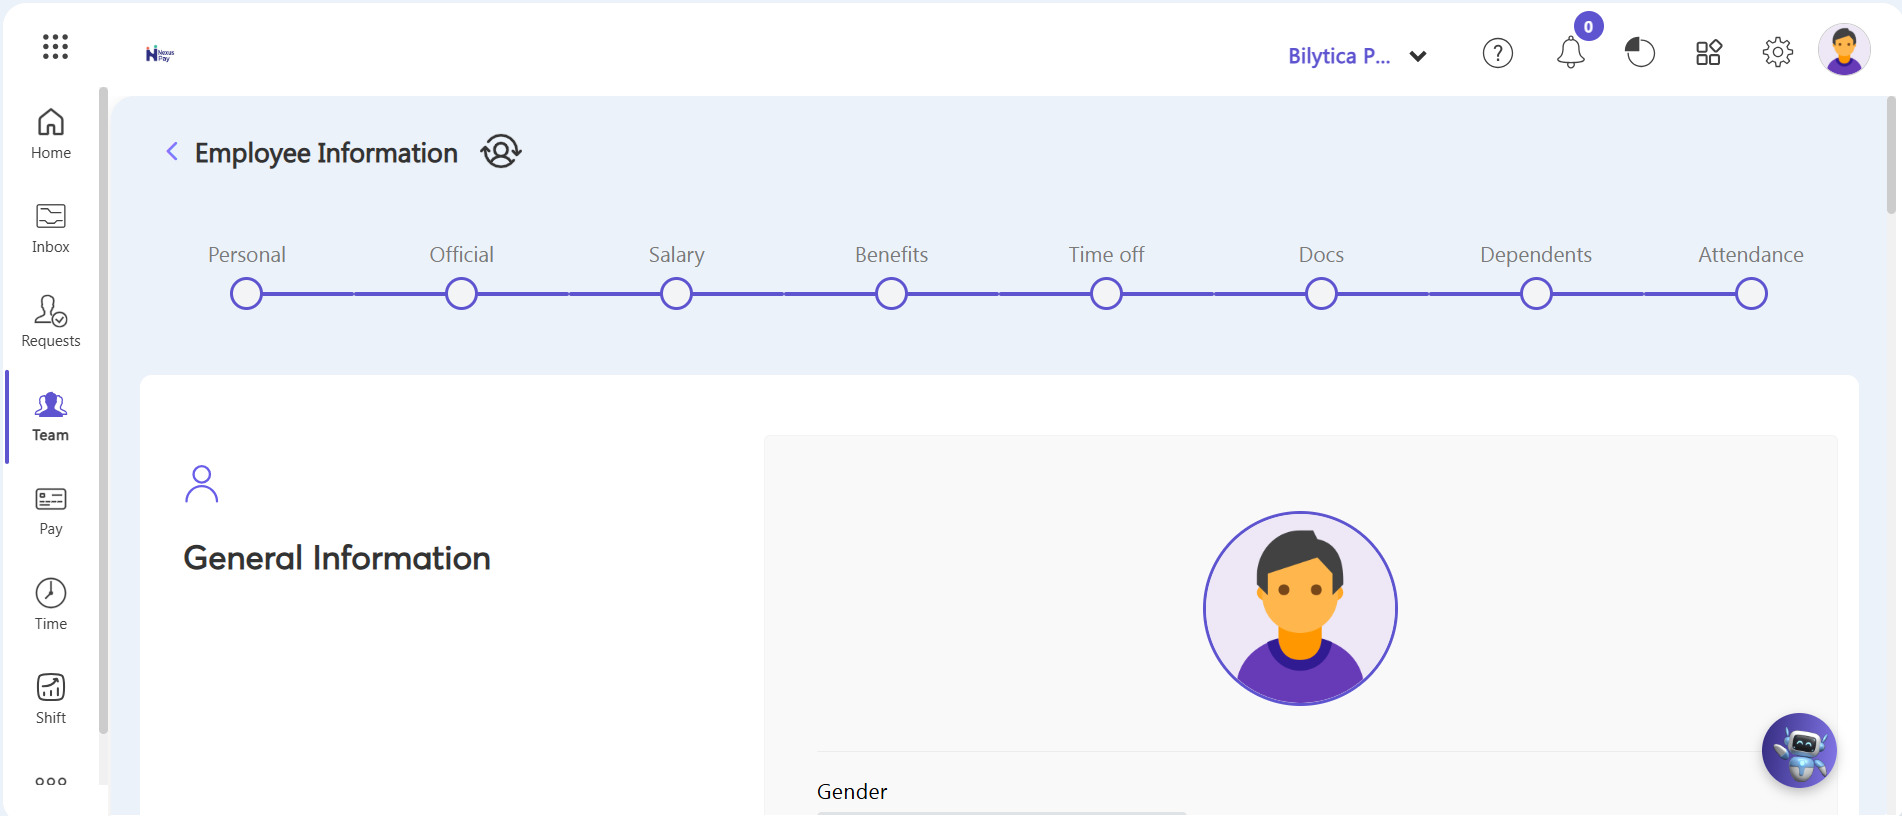
When you click 'Create a New', a top progress bar will guide you through 8 easy steps from left to right. Just fill in the details for each step:
1. Personal: Type their basic everyday details like full name, gender, date of birth, and personal phone number.
2. Official: Enter their workplace details like their unique Employee Code, work email, Job Title, Department, and who their Line Manager is.
3. Salary: Set up their pay details. Choose if they get a Monthly Salary or hourly wage, add their Bank Account info, and select their tax type.
4. Benefits: Add any extra work perks they get, like a fuel allowance, medical support, or phone bill allowances.
5. Time off: Assign their holiday rules. This automatically tells the system how many casual leaves, sick leaves, or annual leaves they are allowed to take.
6. Docs: Upload safe digital copies of their documents, like their signed employment letter, ID card, or university degree certificates.
7. Dependents: Add details of their family members (like parents, spouse, or kids). This is helpful for health insurance or emergency contacts.
8. Attendance: Select their daily work shift timing, machine ID, or enable mobile/web check-in.
3. Finishing and Saving the Profile
Once you have moved through all sections and finished step 8 (Attendance), simply click the Save button at the bottom. The profile is now fully created and active!
Fast Golden Rule: |