

Combining monthly attendance records into a single, verified summary ensures your upcoming payroll stays error-free. The PayPeople system includes two main tools for this: the Time Summary Engine to check full-month records and manage manual deductions before running payroll, and the Project Time Sheet Hub to let workers log daily hours spent on specific company projects.
1. Reviewing and Adjusting Pre-Payroll Time Summaries
To pull a complete monthly attendance summary and adjust employee deductions before running payroll:
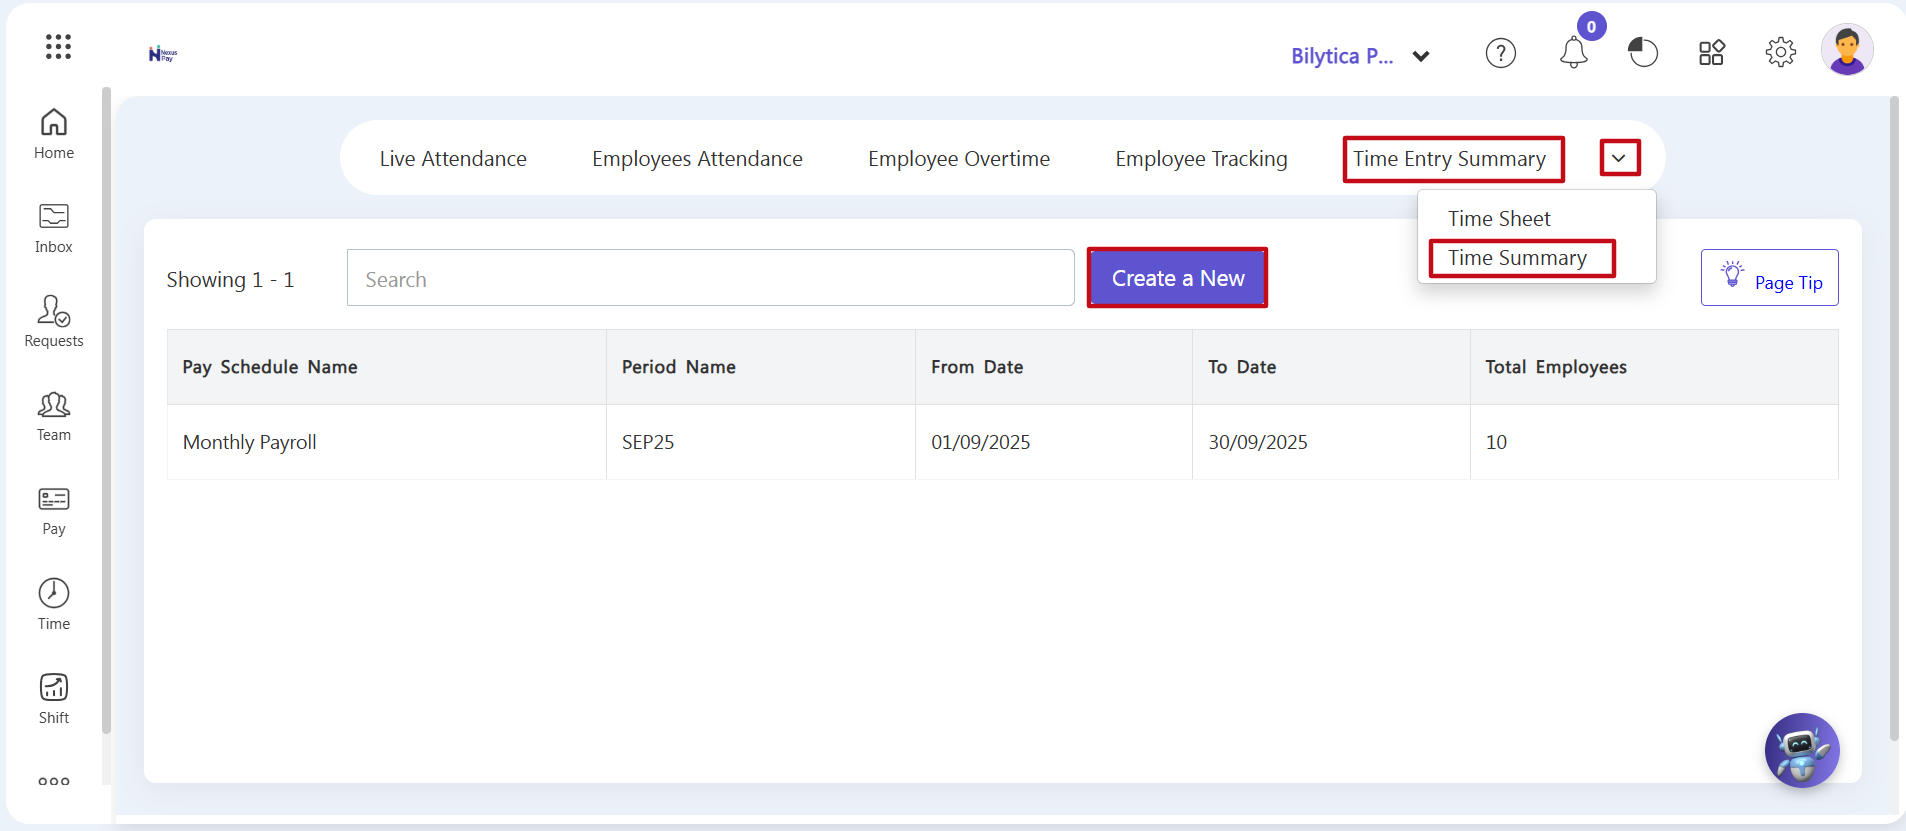
- Step 1: Open the Time Summary Screen — Click on the purple Time icon on the left-hand navigation bar. Go to the top menu bar, click the small down-arrow dropdown arrow next to Time Entry Summary, and select Time Summary from the list.
- Step 2: Start a New Calculation Sheet — On the main summary page, click the purple Create a New button.
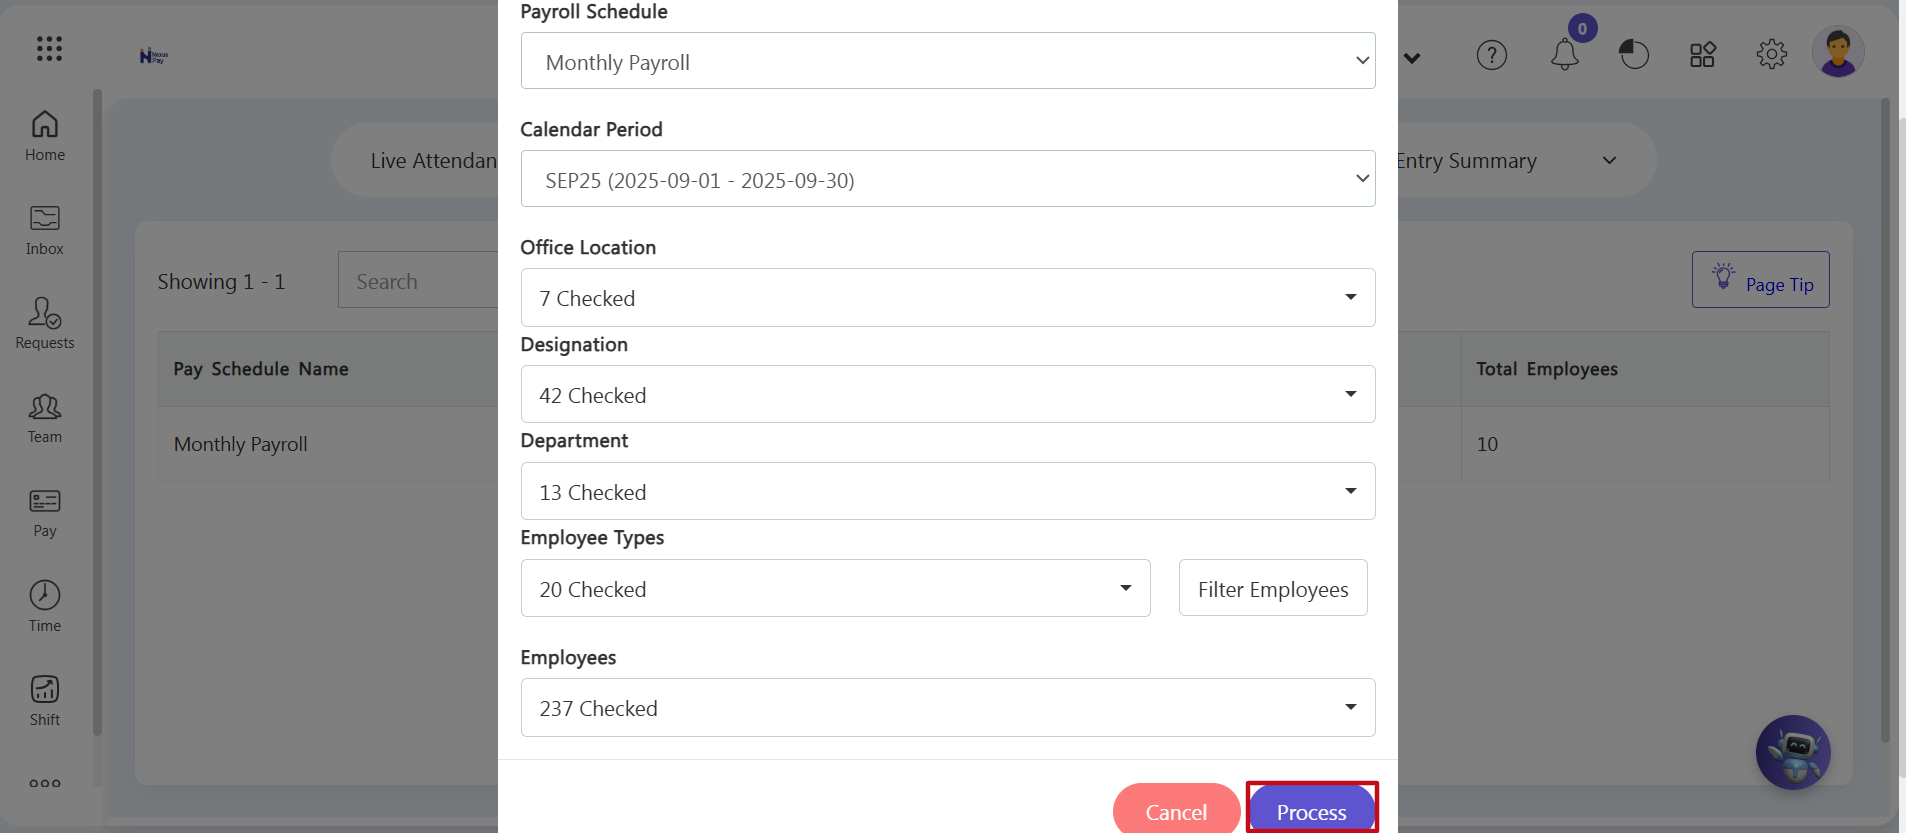
- Step 3: Set Your Filtering Options — A setup wizard window will pop up over the screen. Choose your specific options step-by-step to define exactly what your report should cover:
- Core Boundaries: Select your main payroll track (such as 'Monthly Payroll') and the corresponding calendar block (such as 'SEP25').
- Demographic Slices: Filter your data by office location, job designation, department, employee type, or check the boxes next to specific employee names.
- Step 4: Load and Compile the Data — Click the purple Process button at the bottom of the wizard window to gather and calculate the attendance numbers in the background.
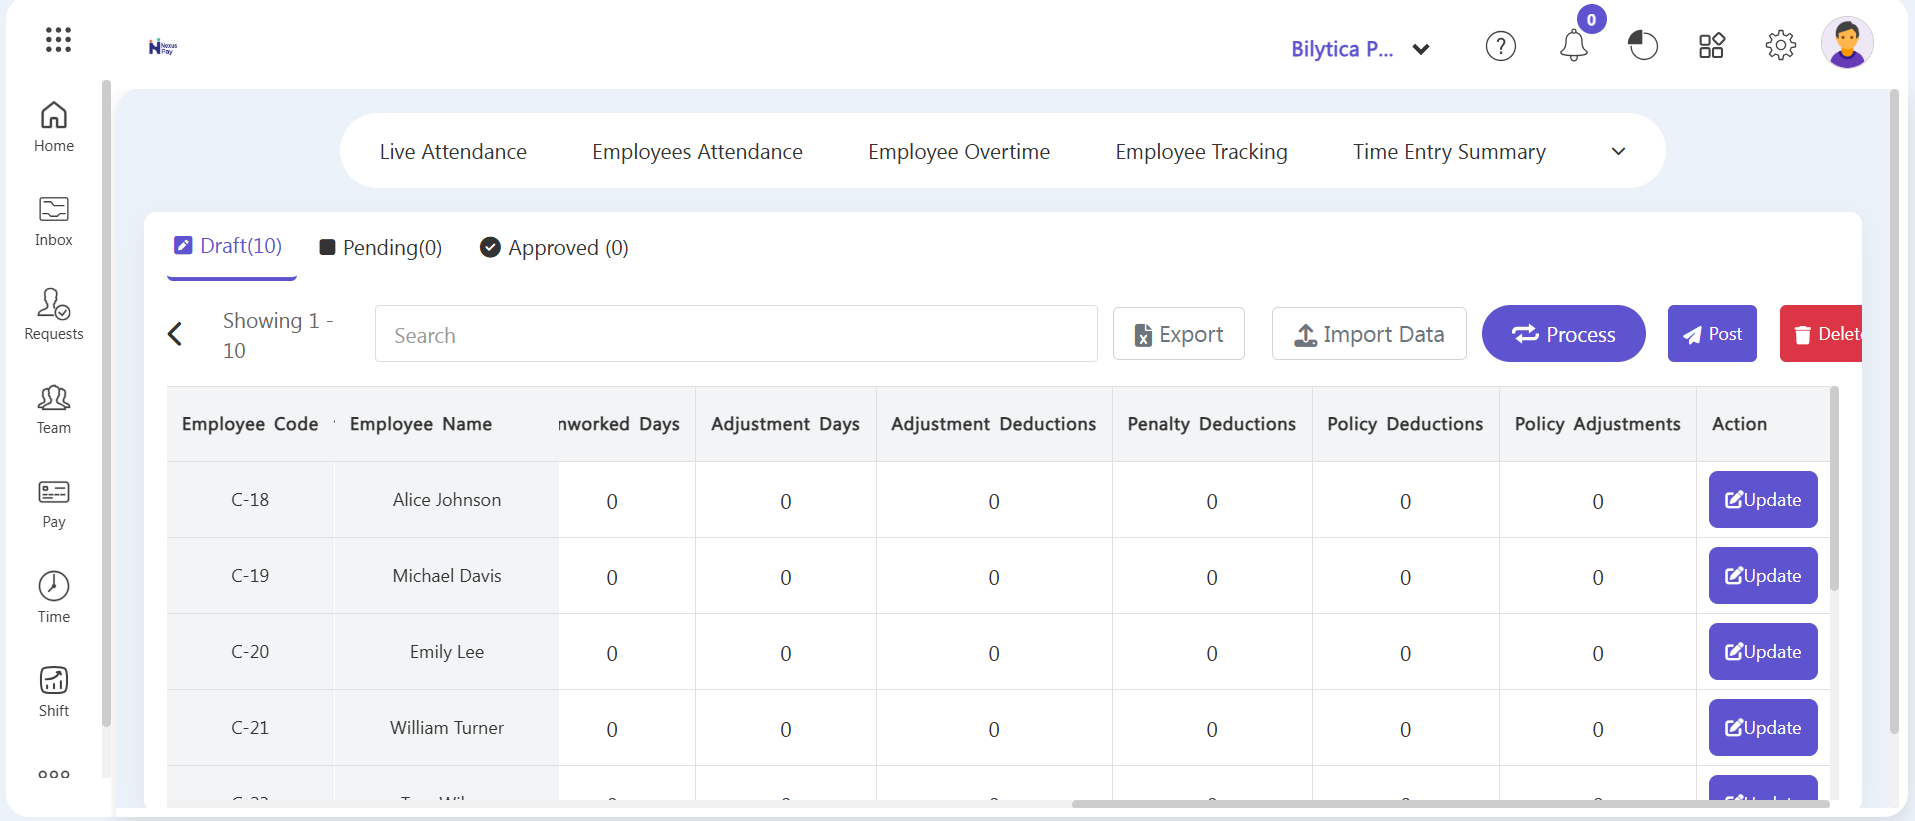
- Step 5: Edit Draft Records — The screen will refresh to show a multi-column tracking grid under the Draft tab. Review the columns for Unworked Days, Adjustment Days, Adjustment Deductions, and Penalty Deductions. To make changes:
- Edit a Cell: Click the blue Update action button next to the employee's name.
- Recalculate: Type in your corrected numbers and click the purple Process button to save the updates.
- Step 6: Move to Pending Status — Once you have verified all your edits, click the purple Post button on the top toolbar to move the time summary from the Draft stage to the Pending stage.
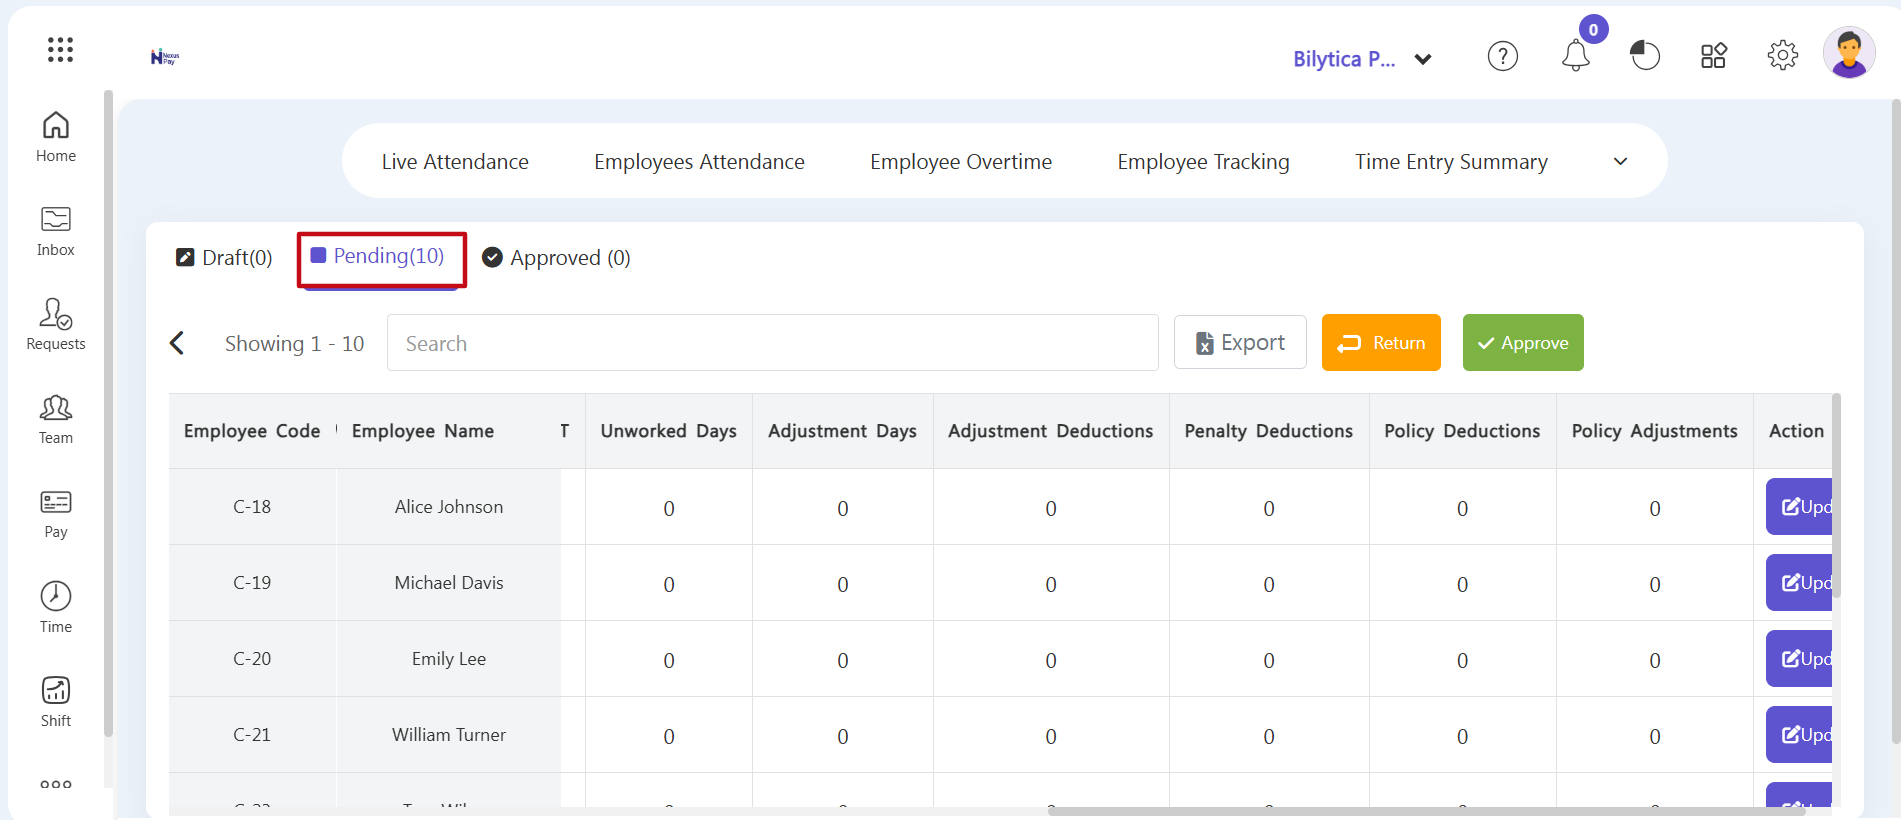
- Step 7: Finalize Pending Balances and Approve — Click on the adjacent Pending sub-tab to open the approval workbench. If any entries require corrections, click the orange Return button to send the summary back to the editable Draft stage. If all data is clean and correct, click the green Approve button to finalize it. Your time summary is now locked, allowing you to run your monthly payroll directly from this processed dataset.
2. Administering Project Time Sheet Tracking
For companies running multi-project ecosystems, this feature allows administrators to monitor exactly how many hours are spent on each assignment by providing a space for employees to track daily logs:
Step 8: Launch the Time Sheet Directory — Tap the top horizontal navigation dropdown tool and select the Time Sheet option card.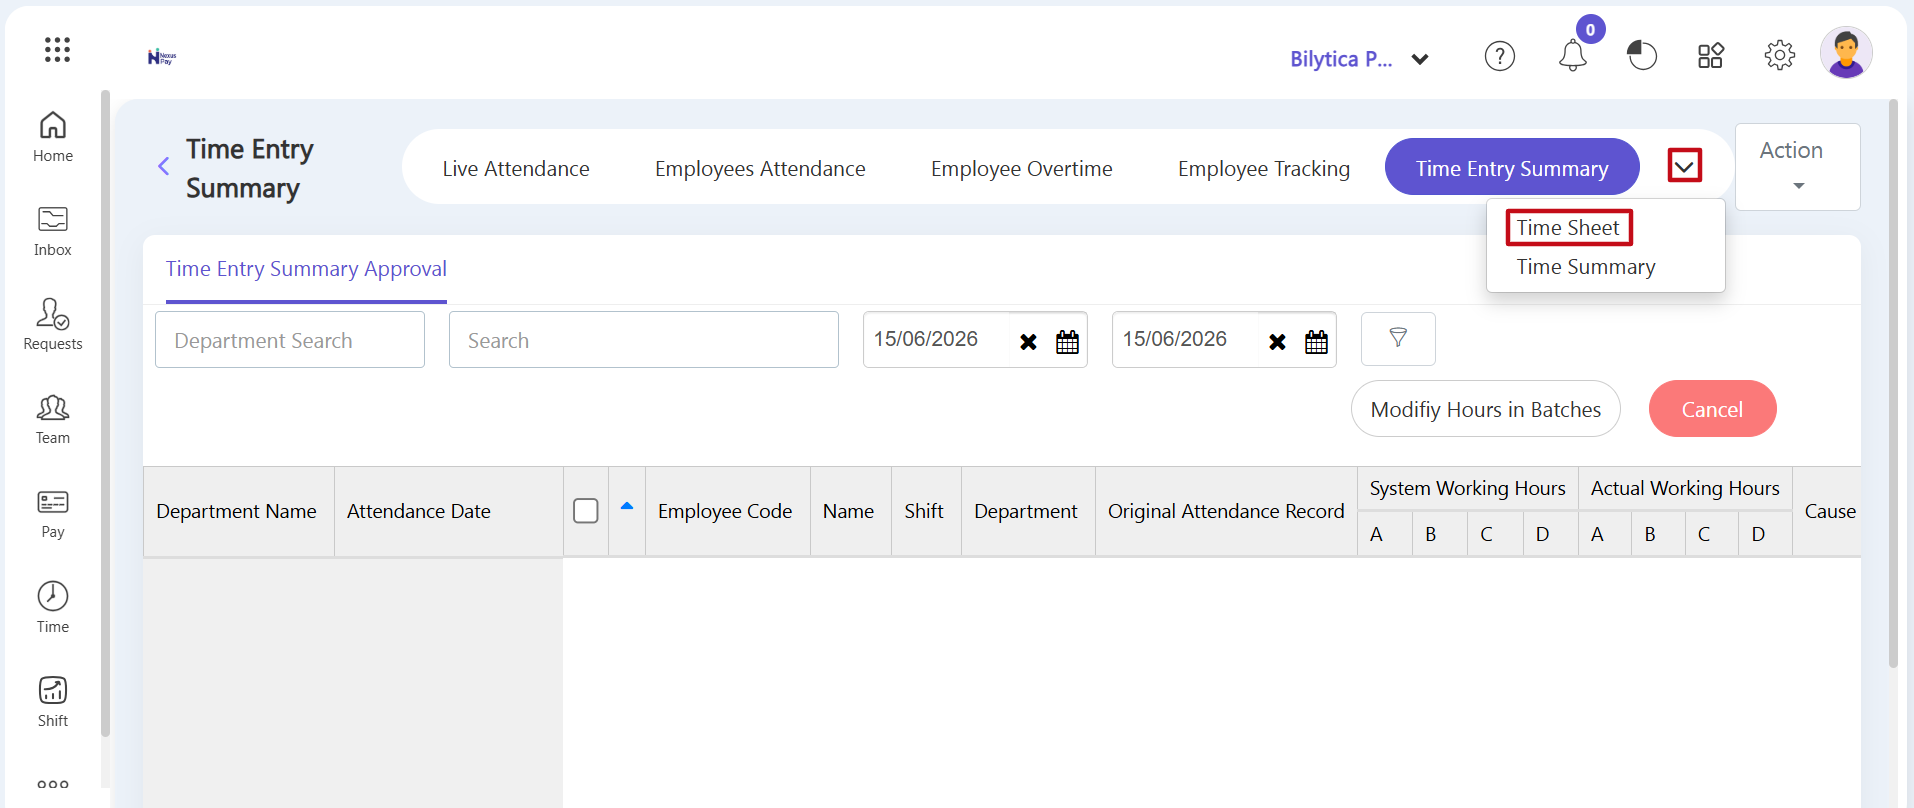
Step 9: Manage Time Logs — The primary monthly timeline ledger view container page will populate. To add new project tracks, use the top controls:
• Manual Entry: Click on the Add Time Log dropdown arrow.
• Bulk Operations: Select Bulk Time Log to open an excel upload or multi-line configuration grid. Alternatively, tap the chevron icon button next to an individual employee name string to open their project grid dashboard.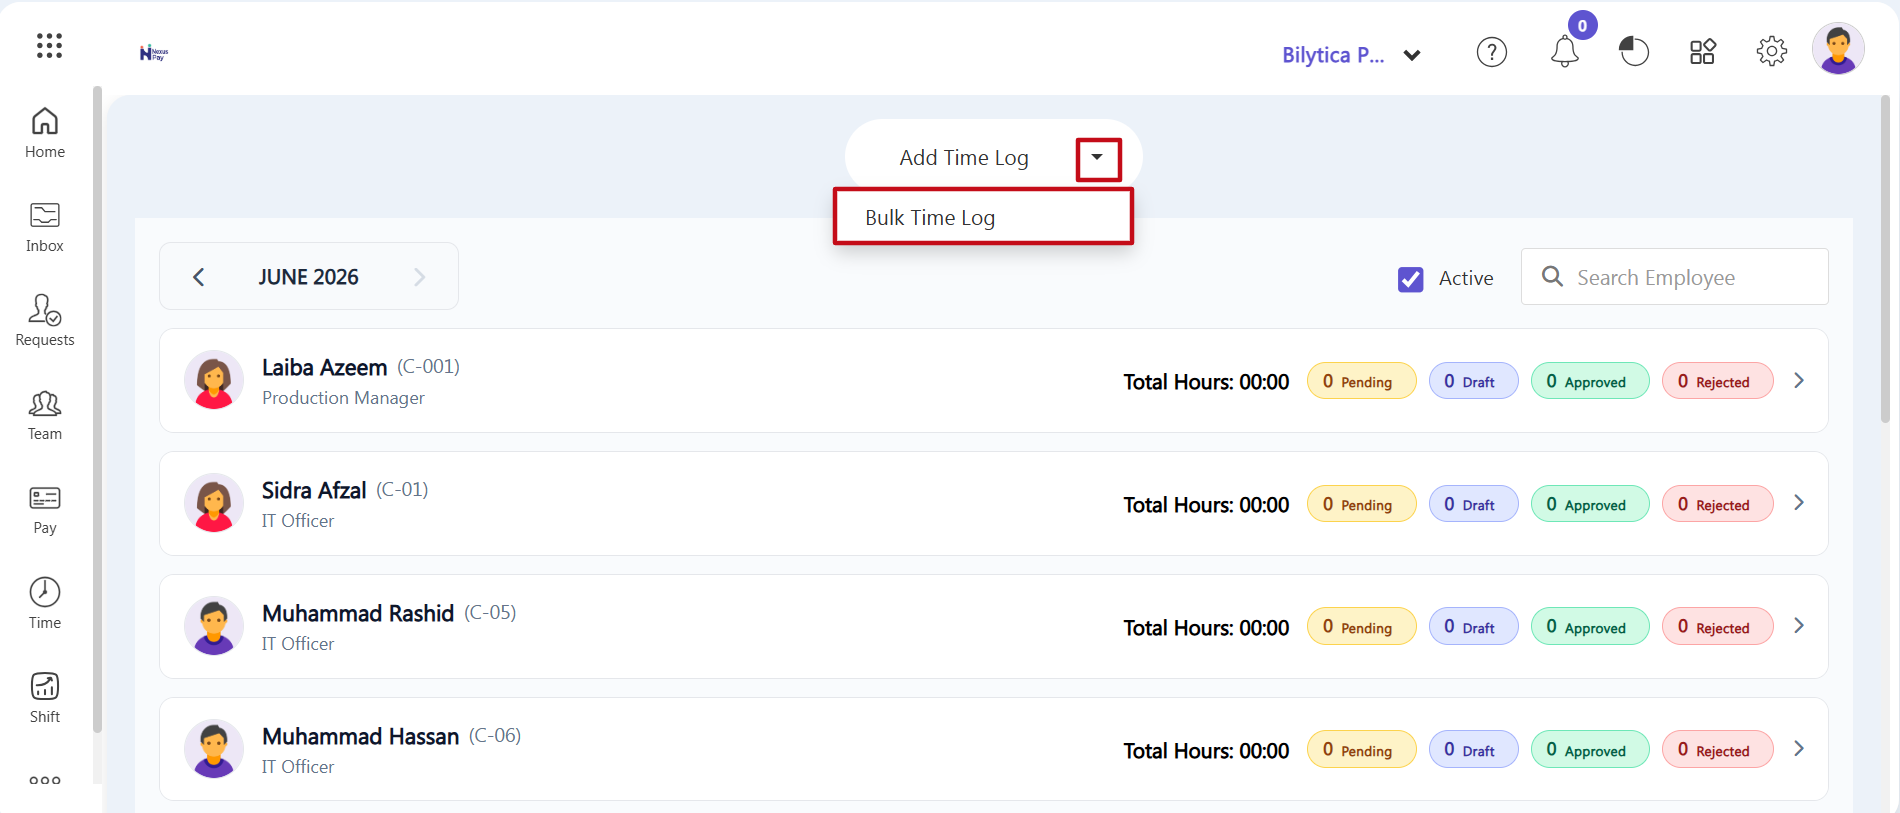
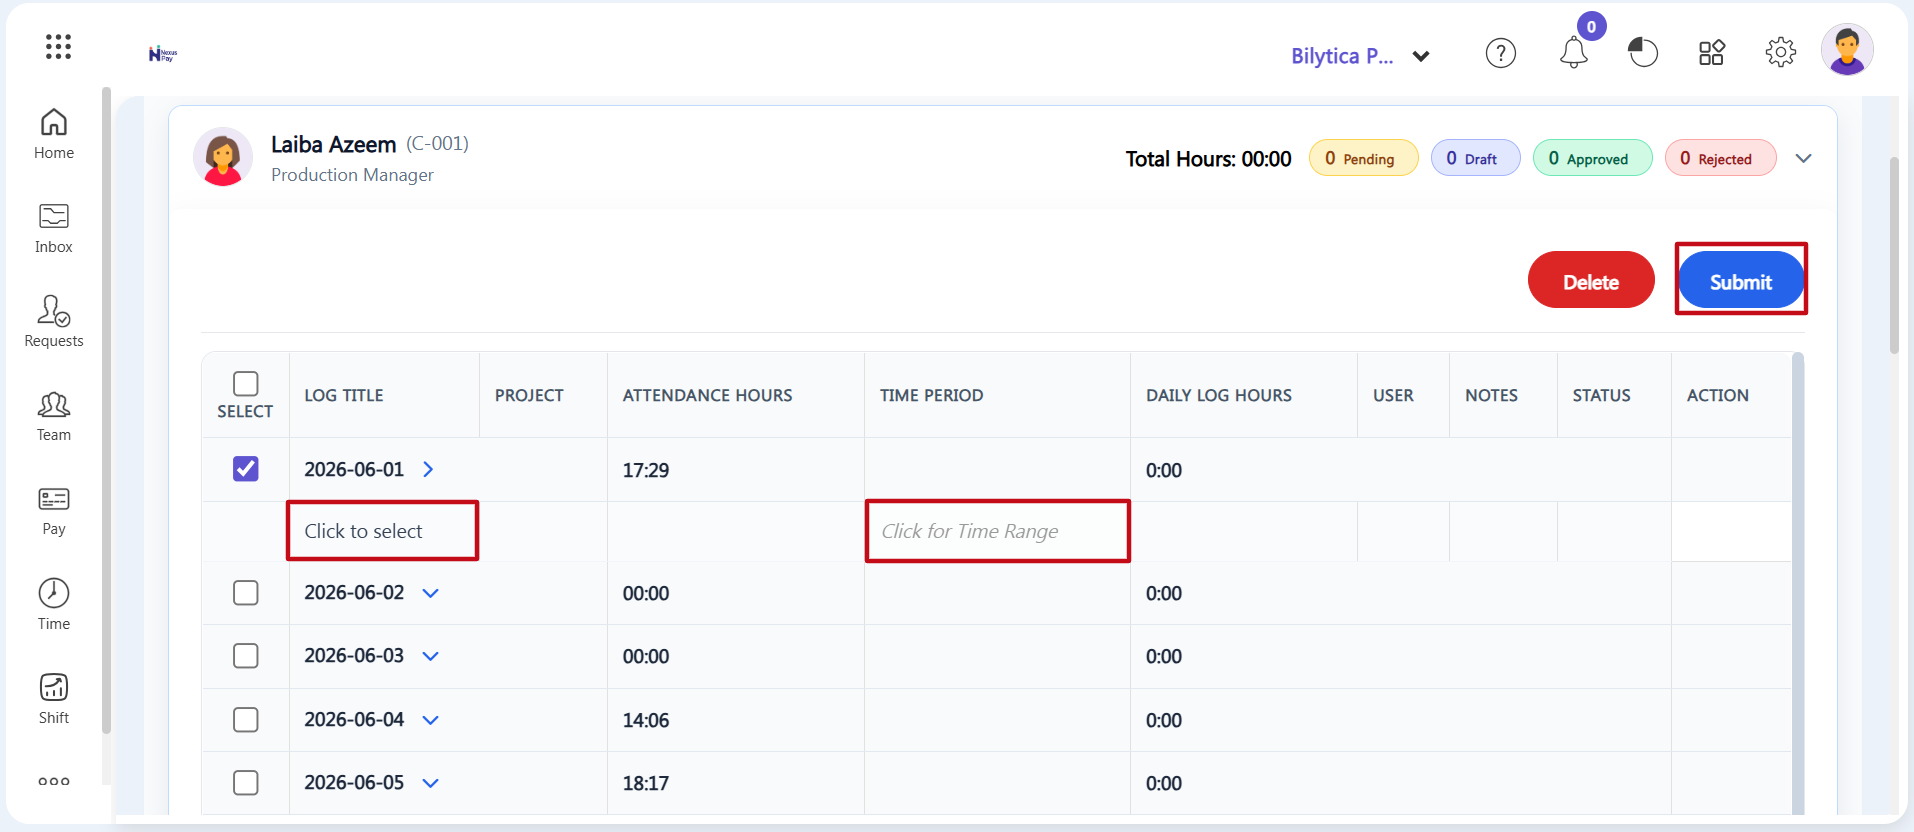
Step 10: Enter Daily Project Tasks and Submit — Inside the employee's daily log sheet grid, fill out your task details row by row:
- Date & Project Allocation: Check the box next to the correct date row, then click the 'Click to select' box under the Project column to assign the active company project name.
- Hours Worked & Notes: Set your exact working hours inside the 'Click for Time Range' box, add comments or details in the Notes box next to it, and review your total Daily Log Hours count.
- Send for Review: Once your entries are complete, click the blue Submit button to route the timesheet to the employee's manager or assigned supervisor for final approval.
Payroll Reconciliation Optimization Pro-Tip: |