To look closely at an individual employee's monthly logs or to fix clock-in times manually:
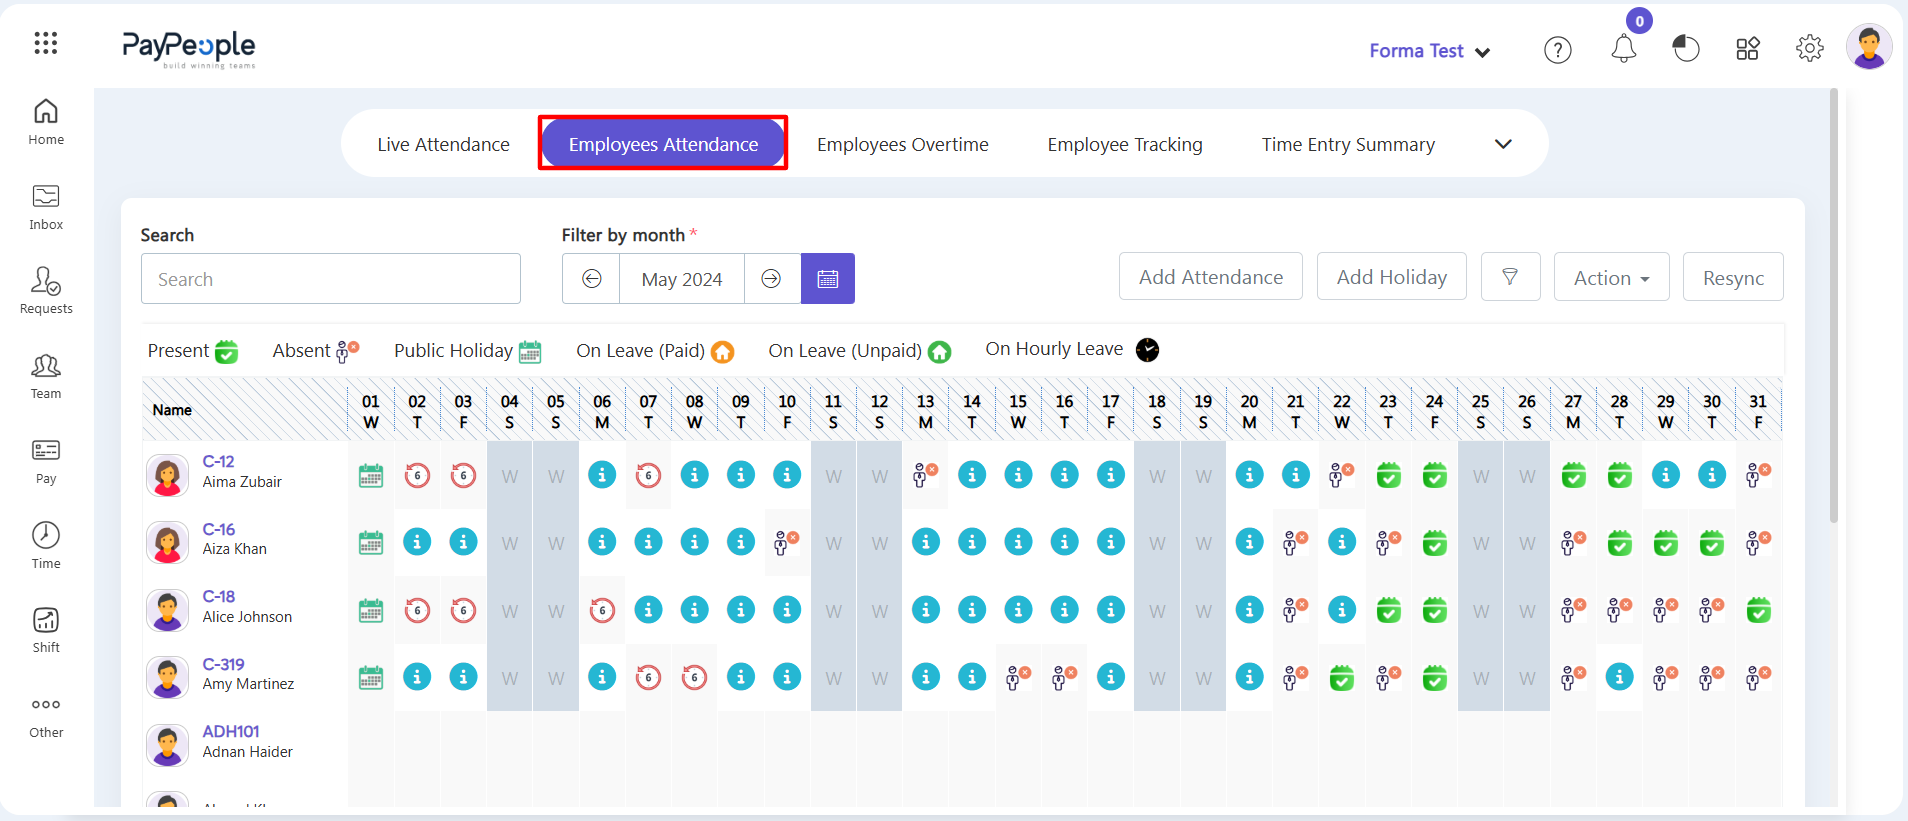
Step 4: Open Employees Attendance — Click on the second tab at the top labeled Employees Attendance (marked with a red box) to open the main attendance grid sheet.
Step 5: Pick the Month — Use the Filter by Month* dropdown menu to choose the exact month and year you want to view. The grid will instantly update to show the full month's daily calendar.
Step 6: Read the Attendance Status Icons — Look at the daily status squares in the grid rows. Each day uses easy color codes and icons to show attendance status:
- Present (Green checkmark box)
- Absent (Red X box)
- Public Holiday (Green calendar icon)
- On Leave Paid (Orange home icon)
- On Leave Unpaid (Green home icon)
- On Hourly Leave (Black clock icon)
Step 7: Make Bulk Changes and Add Holidays — Use the buttons at the top right of the screen to make manual administrative updates:
- Add Attendance / Add Holiday: Click these buttons to manually type in a single attendance record or log a company holiday into the schedule.
- Action Dropdown: Open this menu to upload spreadsheet files or make mass changes to multiple rows at once.
- Resync Button: If you make manual changes, adjust logs, or add holidays, click the white Resync button to rerun the calculations and update your payroll and attendance records instantly.
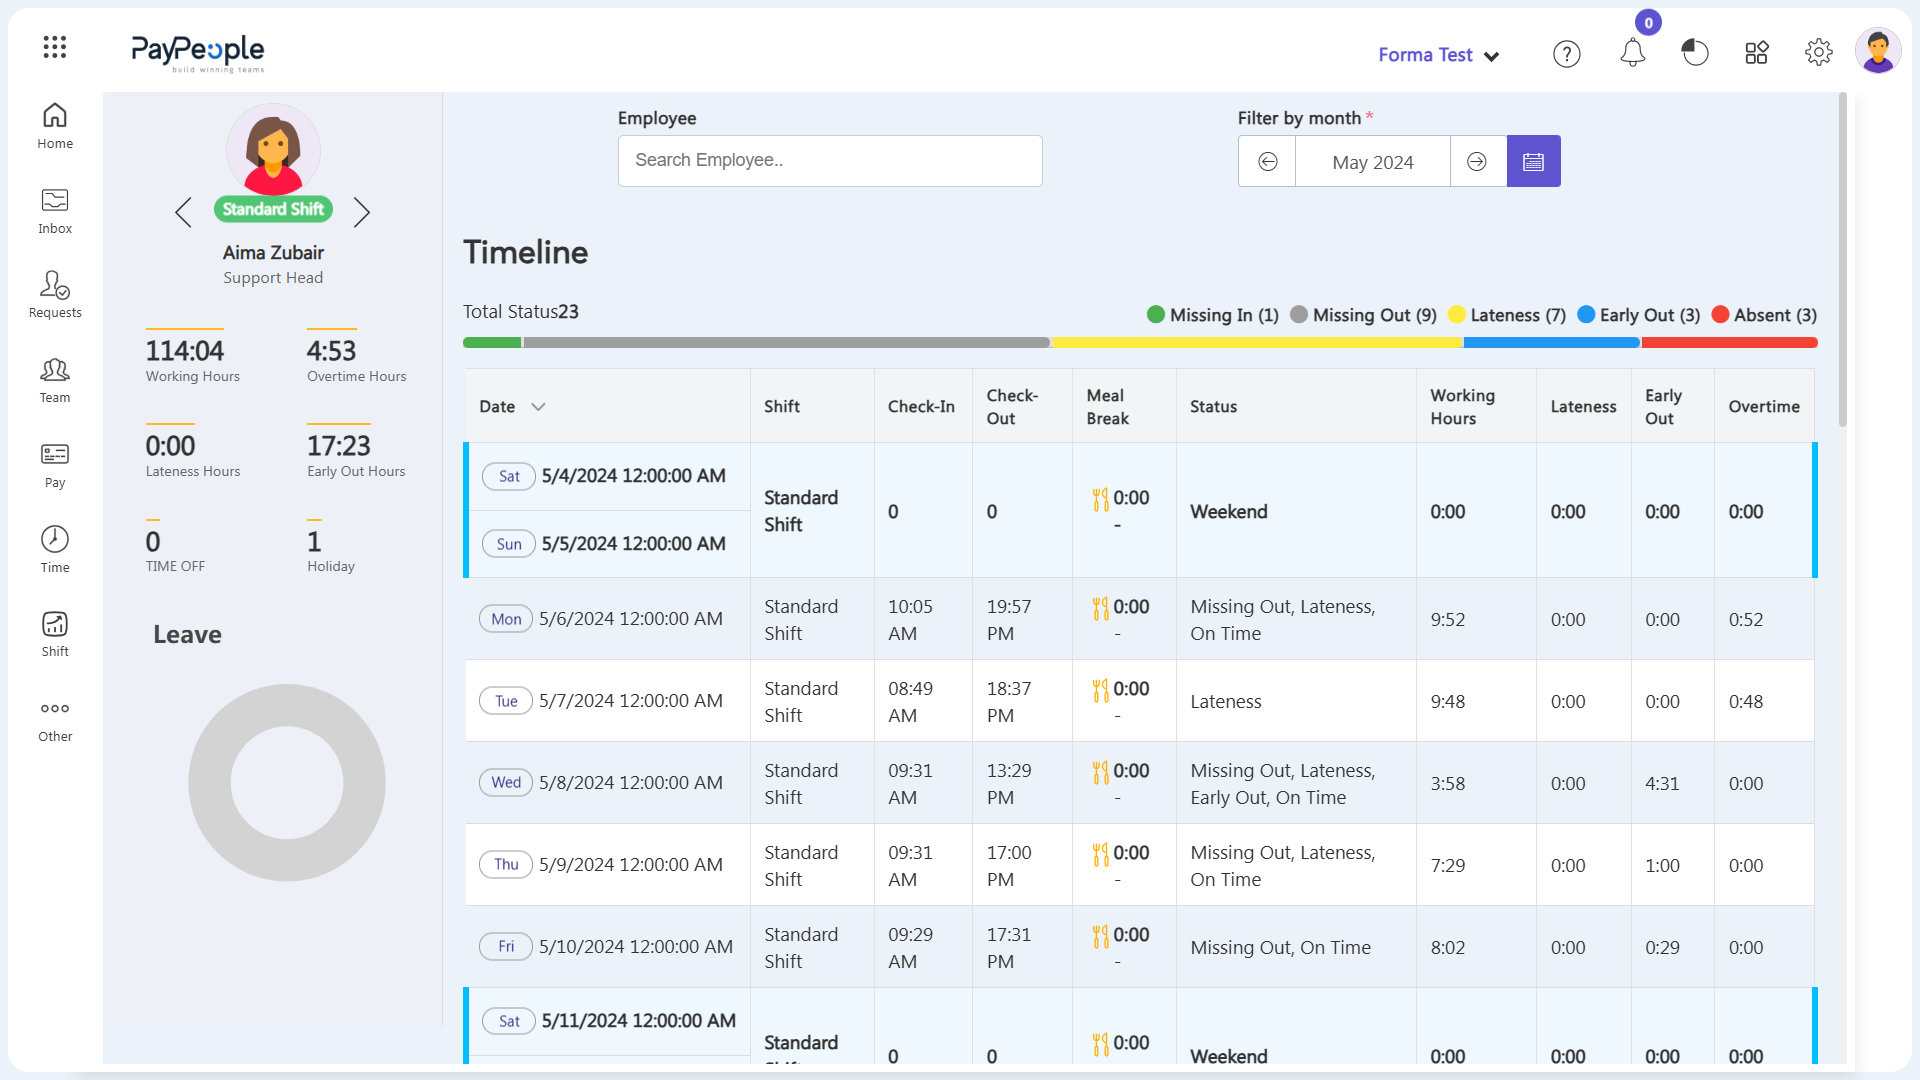
Step 8: Open Detailed Employee Timelines — Click directly on any Employee Name in the main list to open a detailed summary of their attendance for the month, which includes:
- Total Summary & Mistakes (Exceptions): Shows total calculated working hours, overtime, time off, and holiday credits. It also highlights attendance issues like missing clock-ins/clock-outs, late arrivals, early departures, and actual absent days.
- Daily Time Records Table: Shows a day-by-day calendar breakdown with scheduled shift details, exact check-in/check-out punch times, lunch breaks, system status tags, actual hours worked, and earned overtime.