

To launch a new payroll calculation batch and set up your processing options:
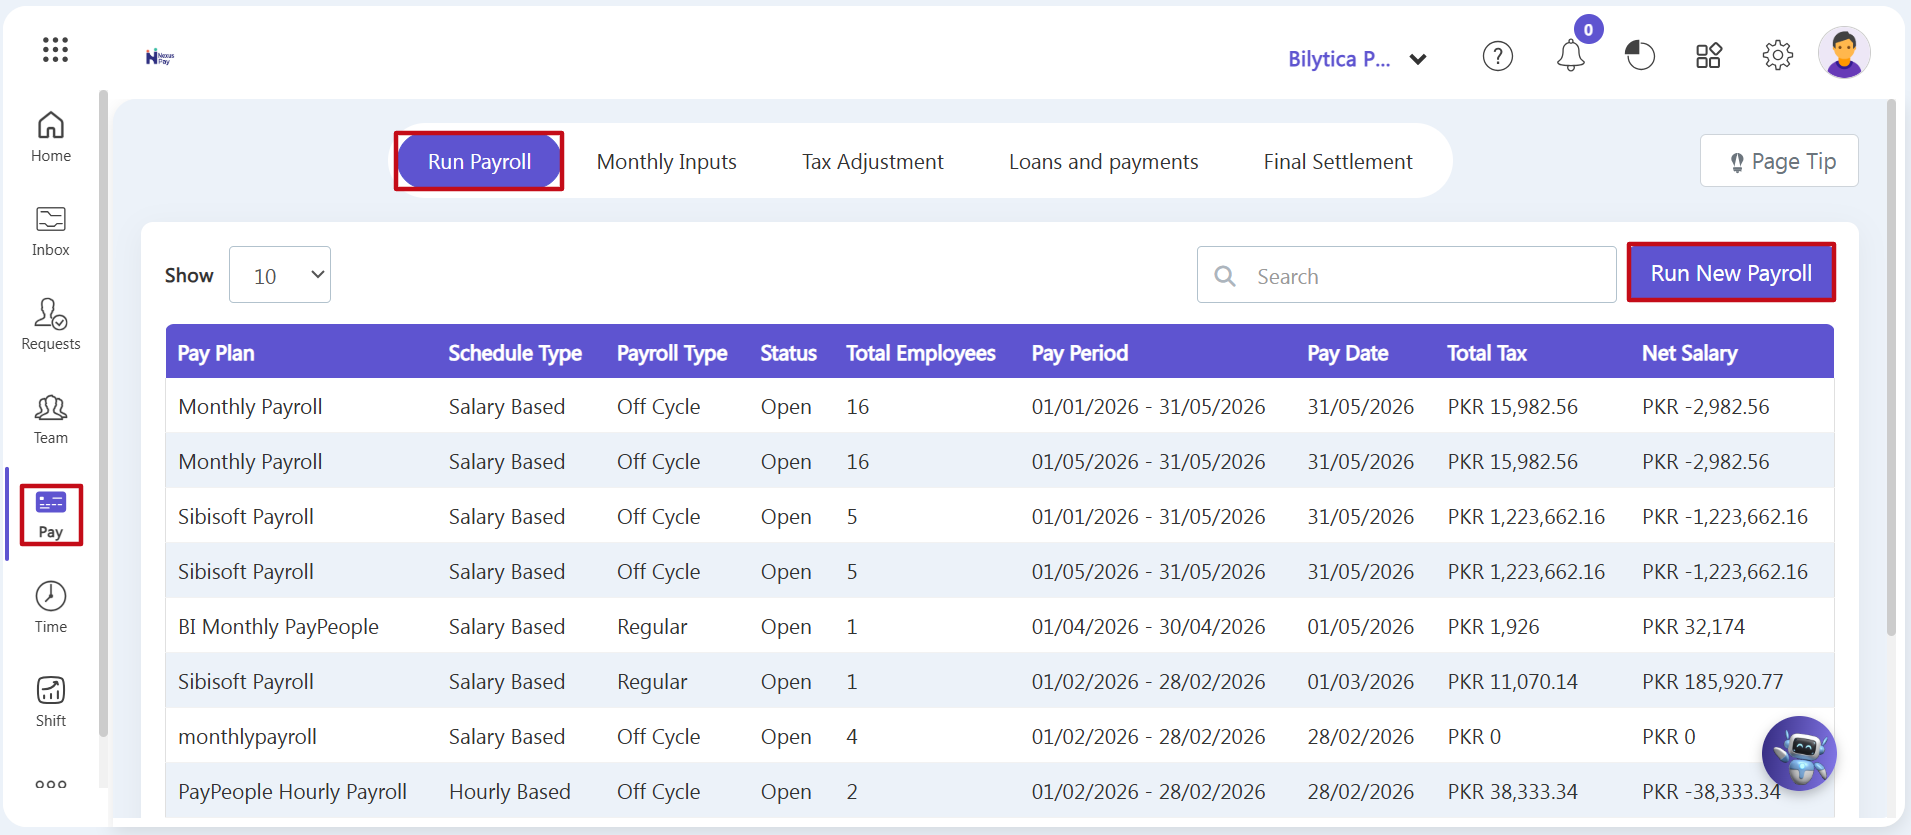
- Step 1: Open the Pay Module — Go to the main left-hand vertical menu and click on the Pay icon box (marked with a red box).
- Step 2: Open the Creation Screen — Make sure you are on the first horizontal tab titled Run Payroll (marked with a red box). On the main list page, go to the right-hand toolbar and click on the purple Run New Payroll button (marked with a red box).
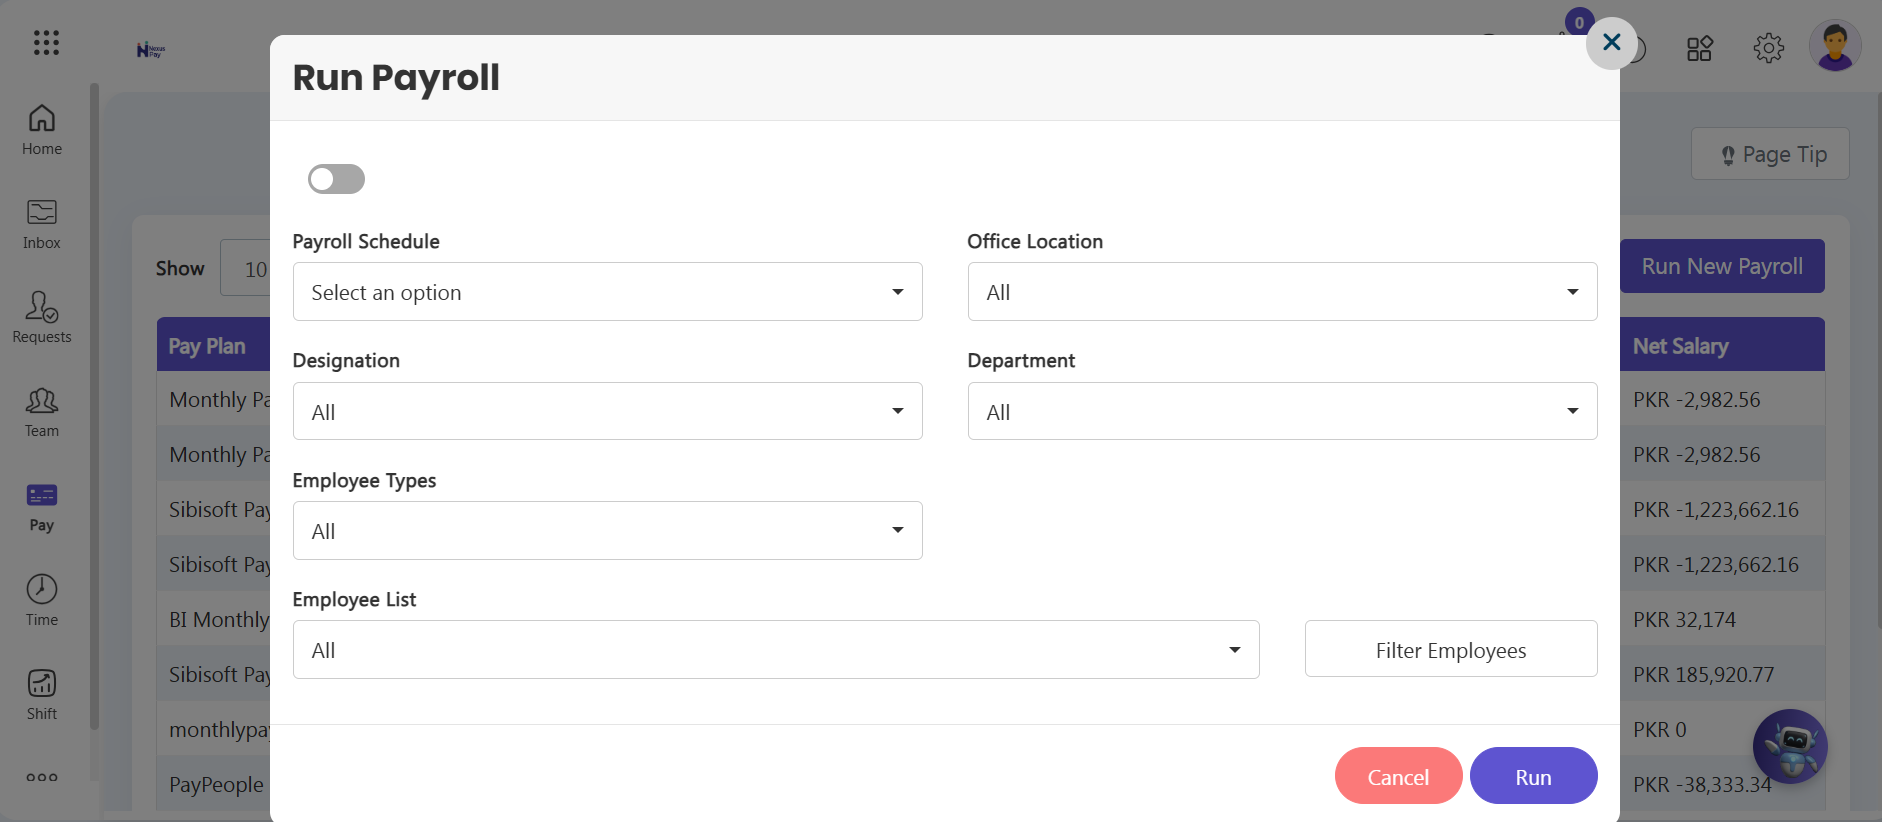
Step 3: Set Your Payroll Filters — A setup wizard window will pop up on your screen. Fill out the target fields step-by-step to define exactly who to include in this payroll run:
- Organizational Filters: Select your main tracking group from the Payroll Schedule dropdown list menu.
- Demographic Slices: Filter your calculations by choosing specific options in the Office Location, Designation, and Department menu fields.
- Targeted Cohorts: Refine your focus by picking specific categories under Employee Types, or use the Employee List box to choose individual staff members.
Step 4: Run the Initial Calculation — Once all your filters are set, click the blue Run button located in the bottom right corner of the wizard window to compile and calculate the payroll data.
2. Managing the 4-Stage Payroll Lifecycle
The system's background engine will process the records, and the payroll entries will move through four distinct stages. Review and advance your records step-by-step:
Phase A: The Draft Stage
Every newly created payroll batch automatically starts in the Draft stage.
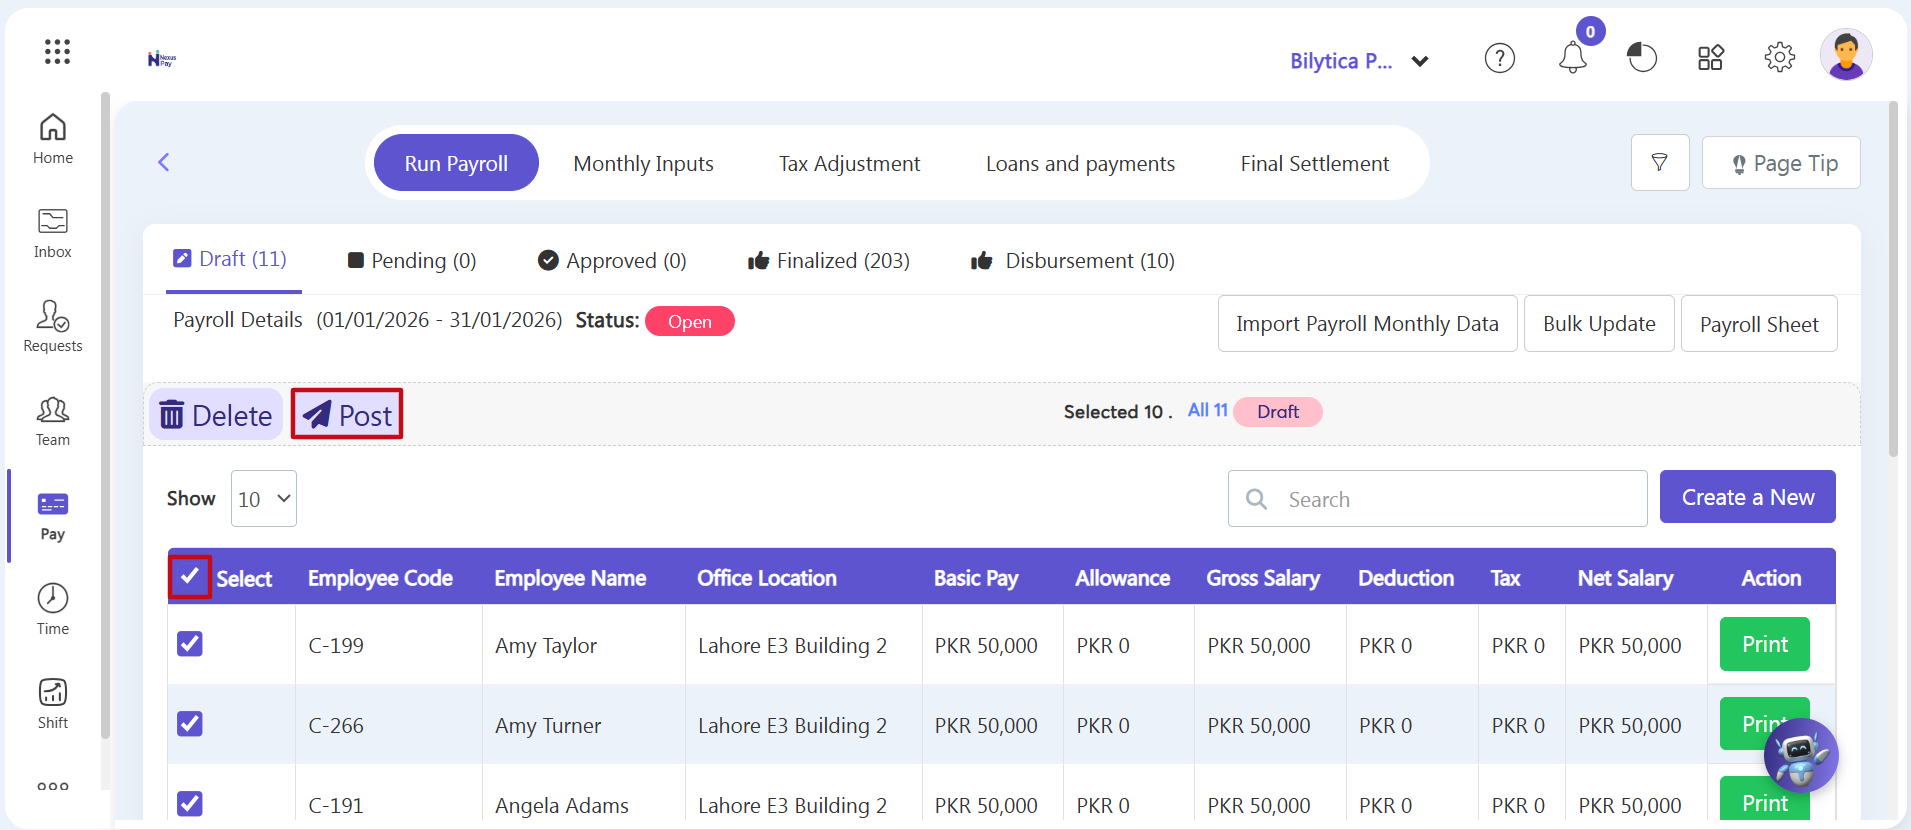
Step 5: Audit Fields and Post Records — Admins can review the calculation rows, fix errors, and make edits directly on screen. Once your reviews are complete:
- Row Selection: Check the boxes next to specific rows, or check the main Select All header box to select all profiles at once.
- Advance Queue: Click the white Post button (marked with a red box) on the top action bar to push the records into the Pending stage.
Phase B: The Pending & Approved Stages
- Step 6: Progress the Approval Queue — The exact same selection and review workflows apply within the Pending and Approved tabs. If an auditor or supervisor notices errors at any point, you can easily push records back. Click the Return button to send the entries back to the editable Draft stage for immediate correction.
Phase C: The Finalized Stage
Once payroll reaches the final milestone under the Finalized tab, the calculations lock down securely to prepare for salary disbursements.
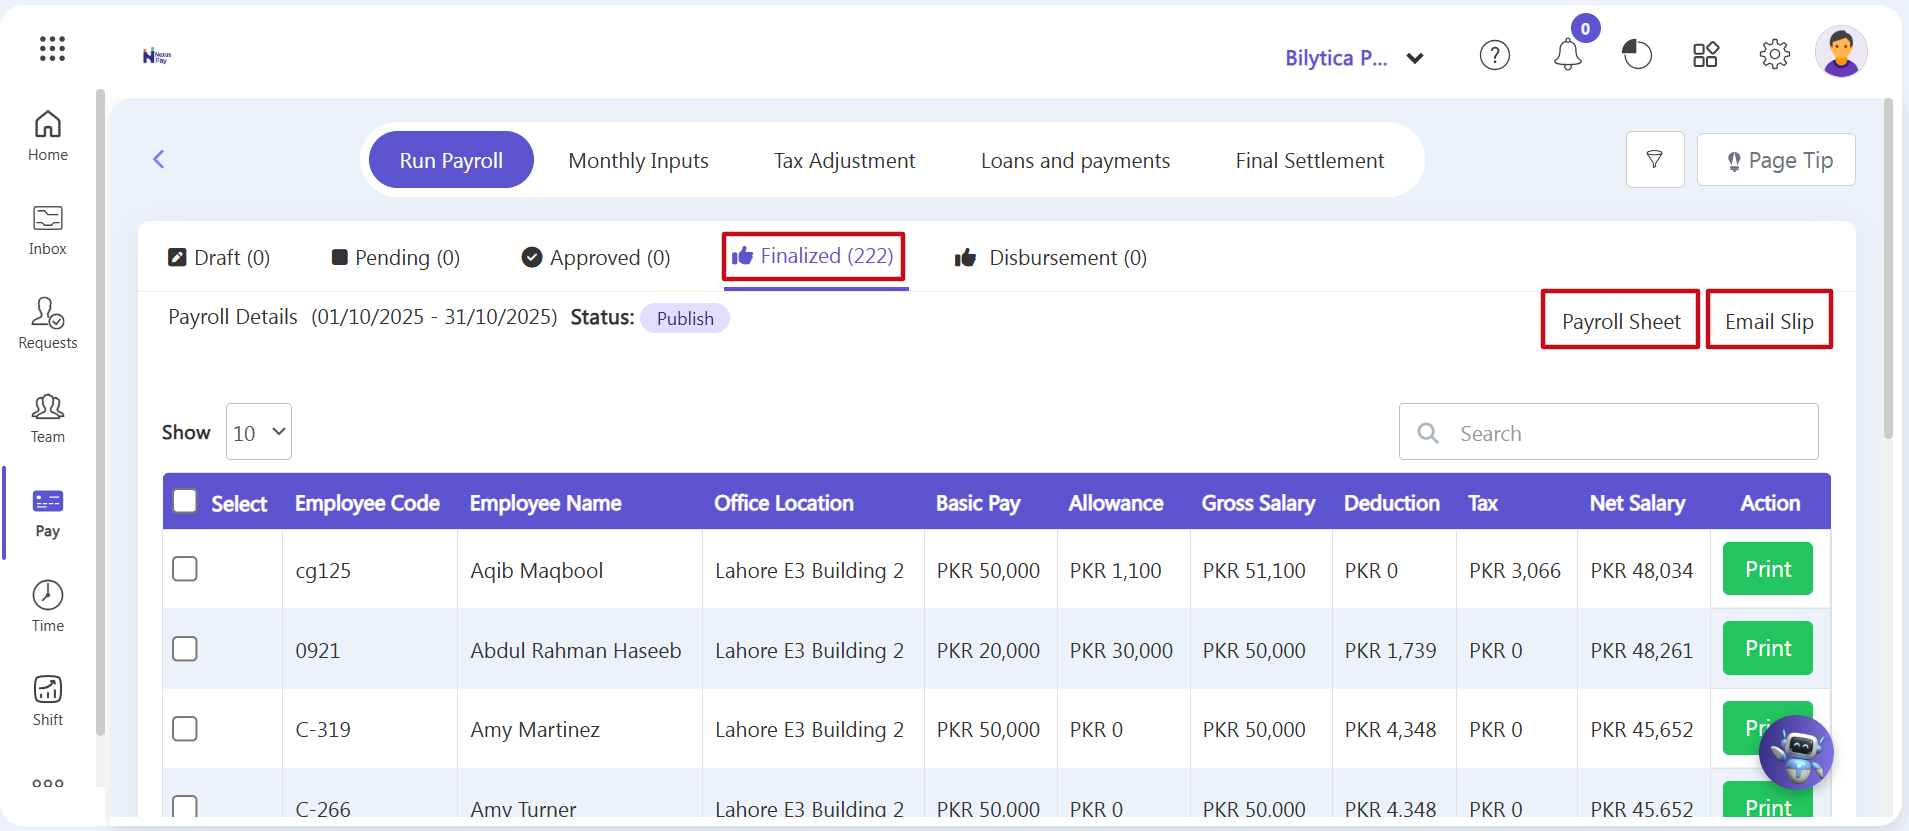
- Step 7: Email Automated Payslips — Click on the Finalized tab to load your locked records directory. To broadcast digital statements straight to employee inbox accounts:
- Bulk Email Dispatches: Apply relevant filters, select your records, and click the white Email Slip button (marked with a red box) to distribute electronic files to your entire workforce at once.
- Step 8: Download the Master Payroll Sheets Ledger — To run deep financial evaluations or cross-check totals with finance teams:
- Master Sheet Auditing: Click the white Payroll Sheet button (marked with a red box). This generates a master spreadsheet displaying all employee particulars, including Allowances, Deductions, Contributions, and final Net Salary totals. Download this master document directly in Excel format for your archives.
- Step 9: Verify and Print Individual Statements — To inspect a single worker's compensation slip layout:
- Individual Slip Verification: Find the specific employee's name and click the green Print button in the final column. Additionally, if self-service access is enabled in system profiles, employees can view and download their official payslips as a clean PDF directly from their mobile portals.
Payroll Validation Optimization Pro-Tip: |