

Managing end-of-service processing requires a secure interface to compile different financial data points. The PayPeople final settlement framework automates this by pulling contract details, subtracting outstanding loans, adding variable commissions, and calculating final net payable amounts into a single, auditable clearance ledger.
1. Going to the Final Settlement Control Panel
To open the centralized offboarding ledger and check ongoing employee clearances:
- Step 1: Open the Pay Module — Click on the primary Pay icon on the left-hand vertical toolbar.
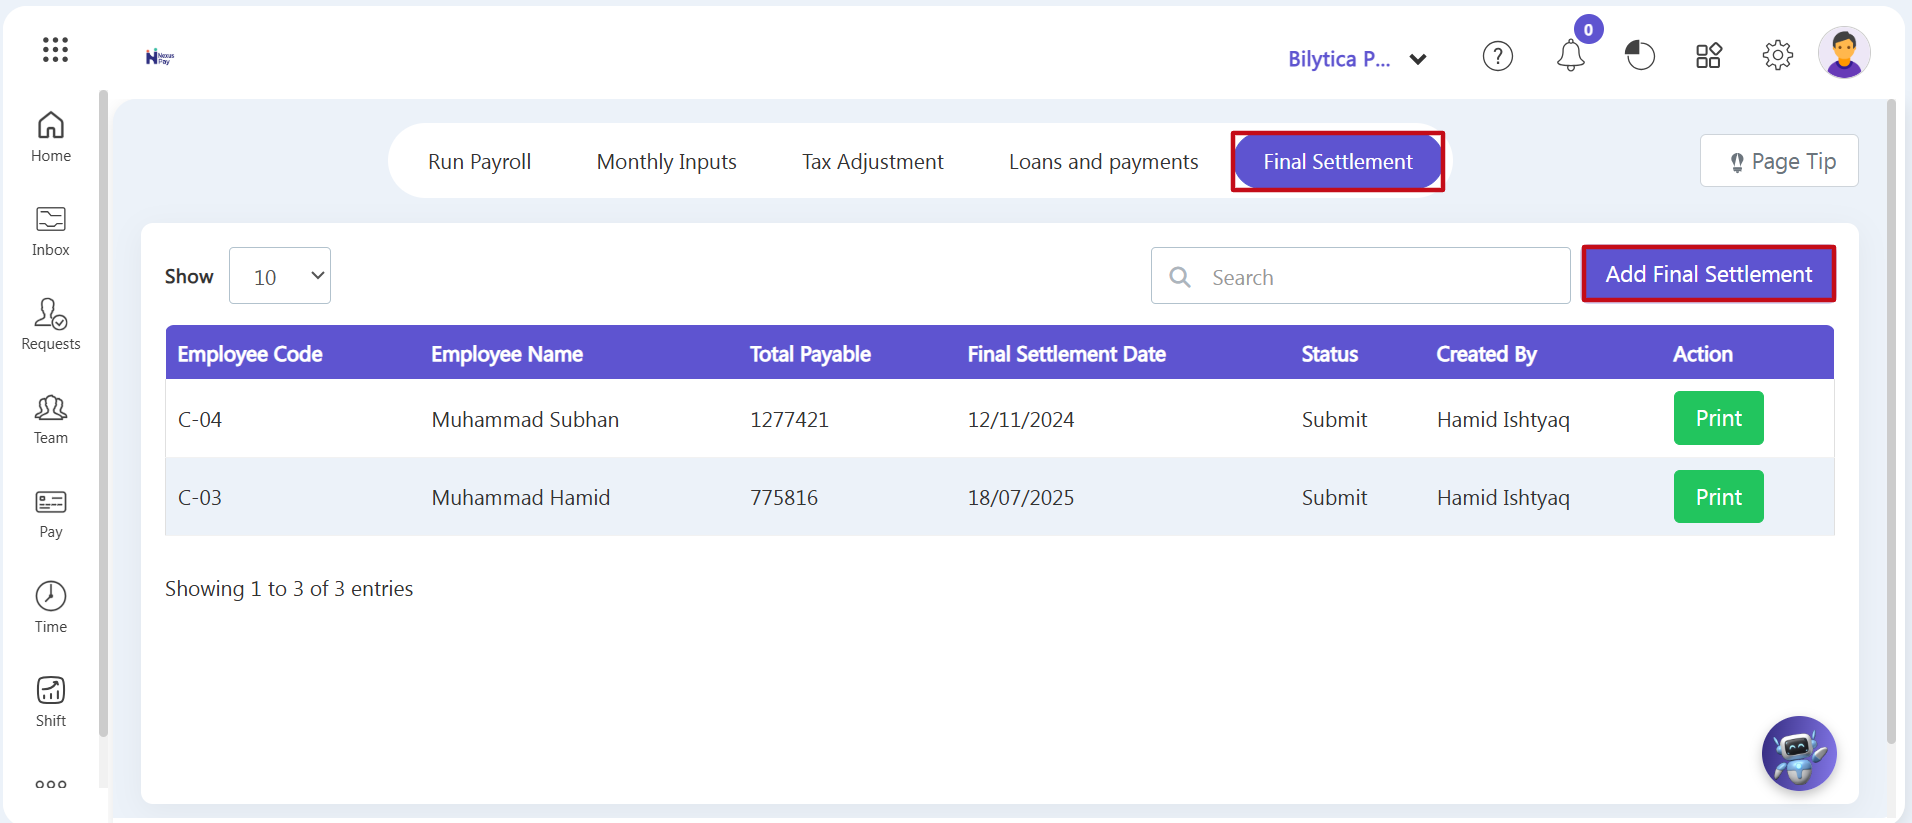
- Step 2: Enter the Settlement Workspace — Click on the fifth horizontal tab at the top labeled Final Settlement (marked with a red box).
- Step 3: Start a New Settlement Sheet — On the main offboarding registry page, click the blue Add Final Settlement button (marked with a red box) in the top right corner to start a new exit balance calculation.
2. Setting Up Employee Clearance & Running Calculations
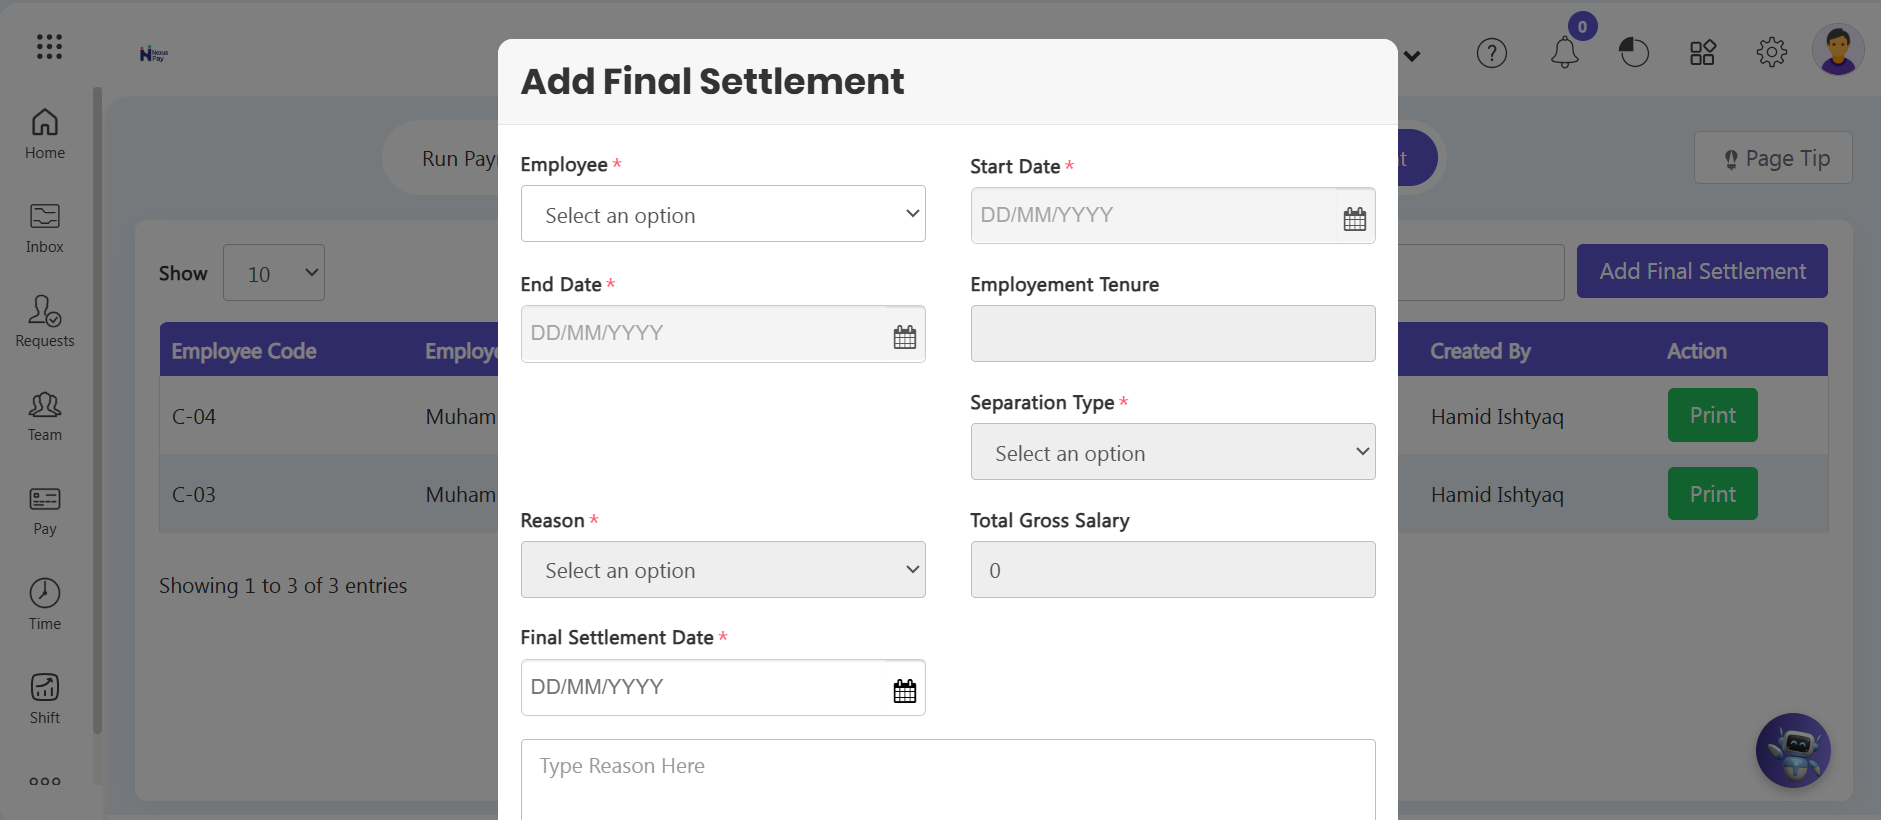
An Add Final Settlement wizard window will pop up on your screen. Fill out the sections step-by-step to calculate the final payout:
- Step 4: Select the Employee — Use the Employee* dropdown menu to pick the offboarded staff member whose account needs to be closed out.
- Step 5: Automated Data Fetch — The system instantly pulls up their linked account details, including contract dates, employment tenure, gross salary history, and separation parameters.
- Step 6: Enter Separation Details — Fill in or verify the required fields: Start Date*, End Date*, Separation Type*, Reason*, Final Settlement Date*, and add any specific exit notes in the description text box.
- Step 7: Calculate the Payout Balance — Click the Fetch button. The background engine will calculate the final settlement amount by combining:
- Salary Details: Unpaid prorated salary based on days worked in the final cycle.
- Loan Offsets: Total remaining balances subtracted from outstanding company loans.
- Variable Additions: Any final commissions, bonuses, or expense claims owed.
- Step 8: Review and Save — Audit the final compiled numbers on your screen. Once verified against your company policy, click the Save button to permanently lock the settlement record into the system.
3. Creating and Printing Settlement Slips
To review completed offboarding records or print a hardcopy exit receipt for your company archives:
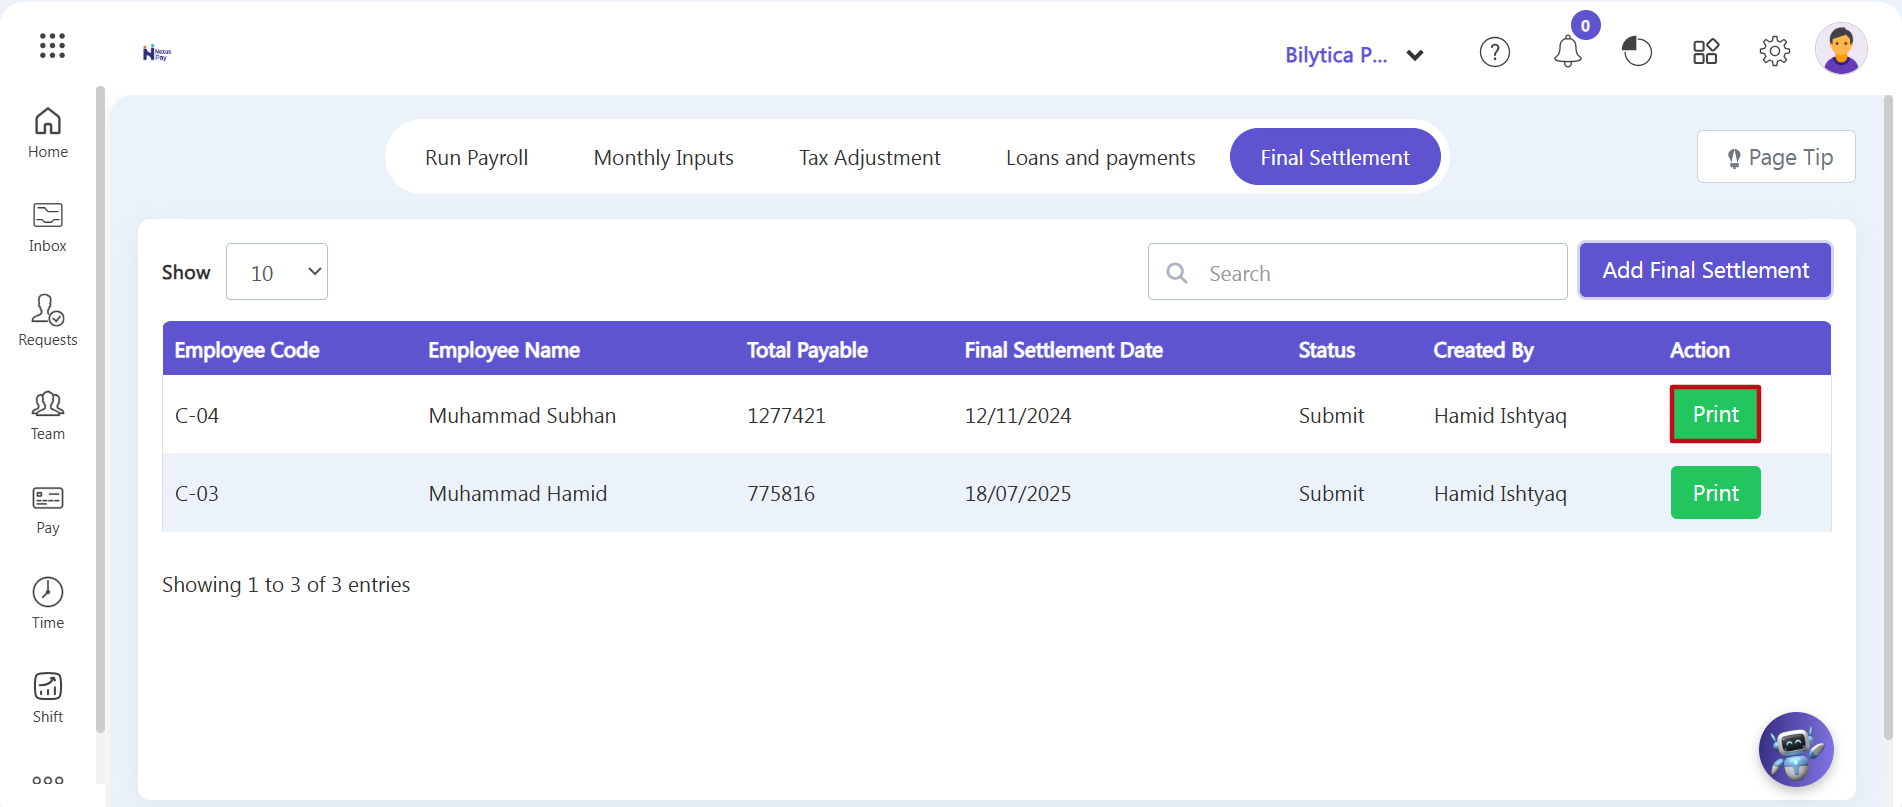
- Step 9: Locate the Settlement Record — Go back to the main Final Settlement overview page and find the saved employee record row.
- Step 10: Print the Statement — Look at the Action column on the far right and click the green Print button (marked with a red box). This opens a detailed offboarding payslip showing all itemized calculations, dues, and deductions. If self-service portal access is enabled, offboarded staff can also view and download their official exit payslips directly as a clean PDF.
Exit Compliance Data Reconciliations Pro-Tip: |