

How to Create a Ticket?
Creating a ticket in PayPeople is a simple process. Follow these steps to create a ticket:
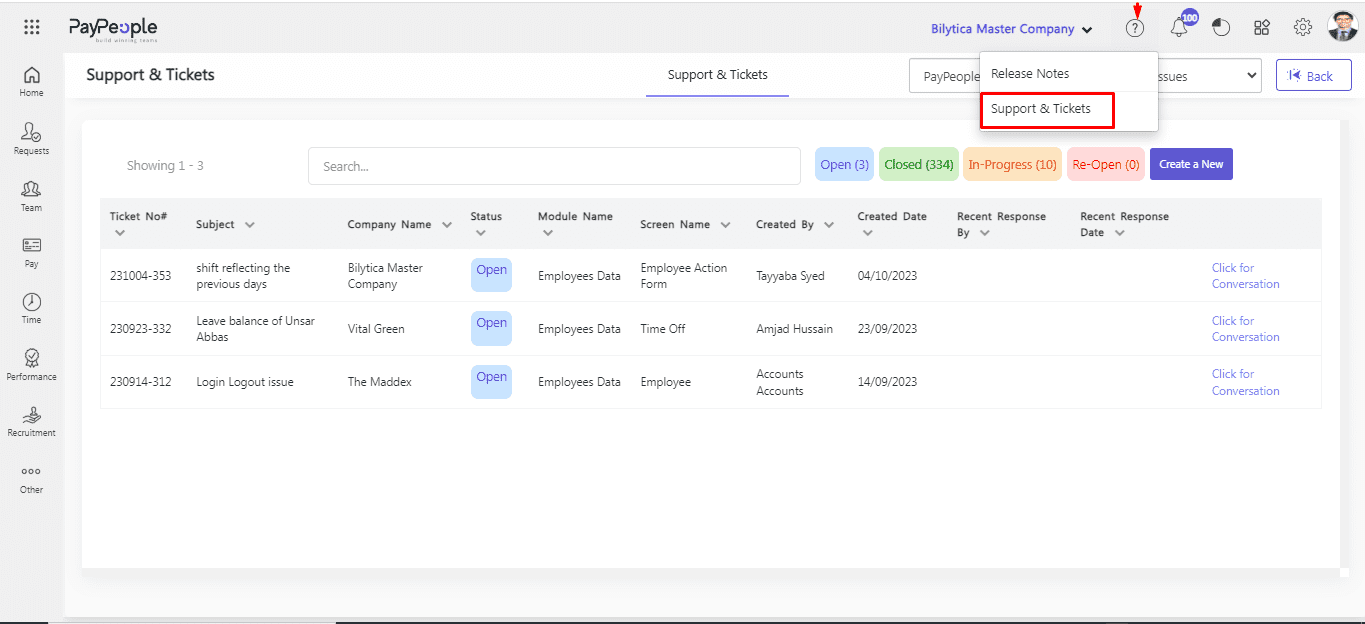
- Click on the “Help” icon located at the top right of the page.
- Select “Tickets and Support” from the drop-down menu.
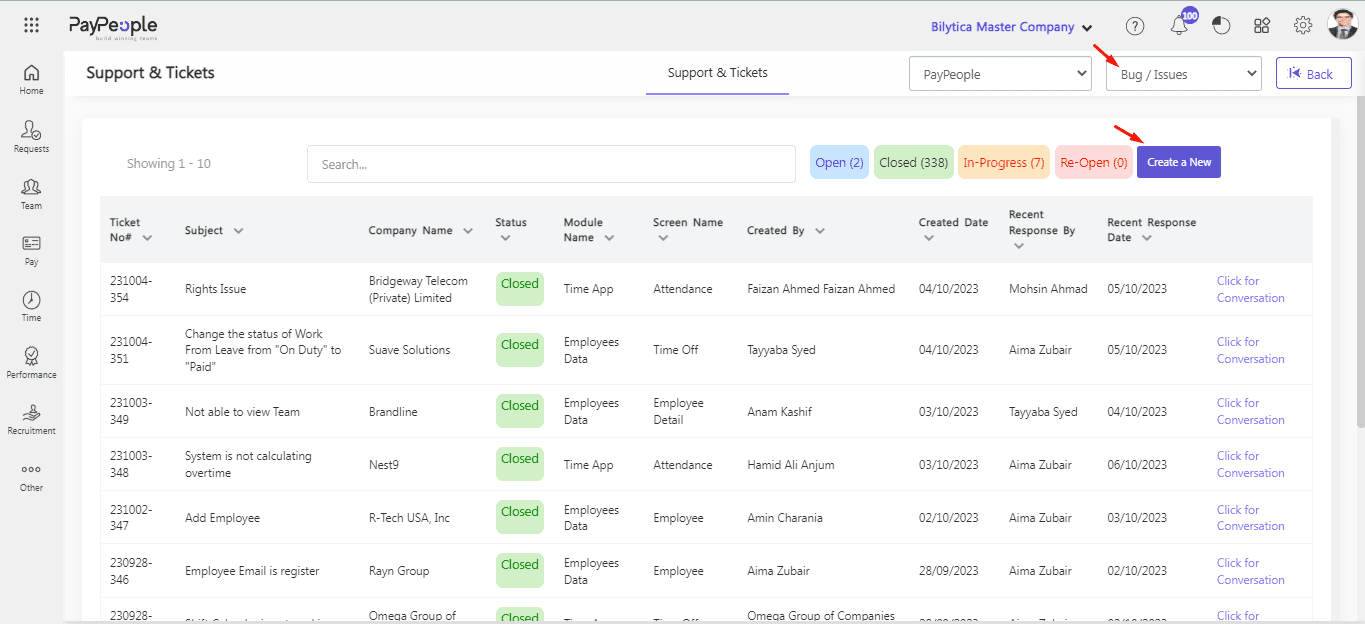
- Click on Bug/Issues > Create a New
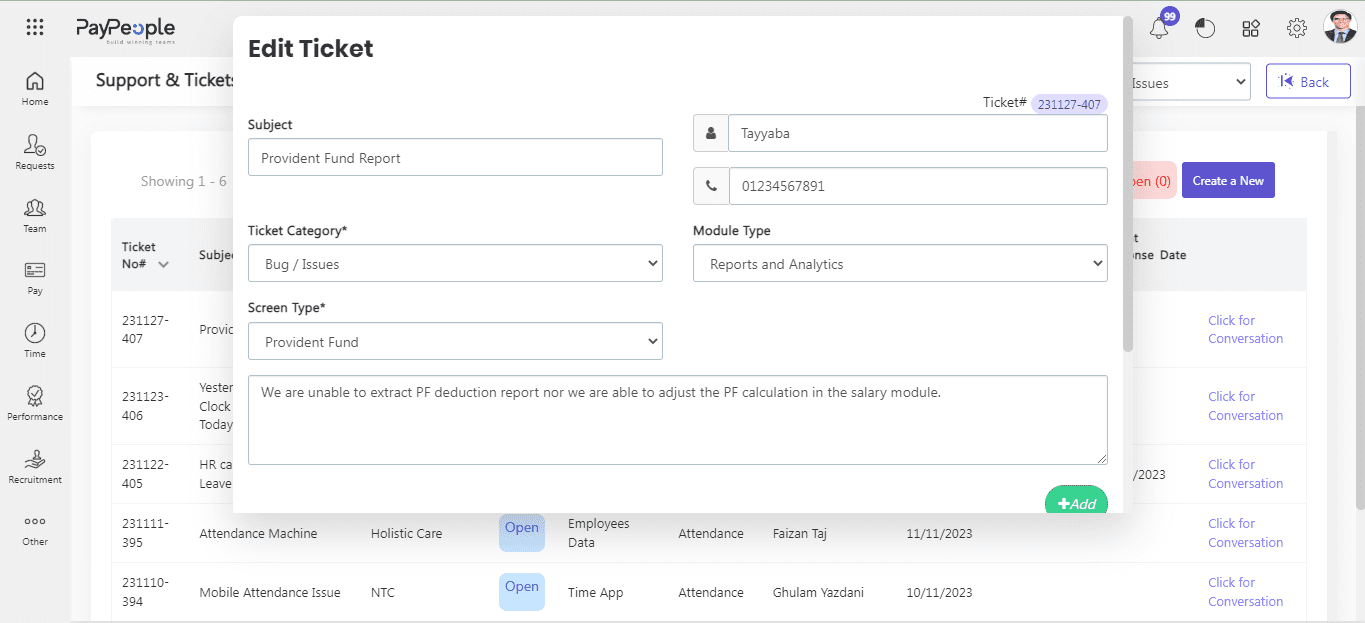
- Select the screen type and module type.
- Add a query description and an attachment if there is a query screenshot.
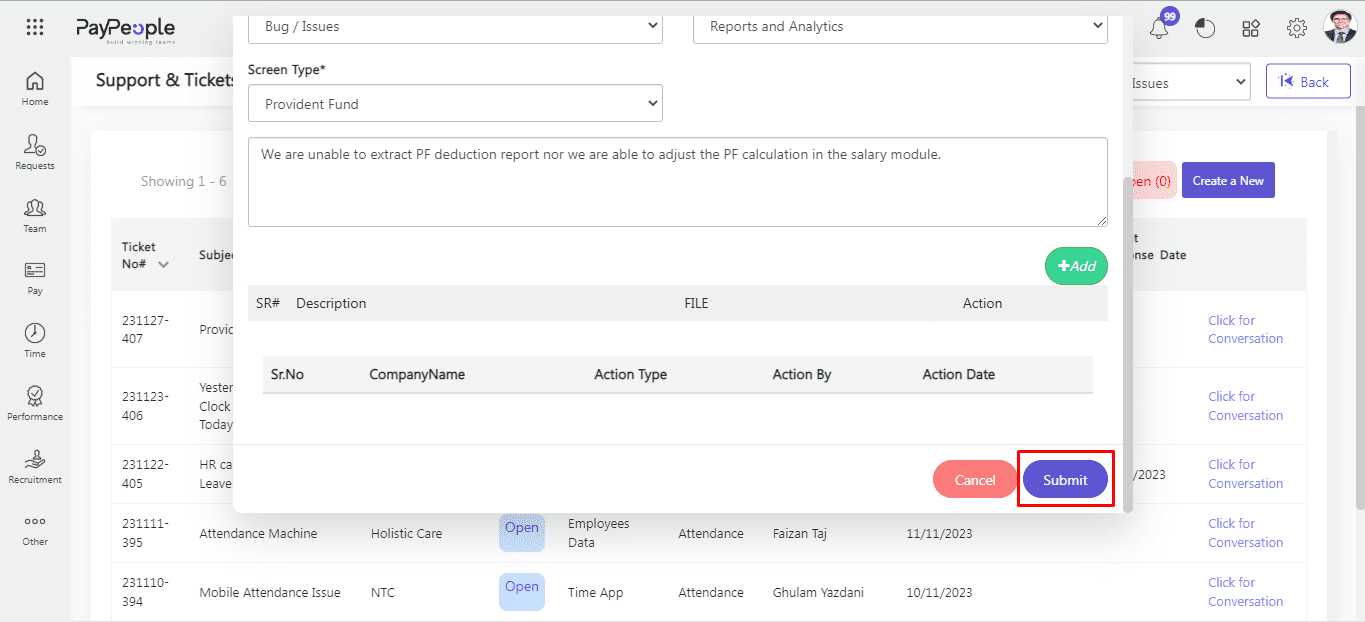
- Once you have filled out the ticket form, click on the “Submit” button to send your ticket to our support team.
- After ticket submission it will be visible in Open tab.
How to Close a Ticket?
Closing a ticket in PayPeople is a simple process that can be completed in just a few steps. Here’s how you can do it:
- Click on the “Help” icon located at the top right of the page.
- Select “Tickets and Support” from the drop-down menu.
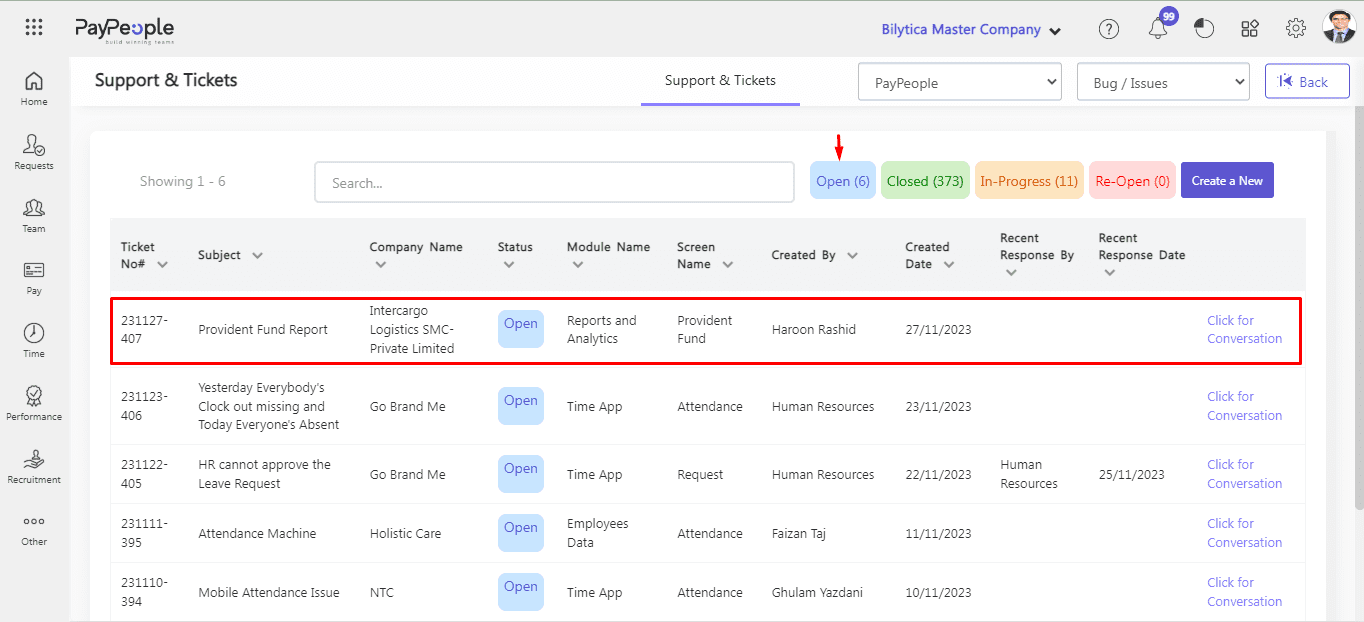
- Find the ticket that you want to close in “Open/ InProgress/Re-Open” tab and click on “Click for Conversation”.
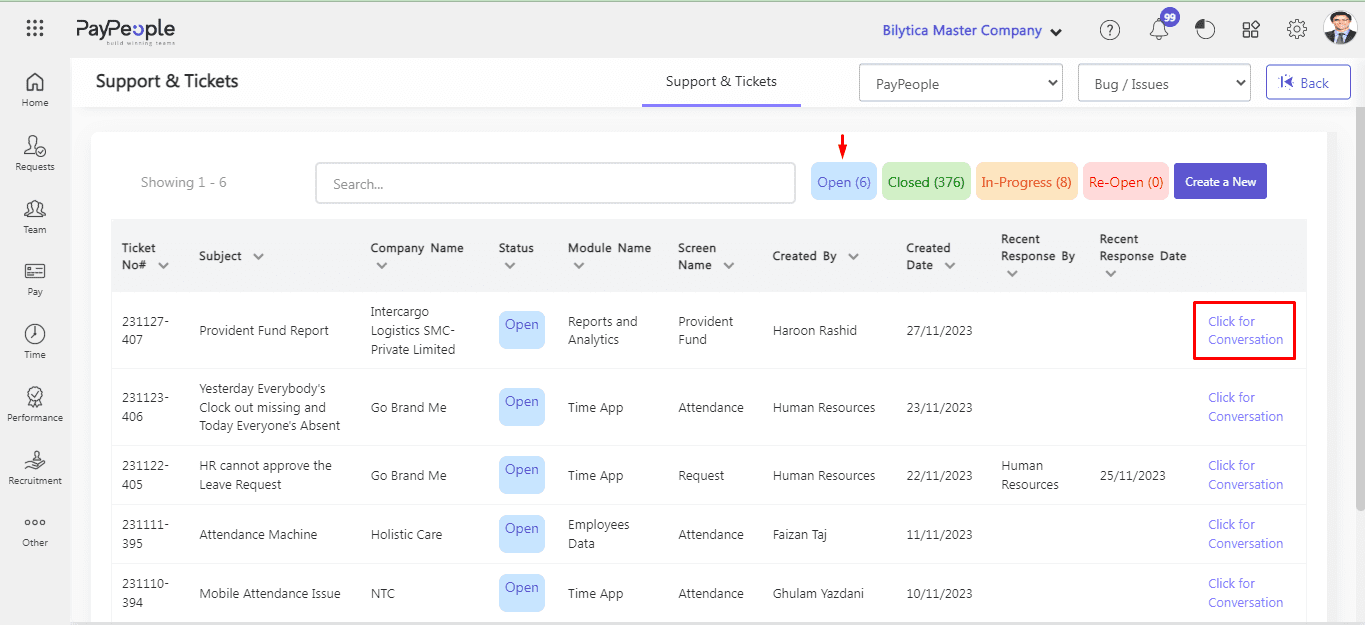
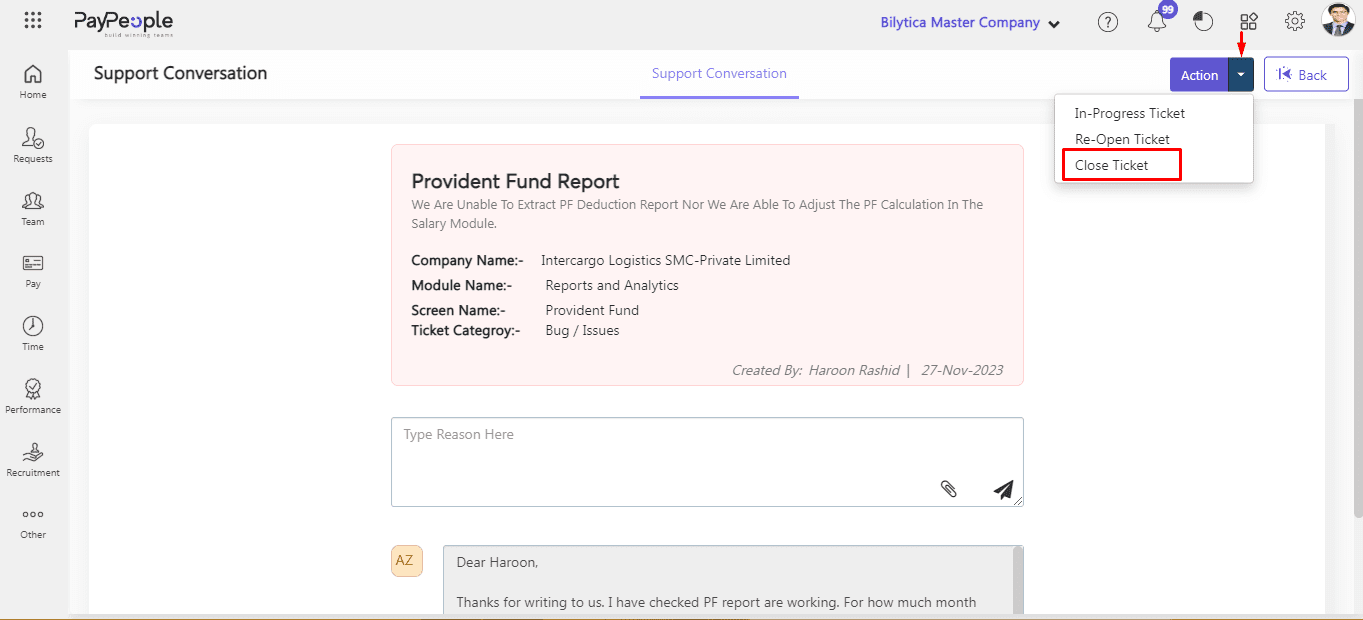
- Click drop down arrow located besides Action on top right corner.
- Once you are satisfied that the ticket has been resolved, click on the “Close Ticket” button.
- You will be prompted to confirm that you want to close the ticket. Click “OK” to confirm.
- The ticket will be marked as closed and will no longer be visible in your open tickets list and visible in Closed tab.
Note: Closed button only visible on client side.
View Incoming Tickets
If you have submitted a ticket to our customer support team, you may want to check on its status or view any updates. Here’s how to view your tickets in PayPeople:
- Click on the “Help” icon located at the top right of the page.
- Select “Tickets and Support” from the drop-down menu.
- Click “Open” tab. You will see a list of all the tickets.
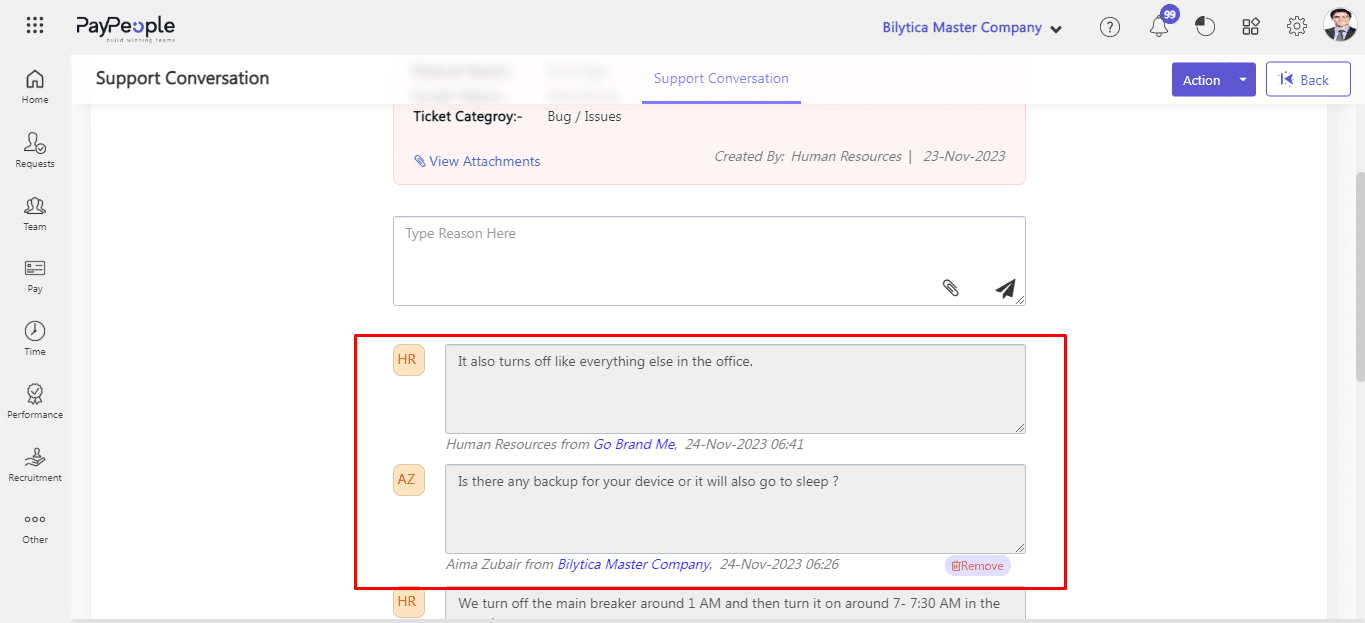
- Click on “Click for Conversation” to view ticket chat between you and support team.
- If you have multiple tickets, you can use the search bar to find a specific ticket by entering the ticket number or keywords related to your issue.
View In-Progress Tickets
If you’re a customer of PayPeople, you may have submitted a support ticket to get help with an issue you’re experiencing. But how do you keep track of the progress of your ticket? Here’s how to view in-progress tickets in PayPeople:
- Click on the “Help” icon located at the top right of the page.
- Select “Tickets and Support” from the drop-down menu.
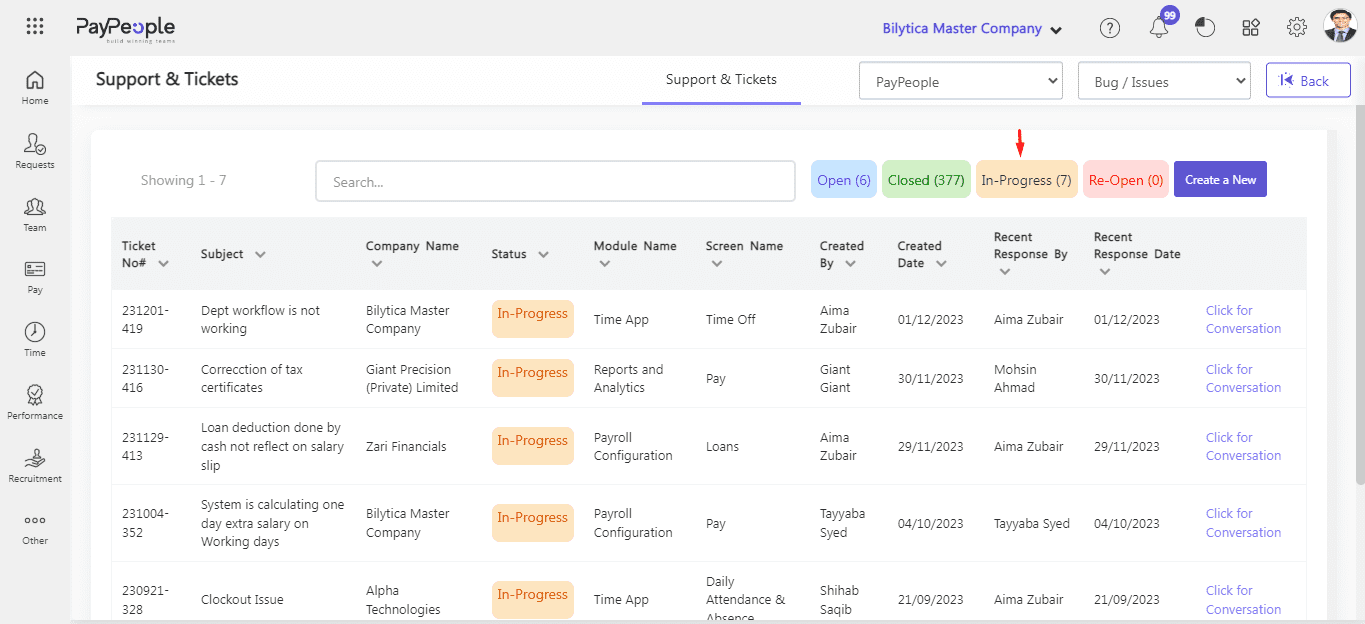
- Click on “In-Progress” tab. Here you can see a list of tickets that are under progress and team is doing working on it.
Change Ticket Status to Resolved
If ticket is resolved, admin can change ticket status to Resolved. In PayPeople it is a simple process that can be completed in just a few steps. Here’s how you can do it:
- Click on the “Help” icon located at the top right of the page.
- Select “Tickets and Support” from the drop-down menu.
- Find the ticket that you want to change its status in “Open/ InProgress/Re-Open” tab and click on “Click for Conversation”.
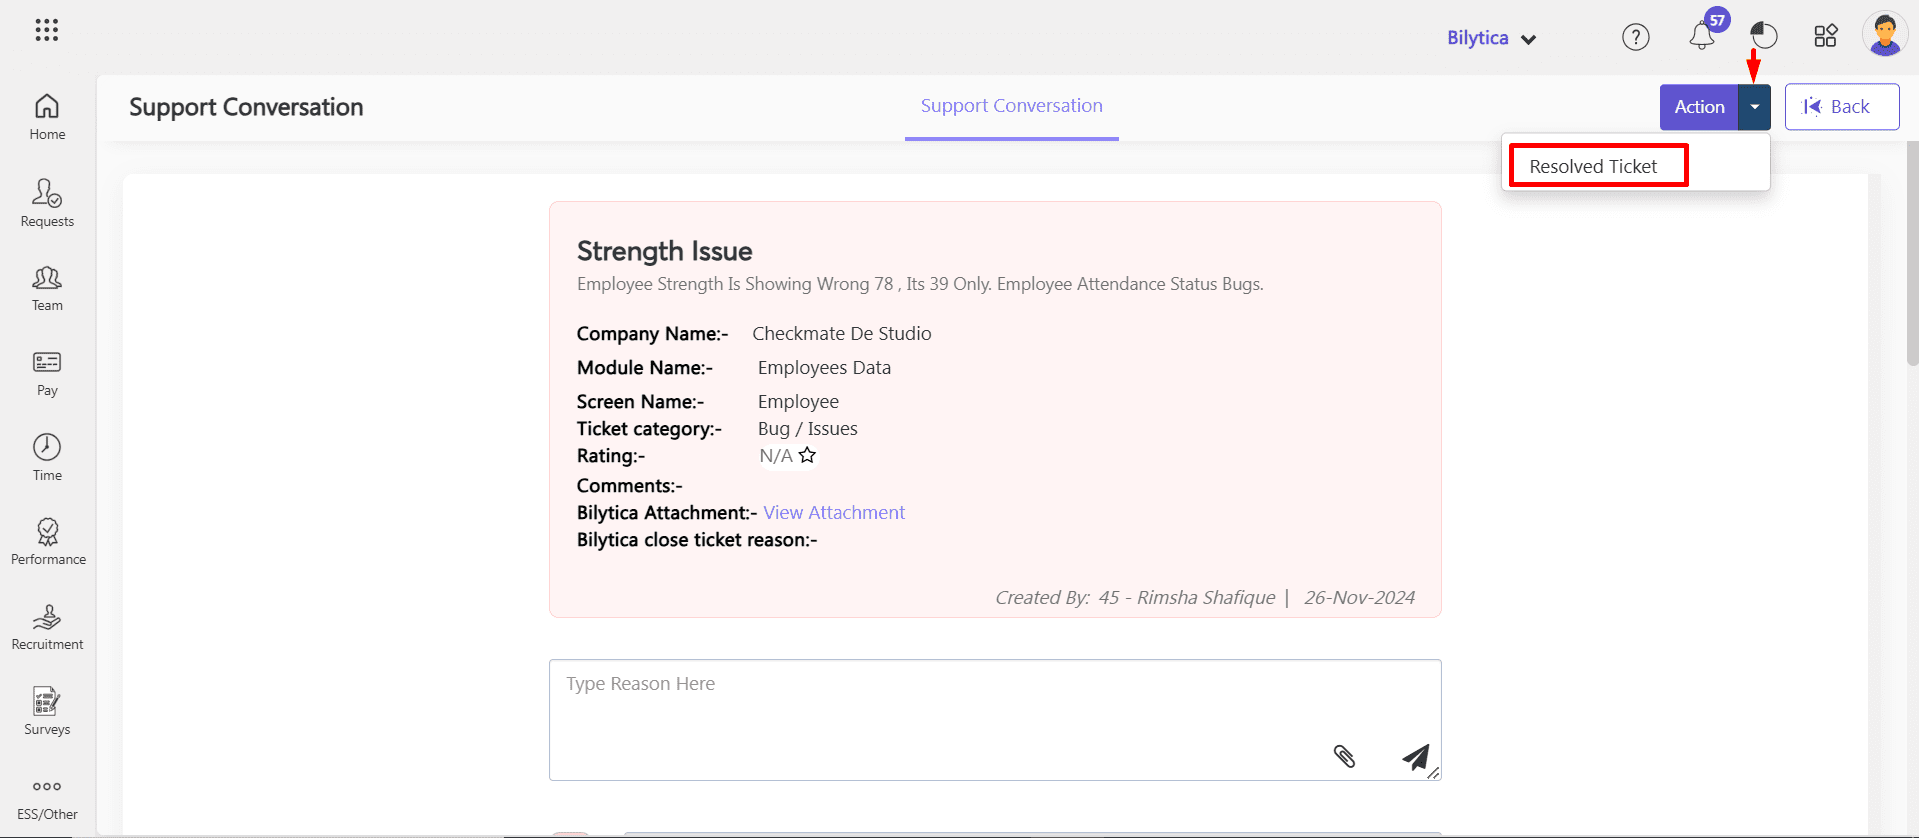
- Click drop down arrow located besides Action on top right corner.
- Once you are satisfied that the ticket has been resolved, click on the “Resolved” button.
- You will be prompted to confirm that you want to close the ticket. Click “OK” to confirm.
- The ticket will be marked as resolved and will no longer be visible in your open tickets list and visible in Resolved tab.
How to Re-Open the Tickets?
If you face any previous issue again you can re-open the closed ticket. Re-open a ticket in PayPeople is a simple process that can be completed in just a few steps. Here’s how you can do it:
- Click on the “Help” icon located at the top left of the page.
- Select “Tickets and Support” from the drop-down menu.
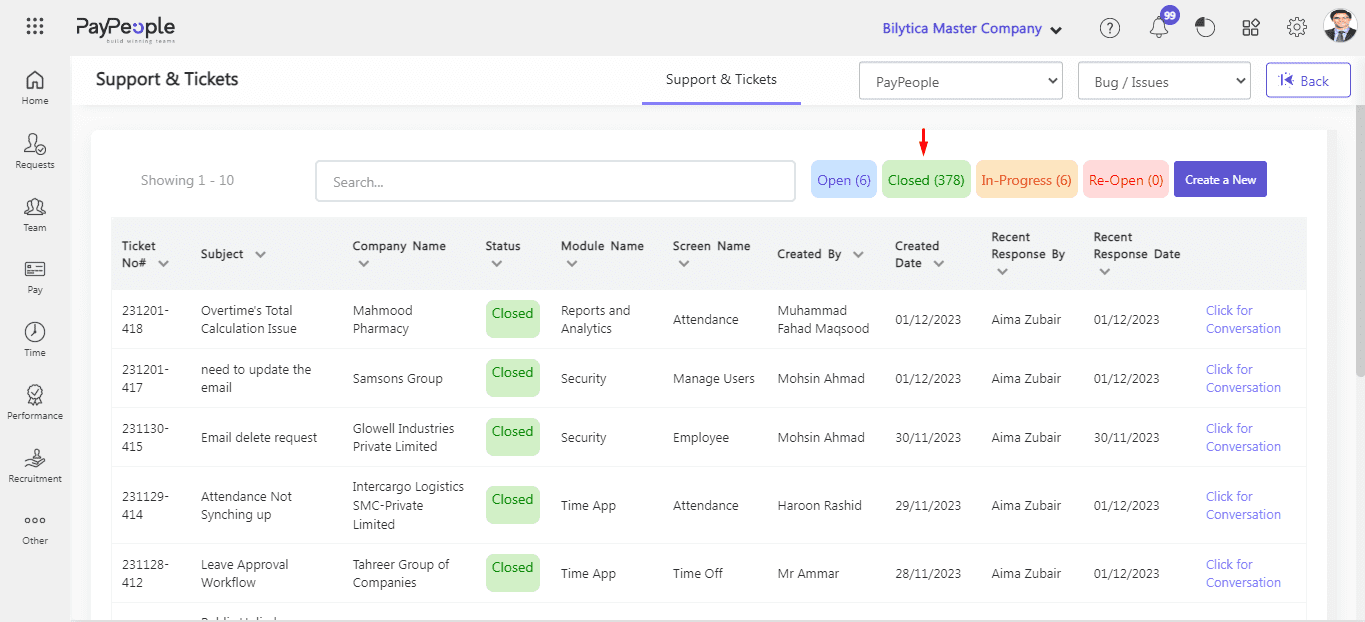
- Click on “Closed” tab.
- Choose the ticket that you wish to reopen. Click on “Click for Conversation”
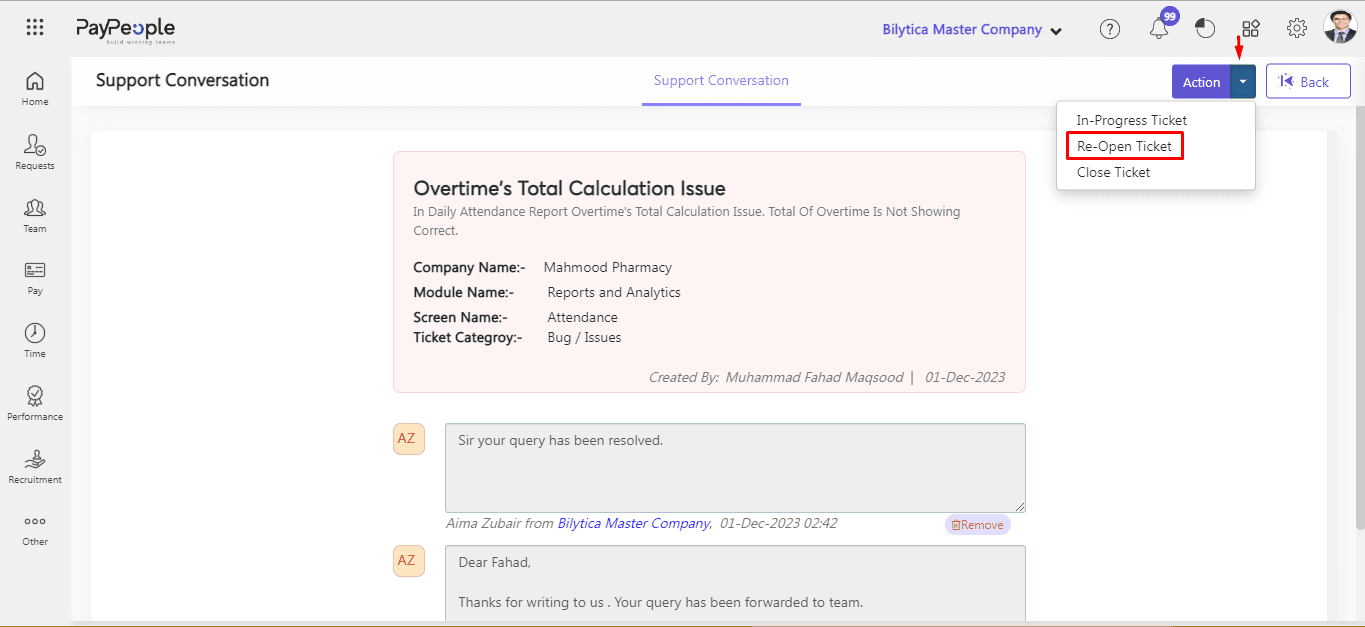
- Then, locate the Action button located on the top right-hand side of the screen. Click on the drop down arrow button and click Re-Open button
- Then the ticket will visible in Re-Open tab.
Suggestions
If you want to give any suggestion about PayPeople. You can also let us know.
- Go to Menu Path:HelpSupport and TicketNew/ Suggestion/ Feedback
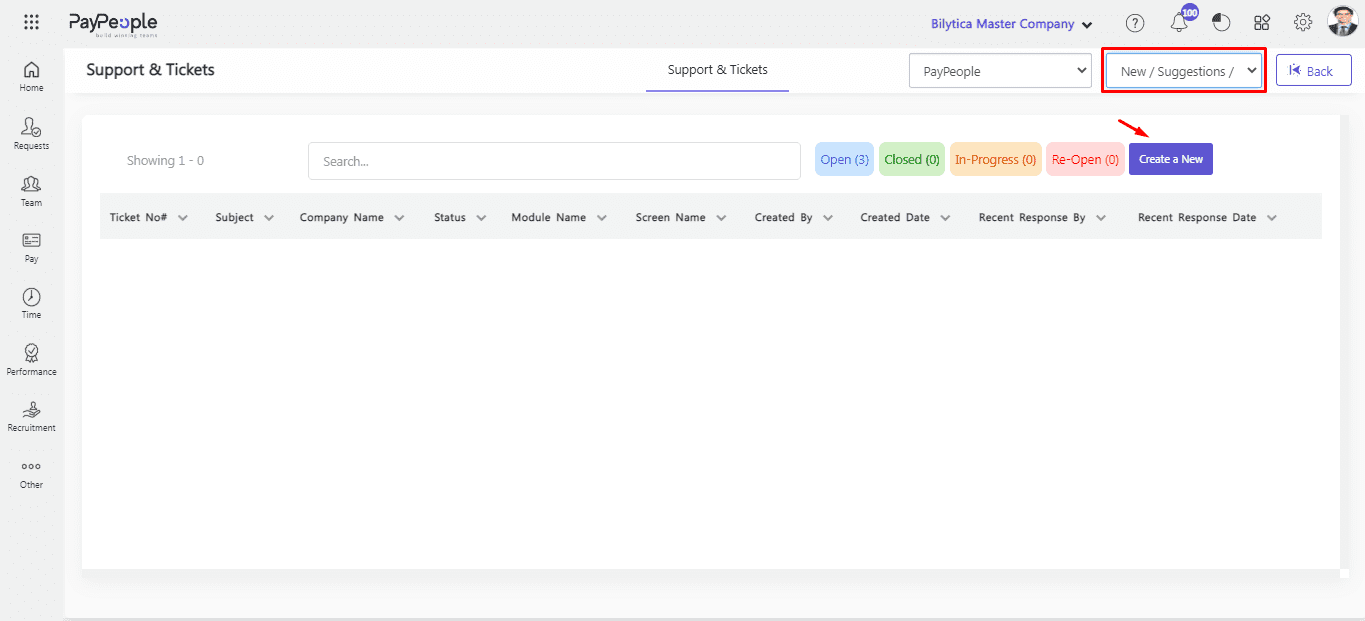
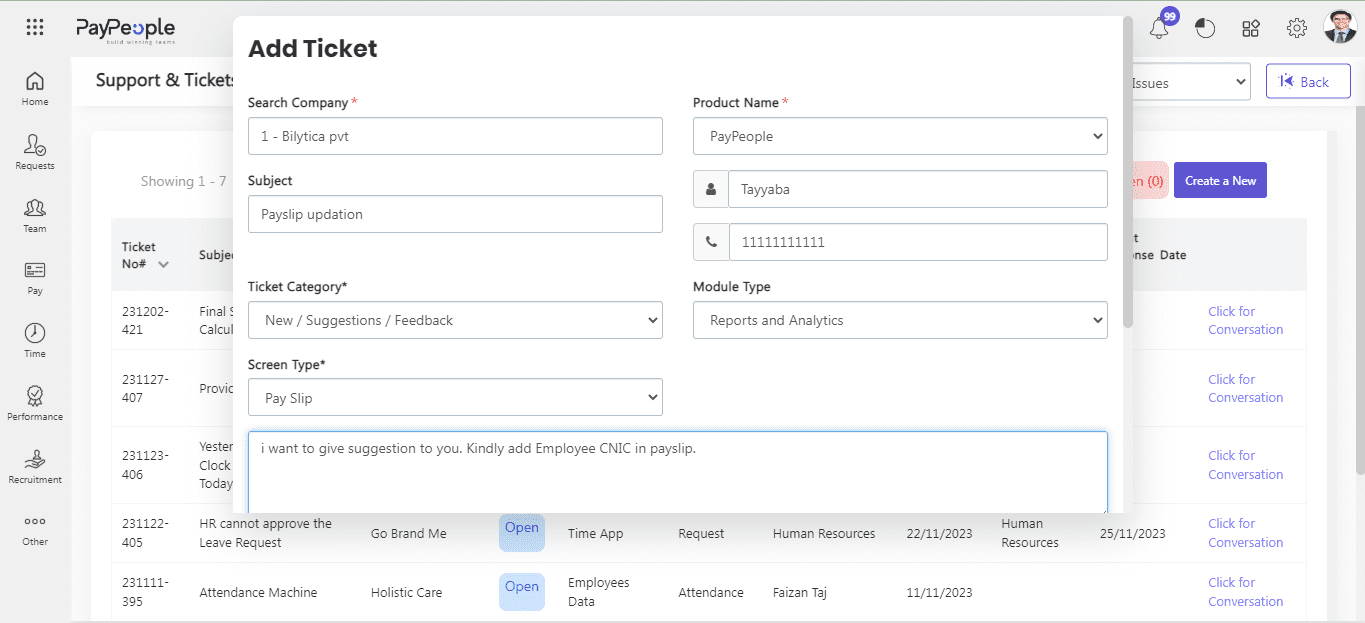
- Select the screen type and module type.
- Add a query description and an attachment if you want.
- Once you have filled out the ticket form, click on the “Submit” button to send your ticket to our support team.
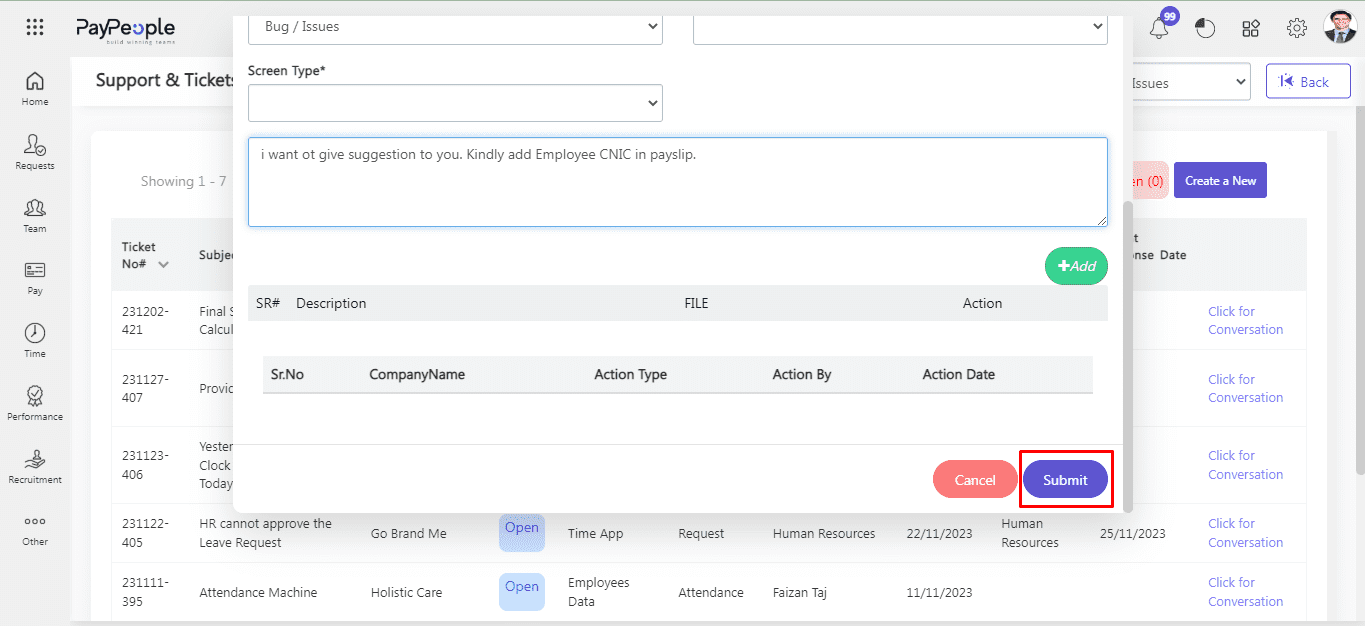
- After that ticket submission it will be visible in Open tab.