

Empowering staff to submit their own work requests while maintaining strict management oversight is a core component of automated payroll and attendance tracking. The PayPeople Request module provides a single, easy-to-use portal for handling all kinds of applications—including leaves, compensation time, loans, salary advances, expense claims, document requests, and attendance corrections—while routing them directly through your company's official approval channels.
1. Initializing and Submitting an Employee Request
To log a new organizational application and route it to your verification authority:
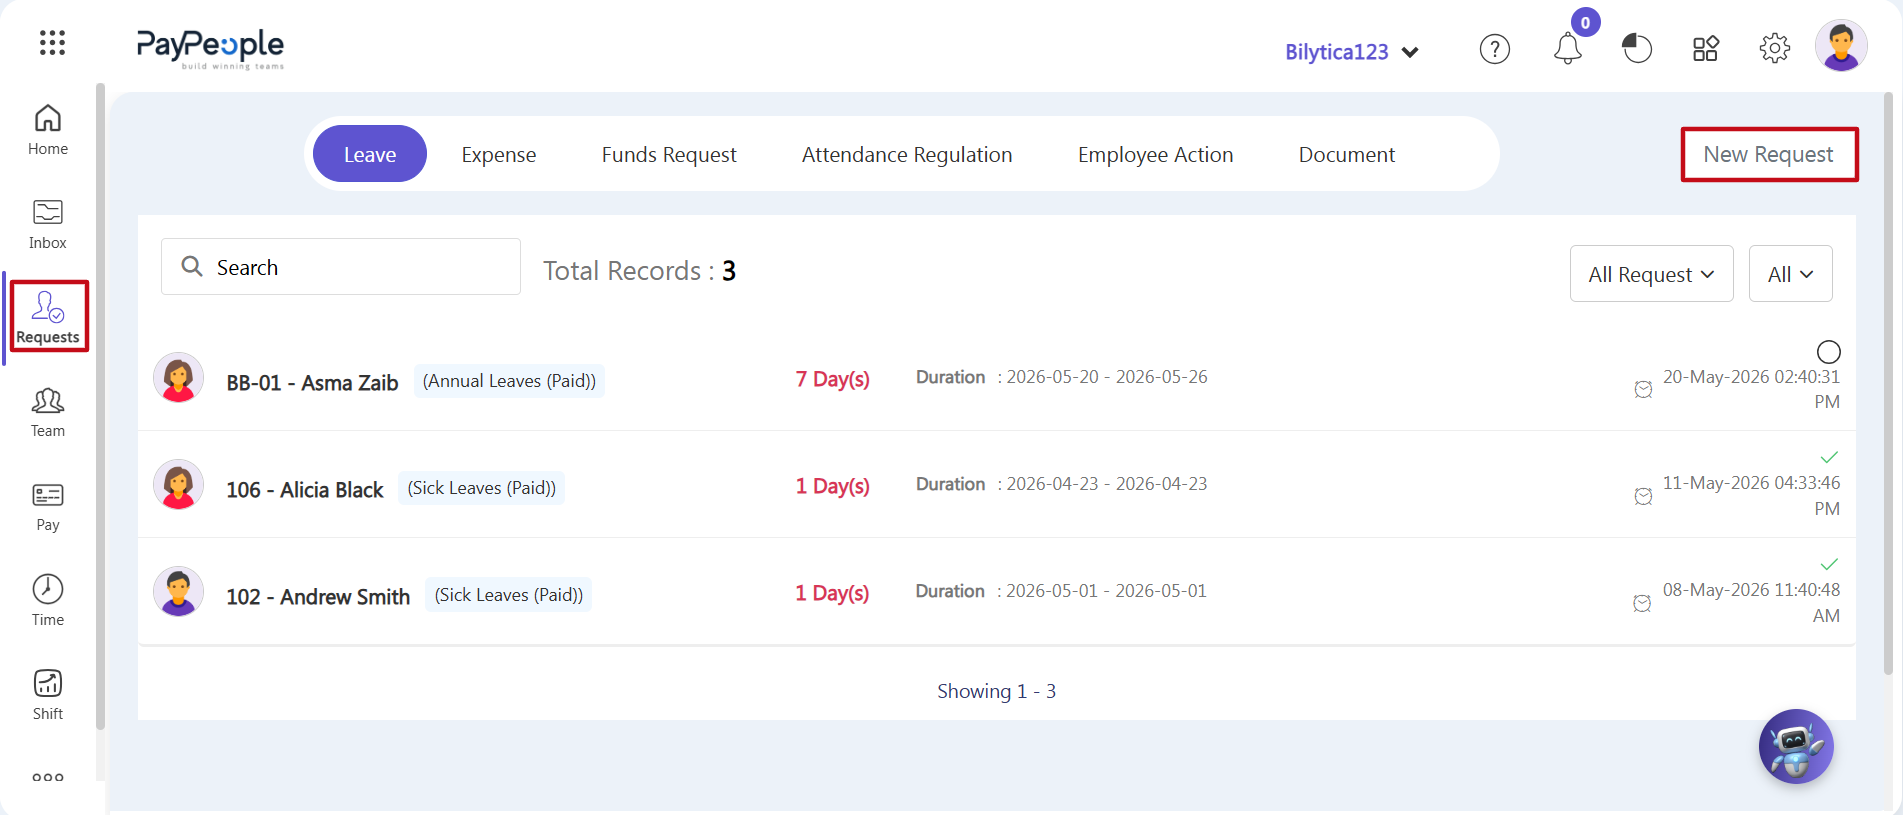
- Step 1: Open the Requests Panel — Go to the main vertical menu on the left side of the platform interface. Locate and click on the Requests module icon (marked with a red rectangular frame box) to open your active summary dashboard.
- Step 2: Choose Request Category — The global overview page will display categories like Leave, Expense, Funds Request, Attendance Regulation, Employee Action, and Document. To launch a new request wizard, go to the top right toolbar and click the white New Request action button (marked with a red rectangular frame box).
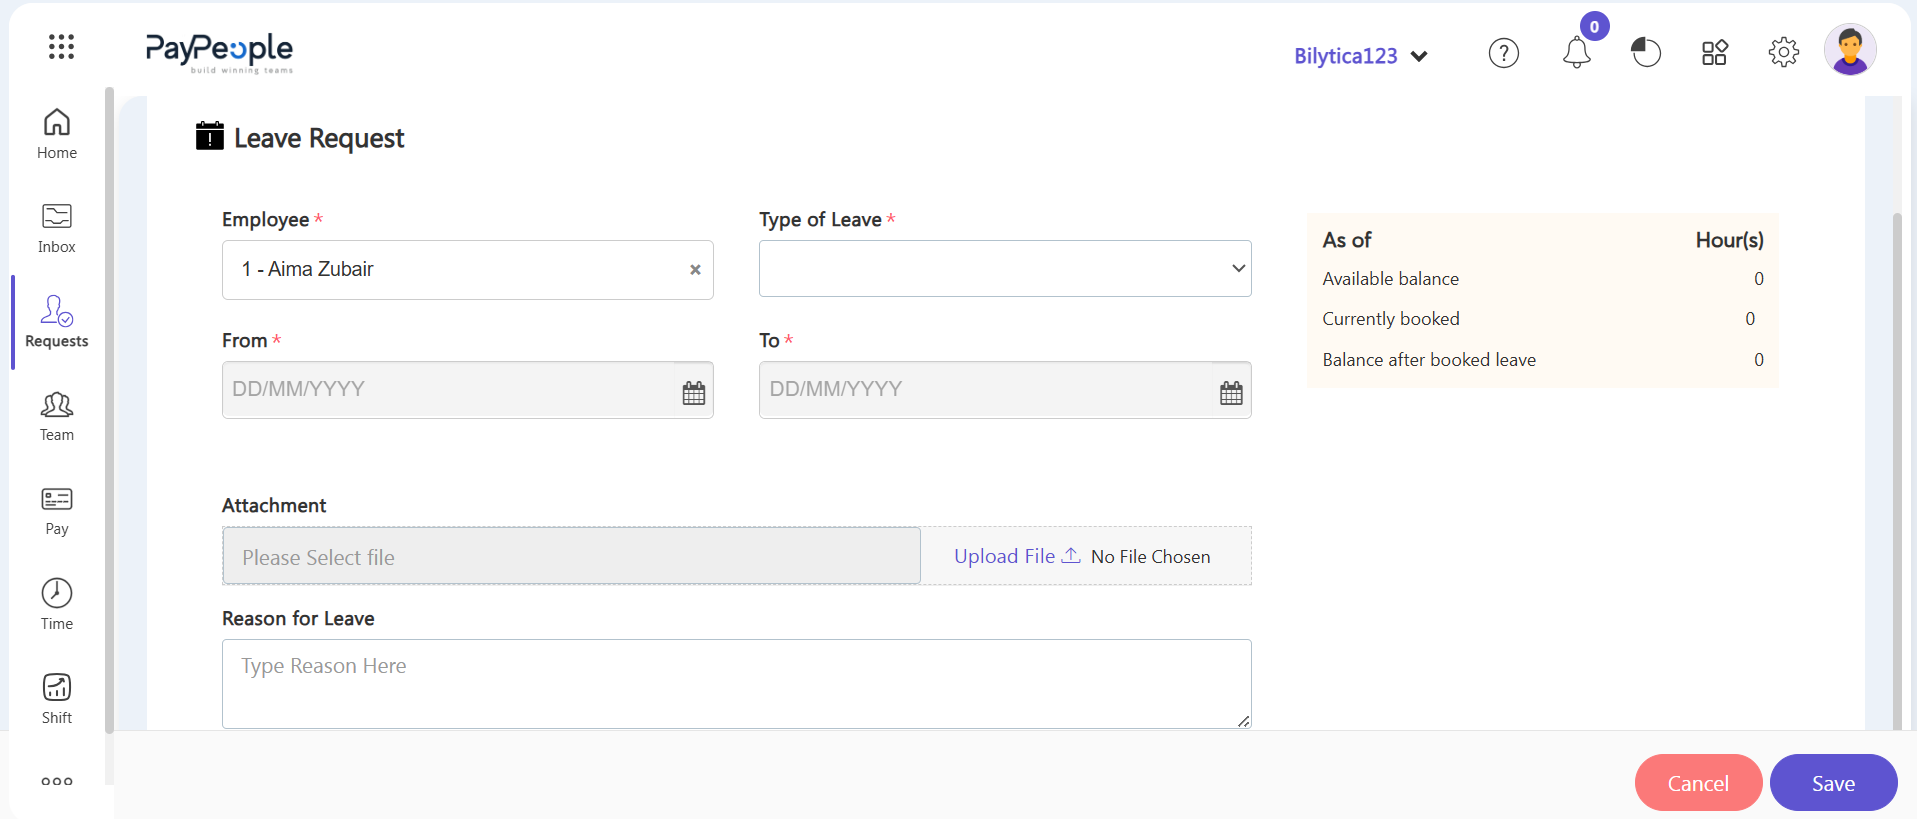
- Step 3: Fill Out the Details Form — A new setup window matching your selected category will pop up on your screen. If you are submitting a Leave Request, complete the following steps:
- Employee & Leave Type Selection: Select the employee's name from the dropdown menu, then choose the exact classification you need from the Type of Leave* mandatory dropdown.
- Real-Time Balance Check: Once a leave type is selected, the system automatically updates the "As of" information box on the right, displaying the exact remaining Available balance, Currently booked hours/days, and Balance after booked leave.
- Duration and Metadata: Select your start and end dates using the From* and To* calendar selectors. Upload any supporting documents or receipts into the Attachment box if required, type a short explanation inside the Reason for Leave text field, and click Save. The request will instantly be routed to the assigned approval manager.
2. Reviewing and Executing Approvals or Rejections
Designated approval authorities can monitor and sign off on pending applications using two core workflow channels:
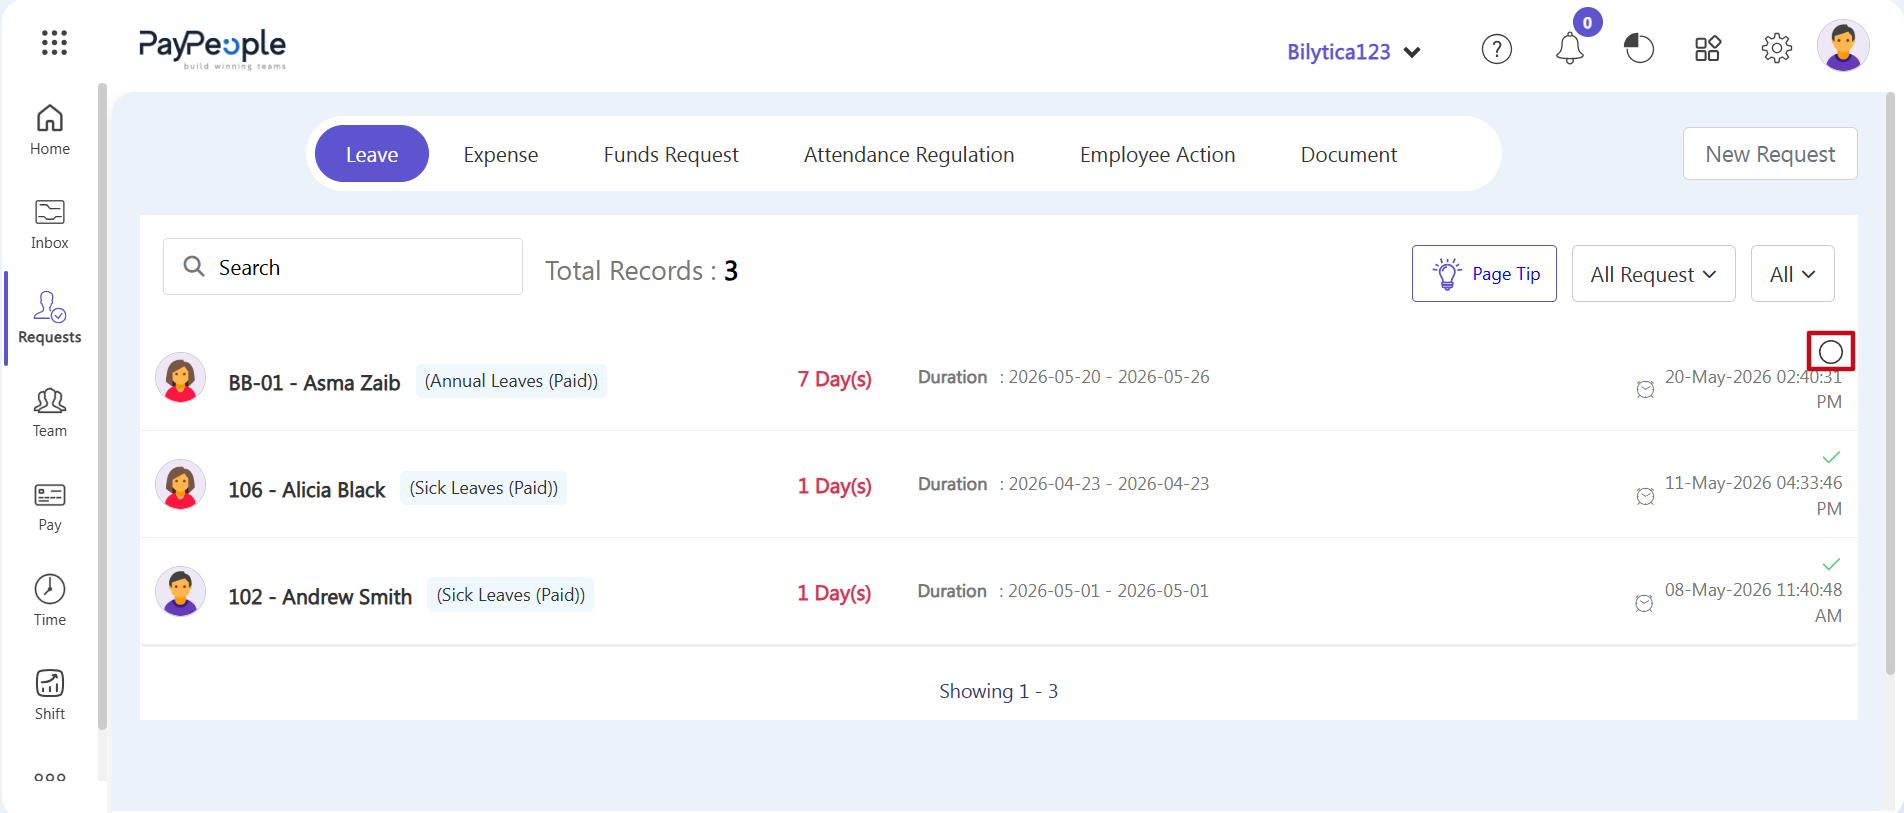
- Method A: Approve or Deny Requests from the Main List — The approval manager can process items directly from the main Requests dashboard. Each request row displays status tracking icons on the right side (marked with a red circle), indicating whether an item is approved (with a checkmark) or still pending (with an open circle). Clicking directly on that status icon row will open the main processing window for that specific request.
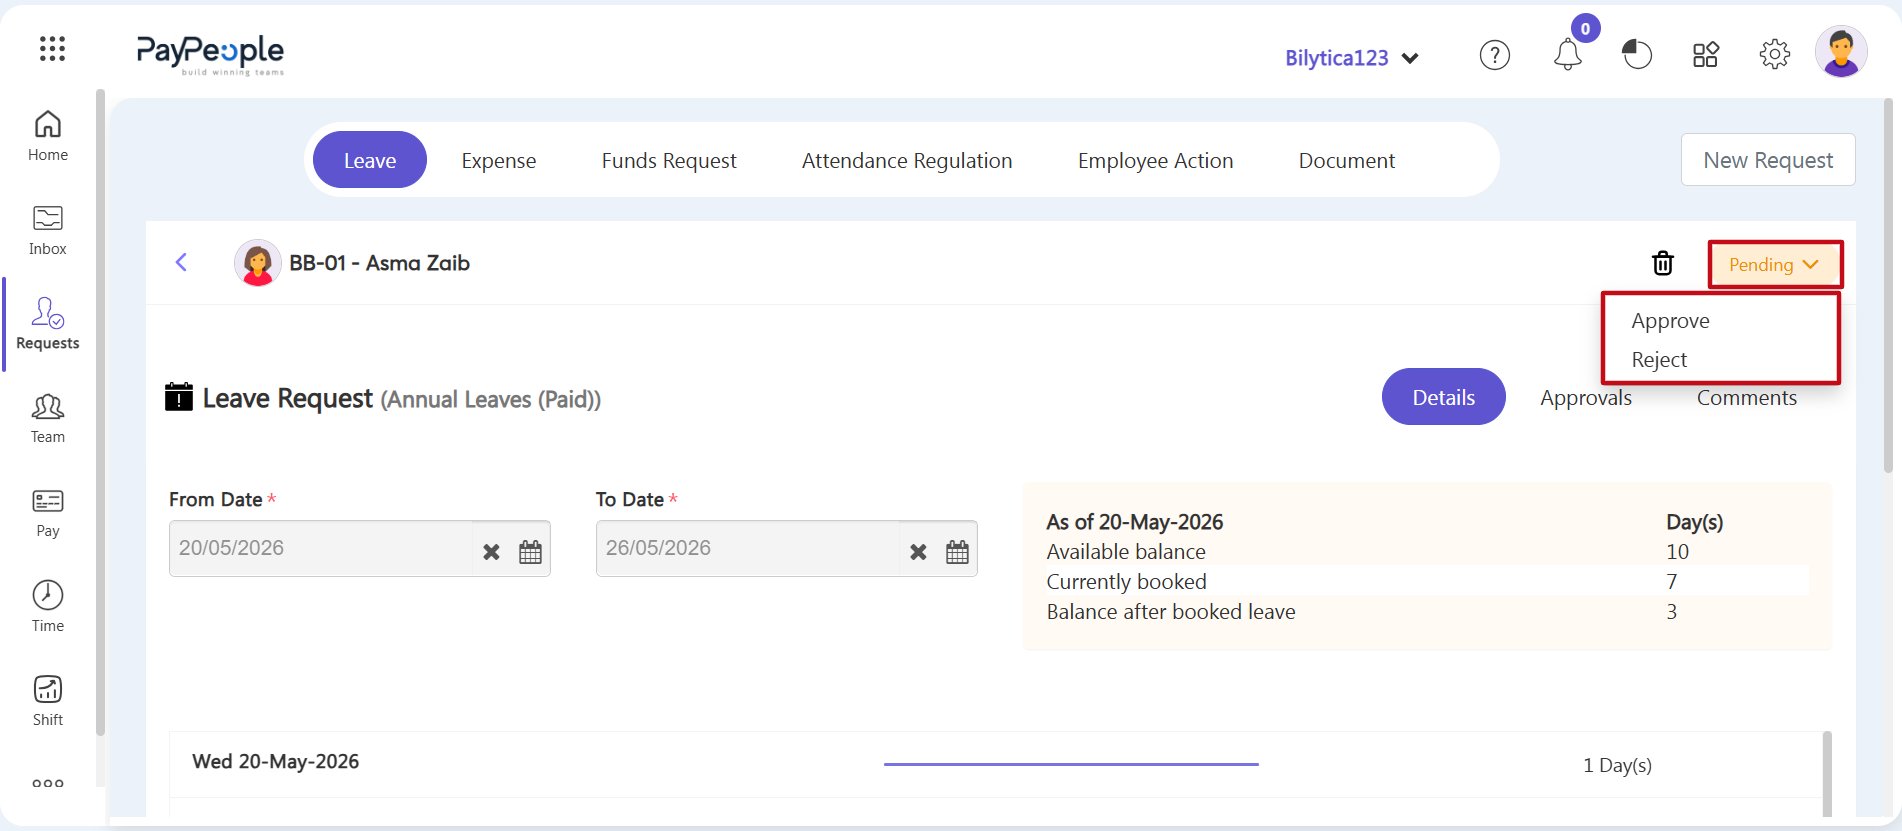
- Step 4: Execute Pending Actions — Inside the detailed application view, locate the dropdown toggle button labeled Pending (marked with a red rectangular border). Click it to open an option menu offering two explicit choices: Approve or Reject. Selecting either option commits the choice to the server, which automatically updates the employee's history timeline.
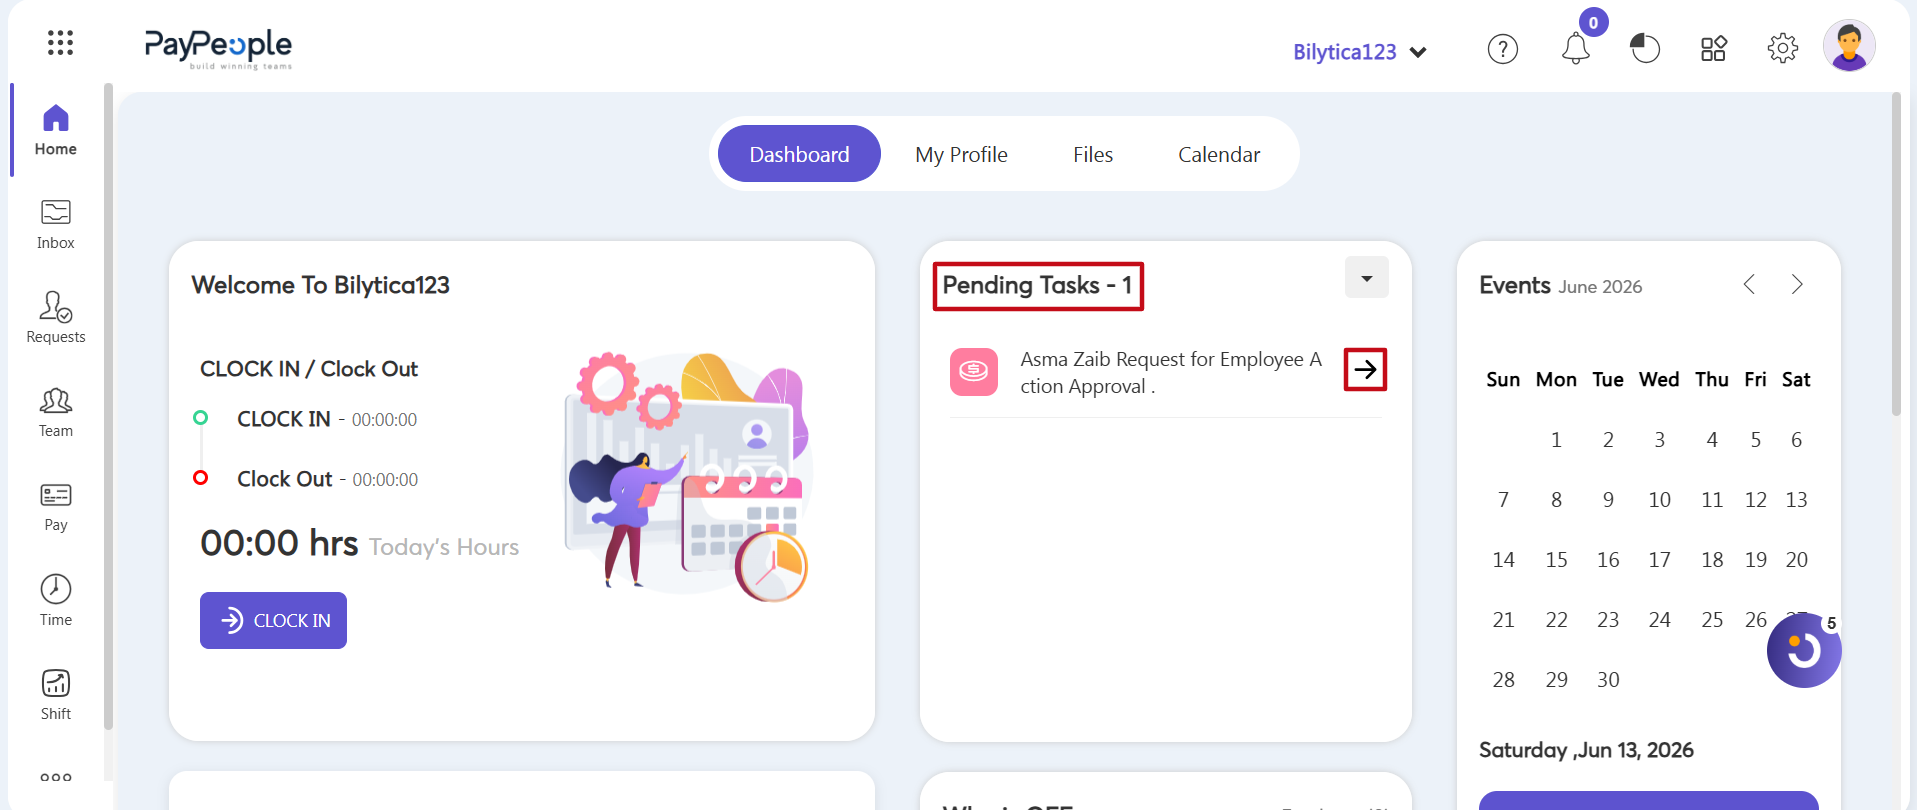
- Method B: Approve Requests Directly from the Dashboard — To clear pending tasks faster without leaving the main landing screen, managers can review the central Pending Tasks grid on the main administrator dashboard. This section lists all active outstanding requests. Clicking the small arrow shortcut button next to any item allows the supervisor to approve or reject it immediately.
Approval Authority Workflow Pro-Tip: |