

Expanding your core employee database allows your company to track unique details, specialized records, or localized compliance IDs. The PayPeople custom fields tool lets administrators easily add these extra tracking rows directly into standard data entry screens without disrupting the system's foundational database architecture.
1. Navigating to the Global Custom Fields Registry
To access the system utility interface and initialize new custom fields:
- Step 1: Open System Settings — Click on the Setup gear icon located in the upper-right toolbar layout.
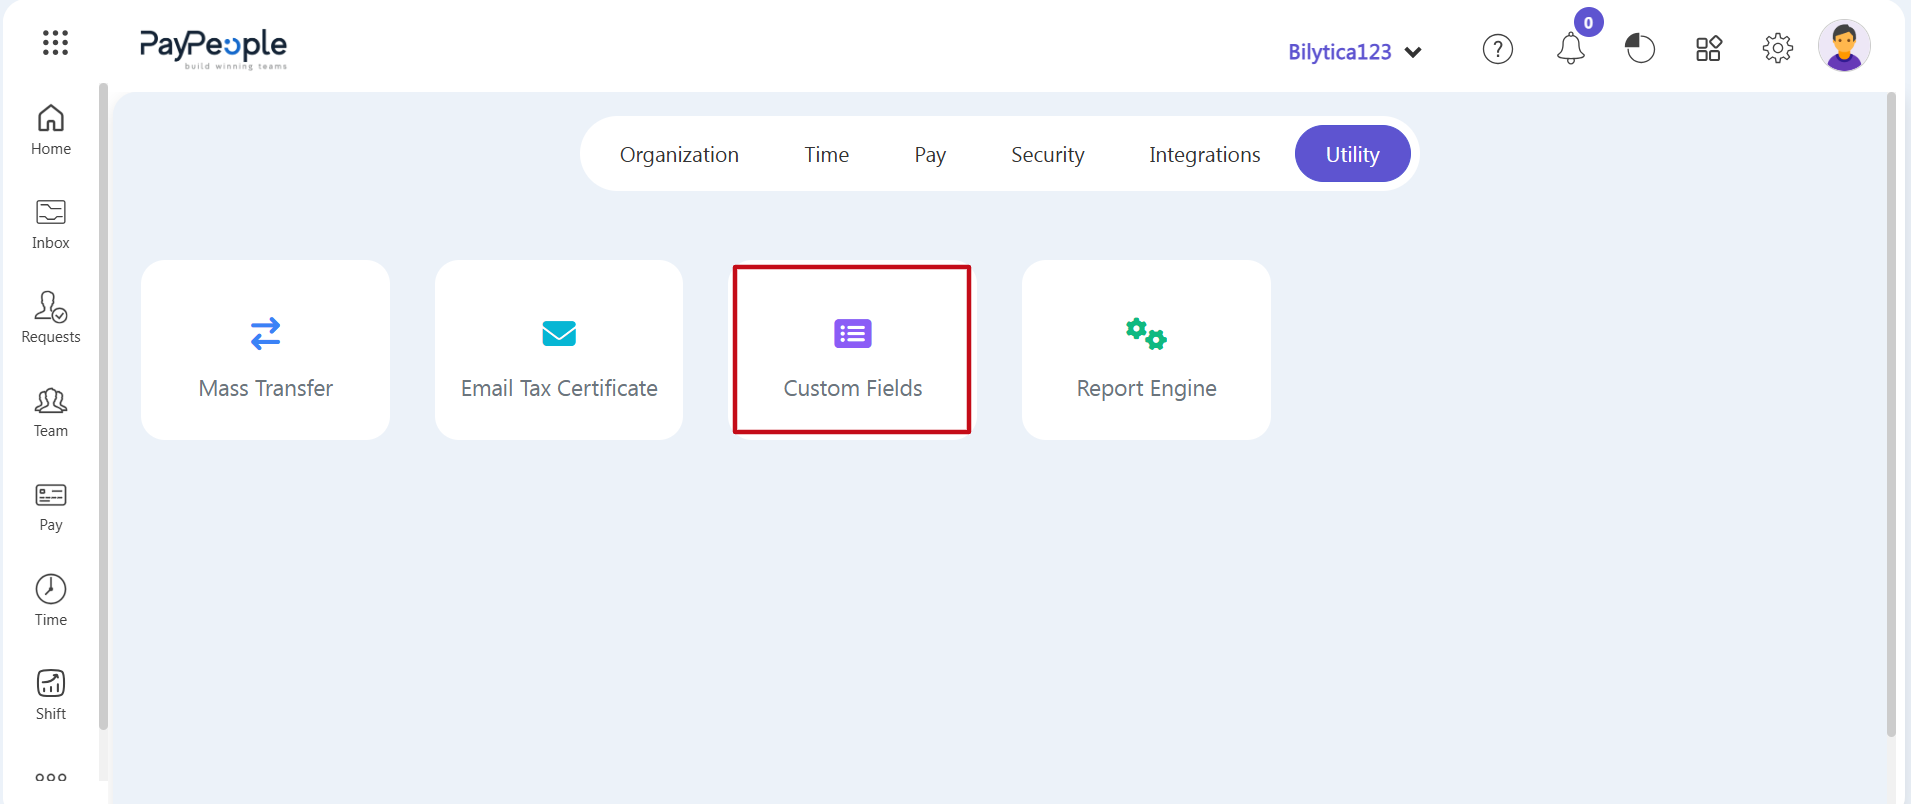
- Step 2: Access the Utility Panel — Click on the horizontal Utility tab inside the top setup menu, then select the Custom Fields card module (marked with a red rectangular frame box).
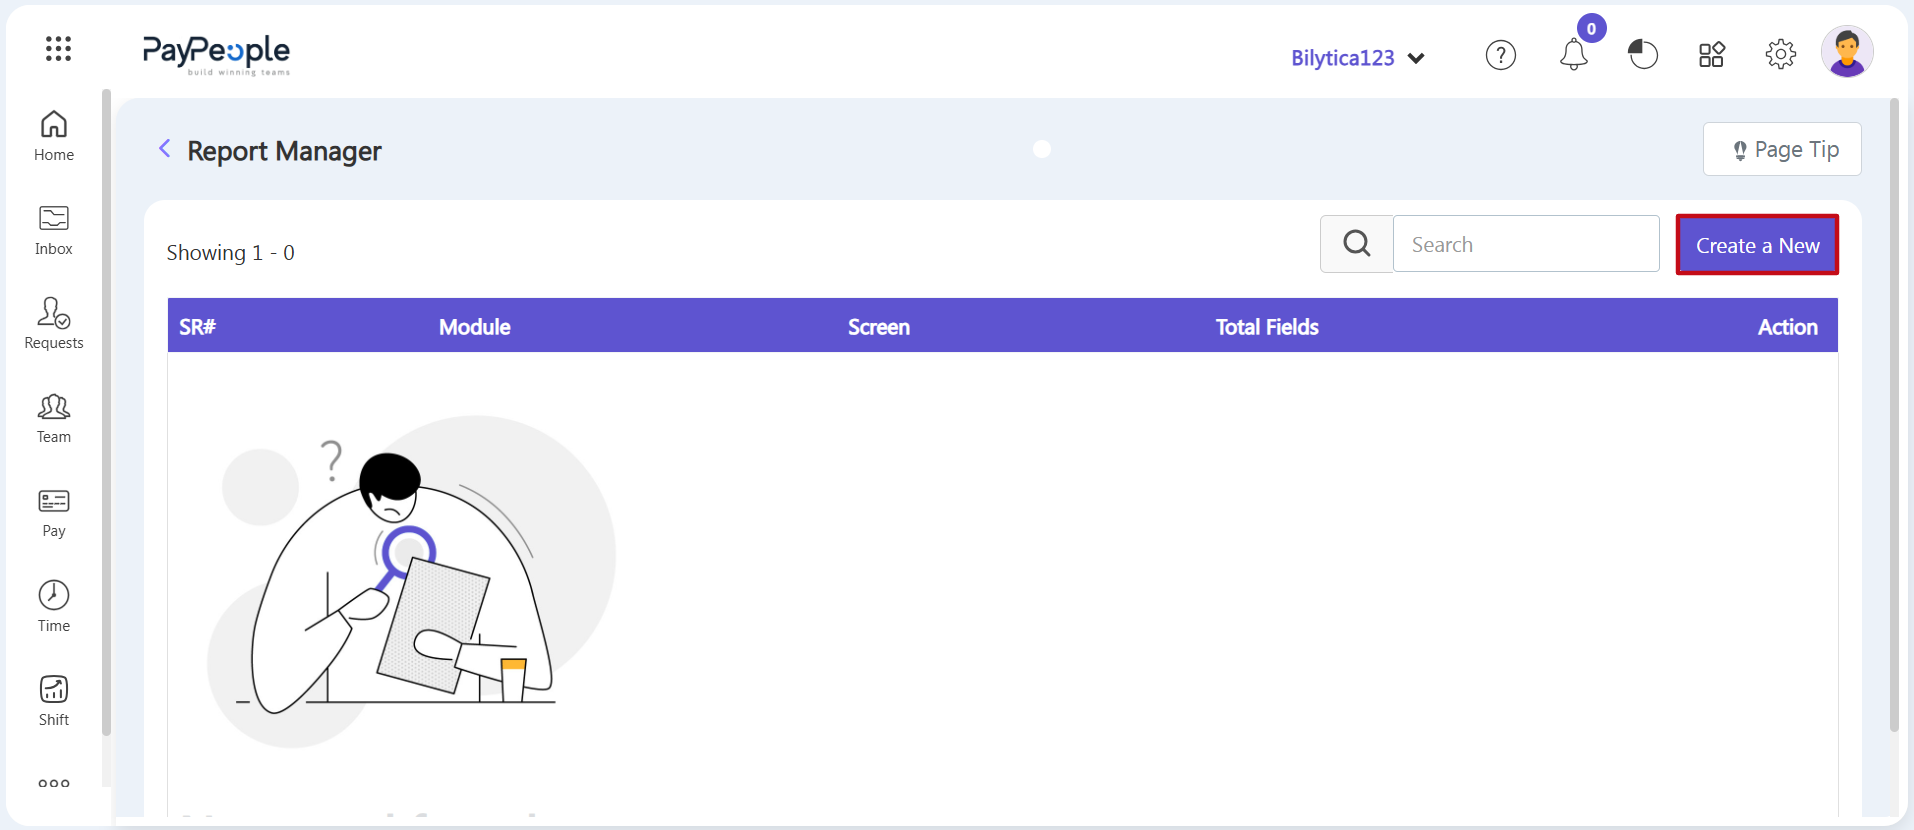
- Step 3: Open the Setup Workspace — The main custom fields registry page will open. Go to the top right side of the screen and click the blue Create a New button (marked with a red box) to open a fresh workspace window.
2. Form Parameter Mapping Workspace
A dynamic Custom Fields design form overlay will open on-screen. Enter the required module fields and validation parameters step-by-step:
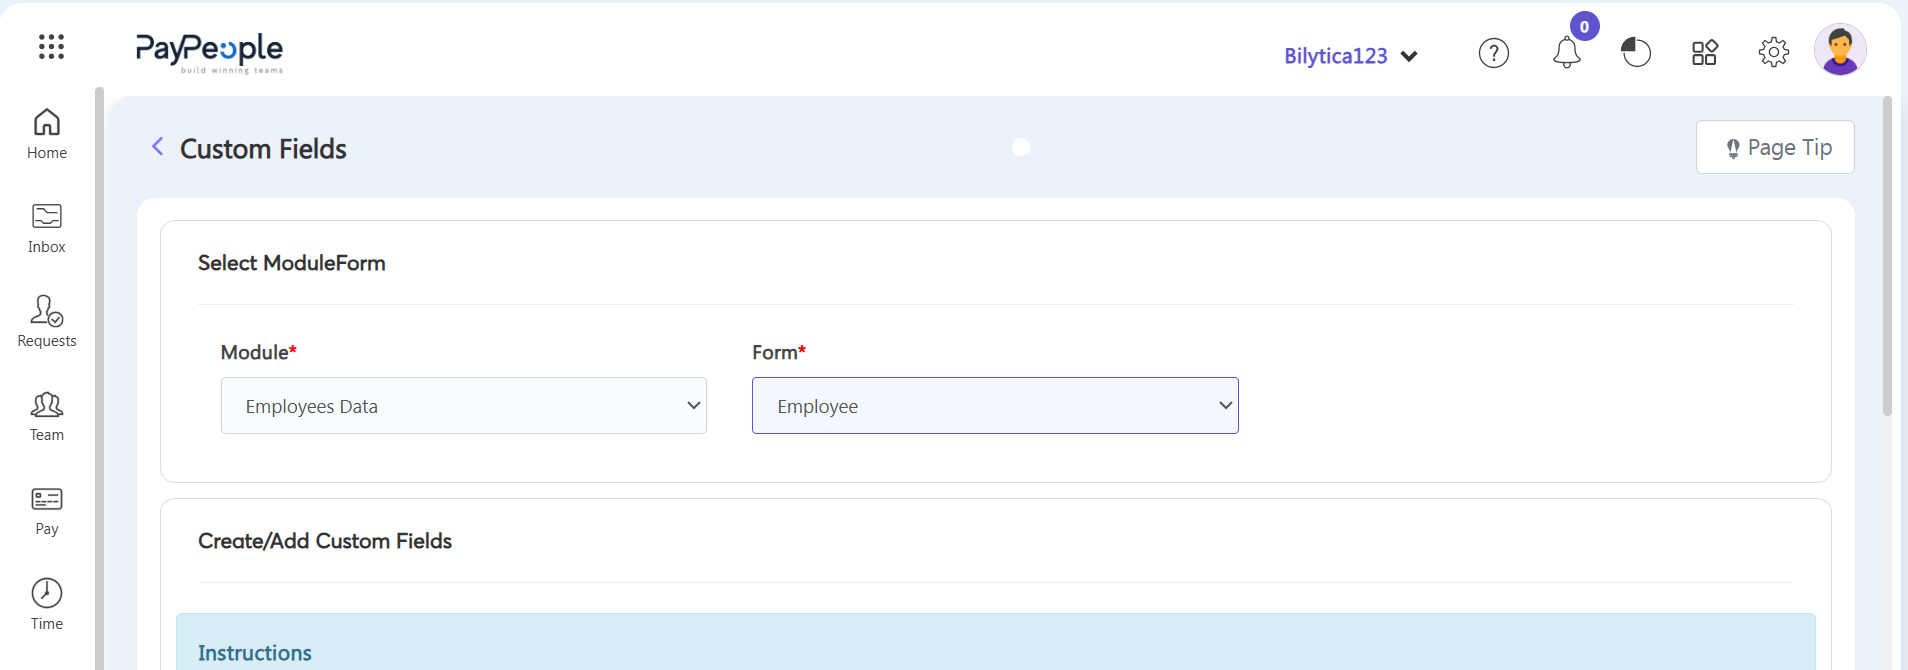
- Step 4: Select Target Module and Form — Under the Select Module section, custom fields are currently restricted to the employee data structure. In the Form* dropdown menu, select Employee.
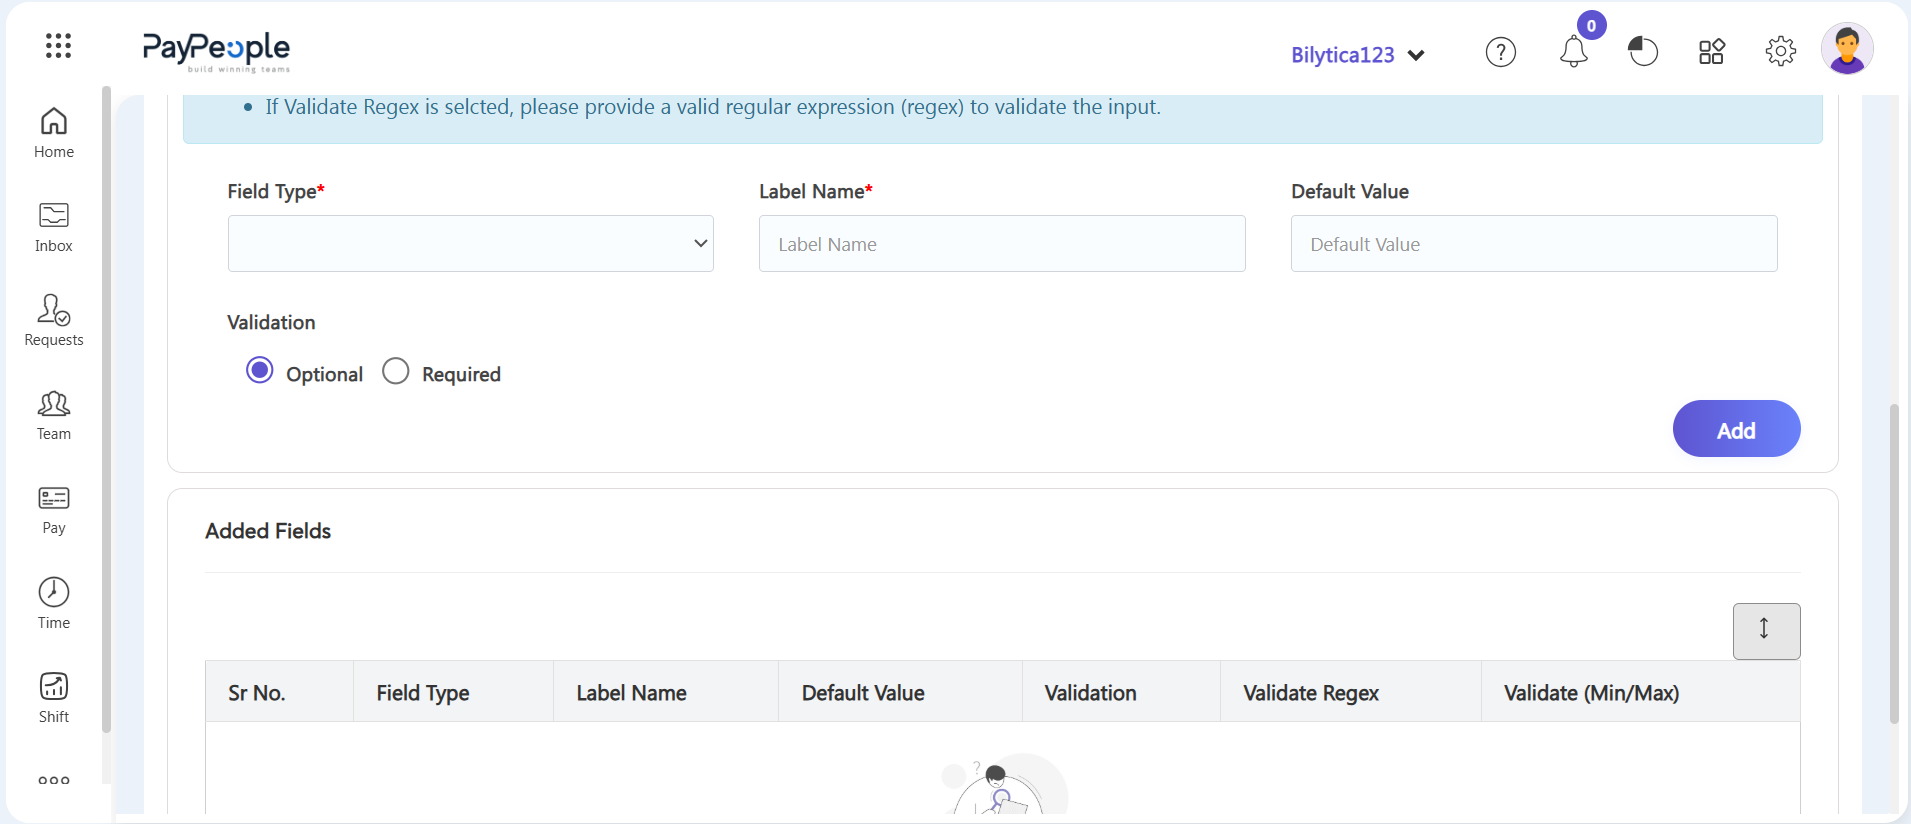
- Step 5: Define the Field Details — Scroll down to the custom fields configuration section and set the following parameters:
- Field Type:* Click the dropdown menu to choose the data format—such as standard words ('Text base'), numbers ('Number based'), or a selection list ('Dropdown').
- Label Name:* Type the exact name or title of the field as you want it to appear on employee screens.
- Step 6: Set Field Requirements — Use the validation options to determine if the field is mandatory:
- Optional: Select this if the field is non-essential and can be left blank during onboarding.
- Required / Compulsory: Enable this to make the field strictly mandatory, preventing a profile from being saved without it.
- Step 7: Add to the Setup List — Once that specific field line is configured, click the blue Add button on the right. The field will immediately move down into the "Added Fields" summary list below. To create multiple fields at once, simply repeat steps 5 and 6 before saving.
- Step 8: Save and Apply to the System — Review your created fields, label names, and validation rules in the summary list. Click the Save button at the bottom of the section to deploy the updates instantly to the live employee data form.
.
Data Architecture Standardization Pro-Tip: |