Table of Contents
How Does an ESS User Add a Leave Request? #
- Go to Requests > Leave Request > All Request/My Request > New Request
Note:
- All Request: If you want to see your team requests.
- My Request : If you want to see your requests.
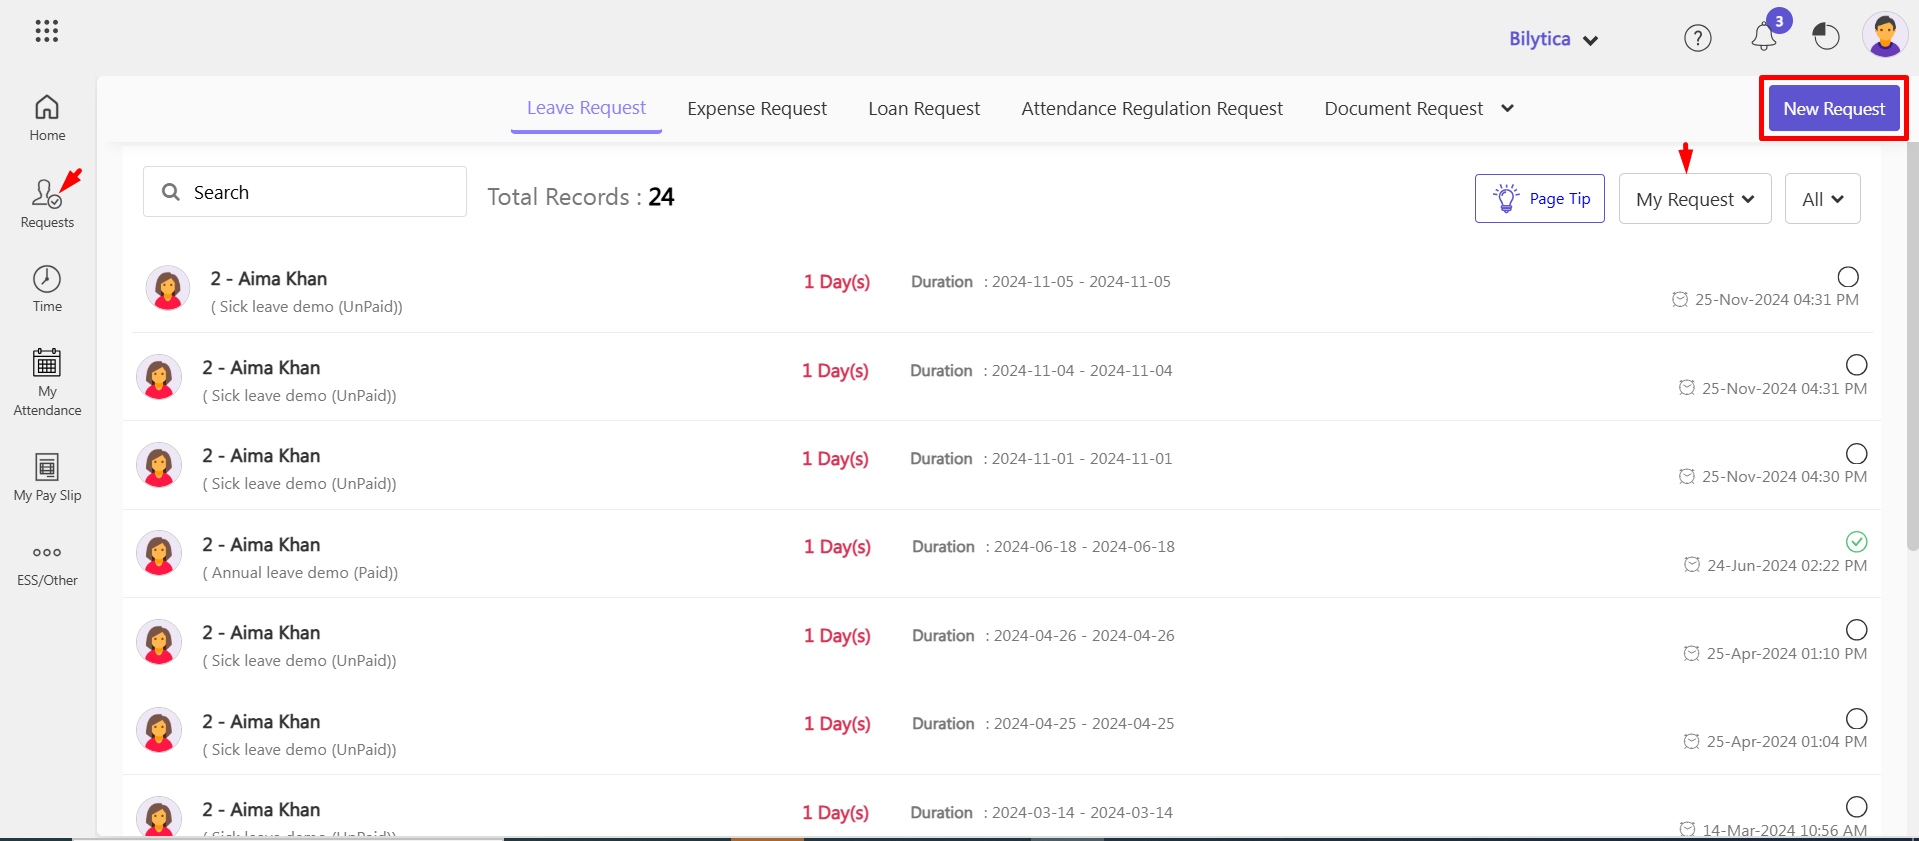
- By default your name is selected in emplpoyee field.
- Select to and from dates for leave.
- If necessary upload document and write reason.
- Click on “Save” button.

- After save the request will show on approver’s dashboard in Pending task.
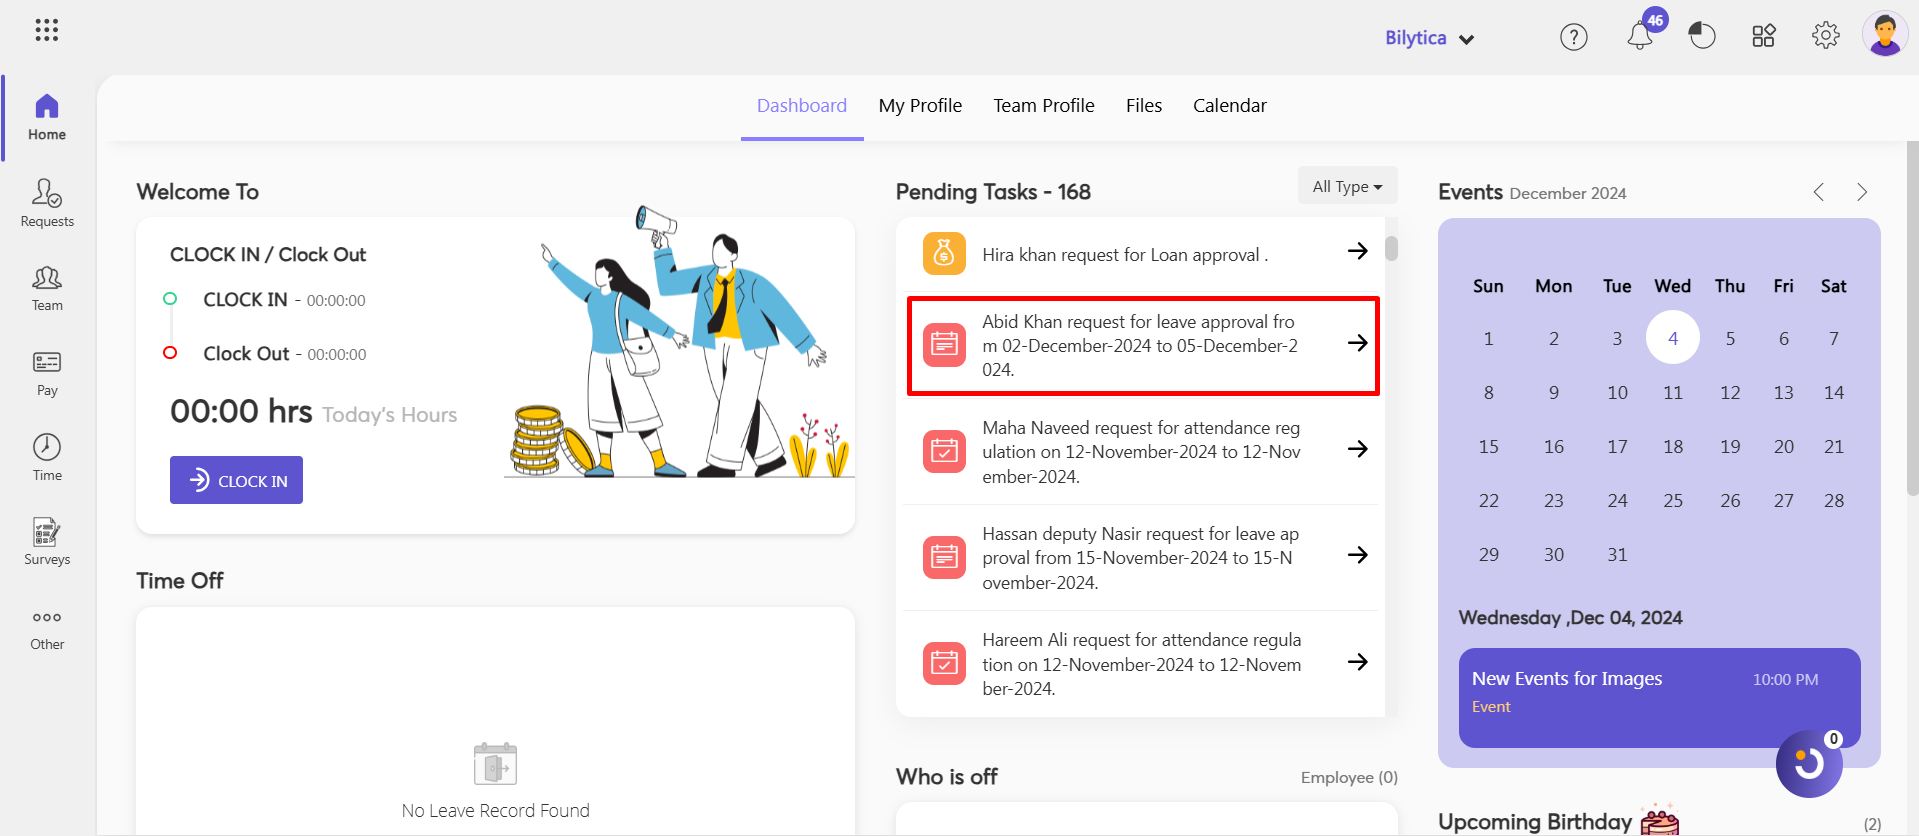
- This request will be added to the list of pending tasks. The approver can then approve or reject it with a single click.
- The administrator can view the pending tasks’ leave requests, loan requests, advance requests, and expense requests.

How Does an ESS User Add a Expense Request? #
To add Expense Request from ESS accounts ;
- Go to Request => Attendance Regulation Request => All Request/My Request => New Request
Note:
- All Request: If you want to see your team requests.
- My Request : If you want to see your requests.
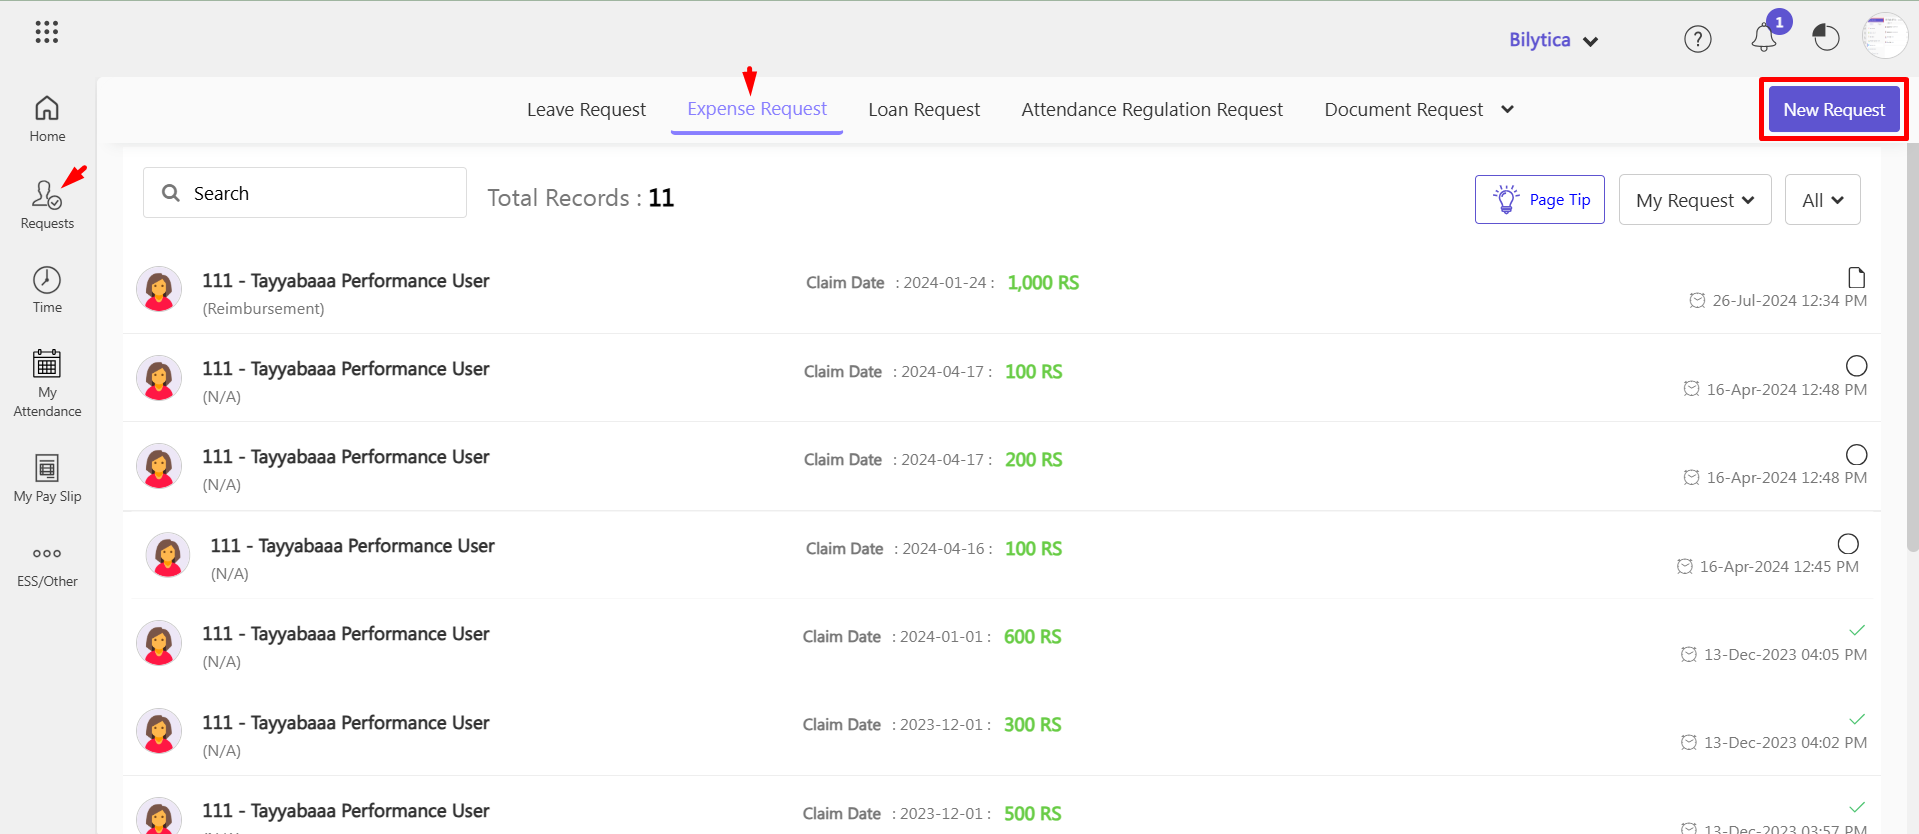
- Upload document; containing relevant expenses such as a deposit slip, a bill, or a form.
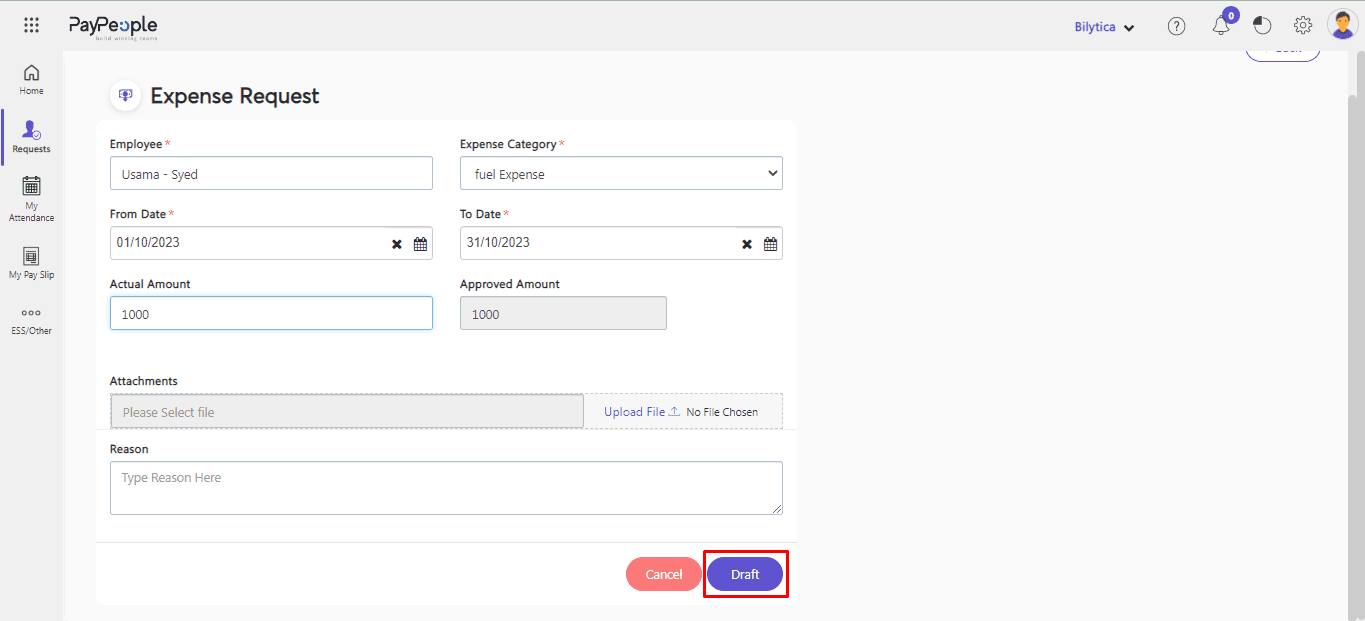
- Expense Category: Secondly, under the Setting section, choose the expense category that you defined in Expense category in Request section.
- Employee name: In the employee name field, write the name of the employee who wants to take any expense.
- Total amount: Mention the whole amount of the expense in this field.
- Date: Have included the date that expense was issued in the date section.
- Draft: Click on Draft button.
- Go to My Request > Expense Request > Click on your Draft request
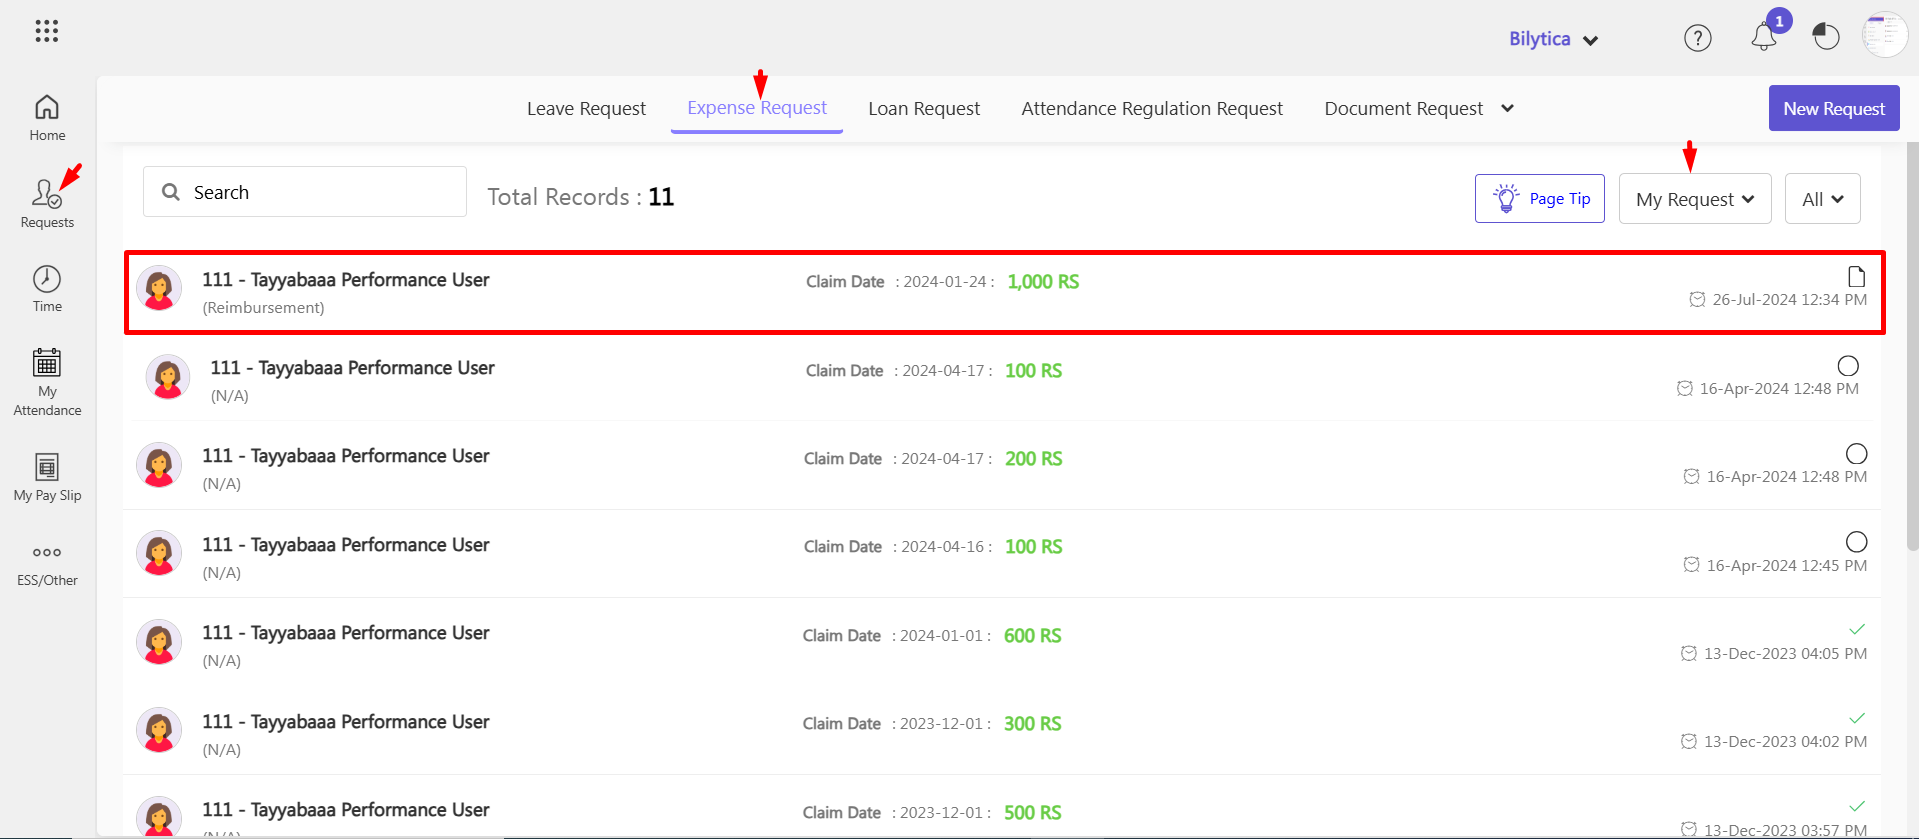
- Click on Update button if you edit something, otherwise click on Finalize button.

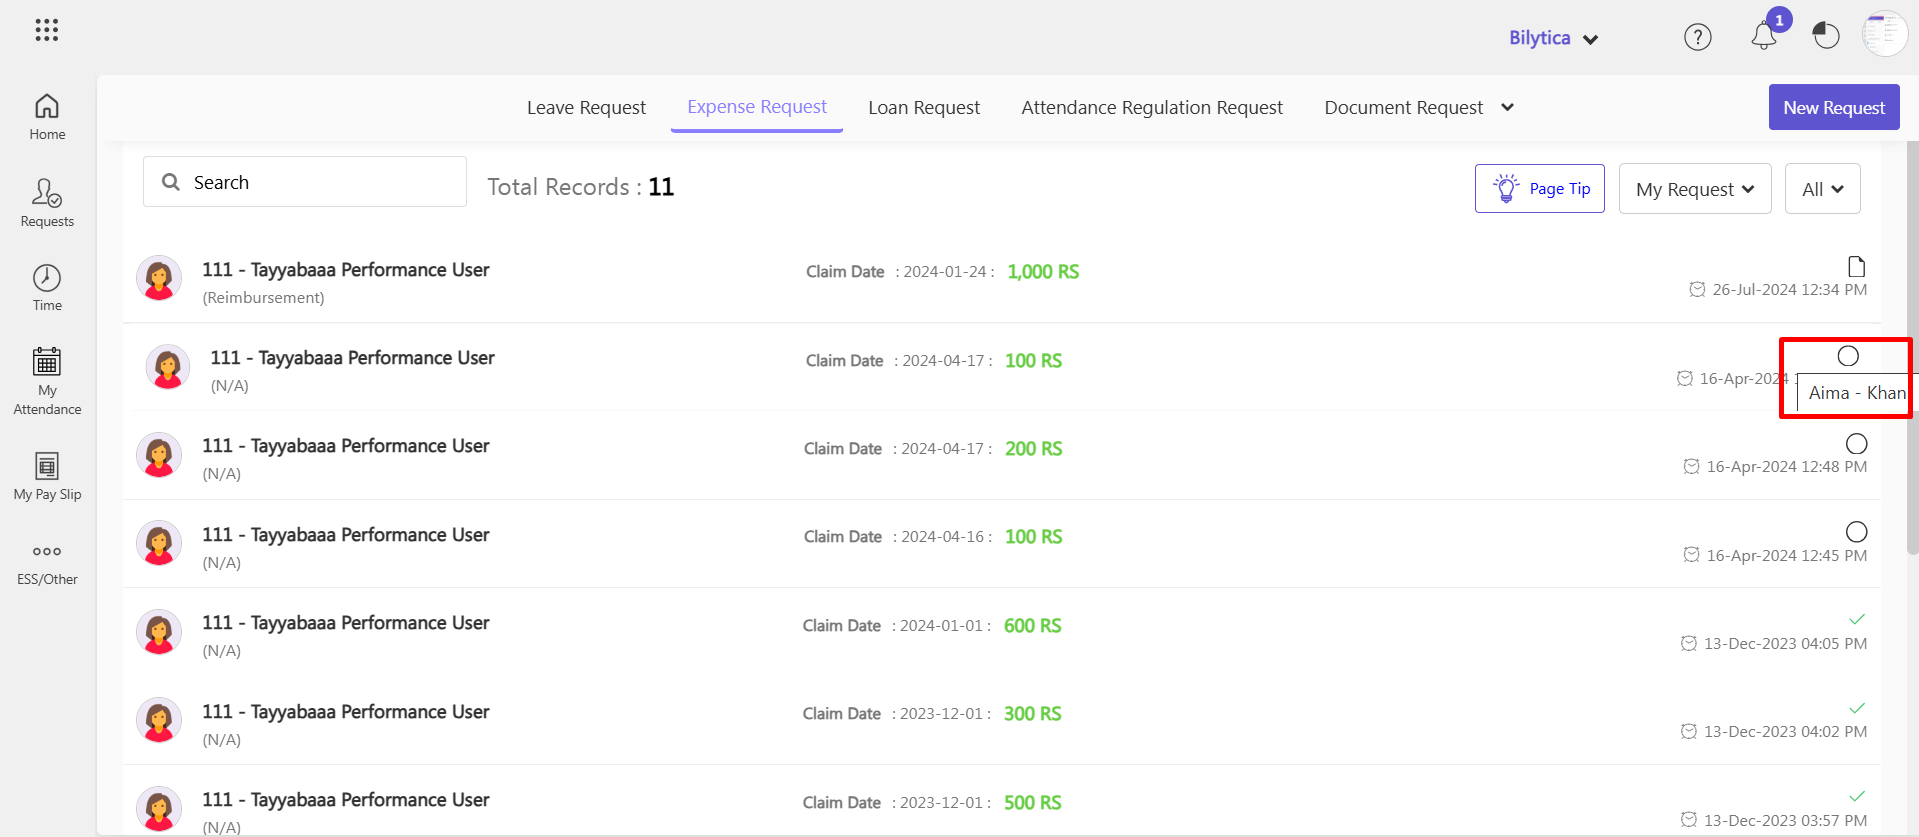
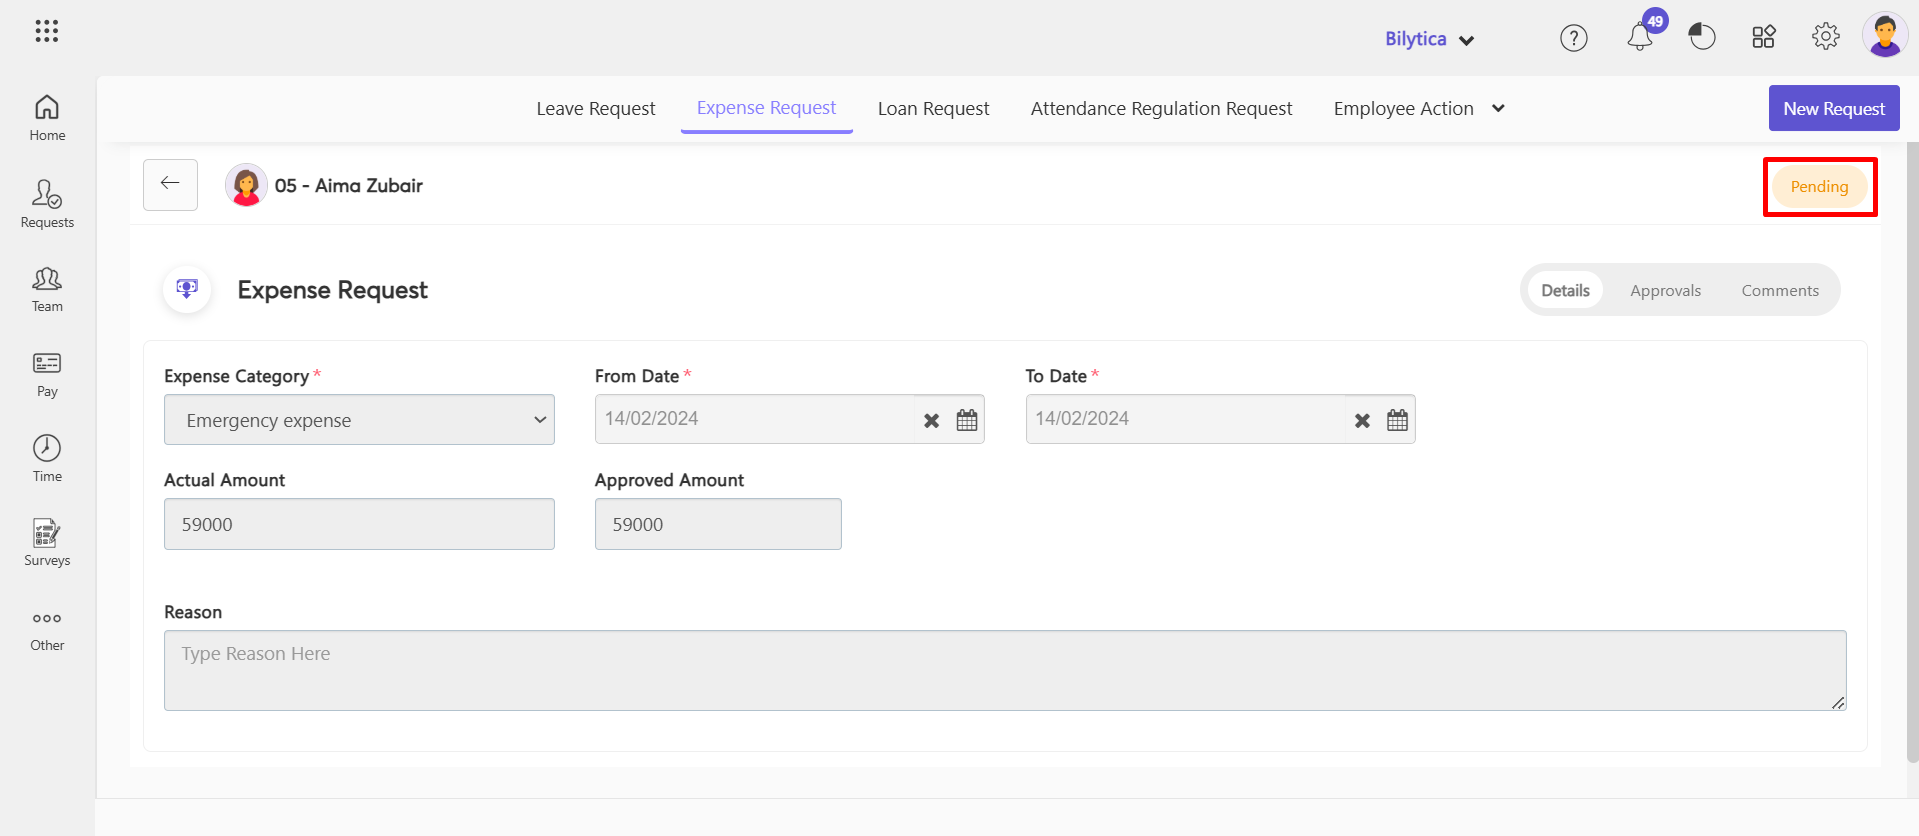
- By hover the cursor on circle, you can view the approver’s name.
- After save the request will show on approver’s dashboard in Pending task.
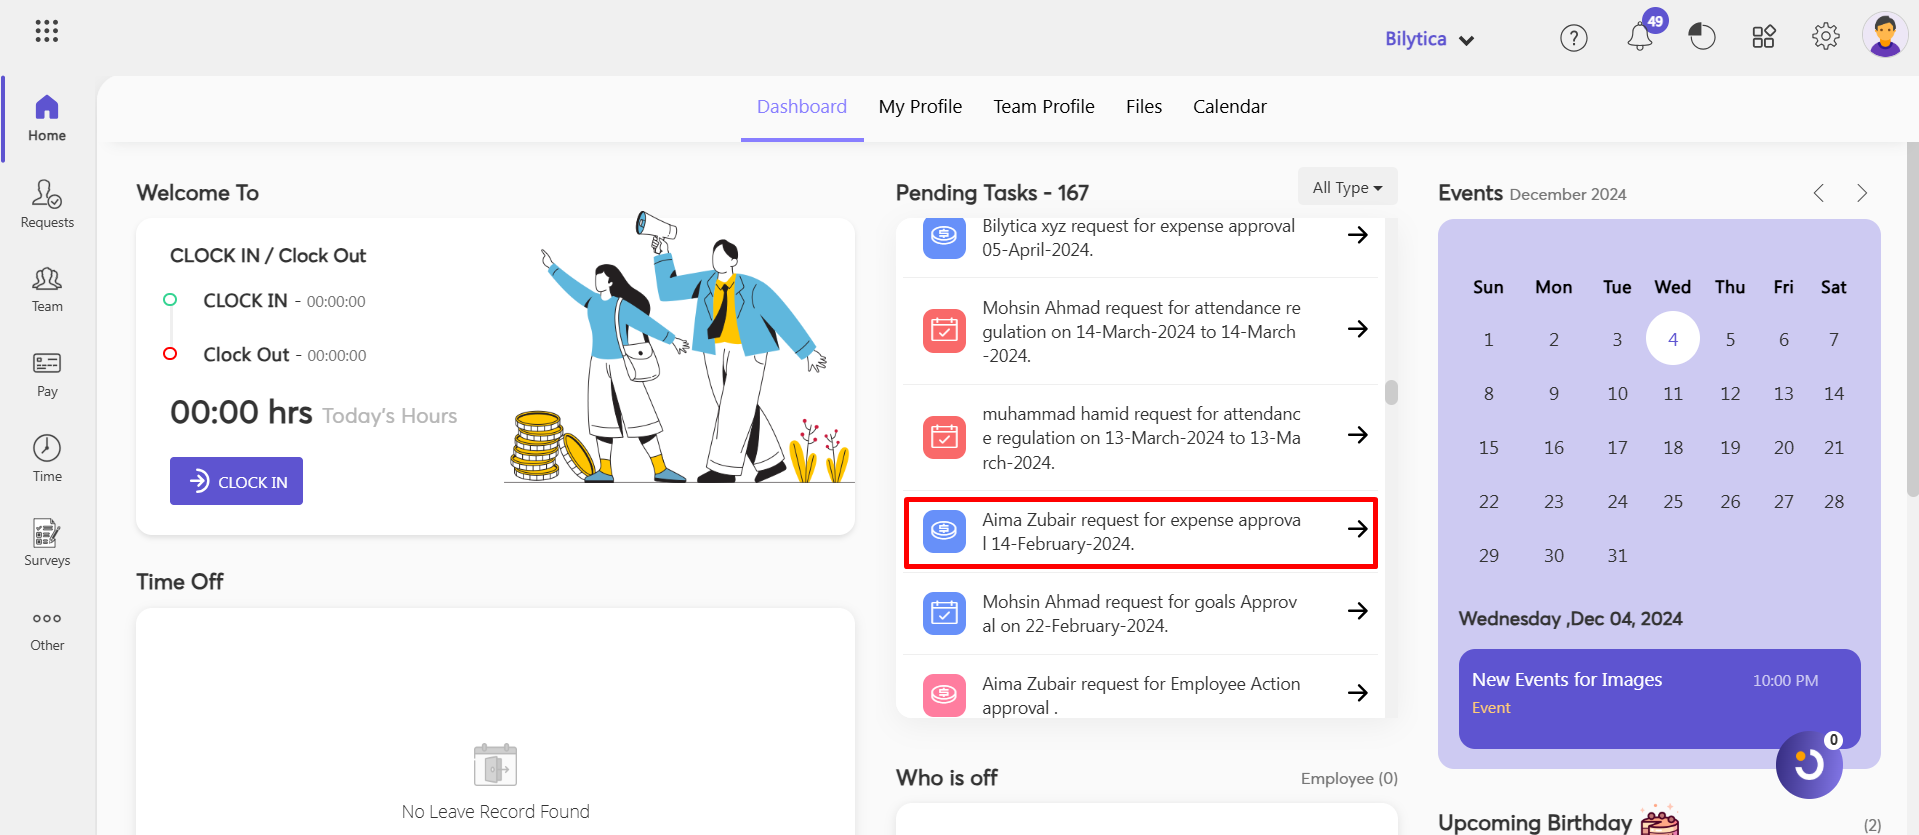
- Action: Higher authorities/approver take action on it, either Approve or Reject it by click pending button.
How Does an ESS User Add a Loan Request? #
To add Loan Request from ESS accounts :
- Go to Request => Loan Request => All Request/My Request => New Request
Note:
- All Request: If you want to see your team requests.
- My Request : If you want to see your requests.
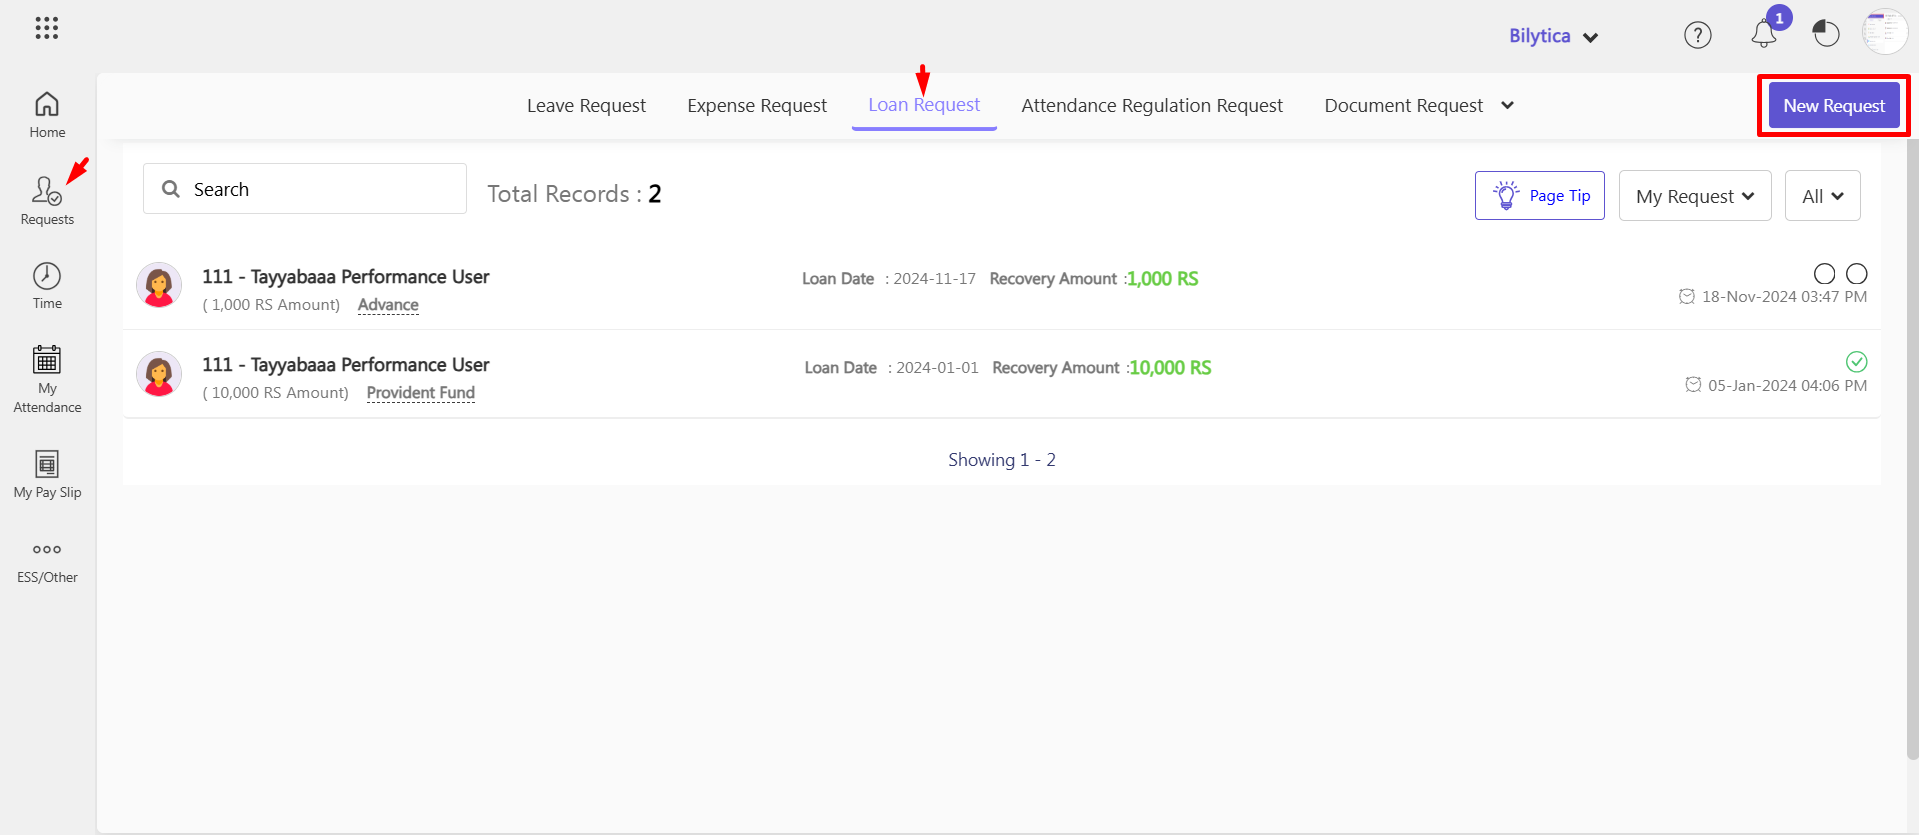
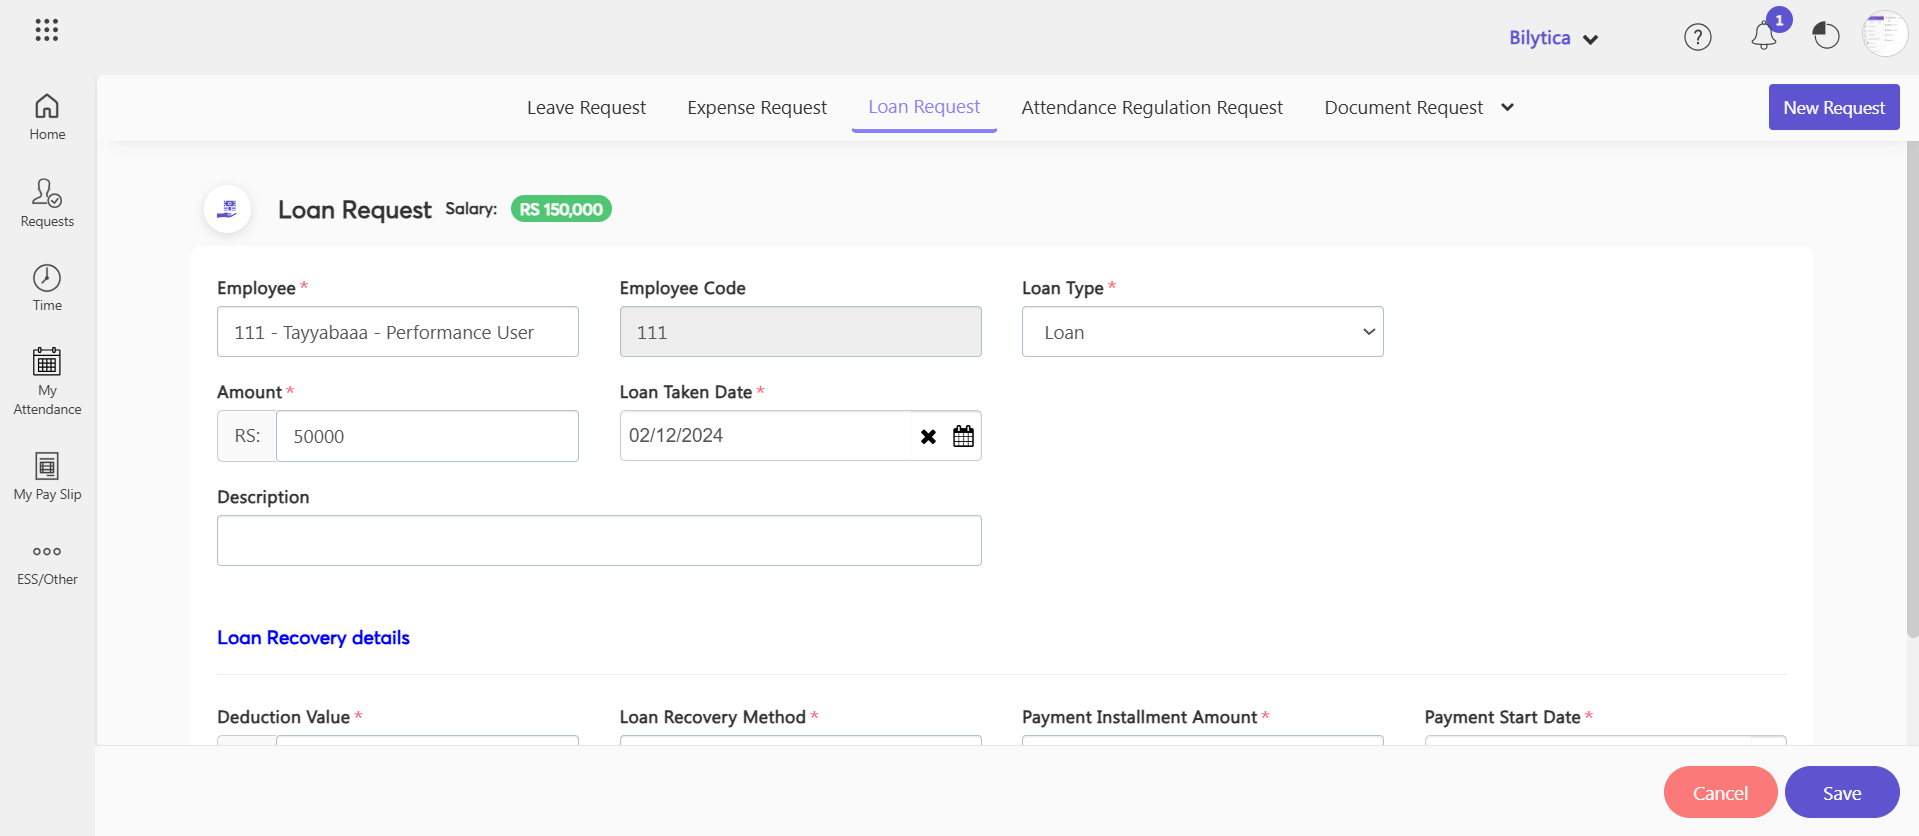
- Loan Type : Select the loan type wether it is loan, advance or Provident Fund.
Loan #
- Your name be default will be show in employee field.
- Select loan of loan type.
- Enter the loan amount.
- Enter loan taken date.
- Then add the description.
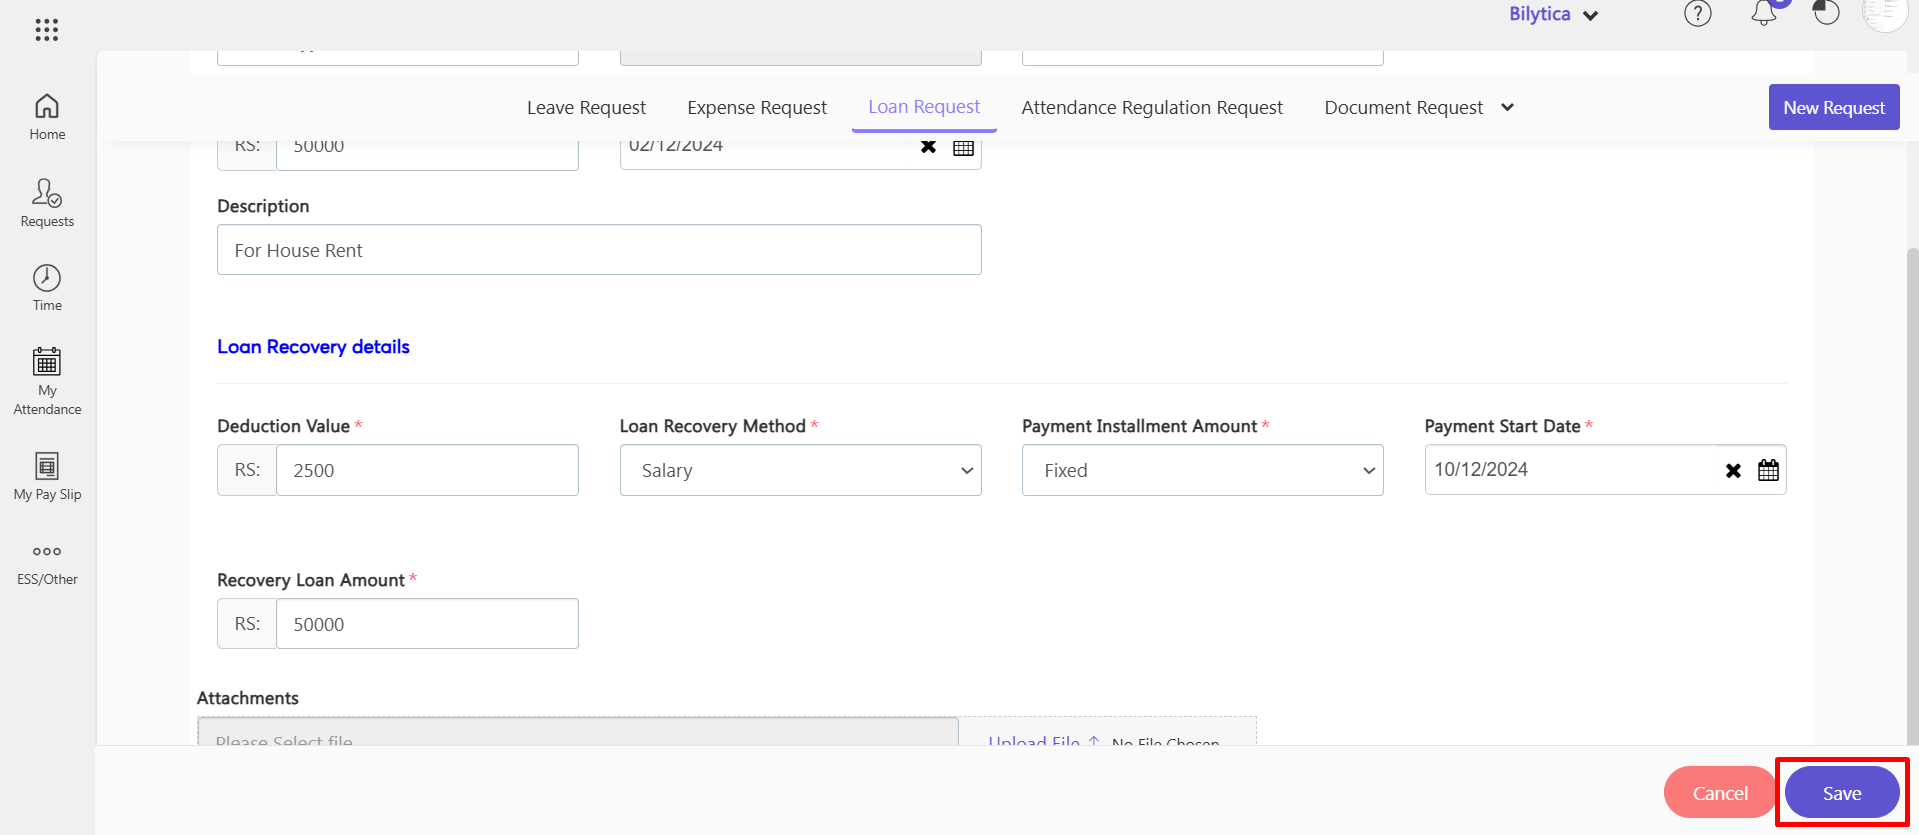
- Enter deduction value: If the deduction is in Percentage(%), enter the percentage value in the “Deduction Field” Alternatively, if you selected a fixed amount in the “Payment Installment Amount” section above, enter that amount.
- Loan Recovery Method: Select the method of payment recovery whether to deduct from per month’s salary or by cash.
- Payment Installment Amount: Select the installment method in which you want to deduct the loan from the employee’s salary whether ‘Fixed Amount’ or ‘Percentage’ of Basic Salary.
- Add payment start date.
Advance #
- Apply in the same way as a loan, but this time chooses advance for an advance loan type.
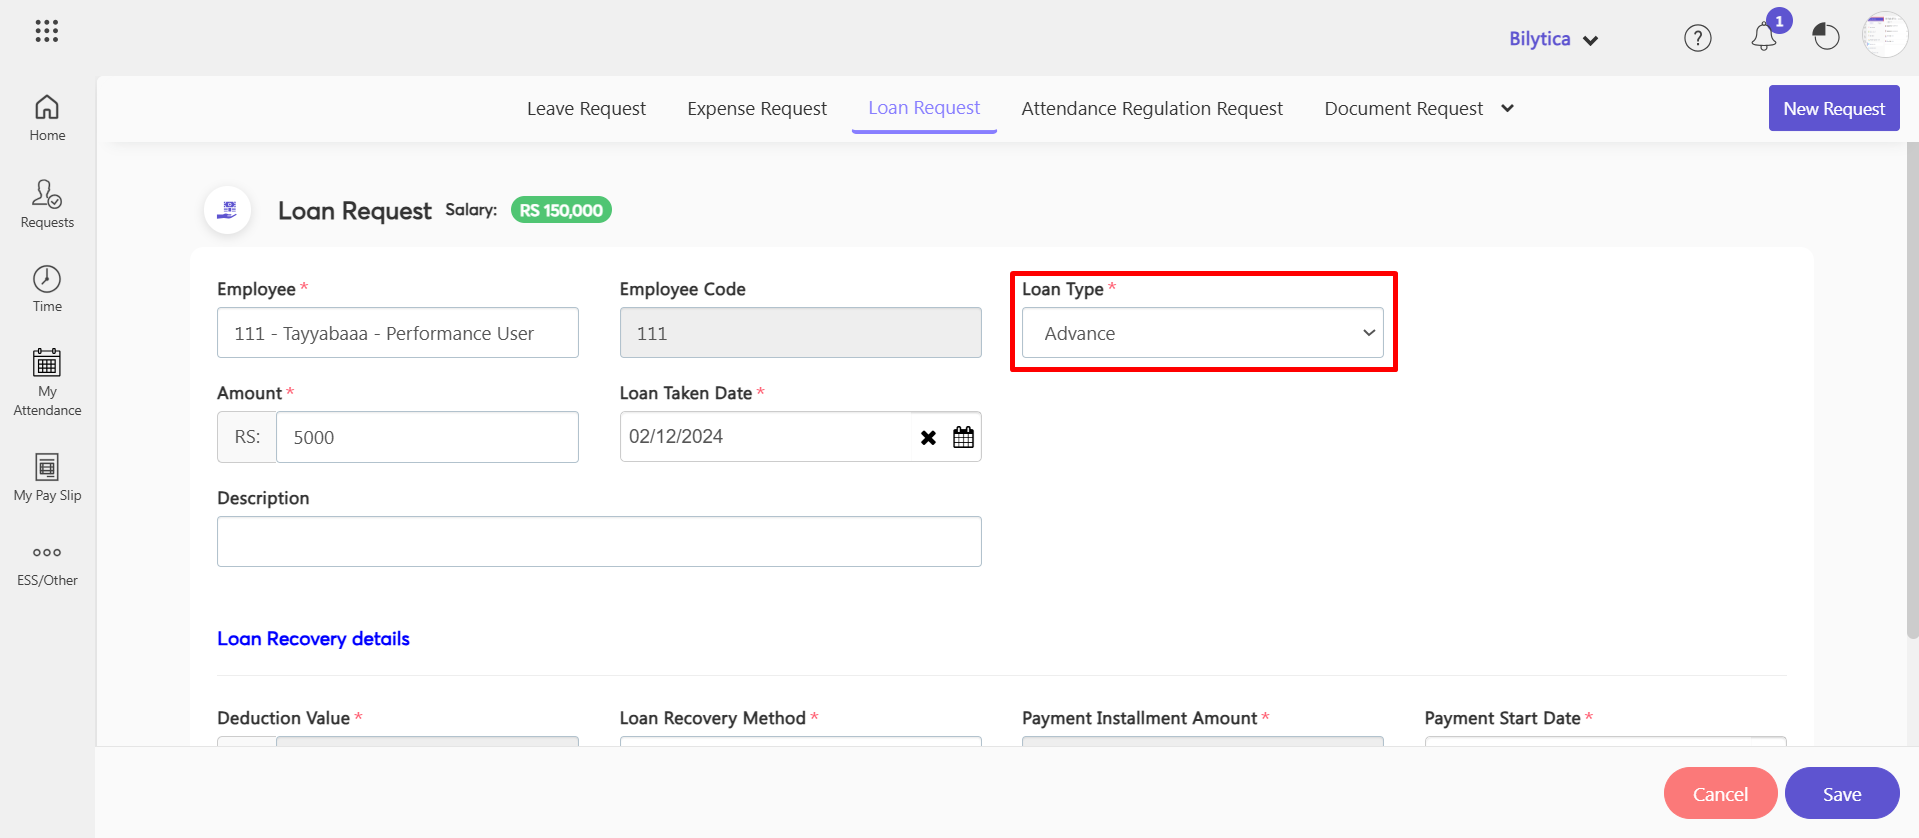
- If we have any Advances, you can integrate them with payroll so that your Advance is deducted straight from your salary account.
Provident Fund #
The method is the same as when applying for a loan or advance. You have two alternatives here if you choose the provident fund.
- Temporary
If you have given any Temporary PF loan it can manage the loans that you have provided for your employee and you can deduct repayments from the employee’s salaries each month.
- Permanent
An employee who takes out a permanent PF loan does not pay it back in monthly installments.
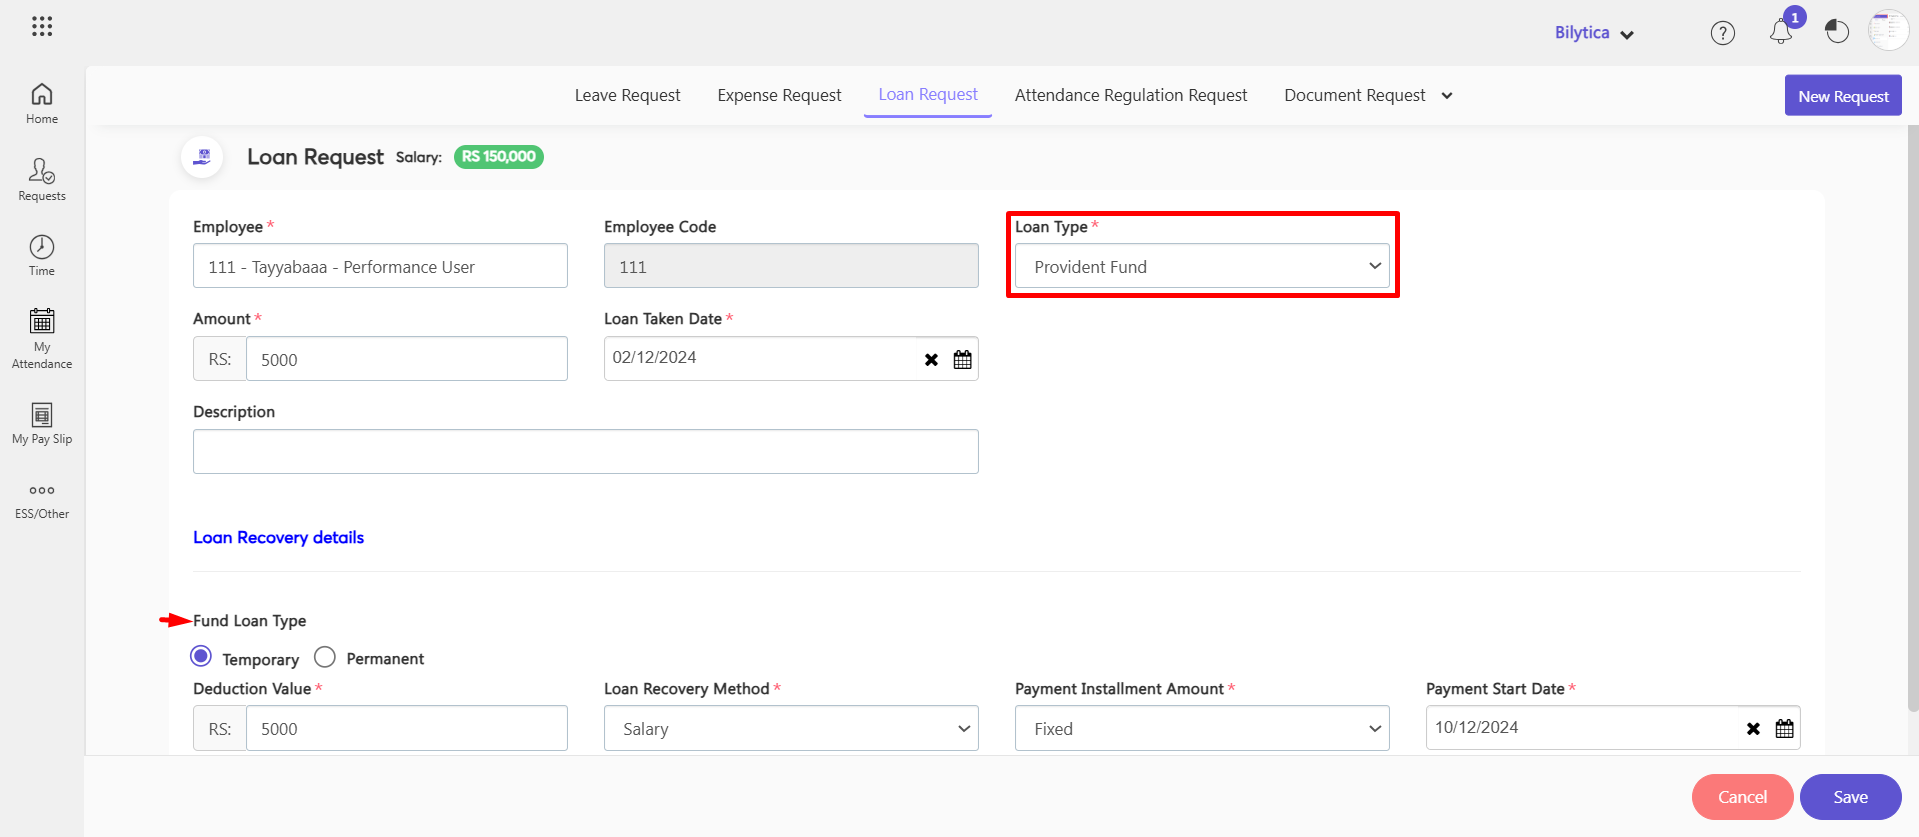
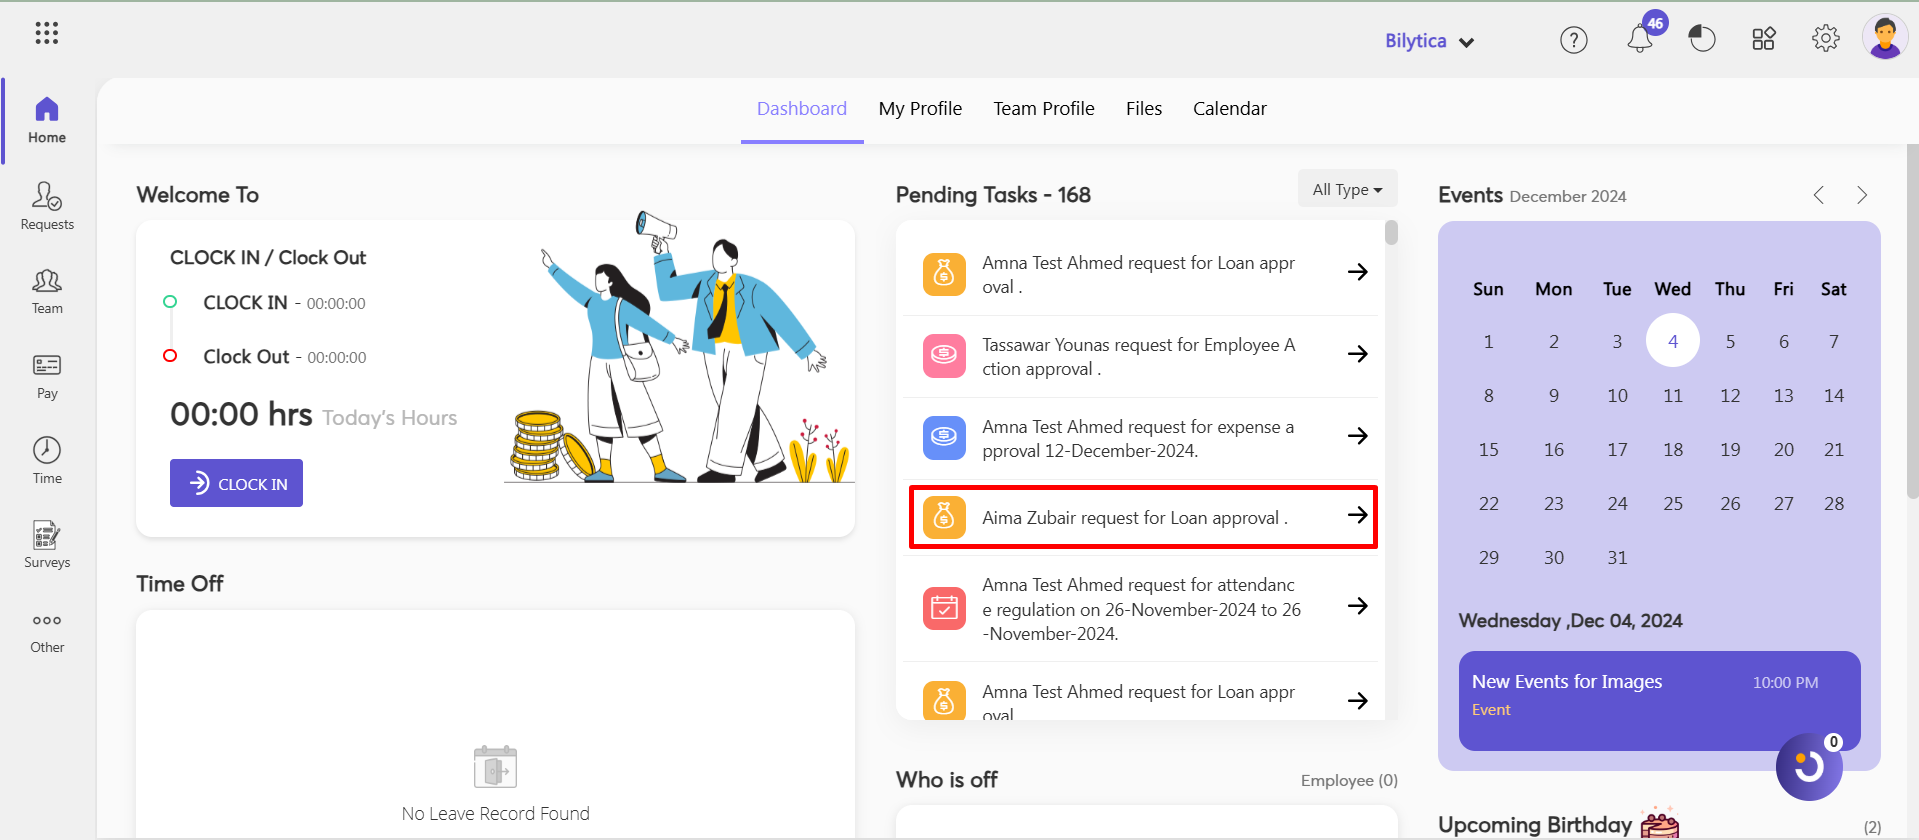
- After save the request will show on approver’s dashboard in Pending task.
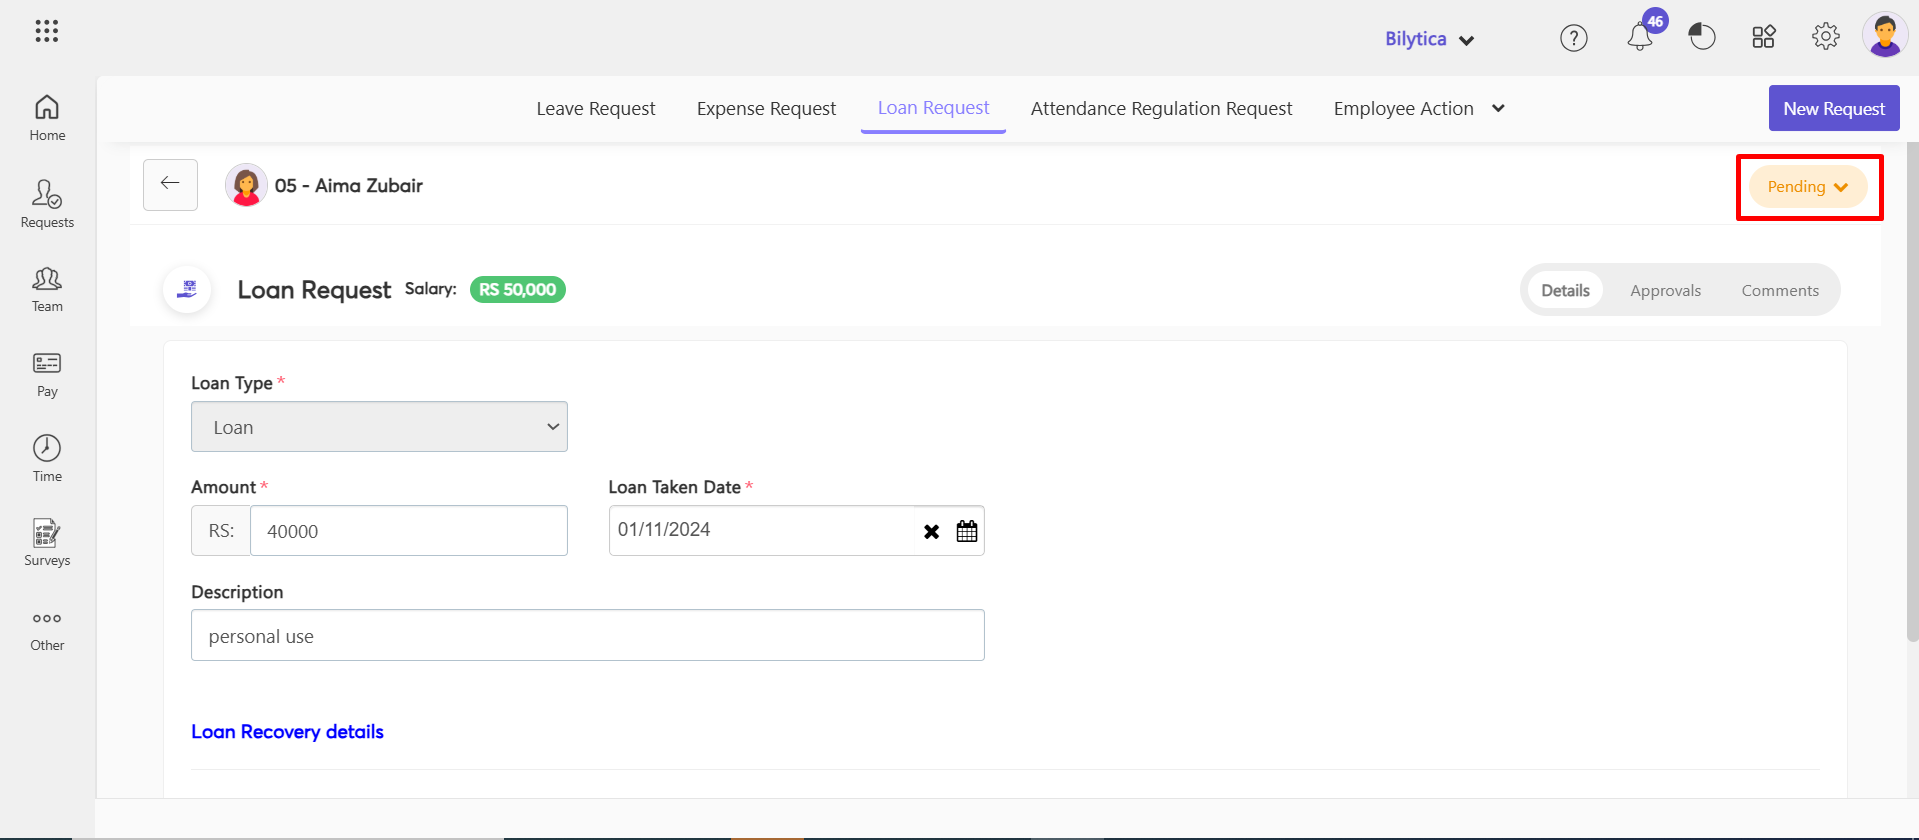
- By click on pending button approver can Accept the Reject the request.
How Does an ESS User Add a Attendance Regulation Request? #
- Go to Request => Attendance Regulation Request => All Request/My Request => New Request
Note:
- All Request: If you want to see your team requests.
- My Request : If you want to see your requests.
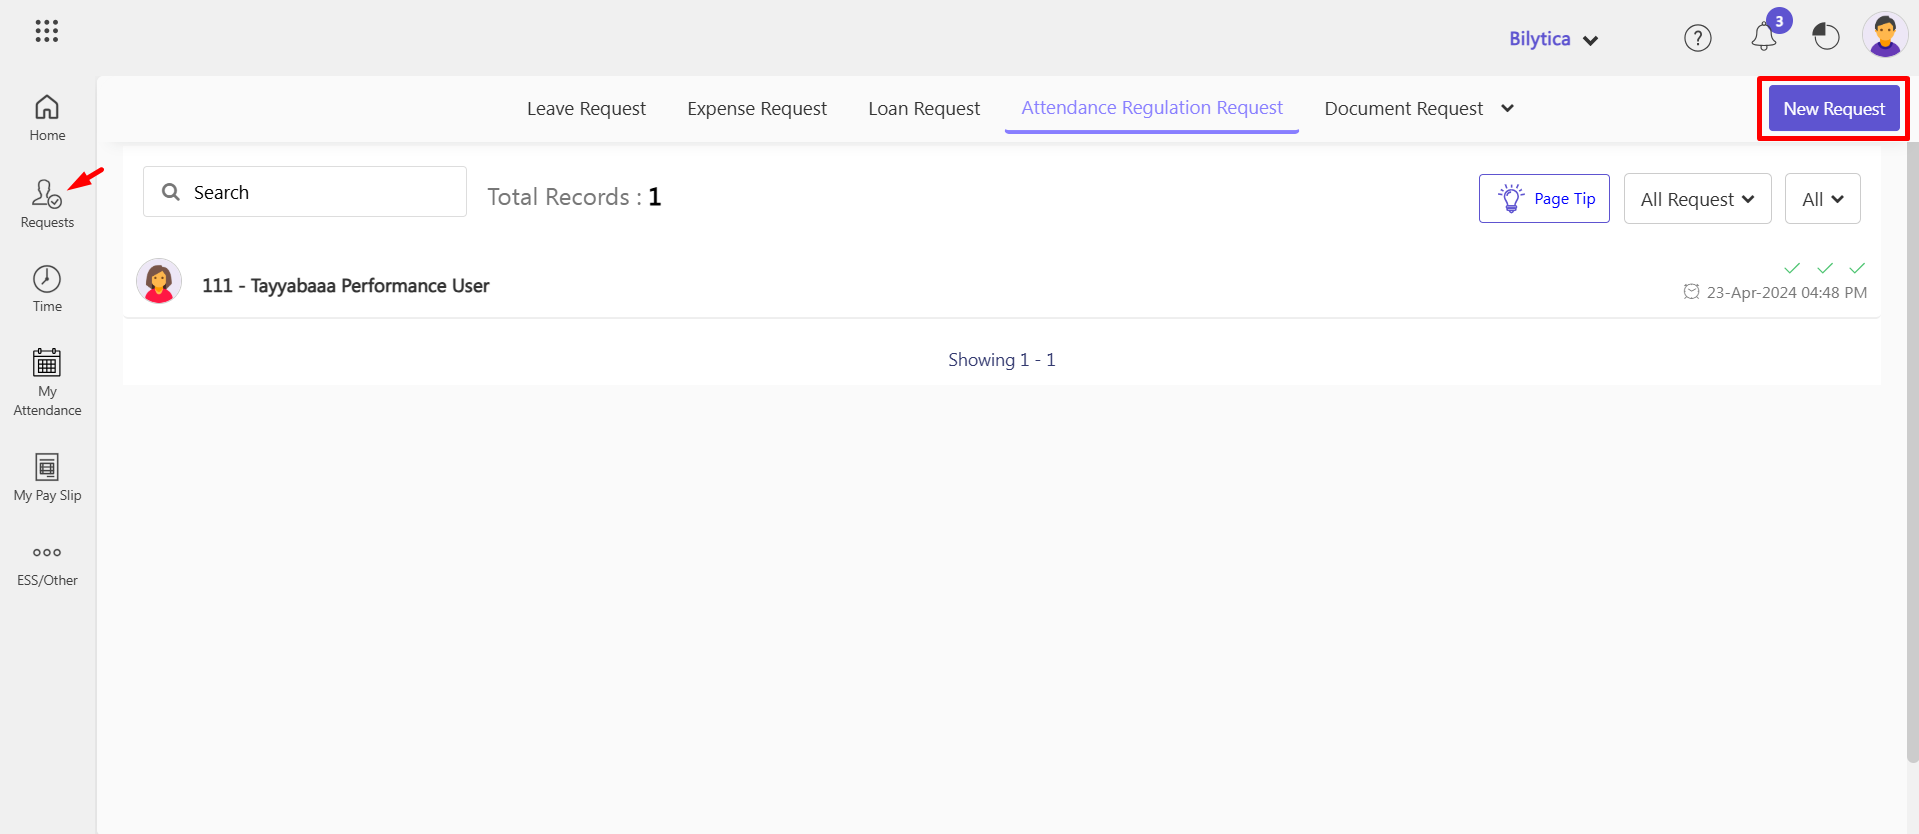
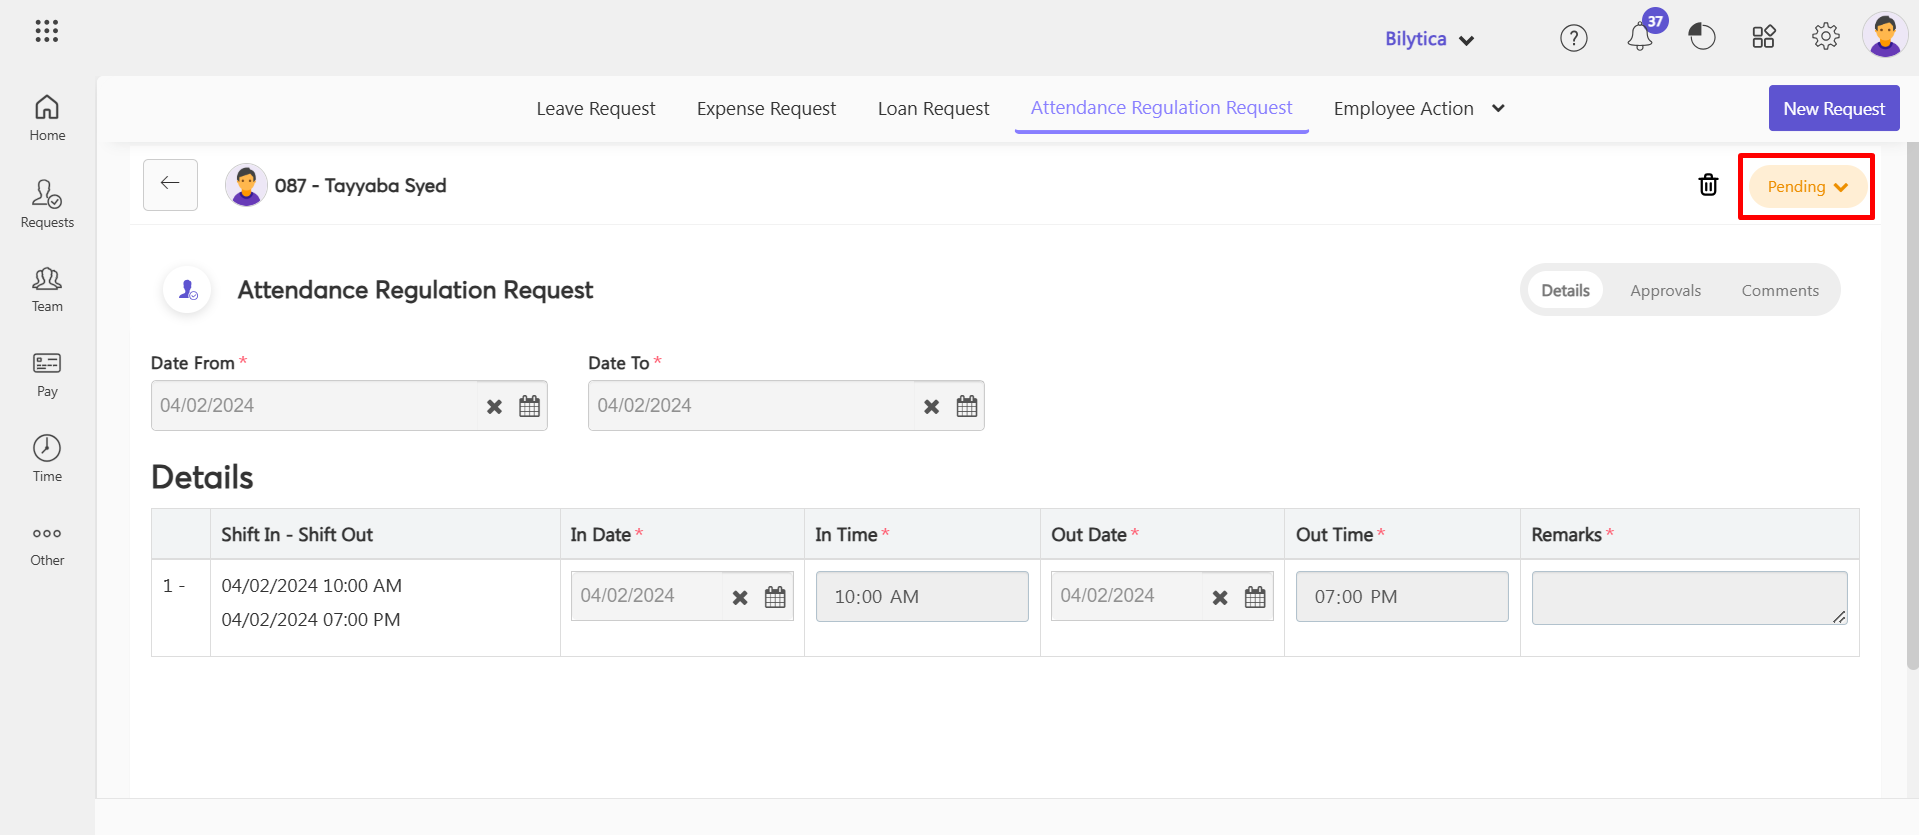
- Select the Date and click Fetch Attendance button.
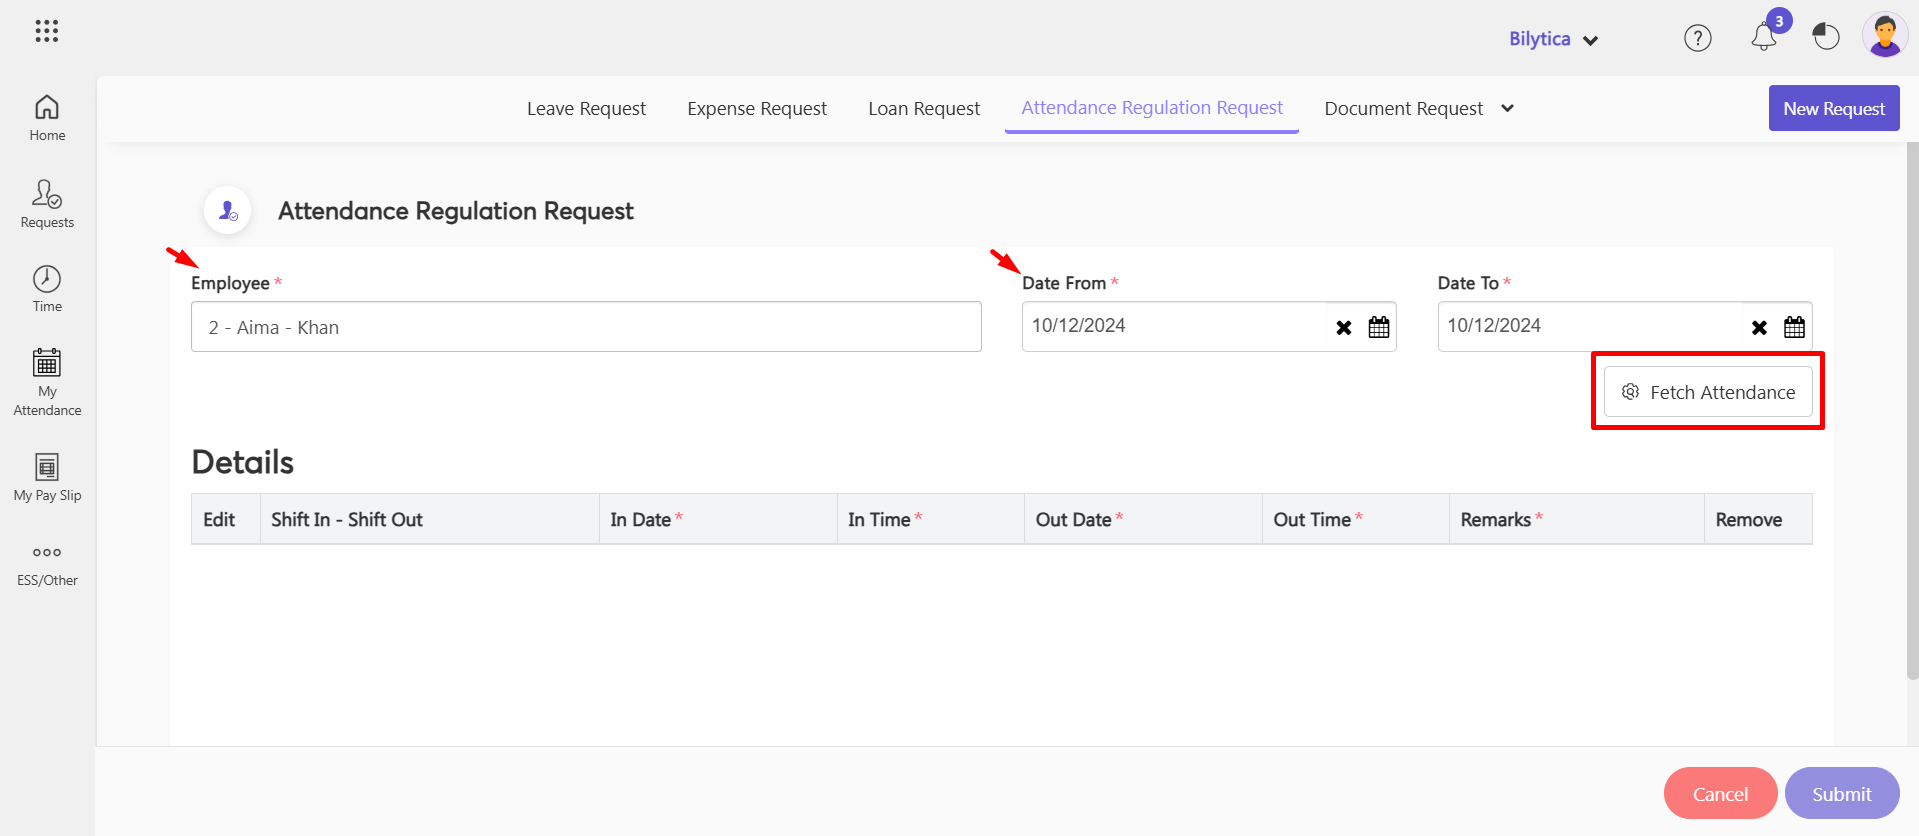
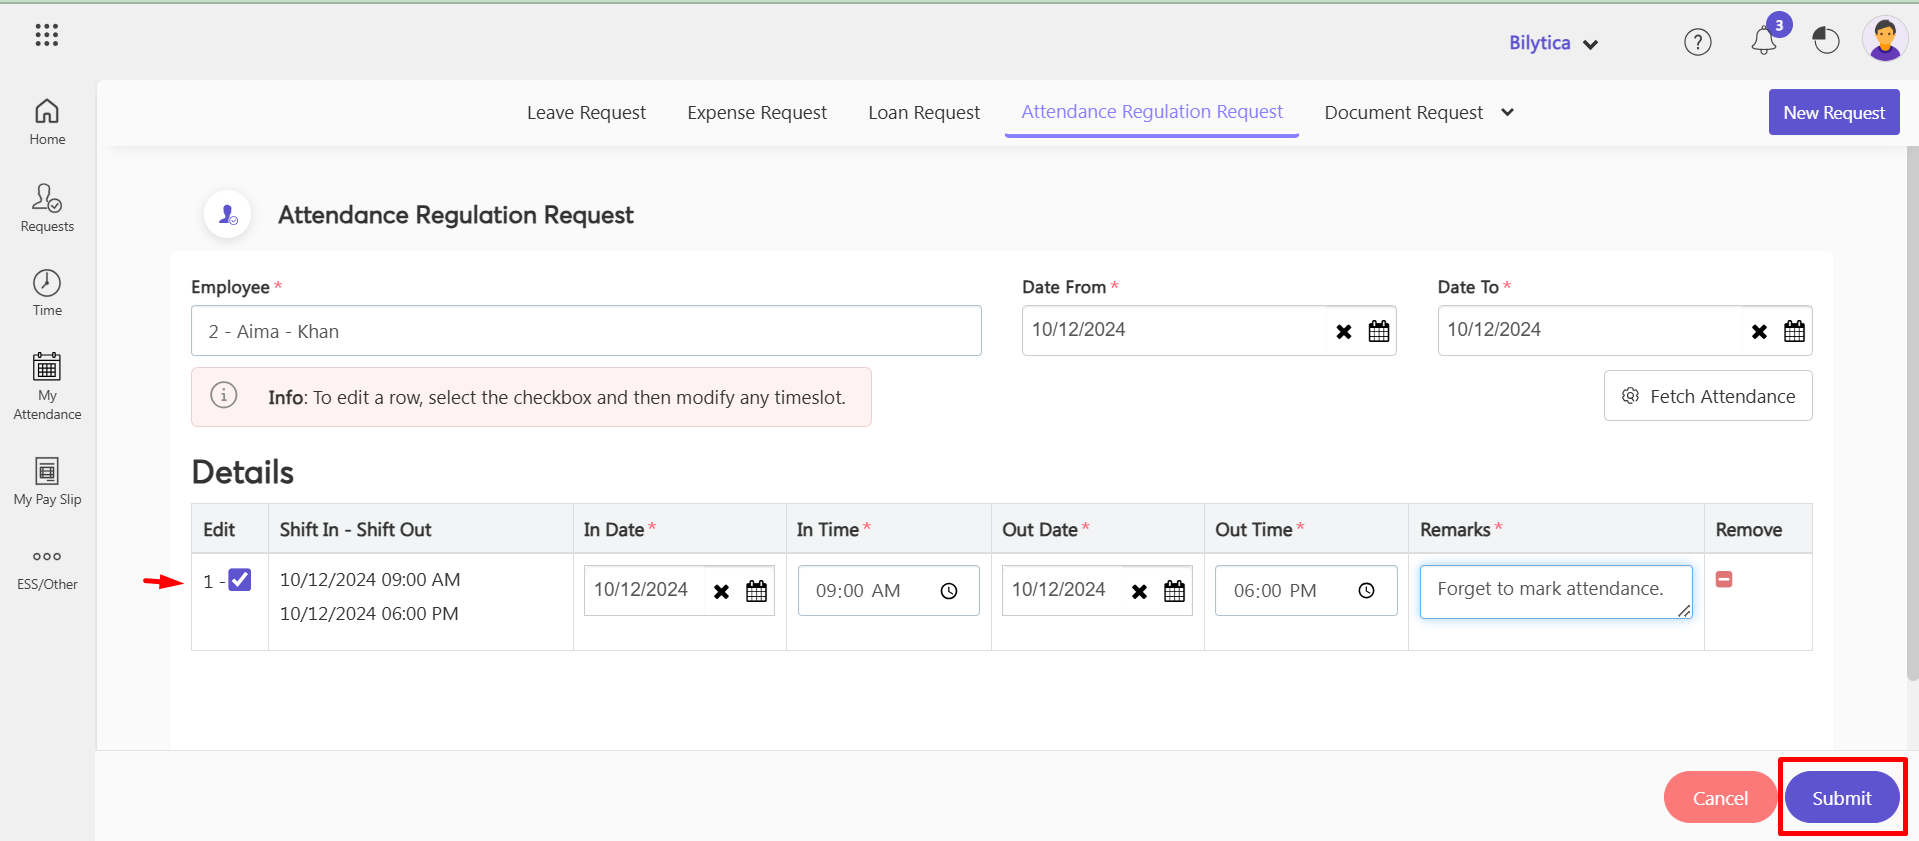
- Click on the Edit checkbox and enter your In-Date and Out-Date and clockin and clockout time.
- Click on Submit.
- After submit the request will be show on Approver’s dashboard for approval.
- After save the request will show on approver’s dashboard in Pending task.
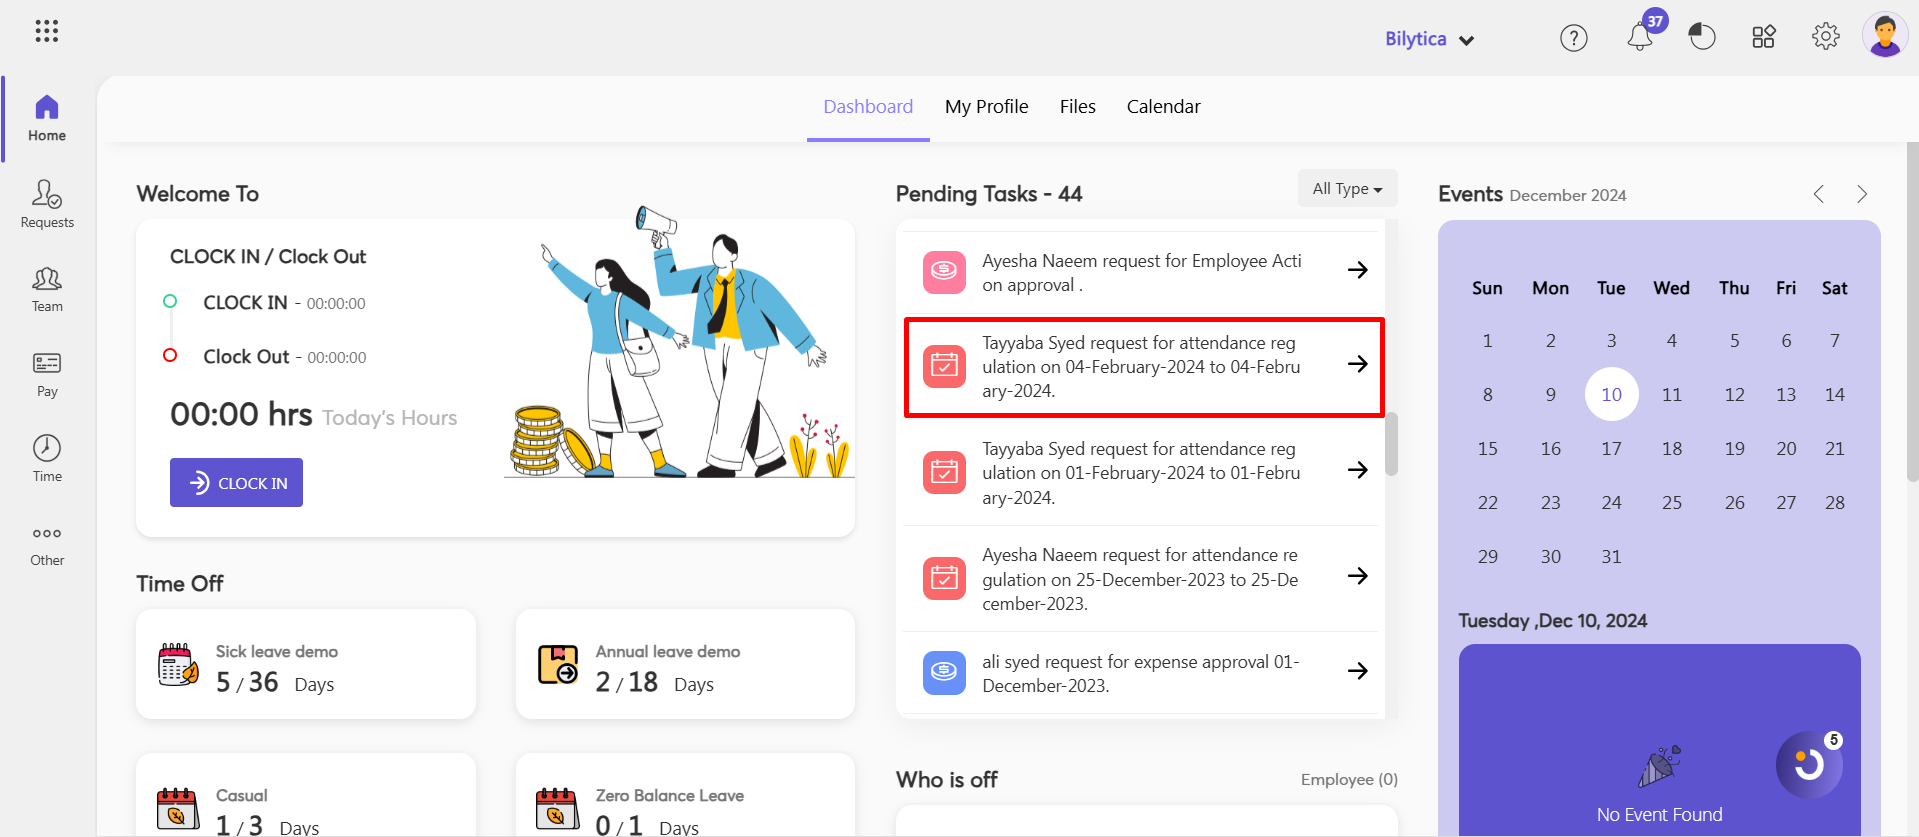
- This request will be added to the list of pending tasks. The approver can then approve or reject it with a single click.
- The administrator can view the pending tasks’ leave requests, loan requests, advance requests, and expense requests.
