- How to Create a New Course?
- How to Add a Start Date to a Course?
- How to Combine the Start Date with Time Limit?
- How to Combine the Start Date with Delay Availability?
- What Happens when Course Capacity is Reached?
- How to Add Content to a Course?
- How to Set Prerequisites for a Course?
- How to Clone Courses and Units?
- How to Download Assignment Submission?
- How to Set Completion Rules for Courses?
- How to Create ILT Session?
Courses within an LMS are created by instructors or course designers and can cover a wide range of topics and subjects. They can be tailored to suit different learning styles and preferences, offering flexibility for learners to engage with the content at their own pace and convenience.
How to Create a New Course? #
- In Administrator mode , under Courses click Create New to add course.

- In the Course name tab, insert the name you’d like to give to your course. Select a category the course will belong to, add a description to your course and select an image.
- Set the course as Active , to be available to the users, or un-check it to be inactive for as long as you’re working on it.
- Tick the Hide from catalog option , if you want to provide access only to users you directly assign the course to.
- Add a course code and a price to the course.
- Adjust the Capacity to reflect the maximum number of users that can enroll in the course.
Note: The default course capacity is unlimited. To see the number of users that have already enrolled in the course, click on Capacity and pass the cursor over the number for the message Currently enrolled users to appear.
- Set a time limit for the course to be completed, and select a certification to award your Learners after completion of the course.
- Set a level for the course to be available on. This means that the Learner will have to reach that level to take the course. It works as a learning Path
- Click Save.

Note:
Only users with Instructor permissions within their user type can act as course instructors (Admin Types, Trainer Types).
How to Add a Start Date to a Course? #
Paypeople LMS lets you set a start date for courses so that users gain access to the learning material at the same
time.
- Sign in to your Paypeople LMS account as Administrator and go to Courses.
- Go to the page of the course you want to modify and click Time options .
- Choose Duration and click on the field to select a Start date and time . Learners will have access to the course from the date and time you choose. If you want access to the course to be limited for a specific amount of time, add an Expiration date and time as well.
- Click the save course to save your changes.

How to Combine the Start Date with Time Limit? #
Once you have set a Start date, you can also choose for the course to only be accessible for a specific number of days
by setting a Time limit. In that case, the Time limit starts counting:
– From the Start date when the learners are enrolled in the course before the course starts.
For example, a course starts on 1, November and has a duration of 30 days. If learners are enrolled earlier than that,
they’ll need to wait until November 1 to access the course, and the course will expire on November 30.
– From the Enrollment date when the learners have been enrolled after the course starts.
For example, the course starts November 1 and has a duration of 30 days. If learners are enrolled after that day, e.g.
November 5, the time limit will start running from that moment on, and the course will expire on December 5.
How to Combine the Start Date with Delay Availability? #
If a course has a Start date and units with Delayed availability too, the Delay availability will always start counting
from the Start Date of the course.
How to Adjust the Course Capacity? #

Paypeople LMS lets you limit the maximum number of users that can register to a course. When creating or editing a course, you’re able to adjust the course capacity to restrict the number of users that can enroll in the course.
To set the course capacity:
- Sign in to your Paypeople LMS account as Administrator and go to Courses
- Go to the page of the course you want to modify and click Capacity . Add the number of users you want to have at most in the course.
- Click Update course to save the capacity changes.
Note: Instructors and deactivated users do not count towards the course’s capacity.
To see the number of users enrolled in the course at any given time, click Capacity and hover over the field to reveal Currently enrolled users.
What Happens when Course Capacity is Reached? #
When course capacity is reached, the course is hidden automatically from the course catalog.
Instructors can still enroll users in the course manually.
- Once a course is hidden automatically from the course catalog and Instructors make the course available in the catalog again, users can continue to self-enroll in the course, regardless of the capacity. If capacity is reached again, the course will not be hidden automatically but continue to appear in the course catalog.
- Once a course is hidden automatically from the course catalog and Instructors reduce the number of enrolled users below the capacity, the course will not change status and will remain hidden. Once Instructors make the course available on the catalog again and the number of enrolled users reaches capacity again, the course will be automatically hidden from the catalog once more.
How to Add Content to a Course? #
Paypeople LMS course builder allows you to manage the composition of your course and its units in the course outline.
To add content to a course:
- First, log in as an Instructor and either create a course or select an existing one to edit its content by click Go to Course Content icon.

Note: Content can only be created or edited by the courses’ assigned Instructors and admin.
Your profile must be assigned to the course before you can access the course content.
Note: The total number of units and sections in a course cannot exceed 1000 items.
There are one ways to start adding content:
- Click the Add button to specify the type of unit you want to add first from the drop-down list. The options are:
- Content: type your text, upload images and use our editor to further customize the content.
- Video: upload your file, capture video
- Presentation|Document: upload your file.
- Scorm |upload your SCORM PACKAGE 1.2 file.
- iFrame: insert other website pages as iframe units. They can be viewed as embedded or in a new window.
- Test: to test your learner’s knowledge.
- Survey: to collect feedback.
- Assignment: if you want to review and grade the answer.
- Sections: help to organize the course material into logical entities.
Video:
- Click Add and select Video

- Search YouTube and type Sales Negotiation Skills.
- Select your video.
- Define how the unit will be completed:
- Simple checkbox: a user will be able to click on the button to complete and continue.
- Question: your user has to correctly answer the question to complete the unit.
- Αfter a period of time: your learner will need to wait X seconds for the unit to be automatically completed.

Let’s select the last option.
- And then, click Save.
Your first unit has been created.

Note: If you like to set the video to autoplay, just edit the video unit, select Options and enable Autoplay. Then, click Save.
Presentation:
- Click Add and select Presentation|Document

- Upload the file from your desktop.
- Define how the unit will be completed
- Click Save.

How to Set Prerequisites for a Course? #
Paypeople LMS lets you define the order by which your learners complete their courses to create a learning path and lead them through your training program.

To set prerequisites for your courses, follow these simple steps:
- Sign in to your Paypeople LMS account as Instructor and go to the page of the course you want to update (e.g.,Advanced features of Paypeople LMS ).
- On the right-hand panel, click Rules & Path .
- From the Learning path drop-down list, choose one or more courses as prerequisites to your current course (i.e., if you want “Advanced Features of Paypeople LMS” to be available to learners only after they have completed “Getting Started with eLearning” and “Content and Paypeople LMS”, then choose “Getting Started with eLearning” and “Content and TalentLMS” as prerequisites).
- You can also click on Add alternative rules and make the course available to learners who have completed either of your prerequisites (i.e. if you want to make the same course available to people that have not completed the ones above, but instead they have completed only “Employee Training 101” then add the “Employee Training 101” as an alternative rule).
- Click Save.
How to Clone Courses and Units? #
Cloning is a time-saving tool that allows you to copy courses and units within your account.
To clone a course:
- Sign in to your Paypeople LMS account as an Administrator and go to Courses
- Locate the course you want to clone, hover your mouse over the three dot icon and click the clone icon under the Add button .
- On the confirmation dialog box that pops up, click Clone .
The course is now cloned and added to your course list. It’s automatically named after the original course, followed by the indication (clone) . It’s an exact replica of the original, as it includes all the original course settings and course units. But, from now on, it can be customized and managed as a completely separate course.
To clone a unit, there are two options.
The first one is cloning a unit from another course:
- Switch to Instructor mode and select the course you want to edit.
- Click Add and select the option Clone from another course.

- From the drop-down menu, select the course you want to copy the unit from and the original unit that will be copied. Then click Clone.

The cloned unit has been added to your course. You can edit it without affecting the original one.

The second option is to link a unit from another course:
- In Instructor mode, select the course you want to edit.
- Click Add and select the option Link from another course
- From the drop-down menu, select the course you want to link the unit from and the original unit that will be linked. Click Link .
The linked unit has been added to your course with the indication that it is linked from another course.
The key difference here is that when you link a unit, changes made to the original one are applied to the copied units as well.
How to Download Assignment Submission? #
Paypeople allows instructors to download users’ assignment submissions.
To download assignment submissions:
- Sign in to your Paypeople account as an Instructor. Under course tab, click Go to Course Content icon.

- Click count icon.

Alternatively, go to the course that contains the assignment unit you want to download submissions from. From there, hover your cursor over the unit, and click submissions.
- You can view all assignment submissions on the next page. Click Check Answer button.

- Click file to download.

Note: You can download any answer type except the ‘text reply’ answers from a learner.
How to Set Completion Rules for Courses? #

Paypeople LMS lets you define what users have to do to complete a course. When the completion condition is met, users can move on to the next course.
To set a completion rule, follow these simple steps:
- Sign in to your Paypeople LMS account as Instructor and go to a course page.
- On the right-hand panel, click Rules & Path
- From the Completion rules drop-down list, choose one of the available completion conditions:
- All units are completed (default)
- Selected units are completed : Specify one or more required units from the Units drop-down list.
Note: Use this rule when some units are optional.
-
- A percentage of units is completed Type the required percentage of completed units in the Percentage field .
- Selected test is passed: From the Test drop-down list, choose the test that users have to pass to complete the course.
Note: If a course has no tests, the Selected test is passed and the rule is not available.
- Click Save to update your course.
How to Create ILT Session? #
ILT (Instructor-Led Training) sessions in PayPeople’s LMS (Learning Management System) allow organizations to schedule and manage training sessions conducted by an instructor, either in person or virtually.
Steps to Create and Publish an ILT Session:
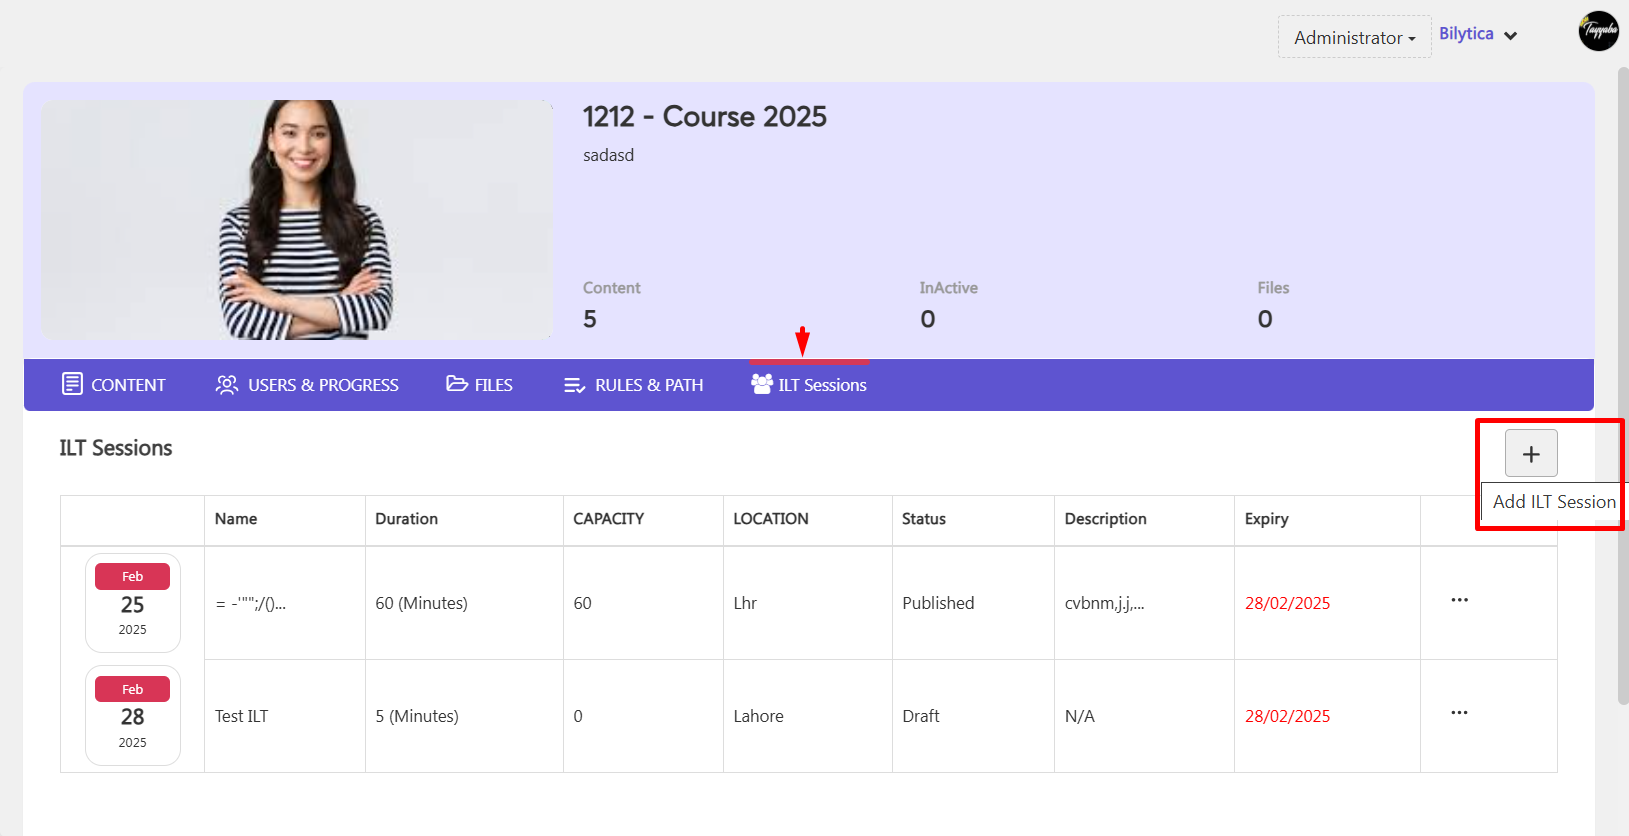
- Go to Course Content
- Click ILT Session tab => click plus icon to add ILT session
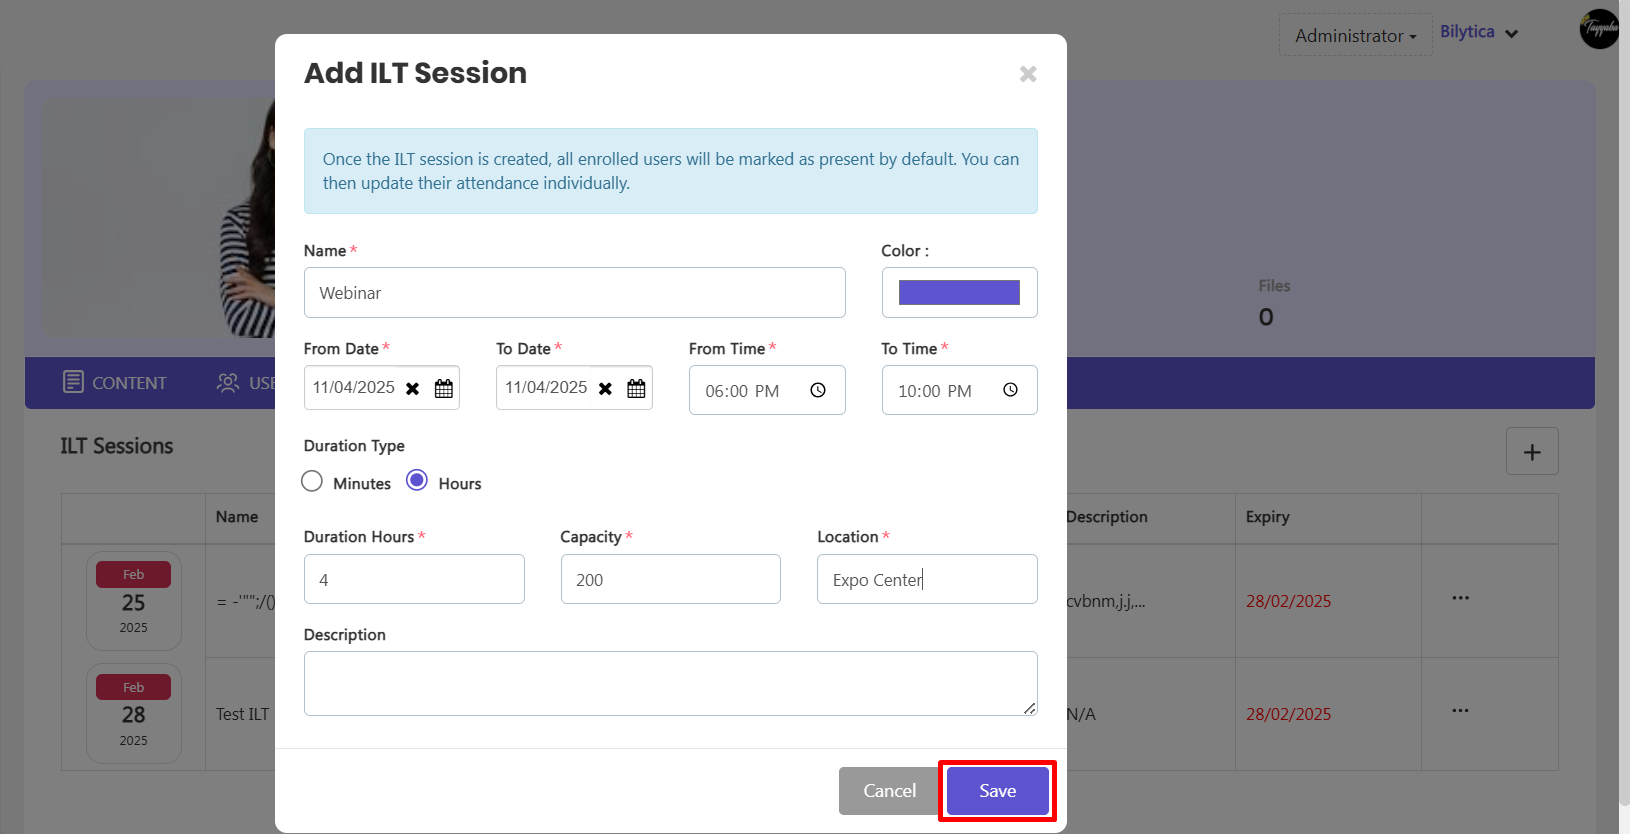
- Add session details.
- Click Save.
-
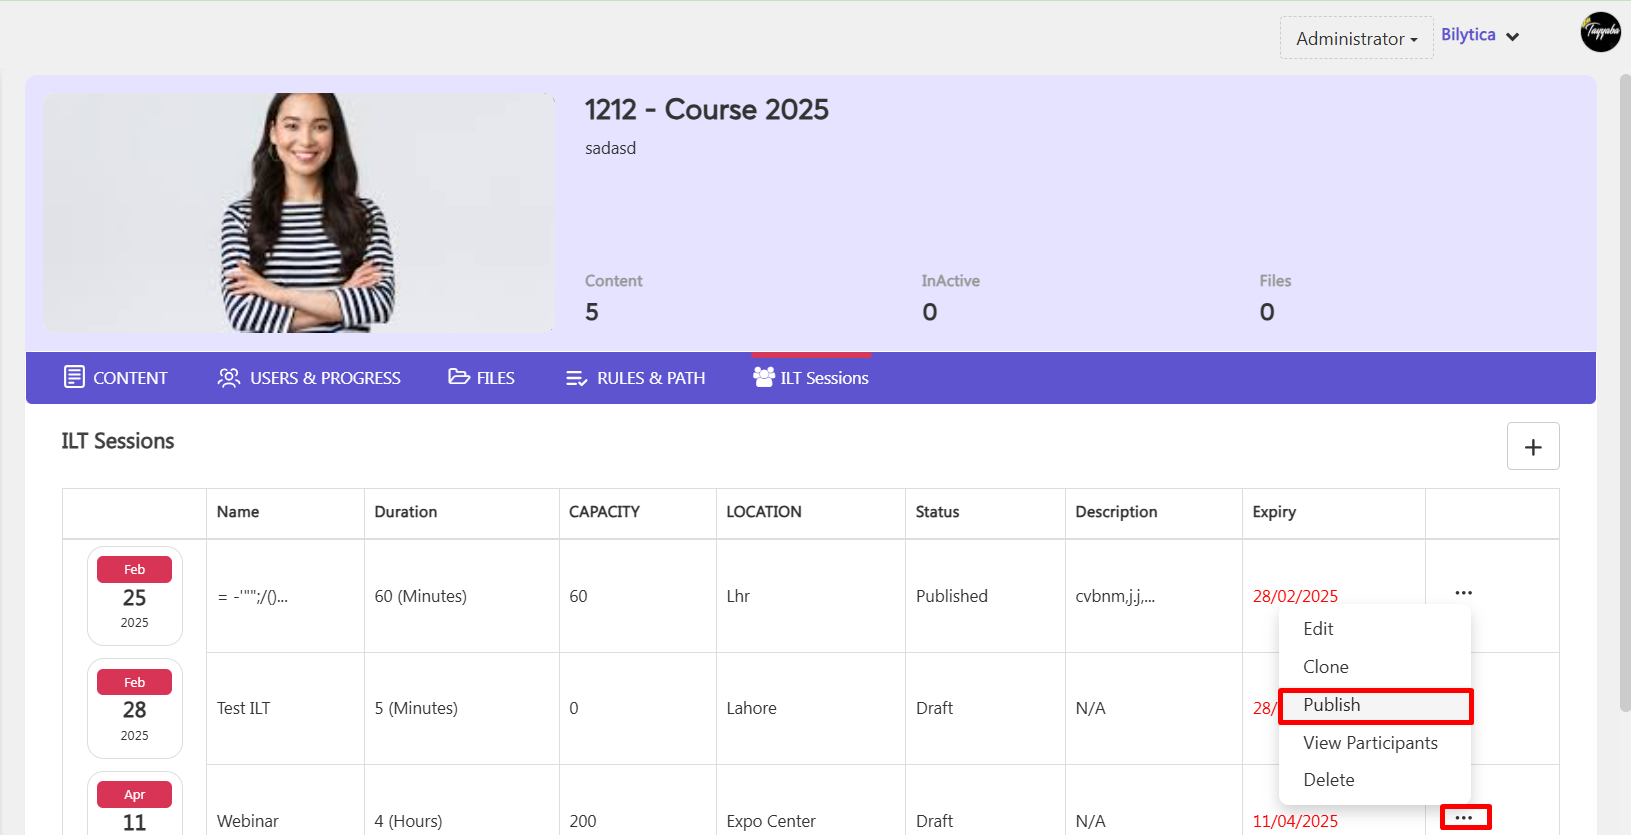
- The ILT session will be saved in draft status.
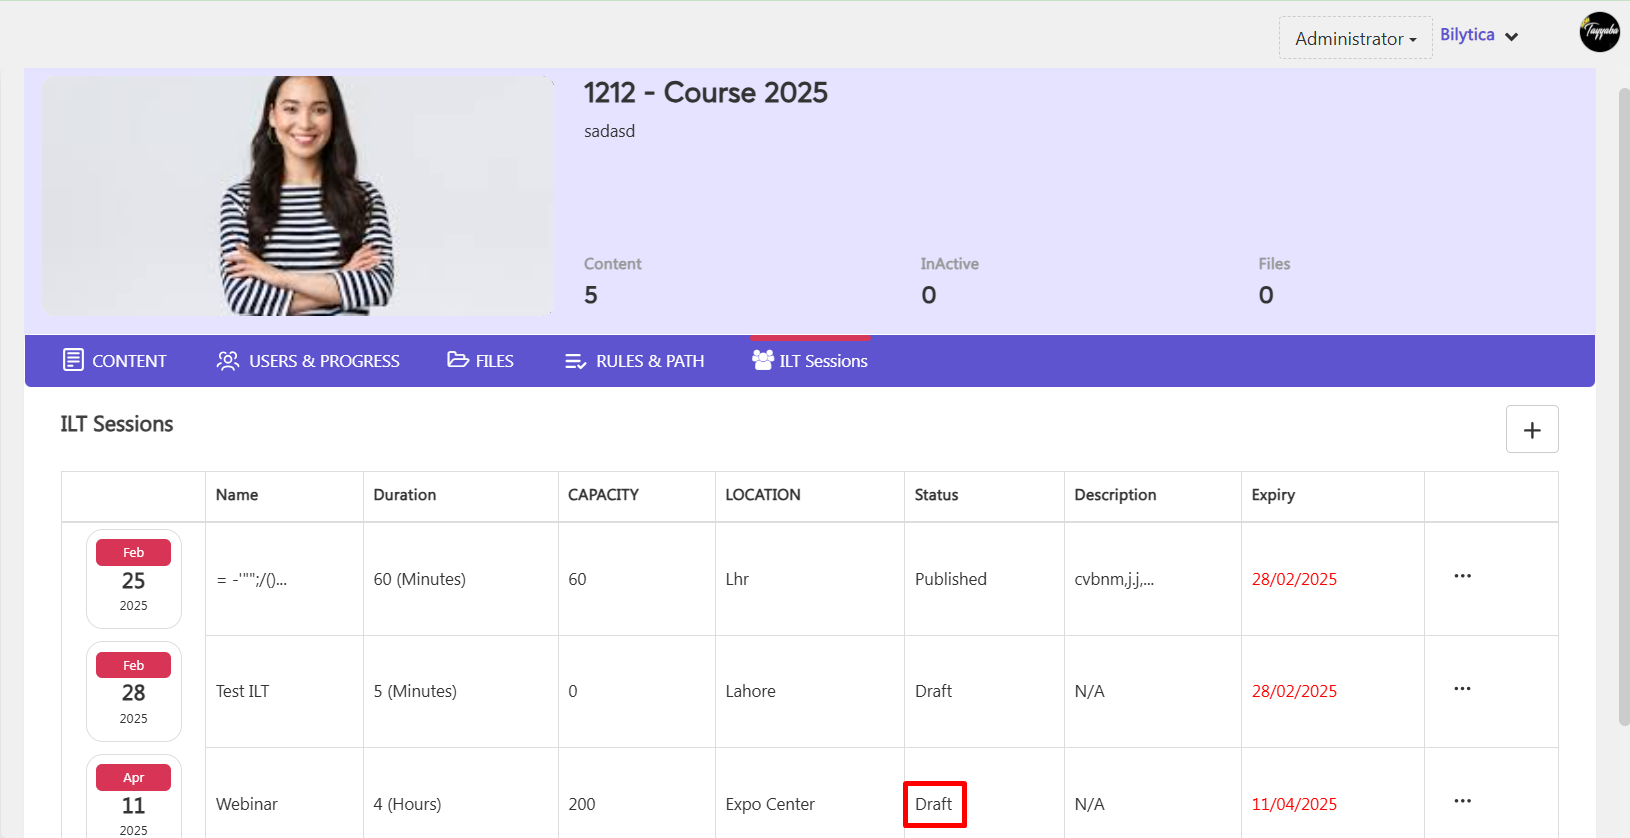
- Click the three-dot icon, then select Publish. A success message will appear, and the session will be published.
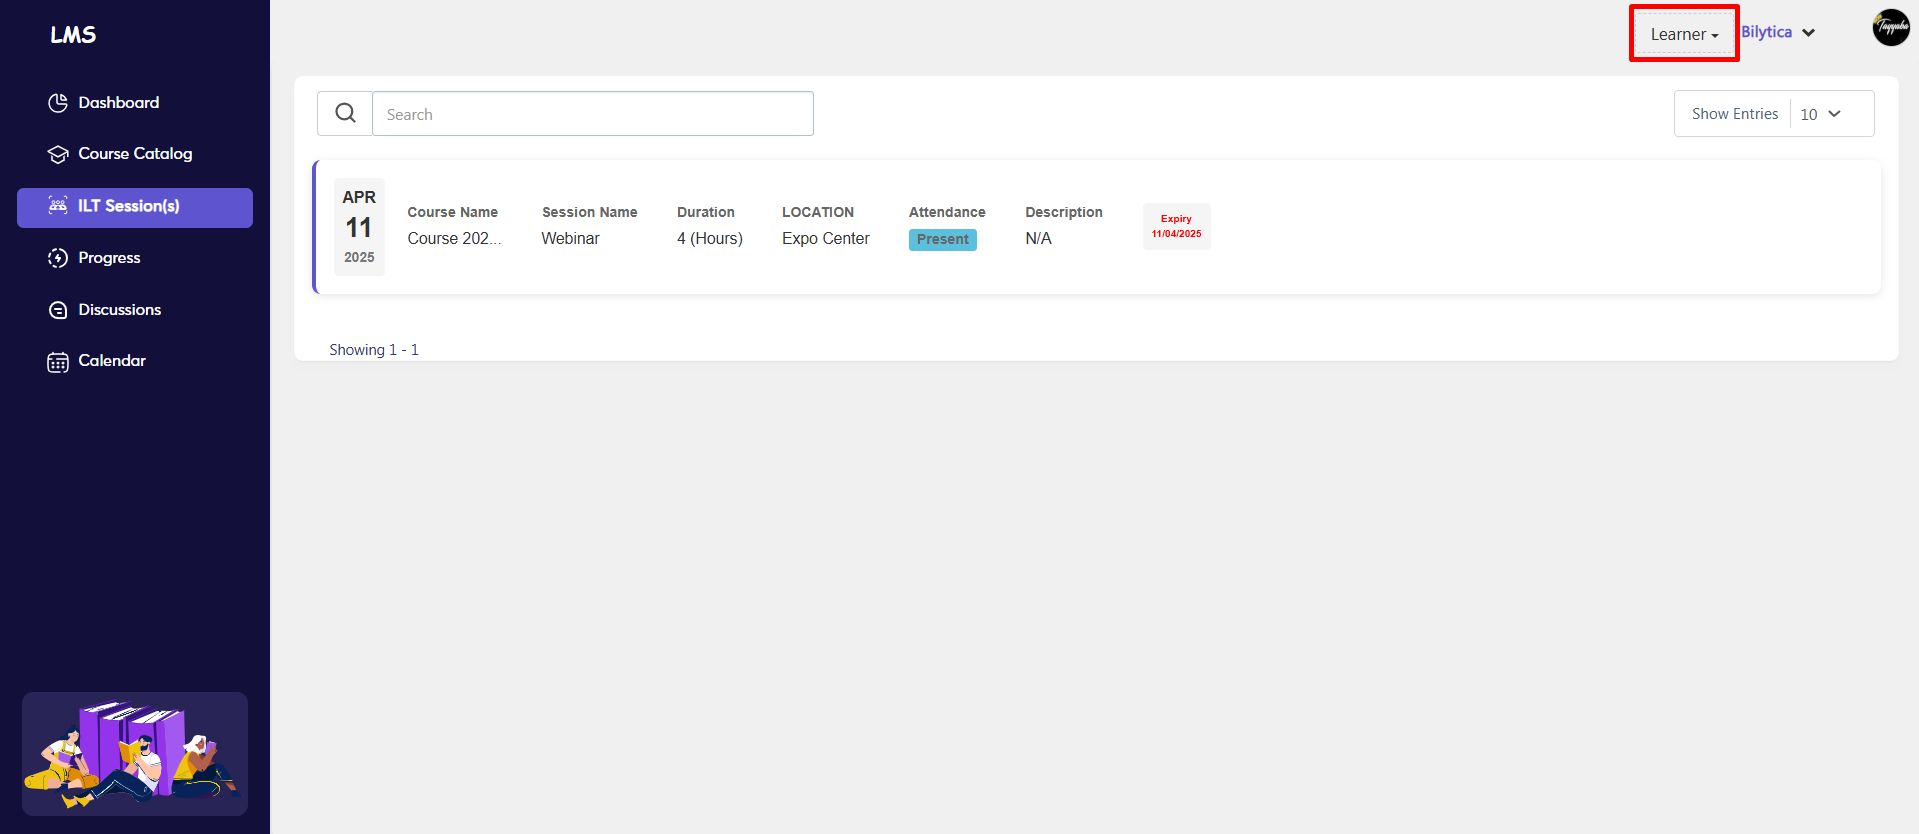
- Once published, the session details will be visible to learners under the ILT Session section on their portal.
Manage ILT Session #
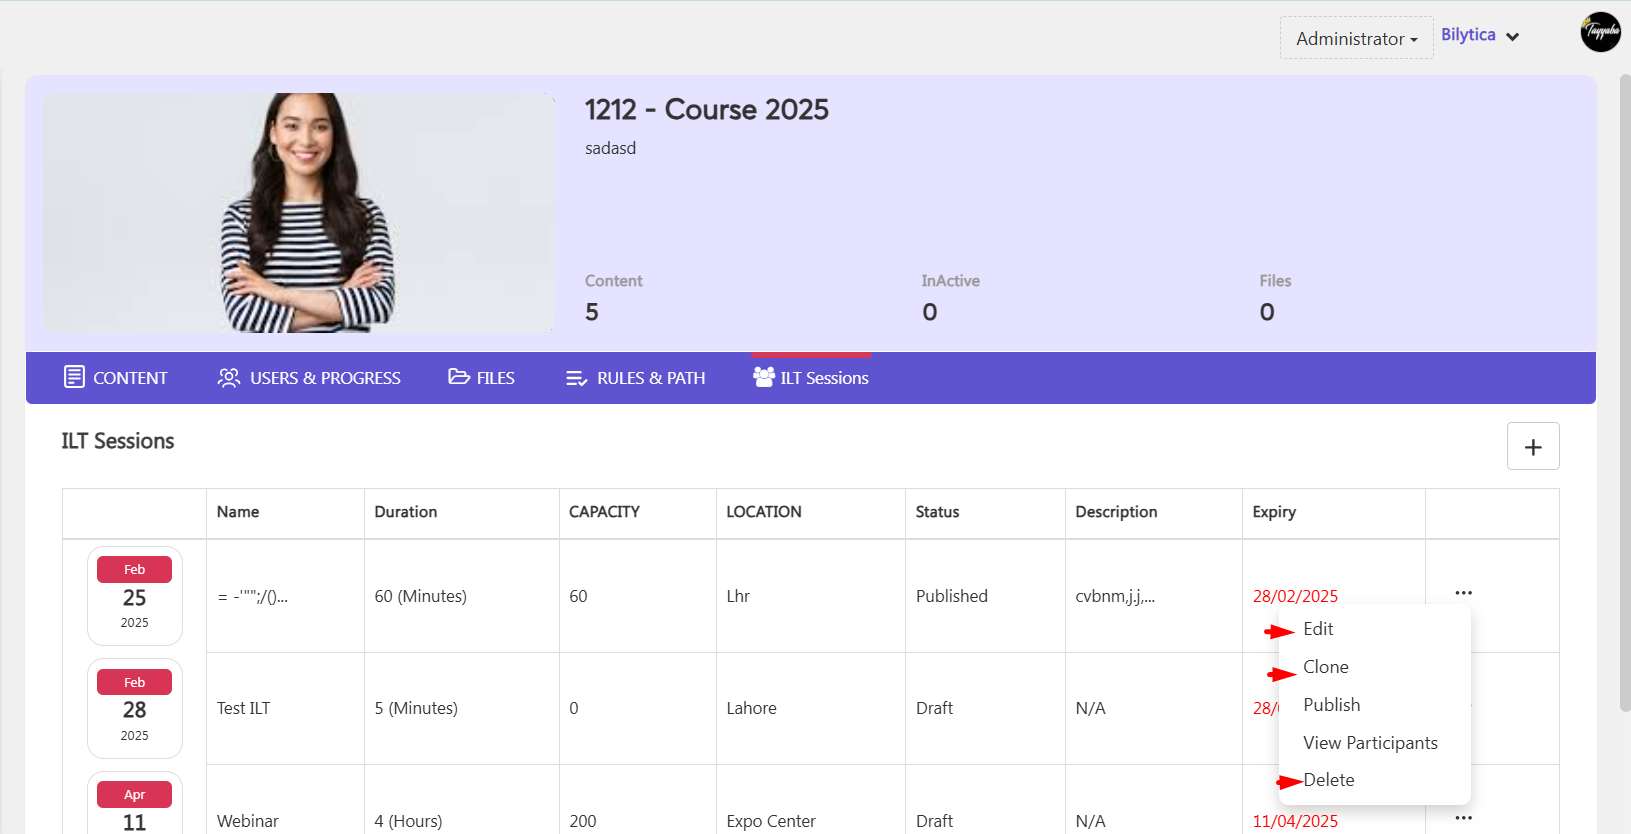
You can edit the ILT session by clicking the Edit button, create a copy using the Clone button, or remove it by clicking the Delete button.
Marking Attendance for ILT Session Participants #
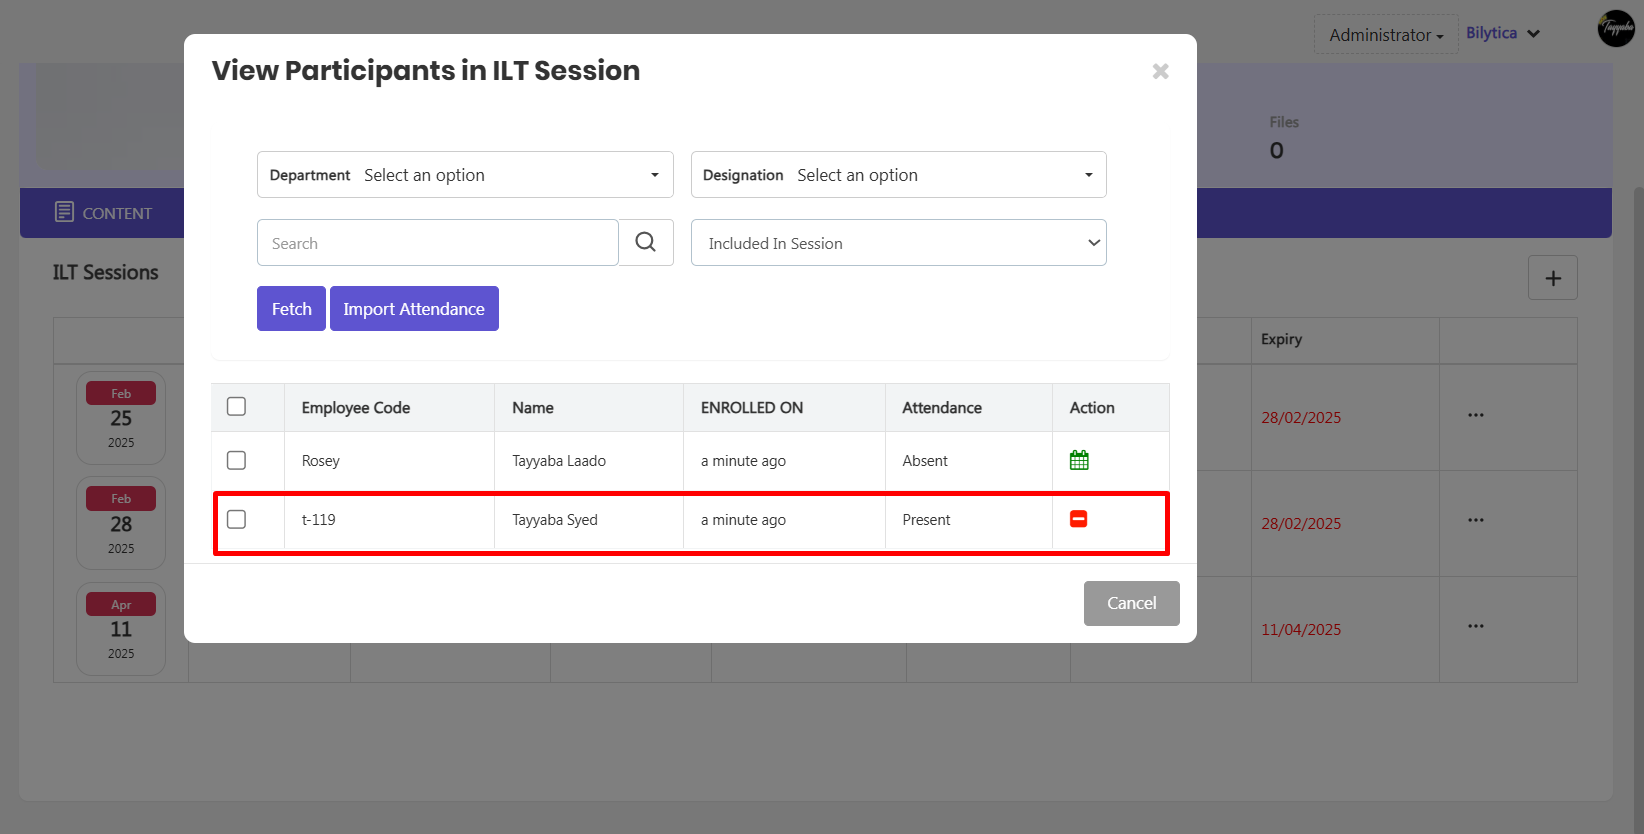
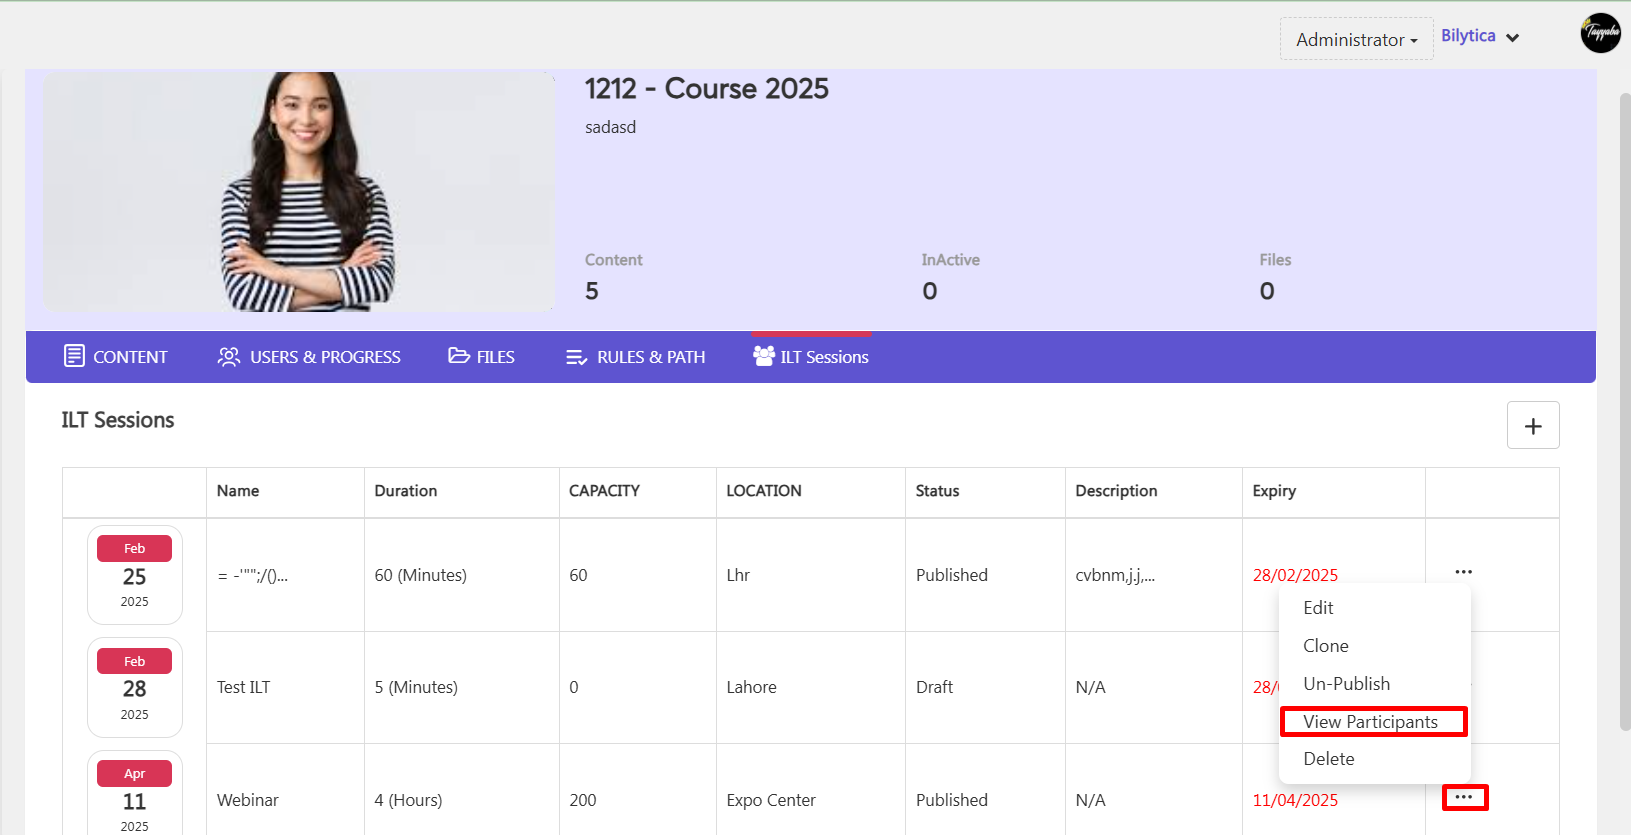
- Click the three-dot icon and select View Participants.
- Set the required session fields.
- Click the Fetch button.
- The list of enrolled users will appear below.
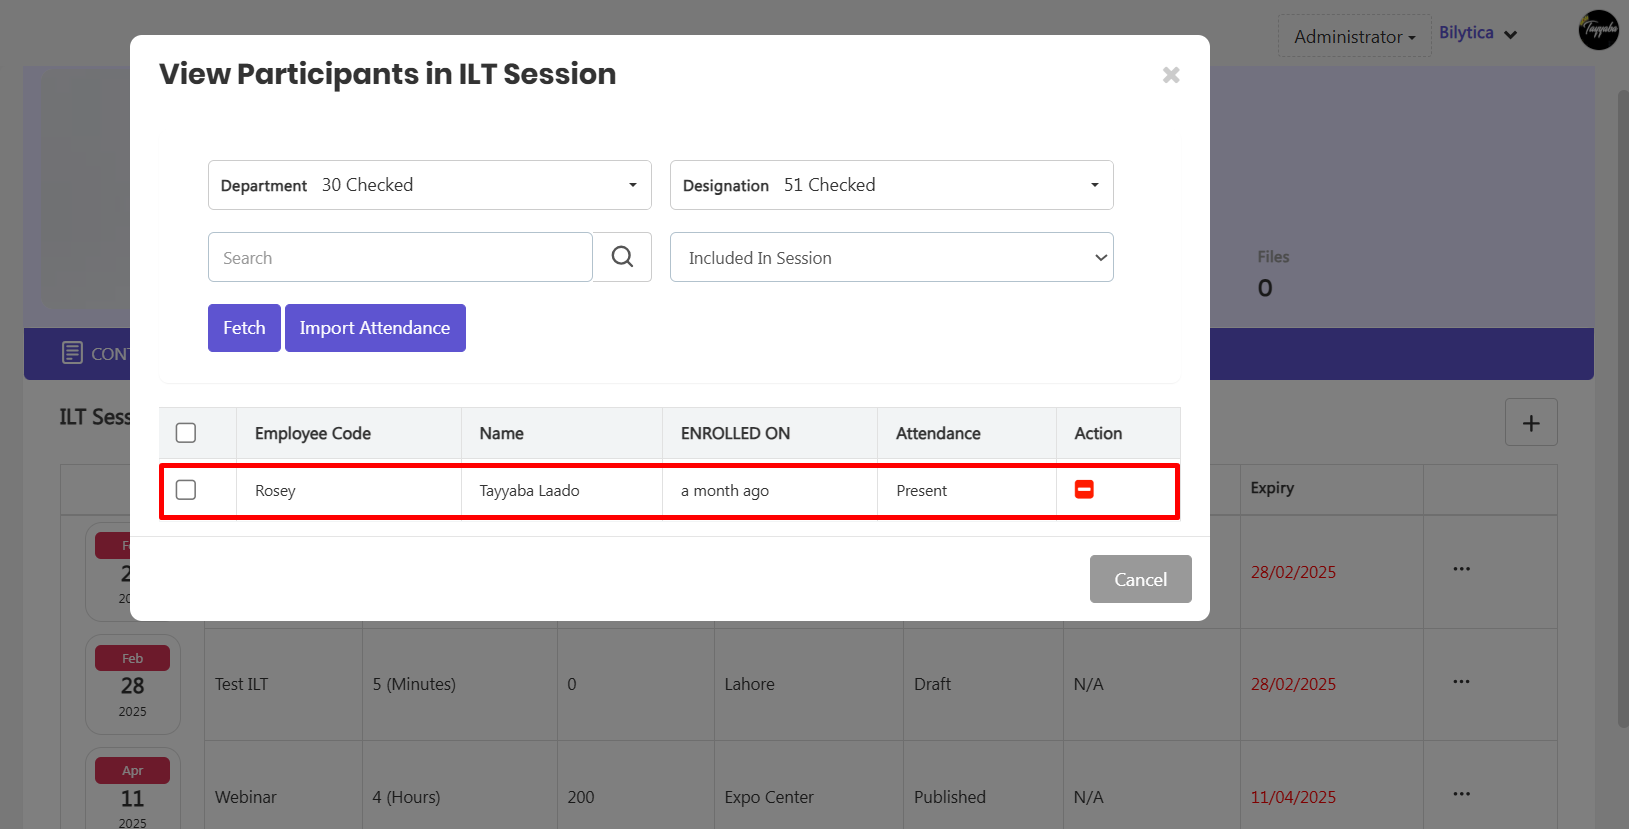
- Select the desired candidates.
- Click Mark Selected User as Present or Mark Selected User as Absent, as needed.

Importing Candidate Attendance for ILT Sessions #
- Click on Import Attendance.

- Click Download Format to get the attendance sheet template.
- Fill in the data as per the downloaded format.
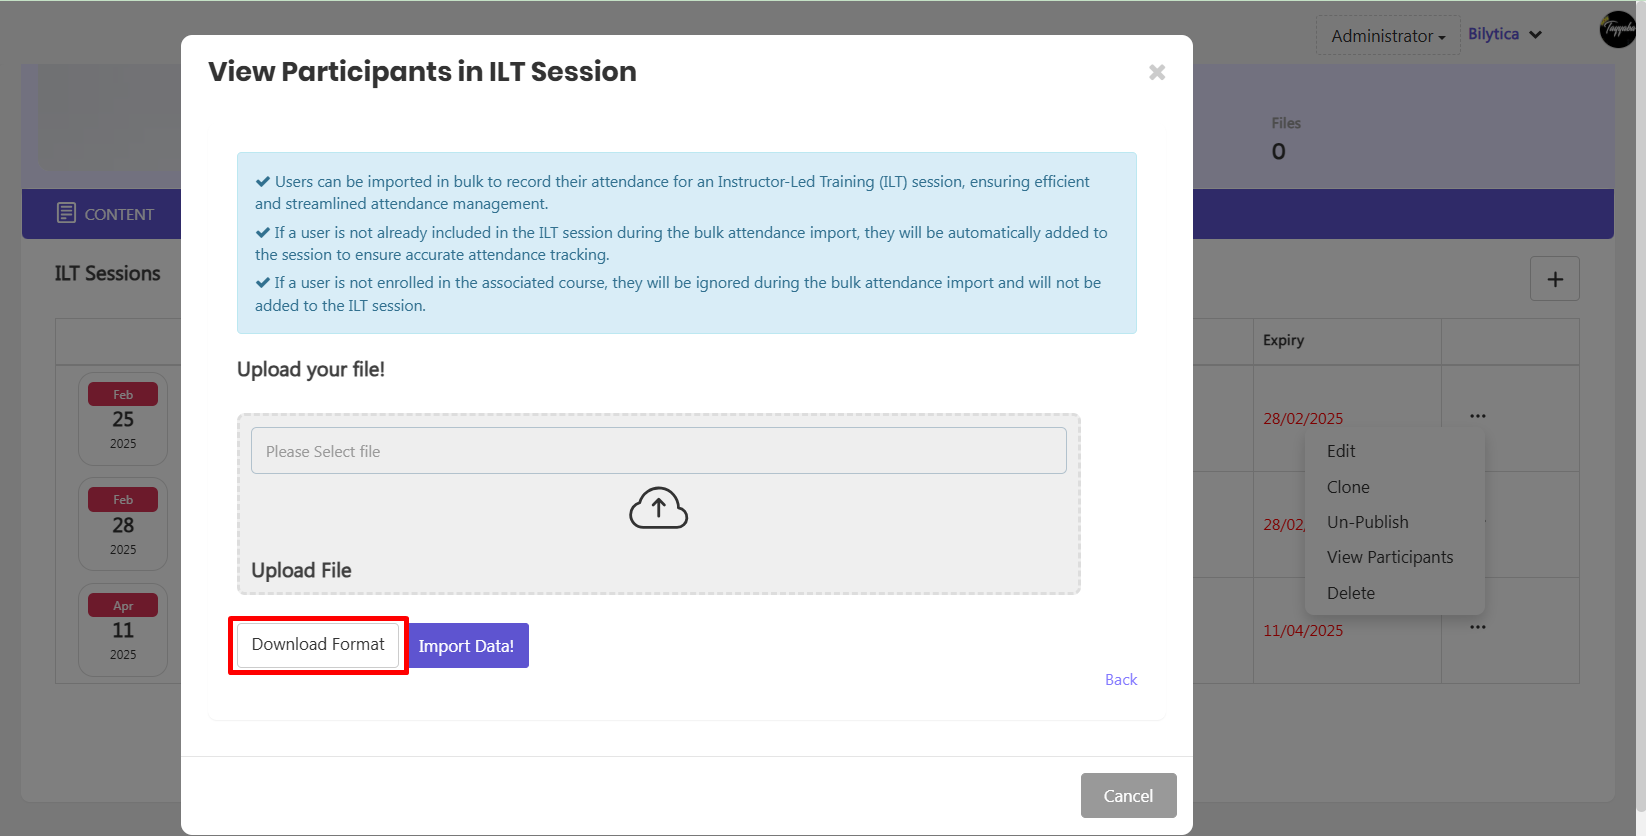
- Return to the same screen.
- Click Upload File.
- Click Import Data.
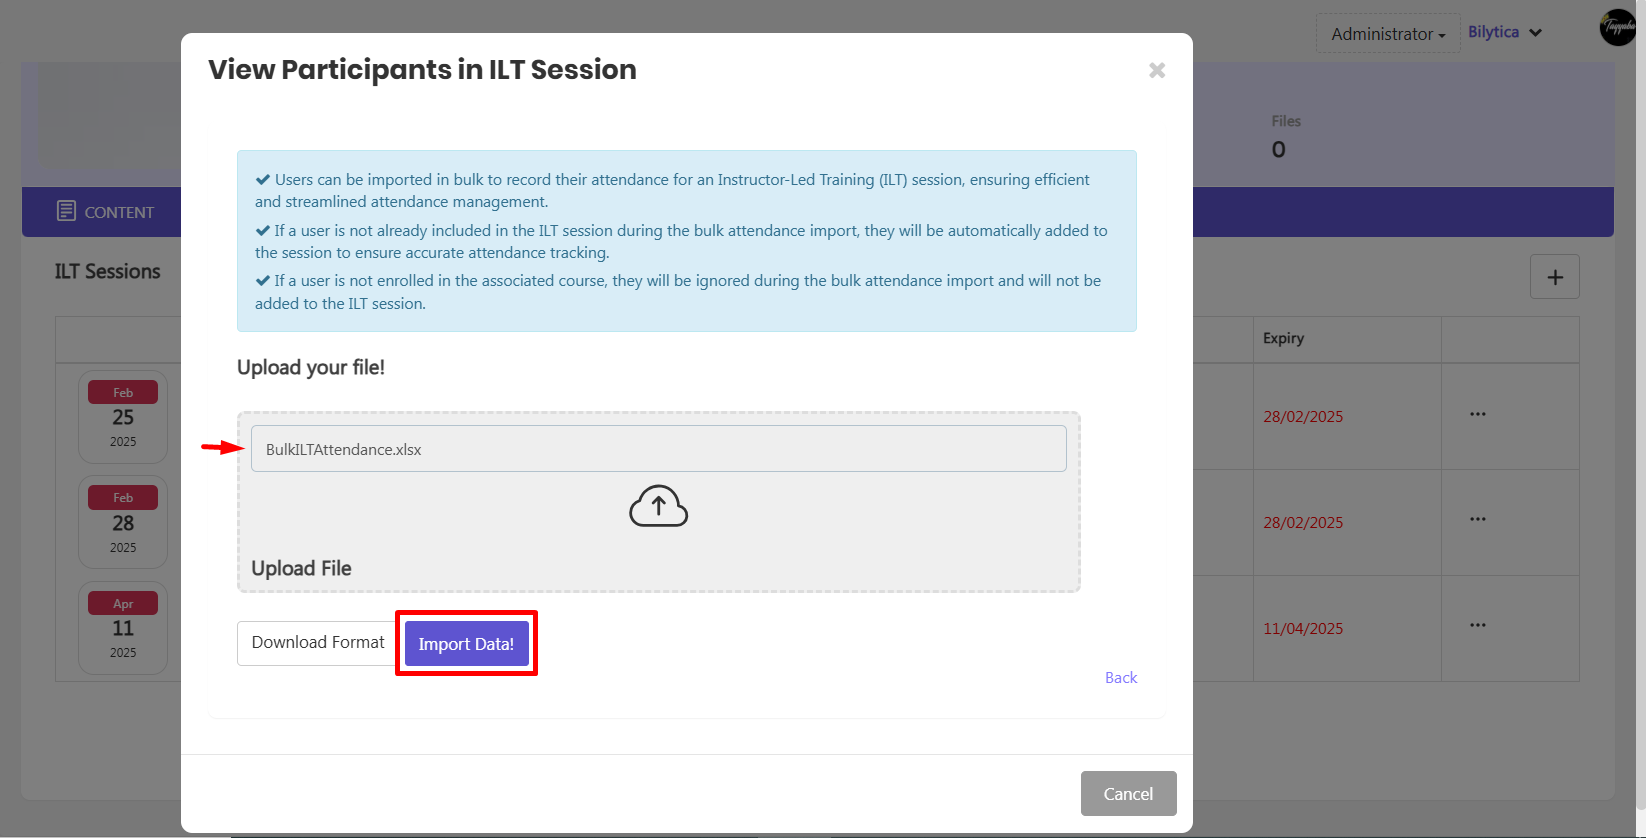
- Participants’ attendance will be displayed on the screen.
